


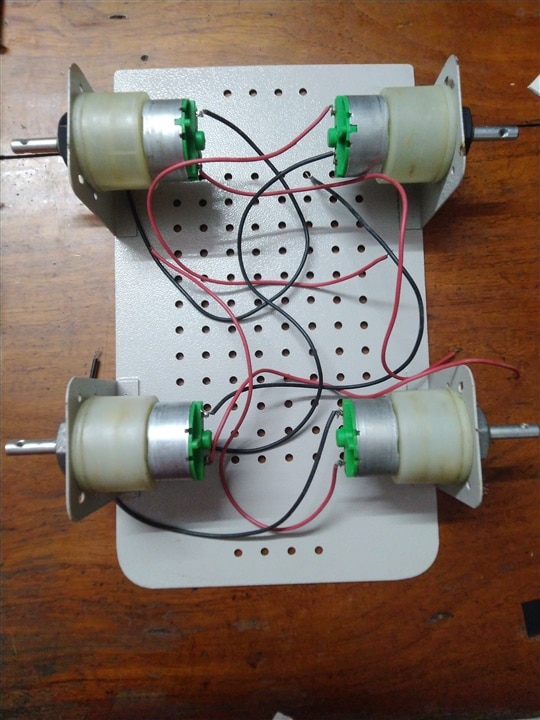
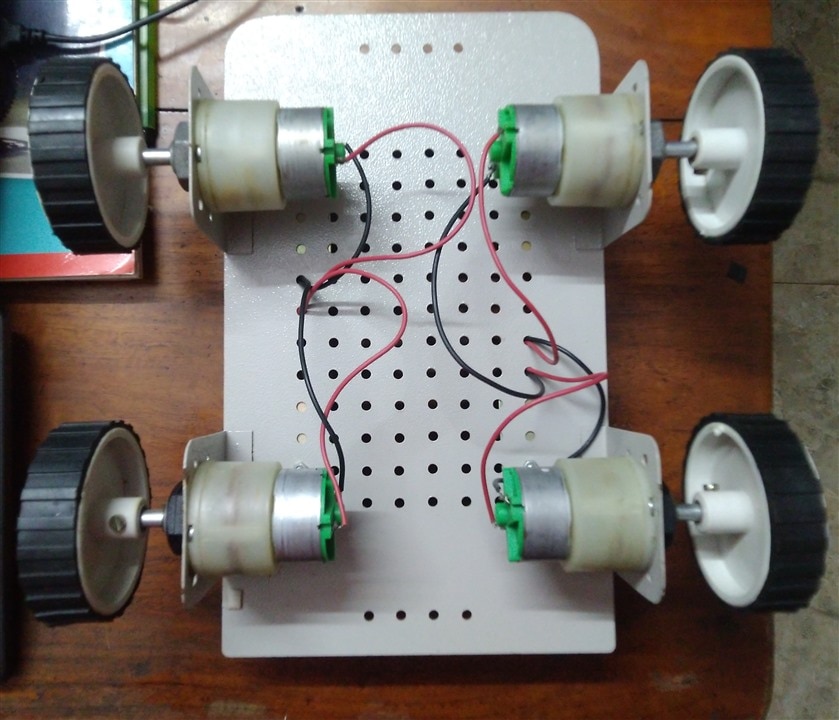
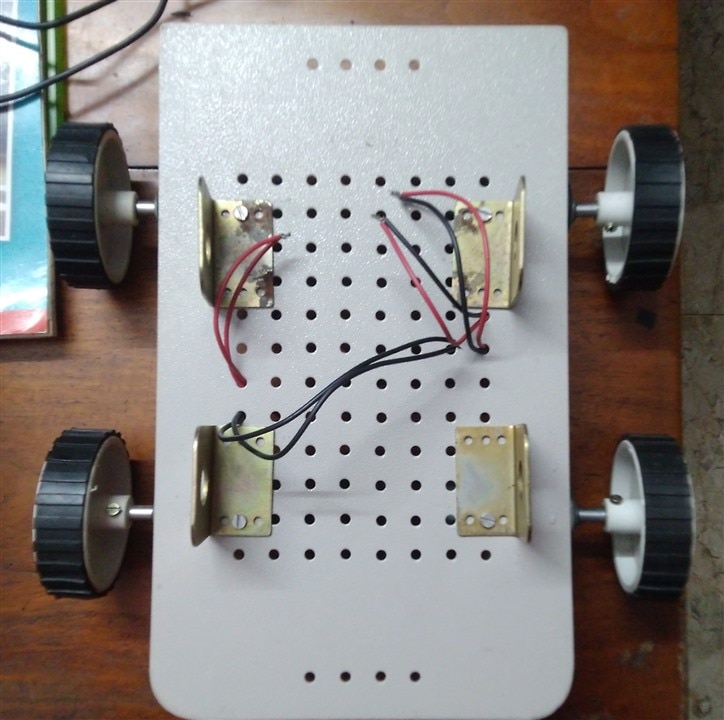
1. The Main Robot Body
I am using a Steel chassis with 4 x 100 RPM - 12V Centre Shaft DC Geared Motors and 4 x 7cm Diameter wheels.
2. Creating the Firebase Realtime Database Project
2.1 Creating a Firebase Project
a. Go to Link - https://console.firebase.google.com/ . You need to sign in to Google Firebase using your Google account.
b. Click on "Create a project"
c. Enter a Project Name for the Firebase project and click Continue.
d. Toggle OFF the Enable Google Analytics for this project and click on Create Project.
Your Firebase Project will be created.
Below is a step-by-step video tutorial for creating a Firebase project.
2.2 Creating the Realtime Database in Firebase
a. Go to Build option from the left menu inside your project and click on Realtime Database.
b. Click on Create Database
c. Select a location in Realtime Database location .
d. Select Start in test mode.
Your Realtime Database will be created.
2.3 Create a Web App to access the Realtime Database
a. Go To Project Overview from the left menu.
b. Click on Web in the Add an app to get started .
c. Enter an App Nickname and click Register App.
d. In the Add Firebase SDK , Select Use a script tag
e. Note the apiKey, authDomain, databaseURL, projectId, storageBucket, messagingSenderId, appId. . These are the firebase config details and will be used later in the Python code.
f. Click on Continue to Console.
NOTE: The Firebase Config Details are private and don't share with others.
The Firebase Config Details would be used later in the Python Code for connecting with the Firebase Realtime Database.

2.4 Integrating Firebase Realtime Database With Python
For accessing the data from the Firebase Realtime Database, I have used the Pyrebase library of Python which is a simple python wrapper for the Firebase API.
Pyrebase module can be installed using the following command in the command line:
pip3 install pyrebase
3. Raspberry Pi and Arduino UNO
I am using the Raspberry Pi 4 for connecting to the Firebase Realtime Database and reading data in real-time from it using the Internet. Then, I am using Serial Communication through USB between Raspberry Pi 4 and Arduino UNO to send data from Raspberry Pi to Arduino.
3.1 Receive Data From Firebase in Raspberry Pi using Python
The database contains 3 "keys" which have their "values" associated with them.
The 3 "keys" are as follows along with their respective "values" and use.
| Key | Values | Uses |
| direction |
FR, BK, ST, LT, RT |
The direction of the Robot Motion. {Front, Back, Stop, Left, Right} |
| arm | 0-3 | Position of the servo motor for Arm Position. |
| gripper | 0-5 |
Position of the servo motor for Gripper Position. |
Below is a snippet from the Database -

Use the Firebase Config Details from Step 2.3 and update them in the Python Code for connecting with the Firebase Database.
import pyrebase

#For use with only user based authentication we can create the following configuration:

//update the below details with Firebase Config details from Step 2.3
firebaseConfig= {
    "apiKey": "***************************",
    "authDomain": "***************************",
    "databaseURL": "***************************",
    "projectId": "***************************",
    "storageBucket": "***************************",
    "messagingSenderId": "***************************",
    "appId": "***************************"
}

firebase = pyrebase.initialize_app(firebaseConfig)
db = firebase.database()    #initialize the database object

# read the value of "arm" key
arm_control = db.child("teleoprobot").child("arm").get().val()
print("Arm value : ", arm_control)

# read the value of "gripper" key
gripper_control = db.child("teleoprobot").child("gripper").get().val()
print("Gripper Value : ",  gripper_control)

# read the value of "direction" key
direction = db.child("teleoprobot").child("direction").get().val()
print("Direction : ", direction_val)
Here's the Python code for reading the data in real-time from Firebase Database - read_from_firebase.py
3.2 Serial Communication between Raspberry Pi and Arduino UNO
The Raspberry Pi 4 reads the data from the Firebase in real-time and then, according to the received data it sends data to the Arduino UNO over serial communication over USB.
| Data from Firebase | Meaning | Data send over serial |
| direction:FR | FRONT | M1 |
| direction:BK | BACK | M2 |
| direction:ST | STOP | M0 |
| direction:LT | LEFT | M3 |
| direction:RT | RIGHT | M4 |
| arm:0 | ARM 0 | A0 |
| arm:1 | ARM 1 | A1 |
| arm:2 | ARM 2 | A2 |
| arm:3 | ARM 3 | A3 |
| gripper:0 | GRIPPER 0 | G0 |
| gripper:1 | GRIPPER 1 | G1 |
| gripper:2 | GRIPPER 2 | G2 |
| gripper:3 | GRIPPER 3 | G3 |
| gripper:4 | GRIPPER 4 | G4 |
| gripper:5 | GRIPPER 5 | G5 |
Here's the Python code for reading the data from Firebase and sending the control command to Arduino UNO over Serial Comm - firebase_read_serial_write.py
3.3 Arduino Code for Control
The Arduino reads the data sent over from the serial communication for its port and according to the received data, it executes the command.
The table below shows the commands executed according to the data sent over serial.
| Data from Serial | Output |
| M0 | All Motors Stop |
| M1 | 4 Motors Front |
| M2 | 4 Motors Back |
| M3 |
2 Left Motors Front 2 Right Motors Back |
| M4 |
2 Left Motors Back 2 Right Motors Front |
| A0, A1, A2, A3 | Positions of Servo Motor 1 for Arm |
| G0. G1, G2, G3, G4, G5 |
Positions of Servo Motor 2 for Gripper |
Here's the Arduino UNO code - main_serial_control_code.ino
4. The GUI for Robot Control
4.1 PyQT5 module of Python and QT Designer
PyQt5 is a comprehensive set of Python bindings for Qt v5. It is used for designing GUI applications in Python.
PyQT5 can be installed with the following command:
pip3 install pyqt5
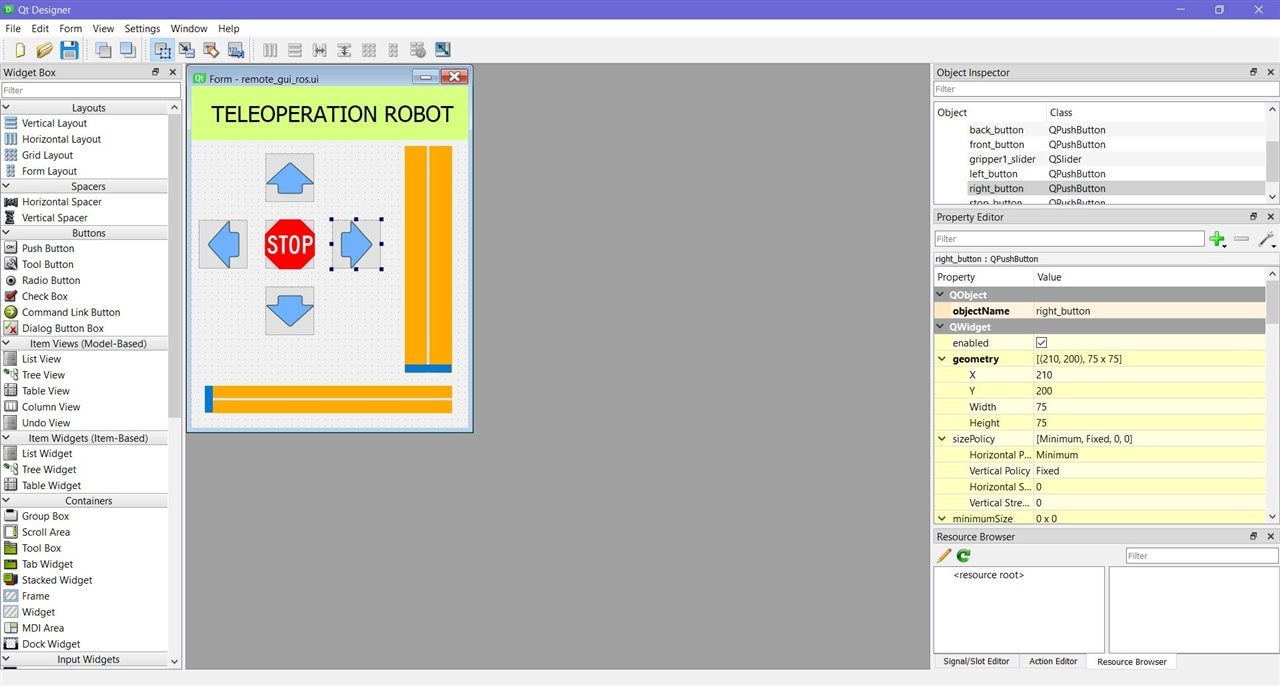
Qt Designer is the Qt tool for designing and building graphical user interfaces (GUIs) with QT Widgets.
You can compose and customize your windows or dialogs in a what-you-see-is-what-you-get (WYSIWYG) manner, and test them using different styles and resolutions.
Below is a snippet from QTDesigner while designing the GUI.
Here is the full GUI code file - remote_gui.ui 4.2 Buttons for control
The design from QTDesigner generates a ".ui" file which needs to be called from our python file.
I created different functions for each of the buttons and sliders positions.
Whenever a button is pressed, the function associated with is called and the data in the database is updated.
self.front_button = self.findChild(QPushButton, "front_button")
self.front_button.clicked.connect(self.front_button_clicked)

def front_button_clicked(self):
        db.child("teleoprobot").update({"direction": "FR"})
        print("GO FRONT")
Similarly, whenever the position of sliders are changed, the function associated is called and the slider's value is updated in the database.
self.arm = self.findChild(QSlider, "arm_slider")
self.arm.valueChanged.connect(self.change_arm_angle)

def change_arm_angle(self, value):
        db.child("teleoprobot").update({"arm": value})
        print(value)
Here is the python code for the GUI - robot_control_gui.py
We need to update the firebase Config details in the above python code so that our python code can connect with the Firebase Realtime Database for writing data into the database. The firebase Config Details are from Step 2.3 ..

4.3 The Final Python GUI
Below is the output for the GUI along with various controls.

4.4 Testing the GUI