element14 Community
element14 Community
    Register Log In
  • Site
  • Search
  • Log In Register
  • Community Hub
    Community Hub
    • What's New on element14
    • Feedback and Support
    • Benefits of Membership
    • Personal Blogs
    • Members Area
    • Achievement Levels
  • Learn
    Learn
    • Ask an Expert
    • eBooks
    • element14 presents
    • Learning Center
    • Tech Spotlight
    • STEM Academy
    • Webinars, Training and Events
    • Learning Groups
  • Technologies
    Technologies
    • 3D Printing
    • FPGA
    • Industrial Automation
    • Internet of Things
    • Power & Energy
    • Sensors
    • Technology Groups
  • Challenges & Projects
    Challenges & Projects
    • Design Challenges
    • element14 presents Projects
    • Project14
    • Arduino Projects
    • Raspberry Pi Projects
    • Project Groups
  • Products
    Products
    • Arduino
    • Avnet & Tria Boards Community
    • Dev Tools
    • Manufacturers
    • Multicomp Pro
    • Product Groups
    • Raspberry Pi
    • RoadTests & Reviews
  • About Us
  • Store
    Store
    • Visit Your Store
    • Choose another store...
      • Europe
      •  Austria (German)
      •  Belgium (Dutch, French)
      •  Bulgaria (Bulgarian)
      •  Czech Republic (Czech)
      •  Denmark (Danish)
      •  Estonia (Estonian)
      •  Finland (Finnish)
      •  France (French)
      •  Germany (German)
      •  Hungary (Hungarian)
      •  Ireland
      •  Israel
      •  Italy (Italian)
      •  Latvia (Latvian)
      •  
      •  Lithuania (Lithuanian)
      •  Netherlands (Dutch)
      •  Norway (Norwegian)
      •  Poland (Polish)
      •  Portugal (Portuguese)
      •  Romania (Romanian)
      •  Russia (Russian)
      •  Slovakia (Slovak)
      •  Slovenia (Slovenian)
      •  Spain (Spanish)
      •  Sweden (Swedish)
      •  Switzerland(German, French)
      •  Turkey (Turkish)
      •  United Kingdom
      • Asia Pacific
      •  Australia
      •  China
      •  Hong Kong
      •  India
      • Japan
      •  Korea (Korean)
      •  Malaysia
      •  New Zealand
      •  Philippines
      •  Singapore
      •  Taiwan
      •  Thailand (Thai)
      • Vietnam
      • Americas
      •  Brazil (Portuguese)
      •  Canada
      •  Mexico (Spanish)
      •  United States
      Can't find the country/region you're looking for? Visit our export site or find a local distributor.
  • Translate
  • Profile
  • Settings
Imagine a World Without Cords
  • Challenges & Projects
  • Design Challenges
  • Imagine a World Without Cords
  • More
  • Cancel
Imagine a World Without Cords
Blog OFFICIAL- Qi Lime Pi Rev 1
  • Blog
  • Forum
  • Documents
  • Files
  • Mentions
  • Sub-Groups
  • Tags
  • More
  • Cancel
  • New
  • Share
  • More
  • Cancel
Group Actions
  • Group RSS
  • More
  • Cancel
Engagement
  • Author Author: johnsocm
  • Date Created: 8 Nov 2012 1:13 AM Date Created
  • Views 1083 views
  • Likes 2 likes
  • Comments 6 comments
  • wireless_power
  • wireless_power_home
  • wireless_power_challenge
  • raspberry_pi
  • wireless_power_charging
  • qi_standard
  • BeagleBone
  • wp_challenge_one
  • wireless_power_consortium
Related
Recommended

OFFICIAL- Qi Lime Pi Rev 1

johnsocm
johnsocm
8 Nov 2012

Hello World,


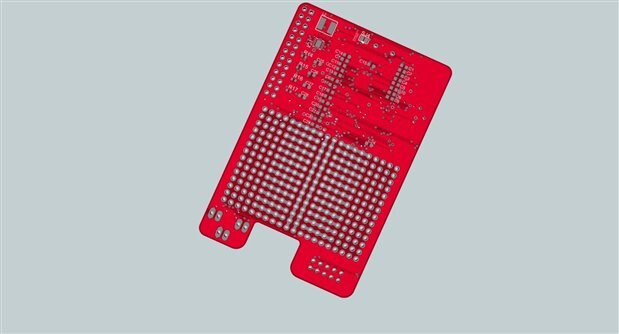
I have completed a sophisticated Highly Efficient Qi Lime Pi ProtoShield. The boards are on their way! The Qi Lime Pi is a Qi/Battery powered and prototyping shield for the Raspberry Pi.


Presenting the Qi Lime Pi..In Red, Green, Black and Moldy Purple!

imageimage

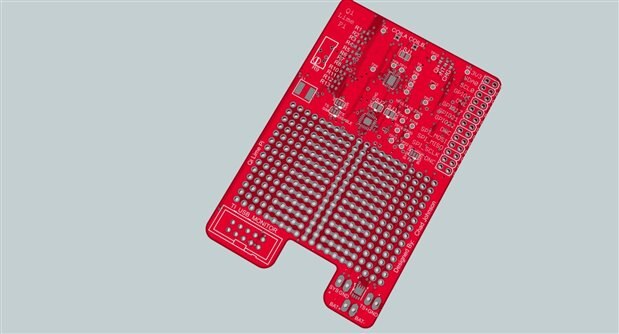
This Qi Lime Pi shield has the following:


Full Evaluation Board Qi Receiver- Has a solder jumper to allow for either a Qi 5V pass through voltage or battery charging functions, comes with lots of test points!

Battery Charger with a GUI Using I2C-A complete charger module for charging compact, flexible, high efficiency, switch-mode charge management for single-cell, Li-ion and Li-polymer batteries.

GUI-Yes this has a GUI. You can download and look at it now right from TI.com! bq2427xEVM_SW_V0001.zip

IC Controlled NexFET Power MOSFET-The NexFET power MOSFET has been designed to minimize losses in power conversion load management applications. The SON 3x3 package offers excellent thermal performance for the size of the package! I had to custom make a SON-8 package for Eagle!

Low Input Voltage Synchronous Boost Converter with 1.3A Switches-More than 90% efficient, Automatic Transition between Boost Mode and Down Conversion Mode, Quiescent Current less than 55 uA. Operating Range from 0.3V to 5.5V, Output short circuit protection under all operating conditions, Power Save Mode, Overtemperature Protection.


I will say it again, It isn't just a battery charger, it is a complete High-Efficiency Switch Mode Charger with Separate Power Path Control!


What is Power Path Management,

-It allows the device to power the system from a high efficiency DC to DC converter while simultaneously and independently charging the battery. The charger monitors the battery current at all times and reduces the charge current when the system load requires current above the input current limit. This allows for proper charge termination and timer operation. The system voltage is regulated to the battery voltage and will not drop below 3.5V. This minimum system voltage support enables the system to run with a defective or absent battery pack and enables instant system turn on even with a totally discharged battery or no battery! Try that with your iPhones or Droids! The power path management architecture also permits the battery to supplement the system current requirements when the adapter cannot deliver the peak system currents. This enables the use of a smaller adapter.


-The battery is charged in three phases:

---conditioning, constant current, and constant voltage

The charger also offers the a voltage based battery pack thermistor monitoring input (TS) that monitors battery temperature for safe charging.

Here are the details if you want or just skip ahead:

-Instantly Startup the system from a deeply discharged battery or no battery

-Integrated FETs for up to 2.5A charge rate, even though I limited this rate to 1A

-Highly integrated Battery N-Channel MOSFET controller for Power Path Management

-Safe and accurate battery management functions

----0.5% Battery Regulation Accuracy

----10% Charge Current Accuracy

-Voltage based, NTC monitoring input (TS) for measuring the temperature of the battery, I also used a solder jumper for this option to be either enabled or disabled

-Thermal regulation protection for output current control

-Battery Short Circuit Protection

-Soft start feature to reduce inrush current

-Thermal shutdown and protection

-Battery charging status LEDs and signal LEDs


Best of all I included the connections for a USB kit from Ti so you can program your own battery charger from the default settings and monitor the battery charging process on a computer. So with this Qi Lime Pi shield you are basically getting a BQ24272 Evaluation Module from Ti embedded on a Pi shield.

This Qi Lime Pi Shield isn't for everyone! This is a kit for the people that want to experiment with different battery types, different charging patterns, different voltages, efficiencies, etc. I wanted to make a kit that includes two of the most efficient, best products that TI has on the market right now. I wanted to include functionality to expand to other devices if needed. This board and design will be easy to transfer over to other designs and boards such as the BeagleBone Cape, in which I will show you in my next post! The Hot Qi Dog Cape.

.

I will make a Qi Lime Pi Slice Shield soon that will have just a basic Qi Receiver, battery charger and buck boost for simplicity.

I will post my design files in a later post when I have fully tested this design and have a fully working prototype! Again, The boards are on their way!


Thank you TI for most of the hard work on making Great Eval Boards and Great Documentation!


Thank You,


Chad

  • Sign in to reply
Parents
  • COMPACT
    COMPACT over 13 years ago

    Chad,

    You've picked the new kid off the block when it comes to TI's Power management products.

    Have you looked at the TPS65217b PMIC used by the beaglebone? It is impressive in its own way with lots of different regulated power outputs including a dedicated output for a RTC (Real Time Clock)!

    • Cancel
    • Vote Up 0 Vote Down
    • Sign in to reply
    • More
    • Cancel
  • johnsocm
    johnsocm over 13 years ago in reply to COMPACT

    Hello COMPACT!


    I think that it is a great idea for using the PMIC for the BeagleBone, for the BeagleBone I will leave the I2C solder jumpered on the proto board so if someone would like to tap into the voltages for experimenting and learning they can. It would be fun to play with that function.


    It actually took me longer than I thought because I had to make a few footprints for the newer NexFET's and the SON 3x3 package. I have looked into the PMIC used by the BeagleBone but I wanted the most high efficient chips for easy designing for all single board computers and to be able to transfer the design by a simple copy and paste and place it on the other shields, capes, etc. with some minor routing for power. When I have more time I will definitely make the BeagleBone exclusive Cape that uses the PMIC, but I figured that someone on here will be creating that and I wanted to see several designs. The nice thing about the BeagleBone is that the I/O's are very easy to deal with and program. I know that the devices I used are a little extreme for the Raspberry Pi but I am hoping that it will help someone achieve new goals and plus the Raspberry Pi and BeagleBone are based on education, and this Qi Lime Pi Shield will help students learn about battery charging and how a battery management system can be progammed for even more efficiency and control.

    • Cancel
    • Vote Up 0 Vote Down
    • Sign in to reply
    • More
    • Cancel
Comment
  • johnsocm
    johnsocm over 13 years ago in reply to COMPACT

    Hello COMPACT!


    I think that it is a great idea for using the PMIC for the BeagleBone, for the BeagleBone I will leave the I2C solder jumpered on the proto board so if someone would like to tap into the voltages for experimenting and learning they can. It would be fun to play with that function.


    It actually took me longer than I thought because I had to make a few footprints for the newer NexFET's and the SON 3x3 package. I have looked into the PMIC used by the BeagleBone but I wanted the most high efficient chips for easy designing for all single board computers and to be able to transfer the design by a simple copy and paste and place it on the other shields, capes, etc. with some minor routing for power. When I have more time I will definitely make the BeagleBone exclusive Cape that uses the PMIC, but I figured that someone on here will be creating that and I wanted to see several designs. The nice thing about the BeagleBone is that the I/O's are very easy to deal with and program. I know that the devices I used are a little extreme for the Raspberry Pi but I am hoping that it will help someone achieve new goals and plus the Raspberry Pi and BeagleBone are based on education, and this Qi Lime Pi Shield will help students learn about battery charging and how a battery management system can be progammed for even more efficiency and control.

    • Cancel
    • Vote Up 0 Vote Down
    • Sign in to reply
    • More
    • Cancel
Children
No Data
element14 Community

element14 is the first online community specifically for engineers. Connect with your peers and get expert answers to your questions.

  • Members
  • Learn
  • Technologies
  • Challenges & Projects
  • Products
  • Store
  • About Us
  • Feedback & Support
  • FAQs
  • Terms of Use
  • Privacy Policy
  • Legal and Copyright Notices
  • Sitemap
  • Cookies

An Avnet Company © 2025 Premier Farnell Limited. All Rights Reserved.

Premier Farnell Ltd, registered in England and Wales (no 00876412), registered office: Farnell House, Forge Lane, Leeds LS12 2NE.

ICP 备案号 10220084.

Follow element14

  • X
  • Facebook
  • linkedin
  • YouTube