element14 Community
element14 Community
    Register Log In
  • Site
  • Search
  • Log In Register
  • About Us
  • Community Hub
    Community Hub
    • What's New on element14
    • Feedback and Support
    • Benefits of Membership
    • Personal Blogs
    • Members Area
    • Achievement Levels
  • Learn
    Learn
    • Ask an Expert
    • eBooks
    • element14 presents
    • Learning Center
    • Tech Spotlight
    • STEM Academy
    • Webinars, Training and Events
    • Learning Groups
  • Technologies
    Technologies
    • 3D Printing
    • FPGA
    • Industrial Automation
    • Internet of Things
    • Power & Energy
    • Sensors
    • Technology Groups
  • Challenges & Projects
    Challenges & Projects
    • Design Challenges
    • element14 presents Projects
    • Project14
    • Arduino Projects
    • Raspberry Pi Projects
    • Project Groups
  • Products
    Products
    • Arduino
    • Avnet Boards Community
    • Dev Tools
    • Manufacturers
    • Multicomp Pro
    • Product Groups
    • Raspberry Pi
    • RoadTests & Reviews
  • Store
    Store
    • Visit Your Store
    • Choose another store...
      • Europe
      •  Austria (German)
      •  Belgium (Dutch, French)
      •  Bulgaria (Bulgarian)
      •  Czech Republic (Czech)
      •  Denmark (Danish)
      •  Estonia (Estonian)
      •  Finland (Finnish)
      •  France (French)
      •  Germany (German)
      •  Hungary (Hungarian)
      •  Ireland
      •  Israel
      •  Italy (Italian)
      •  Latvia (Latvian)
      •  
      •  Lithuania (Lithuanian)
      •  Netherlands (Dutch)
      •  Norway (Norwegian)
      •  Poland (Polish)
      •  Portugal (Portuguese)
      •  Romania (Romanian)
      •  Russia (Russian)
      •  Slovakia (Slovak)
      •  Slovenia (Slovenian)
      •  Spain (Spanish)
      •  Sweden (Swedish)
      •  Switzerland(German, French)
      •  Turkey (Turkish)
      •  United Kingdom
      • Asia Pacific
      •  Australia
      •  China
      •  Hong Kong
      •  India
      •  Korea (Korean)
      •  Malaysia
      •  New Zealand
      •  Philippines
      •  Singapore
      •  Taiwan
      •  Thailand (Thai)
      • Americas
      •  Brazil (Portuguese)
      •  Canada
      •  Mexico (Spanish)
      •  United States
      Can't find the country/region you're looking for? Visit our export site or find a local distributor.
  • Translate
  • Profile
  • Settings
element14 presents
  • Challenges & Projects
  • More
element14 presents
Animated and Talking Wizard Hat! Step 2: Designing Mechanical Parts
  • Blog
  • Forum
  • Documents
  • Polls
  • Files
  • Members
  • Mentions
  • Sub-Groups
  • Tags
  • More
  • Cancel
  • New
Join element14 presents to participate - click to join for free!
  • Share
  • More
  • Cancel
Group Actions
  • Group RSS
  • More
  • Cancel
Engagement
  • Author Author: donnersm
  • Date Created: 25 Jun 2023 8:10 PM Date Created
  • Views 617 views
  • Likes 6 likes
  • Comments 0 comments
  • talking wizard hat
  • movie prop
  • pcb
  • 3D Printing
  • wizard hat
  • mechanical eye
  • mechanical mouth
Related
Recommended

Step 2: Designing Mechanical Parts

donnersm
donnersm
25 Jun 2023

Blog Home        Step 3

In the previous blog I showed you my research that  I did in order to build my own version of the famous sorting hat.

Here's what have I been up to:

  • Did the sketch on the mechanics for the mouth
  • Did the sketch on the Servo motor mount  for the eyebrow
  • Did the sketch for the Servo motor mount for the moving hat top
  • Completed the prototype
  • 3d printed the mechanics
  • Did some testing with servo motors and the mouth mechanism
  • Did a second iteration on the code, now implementing two cores on the ESP32
  • Designed and ordered a PCB

So that's actually a lot :-) You can say I was busy. Let me show you.

Designing the Mechanical Parts

First I designed the mechanical mount and it included a base plate that can be used to mount a PCB.

I used the tutorial by Kevin McAleer from Kevin Robots. Link is in the first blog.

Basically, I up scaled it, making it bigger and I changed the base plate to my liking. I recommend his video and tutorial if you want to learn the basics of Fusion 360.

It helped me a lot and after designing the mouth section, I was able to create 2 more mechanical parts to be used for the other two servos.

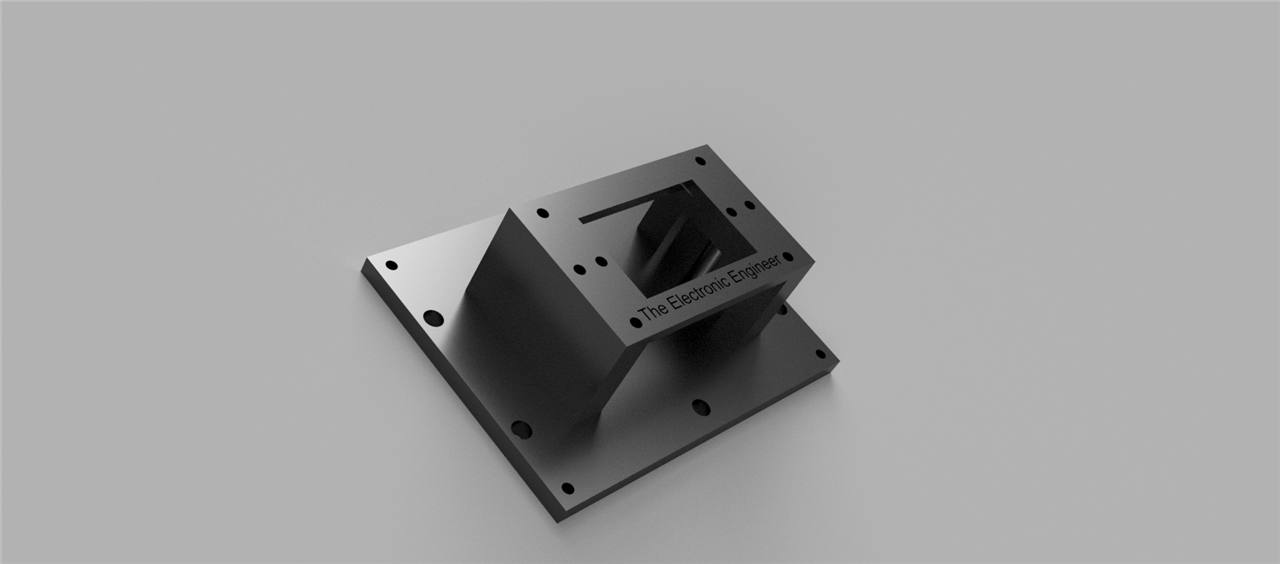
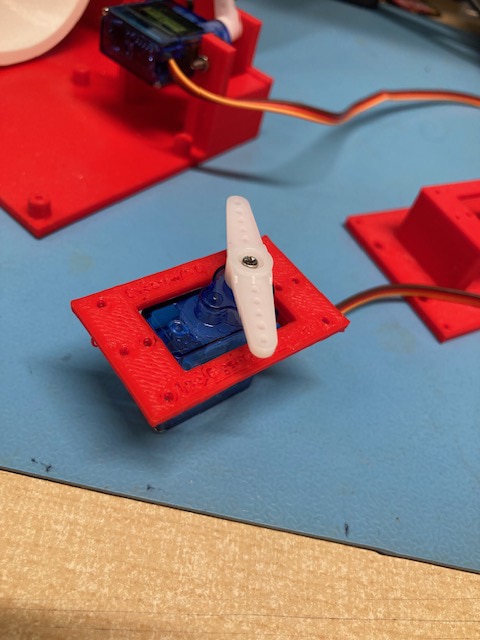
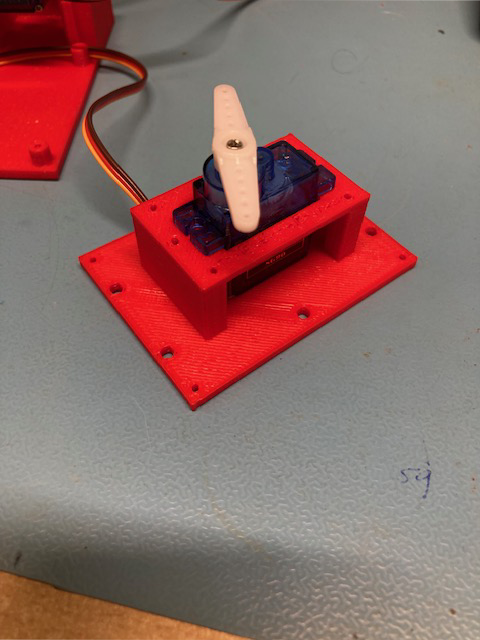
First let me show you the mouth parts:

image

As soon as the video is released, all work files and step files will be available for download.

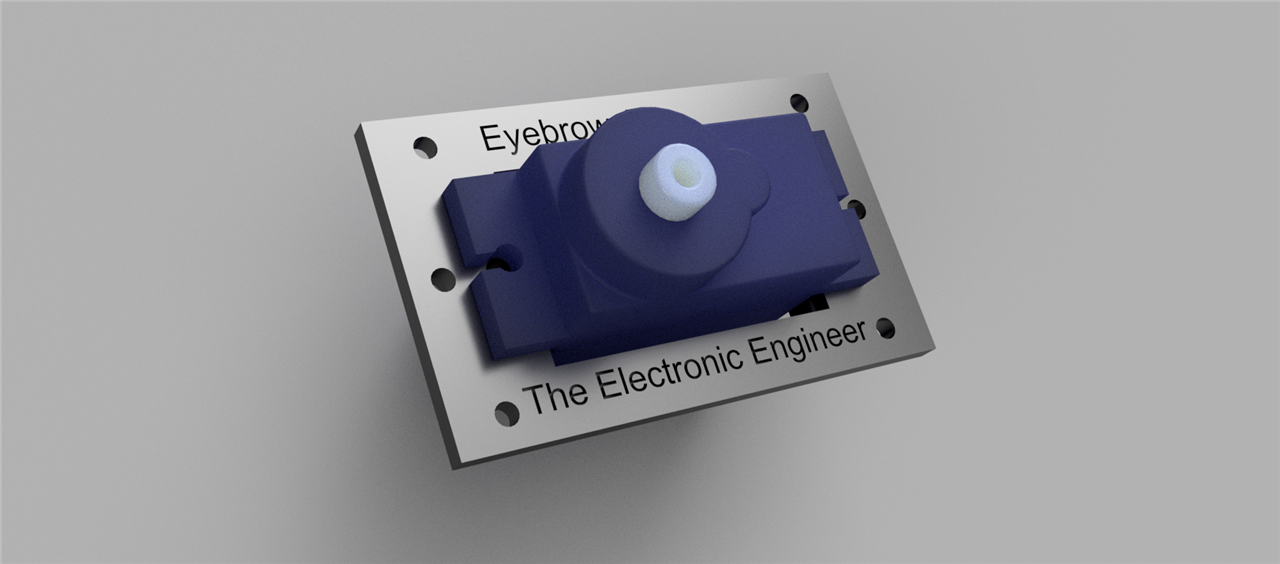
I also made a server mount for the eyebrow and the tip of the hat. The tip of the hat will be moveable in a way that I haven't figured out just yet..

image

image

So after completing the sketches for the mechanics, I used a online print service to 3d print all the parts. It's affordable and fast and the quality of the prints is good enough for this design.

So, after receiving the parts, It's assembly time:

imageimage

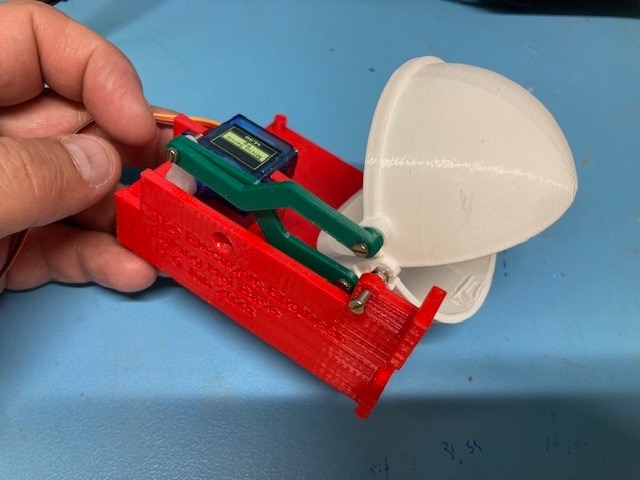
So far so good! I do have to change or shorten some of the bolts but other then that..All is good.

imageimage

On the left you can see the mount bracket for the eyebrow servo and on the right is the mount for the hat top.

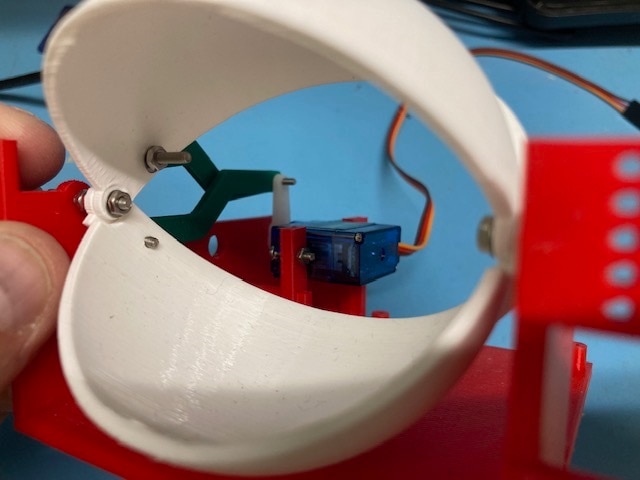
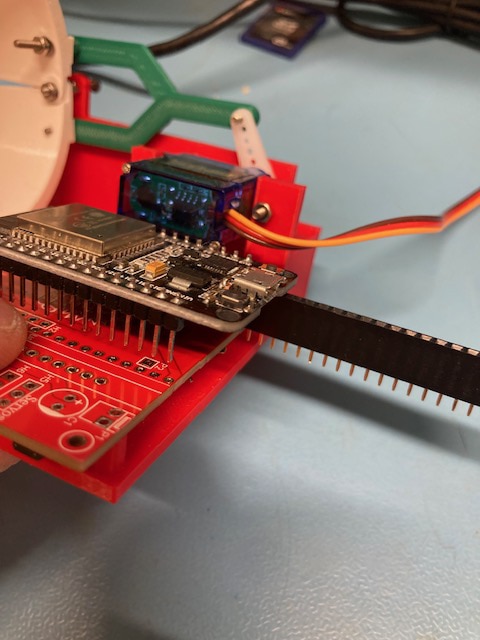
So the mechanical prototype is kind of finished, except maybe the position of the PCB is in need of changing......Turns out that there is no room to place the ESP32 on a socket. Now I need to make a choice between not using header and socket to mount the ESP32 or soldering it directly onto the mainboard or making some sort of bracket.

imageimage

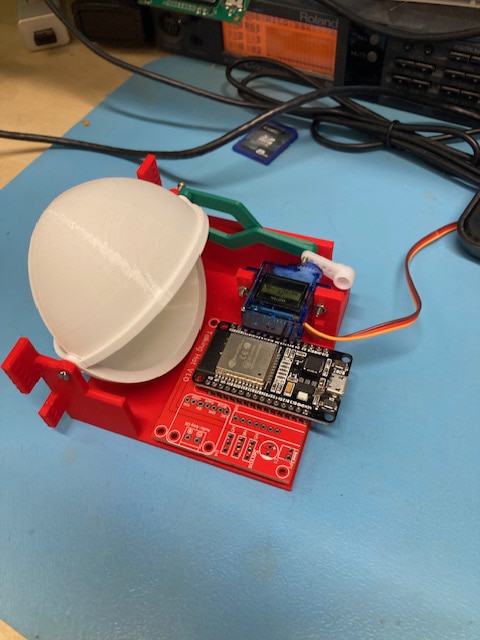
Left: Without socket it fits
Right: With socket the servo is in the way....

Designing the electronics

As you already might have guessed from the picture above, I designed a PCB for this project.

I intended to keep it small so I can save money on the PCB and the mechanical 3d printed parts.

First, Let me show you the schematic.

image

Each block in the schematic shows you it's purpose. It is straight forward and I have not much to add.

The PCB is not complex it's nearly a well arranged placement of components on a plate. Take a Look:

image

As you can see, the ESP32 board is sticking out over the mainboard. This was to save on the production costs of the main pcb and the base of the 3d printed mechanical mounth.

First results

View this post on Instagram

A post shared by Mark Donners (@theelelectronicengineer.nl)

View this post on Instagram

A post shared by Mark Donners (@theelelectronicengineer.nl)

https://www.instagram.com/p/CrWR7-oosID/

https://www.instagram.com/p/Ct7RmkoA3xu/


What's next?

- Building the actual Hat using paper glue and leather

- Recording funny sounds using some of my funny voices ( well...if you must ask...the kids call it funny, who am I to judge)

  • Sign in to reply
element14 Community

element14 is the first online community specifically for engineers. Connect with your peers and get expert answers to your questions.

  • Members
  • Learn
  • Technologies
  • Challenges & Projects
  • Products
  • Store
  • About Us
  • Feedback & Support
  • FAQs
  • Terms of Use
  • Privacy Policy
  • Legal and Copyright Notices
  • Sitemap
  • Cookies

An Avnet Company © 2025 Premier Farnell Limited. All Rights Reserved.

Premier Farnell Ltd, registered in England and Wales (no 00876412), registered office: Farnell House, Forge Lane, Leeds LS12 2NE.

ICP 备案号 10220084.

Follow element14

  • X
  • Facebook
  • linkedin
  • YouTube