element14 Community
element14 Community
    Register Log In
  • Site
  • Search
  • Log In Register
  • About Us
  • Community Hub
    Community Hub
    • What's New on element14
    • Feedback and Support
    • Benefits of Membership
    • Personal Blogs
    • Members Area
    • Achievement Levels
  • Learn
    Learn
    • Ask an Expert
    • eBooks
    • element14 presents
    • Learning Center
    • Tech Spotlight
    • STEM Academy
    • Webinars, Training and Events
    • Learning Groups
  • Technologies
    Technologies
    • 3D Printing
    • FPGA
    • Industrial Automation
    • Internet of Things
    • Power & Energy
    • Sensors
    • Technology Groups
  • Challenges & Projects
    Challenges & Projects
    • Design Challenges
    • element14 presents Projects
    • Project14
    • Arduino Projects
    • Raspberry Pi Projects
    • Project Groups
  • Products
    Products
    • Arduino
    • Avnet Boards Community
    • Dev Tools
    • Manufacturers
    • Multicomp Pro
    • Product Groups
    • Raspberry Pi
    • RoadTests & Reviews
  • Store
    Store
    • Visit Your Store
    • Choose another store...
      • Europe
      •  Austria (German)
      •  Belgium (Dutch, French)
      •  Bulgaria (Bulgarian)
      •  Czech Republic (Czech)
      •  Denmark (Danish)
      •  Estonia (Estonian)
      •  Finland (Finnish)
      •  France (French)
      •  Germany (German)
      •  Hungary (Hungarian)
      •  Ireland
      •  Israel
      •  Italy (Italian)
      •  Latvia (Latvian)
      •  
      •  Lithuania (Lithuanian)
      •  Netherlands (Dutch)
      •  Norway (Norwegian)
      •  Poland (Polish)
      •  Portugal (Portuguese)
      •  Romania (Romanian)
      •  Russia (Russian)
      •  Slovakia (Slovak)
      •  Slovenia (Slovenian)
      •  Spain (Spanish)
      •  Sweden (Swedish)
      •  Switzerland(German, French)
      •  Turkey (Turkish)
      •  United Kingdom
      • Asia Pacific
      •  Australia
      •  China
      •  Hong Kong
      •  India
      •  Korea (Korean)
      •  Malaysia
      •  New Zealand
      •  Philippines
      •  Singapore
      •  Taiwan
      •  Thailand (Thai)
      • Americas
      •  Brazil (Portuguese)
      •  Canada
      •  Mexico (Spanish)
      •  United States
      Can't find the country/region you're looking for? Visit our export site or find a local distributor.
  • Translate
  • Profile
  • Settings
Ben Heck Featured Content
  • Challenges & Projects
  • element14 presents
  • element14's The Ben Heck Show
  • Ben Heck Featured Content
  • More
  • Cancel
Ben Heck Featured Content
Forum Engine Management
  • Blog
  • Forum
  • Documents
  • Events
  • Polls
  • Files
  • Members
  • Mentions
  • Sub-Groups
  • Tags
  • More
  • Cancel
  • New
Join Ben Heck Featured Content to participate - click to join for free!
Actions
  • Share
  • More
  • Cancel
Forum Thread Details
  • Replies 63 replies
  • Subscribers 46 subscribers
  • Views 4108 views
  • Users 0 members are here
Related

Engine Management

jack.chaney56
jack.chaney56 over 9 years ago

Hi Ben,

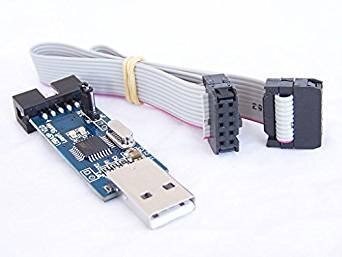
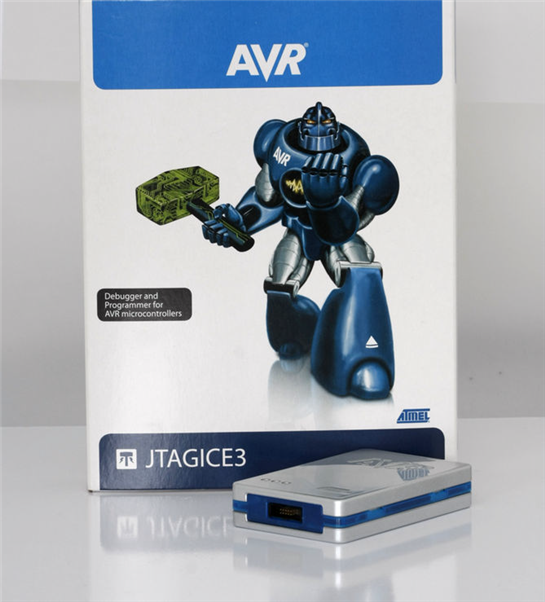
I am a programmer with a very small amount of skill with circuits, and am looking to create a platform for an engine management system, using an Arduino Mega 2560. I had done a bit of the coding, when I ran into some timing issues with the built in Arduino manager, so I switched over and started using AVR Studio and a programmer to go directly to the chip itself.  The code looks like it should work ok, but now I need some additional circuits to handle the energy levels of coils and injectors (Something like IGBTs). Sensors are being run through simple dividers (no protection yet), and cam and crank inputs are through a simple comparitor


Let me know what you think,

Jack

  • Sign in to reply
  • Cancel

Top Replies

  • jack.chaney56
    jack.chaney56 over 7 years ago +2
    Back again... After a bit of time away seeking enlightenment (and a steady paycheck), I am ready to get back to work on my project. I have continued to play around with the code and a number of components…
  • jack.chaney56
    jack.chaney56 over 7 years ago +2
    I want to start this thing right, so the shopping list for people that want to play along at home: Raspberry Pi - version is not significant if you don't mind a slow response when using Eclipse, but 3B…
  • jack.chaney56
    jack.chaney56 over 7 years ago +2
    Start off with two things. First, I forgot (neglected) to provide instruction on how to get the compiled code onto the Nano. Fault of familiarity; having done the process so many times, I had shifted to…
Parents
  • jack.chaney56
    jack.chaney56 over 7 years ago

    I want to start this thing right, so the shopping list for people that want to play along at home:


    Raspberry Pi - version is not significant if you don't mind a slow response when using Eclipse, but 3B+ if this is a new set up

    - all the stuff to make a RPi a working desktop (SD card, keyboard, mouse, monitor, power supply, and cabling)

    - internet connection is also handy, but not mandatory for the workstation after configuration.

    Breadboard(s) - the usual kind so outboard components can get attached.

    image

    Arduino Nano - this will be the controller platform for the project

    Arduino Nano

    Programmer - Pretty much any programmer for AVR that has the 6pin connector

    imageimage

    That is pretty much it for the moment, Probably want to get two of the Atmel units. I have a plan to use one as a signal generator for cam and crank signals.


    I'll leave the description of initial set up of the Raspberry Pi to the experts, just go through the basic steps to get a version of Raspbian up and running.

    Then do the obligatory sudo apt-get update; sudo apt-get -y upgrade step.

    Install the AVR components (using the installer type AVR in the search box)

    - gcc-avr

    - gdb-avr

    - avr-libc

    - binutils-avr

    - avrdude

    - debug symbols for avrdude

    Next install Eclipse IDE (using the installer type eclipse in the search box)

    - Extensible Tool Platform (eclipse)

    - C/C++ Development tools for Eclipse (eclipse-cdt)


    Last add the AVR plugin to Eclipse. First start Eclipse and agree to the workspace popup. Next go to:

         Help->Install New Software

    In the work box, enter: http://avr-eclipse.sourceforge.net/updatesite/ and say Add, and when asked name it AVR and say OK

    Next window click the checkbox for the offering and select Next

    Keep agreeing with all the boxes, accept the license agreement and finish.

    You will need to restart Eclipse when asked.


    It might be a good idea to be sure you have a good text editor (this I will leave to you, as text editors are very personal attachments).

    It is also a good idea to install a configuration management system like GIT or Mecurial and add the Eclipse plugin (GIT is already on Raspbian).


    Once things are up and running, it is always nice to test things out with a "Hello, world!" example.

    First start Eclipse, and after it starts, from the menu bar select File->New->Project Then select the type of project, C++ Project and say Next (not Finish)

    This is for an AVR project, so in the next window select AVR Cross Target Application->Empty Project name the project appropriately, then say Next (again, not Finish)

    Say Next for the debug selections.

    Last, select the processor and speed, the processor can be selected from the dropdown, for the Nano, it is an ATMega328p, and the MCU Frequency is 16000000Hz.


    Since this is the first project, it will say "Due to selection, it is appropriate to use the C/C++ interface" and "is this OK?"; just agree.


    In the icon bar at the top (middle) there is a box with a C on it. This runs the wizard to make a C/C++ file, just remember to include the .c extension.

    In the open file, type the usual...

    #include <stdio.h>


    int main(void) {


         printf("Hello, world!\n");

         return 0;

    }


    Save the file and build using the little hammer icon in the icon bar.


    ...hopefully you can now say "Ta Da!"


    More to come,

    Jack

    • Cancel
    • Vote Up +2 Vote Down
    • Sign in to reply
    • Cancel
Reply
  • jack.chaney56
    jack.chaney56 over 7 years ago

    I want to start this thing right, so the shopping list for people that want to play along at home:


    Raspberry Pi - version is not significant if you don't mind a slow response when using Eclipse, but 3B+ if this is a new set up

    - all the stuff to make a RPi a working desktop (SD card, keyboard, mouse, monitor, power supply, and cabling)

    - internet connection is also handy, but not mandatory for the workstation after configuration.

    Breadboard(s) - the usual kind so outboard components can get attached.

    image

    Arduino Nano - this will be the controller platform for the project

    Arduino Nano

    Programmer - Pretty much any programmer for AVR that has the 6pin connector

    imageimage

    That is pretty much it for the moment, Probably want to get two of the Atmel units. I have a plan to use one as a signal generator for cam and crank signals.


    I'll leave the description of initial set up of the Raspberry Pi to the experts, just go through the basic steps to get a version of Raspbian up and running.

    Then do the obligatory sudo apt-get update; sudo apt-get -y upgrade step.

    Install the AVR components (using the installer type AVR in the search box)

    - gcc-avr

    - gdb-avr

    - avr-libc

    - binutils-avr

    - avrdude

    - debug symbols for avrdude

    Next install Eclipse IDE (using the installer type eclipse in the search box)

    - Extensible Tool Platform (eclipse)

    - C/C++ Development tools for Eclipse (eclipse-cdt)


    Last add the AVR plugin to Eclipse. First start Eclipse and agree to the workspace popup. Next go to:

         Help->Install New Software

    In the work box, enter: http://avr-eclipse.sourceforge.net/updatesite/ and say Add, and when asked name it AVR and say OK

    Next window click the checkbox for the offering and select Next

    Keep agreeing with all the boxes, accept the license agreement and finish.

    You will need to restart Eclipse when asked.


    It might be a good idea to be sure you have a good text editor (this I will leave to you, as text editors are very personal attachments).

    It is also a good idea to install a configuration management system like GIT or Mecurial and add the Eclipse plugin (GIT is already on Raspbian).


    Once things are up and running, it is always nice to test things out with a "Hello, world!" example.

    First start Eclipse, and after it starts, from the menu bar select File->New->Project Then select the type of project, C++ Project and say Next (not Finish)

    This is for an AVR project, so in the next window select AVR Cross Target Application->Empty Project name the project appropriately, then say Next (again, not Finish)

    Say Next for the debug selections.

    Last, select the processor and speed, the processor can be selected from the dropdown, for the Nano, it is an ATMega328p, and the MCU Frequency is 16000000Hz.


    Since this is the first project, it will say "Due to selection, it is appropriate to use the C/C++ interface" and "is this OK?"; just agree.


    In the icon bar at the top (middle) there is a box with a C on it. This runs the wizard to make a C/C++ file, just remember to include the .c extension.

    In the open file, type the usual...

    #include <stdio.h>


    int main(void) {


         printf("Hello, world!\n");

         return 0;

    }


    Save the file and build using the little hammer icon in the icon bar.


    ...hopefully you can now say "Ta Da!"


    More to come,

    Jack

    • Cancel
    • Vote Up +2 Vote Down
    • Sign in to reply
    • Cancel
Children
No Data
element14 Community

element14 is the first online community specifically for engineers. Connect with your peers and get expert answers to your questions.

  • Members
  • Learn
  • Technologies
  • Challenges & Projects
  • Products
  • Store
  • About Us
  • Feedback & Support
  • FAQs
  • Terms of Use
  • Privacy Policy
  • Legal and Copyright Notices
  • Sitemap
  • Cookies

An Avnet Company © 2025 Premier Farnell Limited. All Rights Reserved.

Premier Farnell Ltd, registered in England and Wales (no 00876412), registered office: Farnell House, Forge Lane, Leeds LS12 2NE.

ICP 备案号 10220084.

Follow element14

  • X
  • Facebook
  • linkedin
  • YouTube