
2.jpg.jpg-68x68x2.jpg?_=zqdYZYFj3EWNUExYxEhR6Q==)
Table of contents

Abstract
Device for projecting ghosts to the wall when entering room.
Project
As part of this year Halloween, I made automatic ghost on wall projector from one devkit with microcontroller, motion sensor, 4 addressable RGB LEDs, few wires, few lego pieces, and one sheet of paper. When somebody enter room containing it, it scary entering person by projecting ghosts to the wall.
Let’s look
Projector
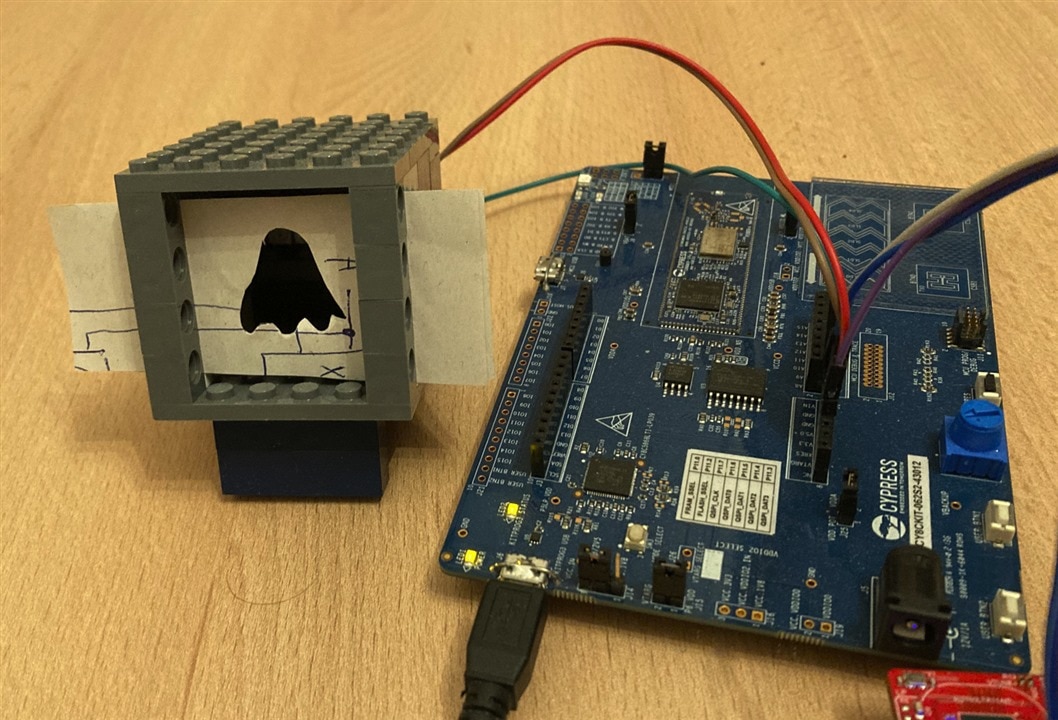
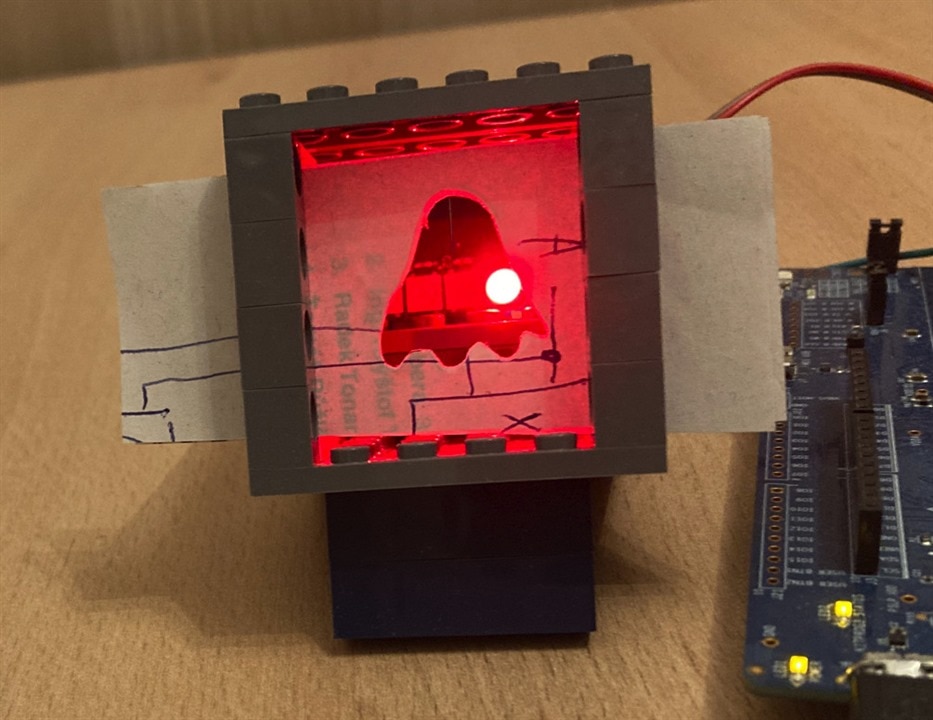
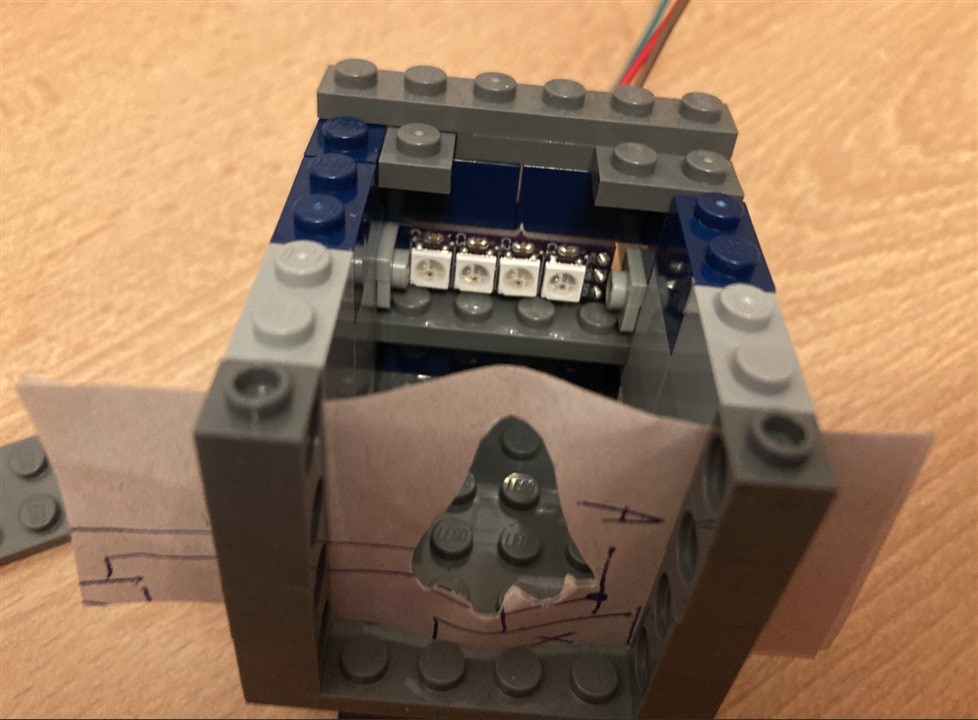
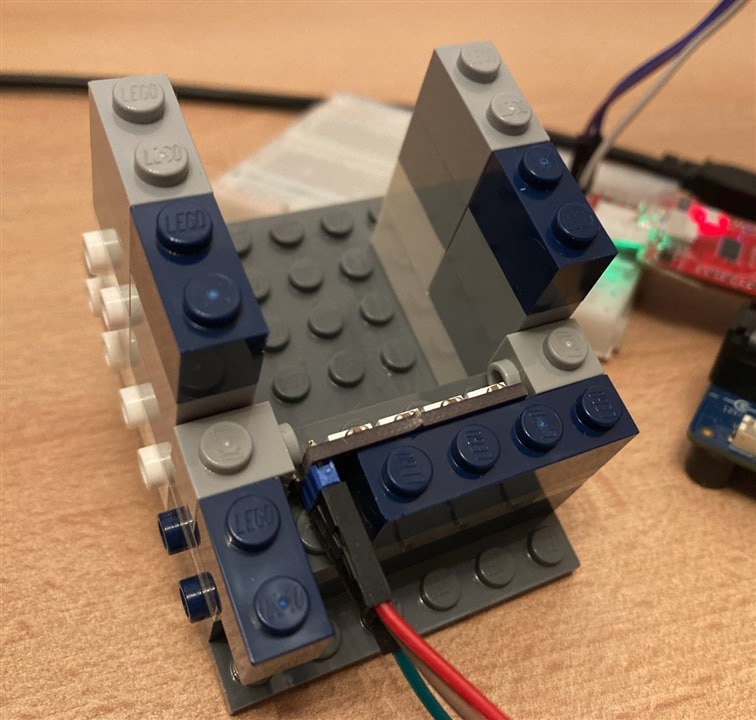
Core part of projector is box made from LEGO pieces. At the back side of box, there are four LEDs. In front of box there is paper with ghost ornament cut in it. When LED inside box turns on, device start projecting pattern cut into paper.
Using multiple LEDs can make pattern of ghost slightly moving despite the projector box stay at fixed position. Because there is spacing between LED, ghost emitted by rightmost LED is shifted to left side on wall. It can be highlighted by following simplified drawing:
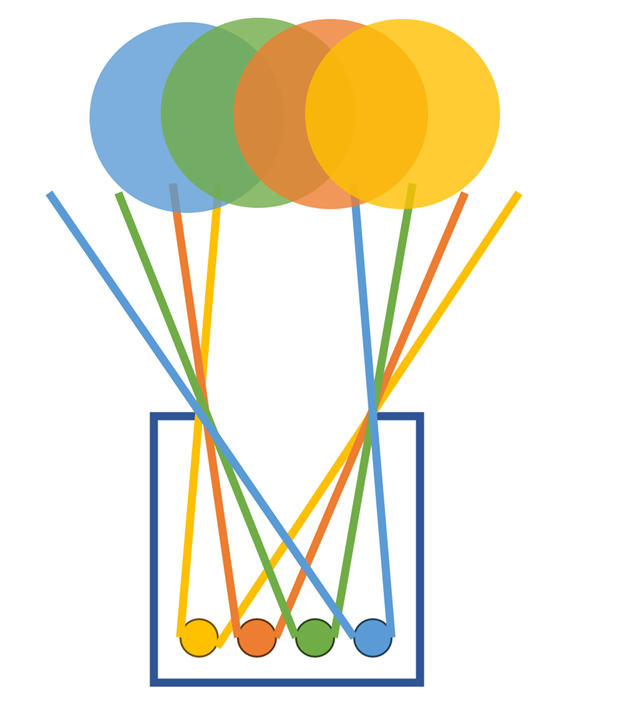
Projecting using right most and left most LED at the same time cause showing two ghosts which are mostly non-overlapping. It is visible at the end of projection where there are actually two white ghosts. Amount of overlap can be tuned by box length.
Technically it is 4-pixel projector (Only 2073596 additional pixels are needed to make it actually Full HD). And obviously there is disadvantage, that pixels are not round, but form a ghost pattern…
Distance from wall defines ghost size. Can be quite big, but brightness is reduced with longer distance. And yes, cutting different pattern to paper cause projecting different picture.
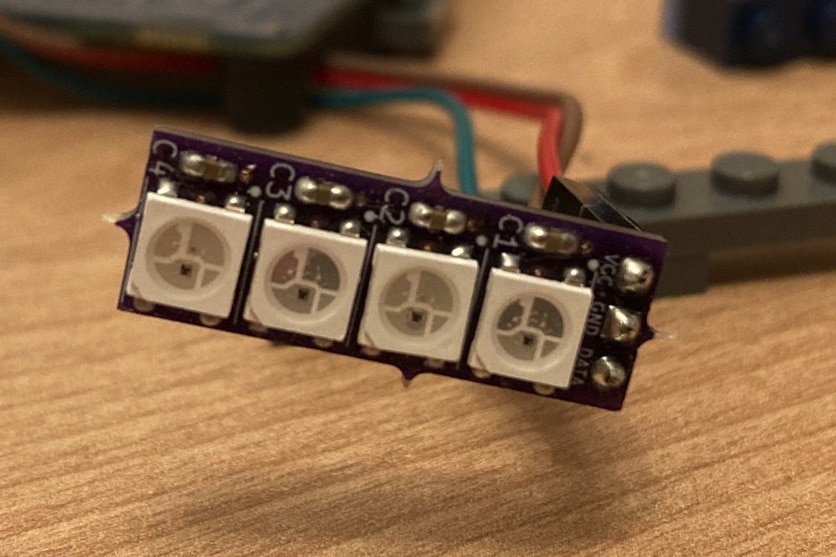
Box has stand from Lego for making it easier to position. Can be made from almost any LEGO bricks. I have limited set of pieces, so my box is very colourful. At the back there is space for PCB with 4 LEDs. Interestingly, my WS2812B LED test PCB (which I made few years ago) almost exactly fit LEGO bricks. Here are some more detailed pictures of projector box:
Electronics
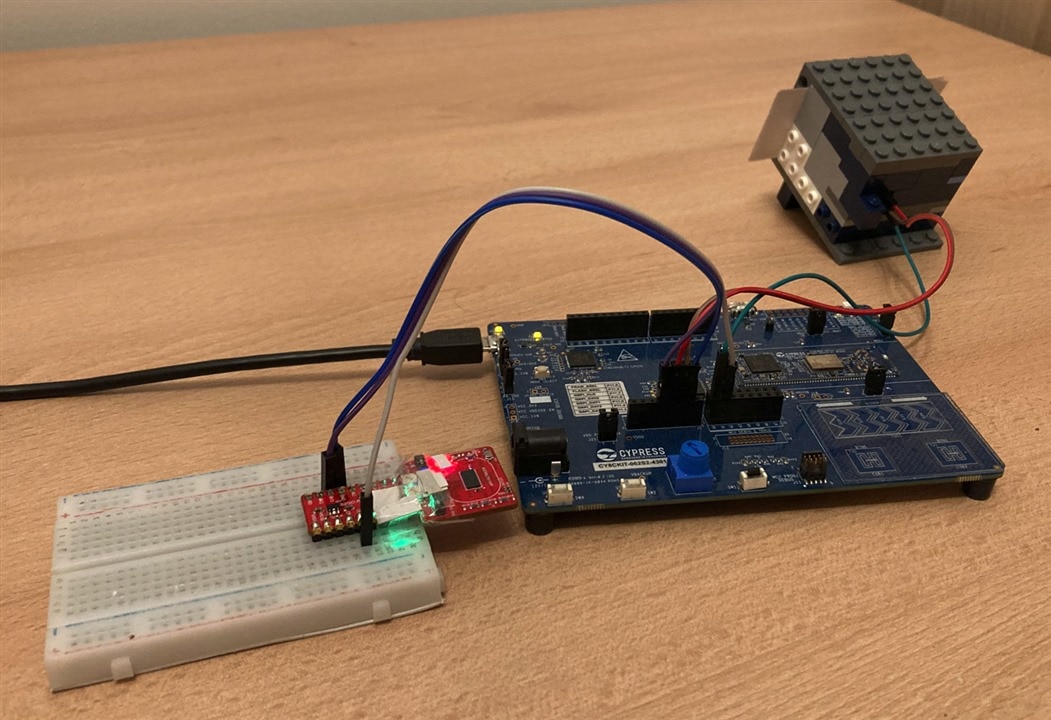
Electronics is quite simple. Device is controlled by Infineon (Cypress) PSoC 6 MCU on CY8CKIT-062S2-43012 kit. I pick this MCU because it has large flash and versatile clocking system. It is the kit which I RoadTested in 2020. Sensor is XENSIV 60 GHz radar sensor from Infineon. It is variant BGT60LTR11 which act like black box and just using two GPIOs outputs if movement is detected or not. And if yes, it also indicates if object is approaching or departing sensor. I use sensor on S2GO board which allows easy usage of sensor on breadboard. For limiting optical noise, I covered onboard debug LEDs by paper.
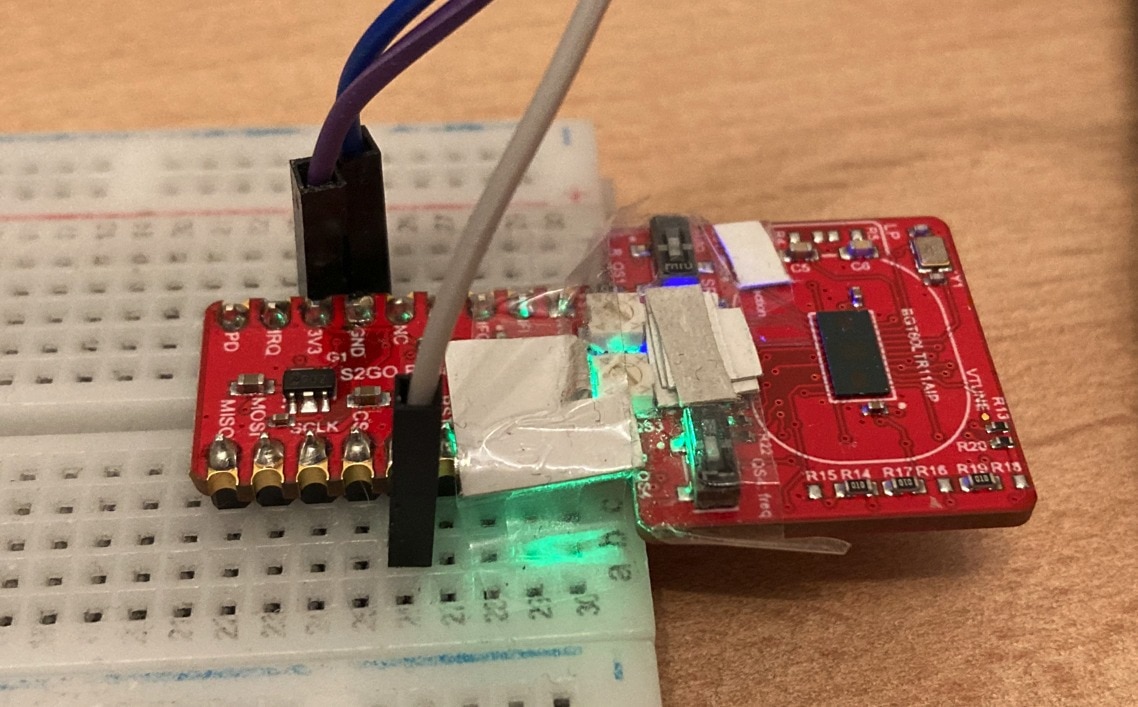
Sensor should be configured in automatic mode and you can adjust sensitivity to limit detection to some distance as well as for detecting movements when entering doors several meters away. There is potentionmeter on S2GO board for configuring this. Since interface of sensor is pretty simple, you can likely replace it with PIR sensor, if you have one.
Firmware
Firmware contains my own drivers for WS2812B LEDs and in main loop contains logic for determine movement. LEDs driver is based on 8-bit integer clock divider, DMA and SPI (using SCB block). This allow emitting LED signal on background.
I originally planed make it even with sound, but PCB for audio amplifier which I bought did not arrive at time, so it is without sound. In firmware there is preparation for outputting audio using MAX5715 DAC. It is not tested. Since animation is pretty short, I considered storing sound directly in MCU flash (for this reason I chosen devboard with lot of flash). If it do not fit there is additional external flash on this board.
Closing
It was nice project. Not that complex compared to my entries in previous competition. Since It was long time since I worked with PSoC, so I had to refresh some knowledge. But except PCB for audio amplifier not arriving at time, it was quite seamless. Feel free to build it, it is funny and quite easy to build. if you need different pattern feel free to make it. Just cut different shape to paper. With adjusting box size, it can be quite powerful and easy to program toy.
Resources
- WS2812B LED Board PCB Gerbers (ZIP)
- WS2812B LED Board Kicad Project (ZIP)
- Firmware (ELF)
- Firmware ModusToolbox project (ZIP)