I purchased some LED filaments a while back off of AliExpress for a project after learning they are available with 3V forward voltage. They looked like they would also work for making DIY 7-Segment displays.

You will have seen them used in certain types of lighting.

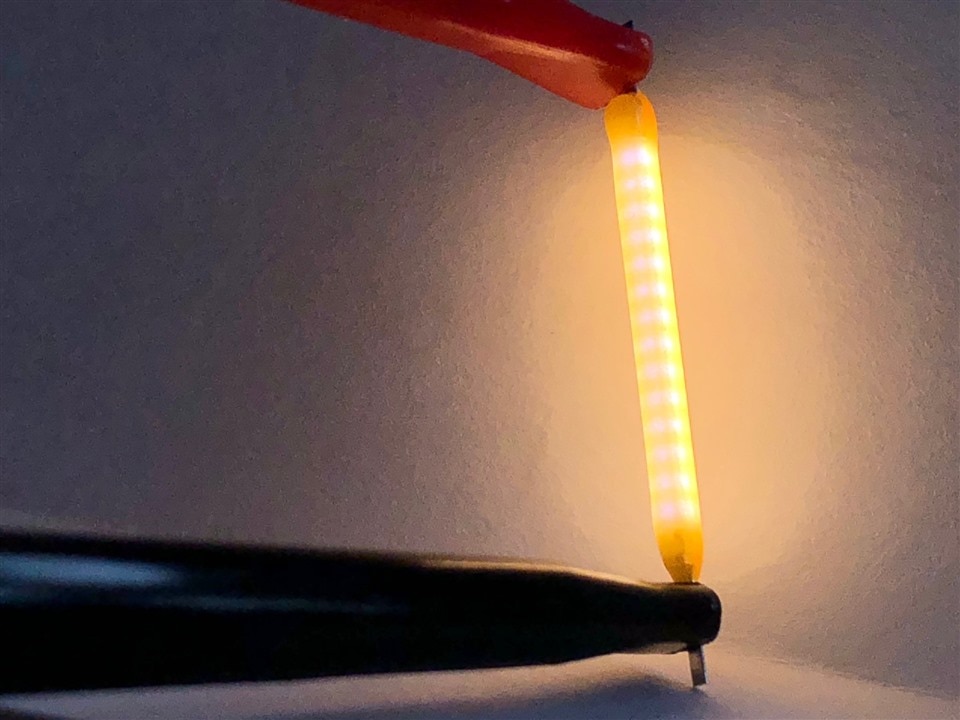
They can be bought in 3V, 6V, 9V, 12V, 24, and up. Lengths include 18.5mm, 26mm, 38mm, 68mm and more in both rigid and flexible packages. Various colors are available, including blue, green, pink, and red. As expected they are quite bright and the 26mm version I bought states the maximum current is 120mA per segment. The image below shows a filament dimmed to show the 14 individual LEDs in the strip.

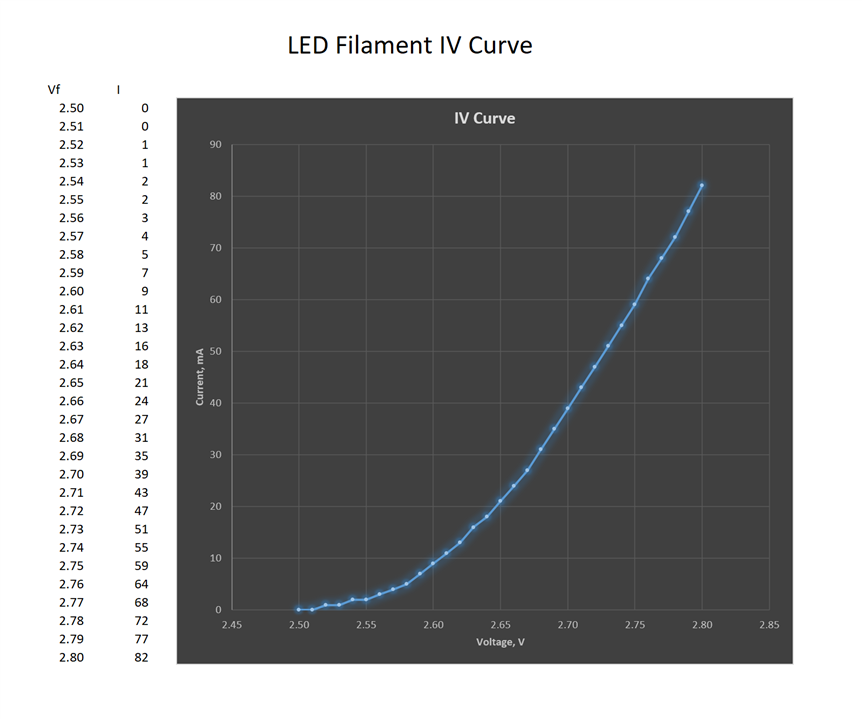
Since there wasn't a datasheet, a rough IV curve was created to better understand their behavior.

It appeared that 5mA would be more than sufficient for an individual segment and a circuit with 150 ohm resistors to control current and a 74LS47 IC to control the individual segments was constructed as shown in the schematic below.

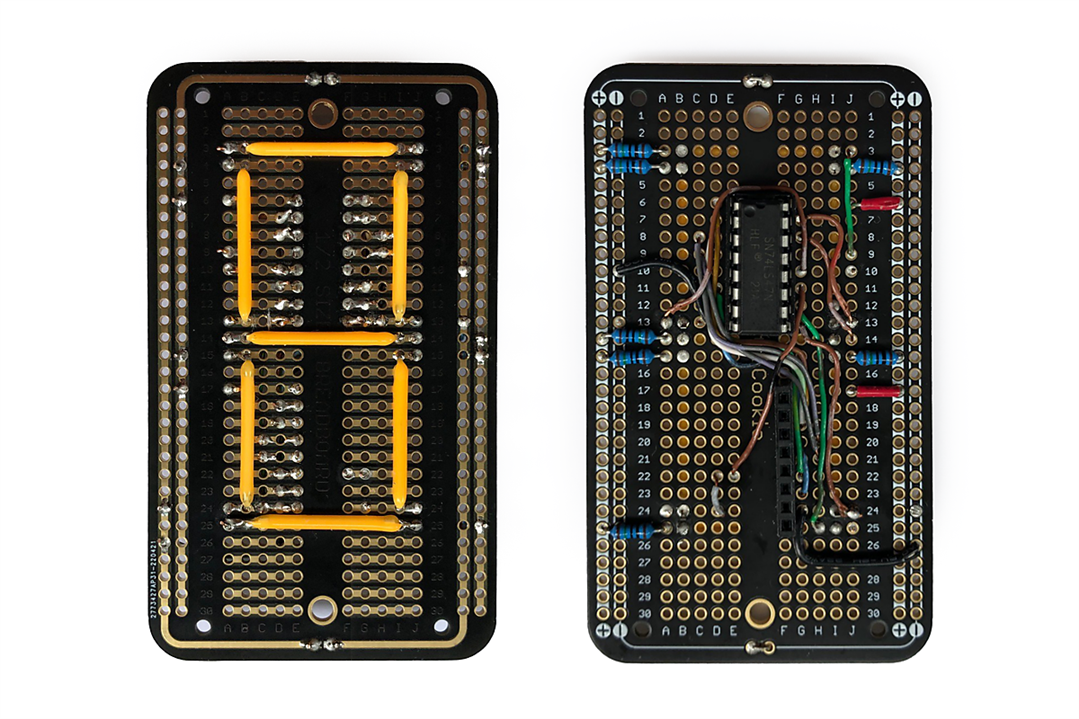
Prototyping strip board was used to create the circuit as shown below. The numerals are a bit over 2 inches (64mm) high.

Different length filaments could be used to make larger or smaller displays. It would even be possible to make 14-Segment displays. I hooked it up to an Arduino Uno and used PWM to obtain the desired brightness.
/*
 * 74LS47 BCD to 7-Segment Demonstration
 *
 * This code is in the public domain
 * fmilburn May 2022
 */

const int b = A0;   // BCD pins on 74LS47
const int c = A1;
const int d = A2;
const int a = A3;
const int rbi = 3;  // display brightness (0 to 255)
const int bright = 16;

void setup() {
  pinMode(a, OUTPUT);
  pinMode(b, OUTPUT);
  pinMode(c, OUTPUT);
  pinMode(d, OUTPUT);
  // Set brightness of display with PWM
  pinMode(rbi, OUTPUT);
  analogWrite(rbi, bright);
}

void loop() {
  // Displays 0 to 9 in a loop on a seven segment display
  // Bits are read from the number to be displayed and written
  // to the 74LS47 a, b, c, and d pins per the datasheet
  for(byte displayNumber = 0; displayNumber < 10; displayNumber++){
    digitalWrite(a, bitRead(displayNumber,0));
    digitalWrite(b, bitRead(displayNumber,1));
    digitalWrite(c, bitRead(displayNumber,2));
    digitalWrite(d, bitRead(displayNumber,3));
    delay(1000);
  }
}
The short video below shows it working in a 3-D printed enclosure.

Top Comments