


You know how sometimes you build things that are so impressive you just have to share it with the world?
This is not one of those times 
but I'll share it anyway.
I did have a fun project remake in mind, and this would be step 1 in that process.
I hope to add extra steps as time allows, but I'm super busy now that I'm retired - turns out it takes ALL DAY to do nothing all day! 
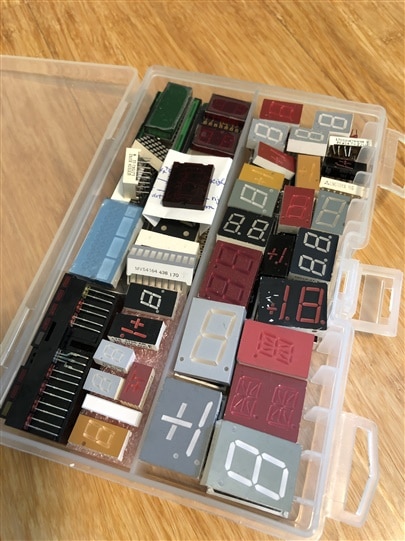
I've had this box of displays for quite a long time, so it's probably about time I built something with it.
I'm still fairly new to Python and the Raspberry Pi Pico, so this seemed like the perfect time to brush up on those skills a little.
I picked out that bigger grey one in the bottom corner, just because it seemed like a nice size. Luckily it has a product number stamped onto the side so I was able to find the pinouts for it very easily. I won't share the specific details here because it's likely going to be different for nearly every display in that box, and from a display anyone else might be using who happens to want to follow my quest.
Suffice it to say, unless you have a very fancy schmancy display with added chips and smarts, each segment will require its own wire and a current-limiting resistor. This one had 2 dots as well, but I'm ignoring that. Two extra wires and resistors is just too much extra effort to put in 
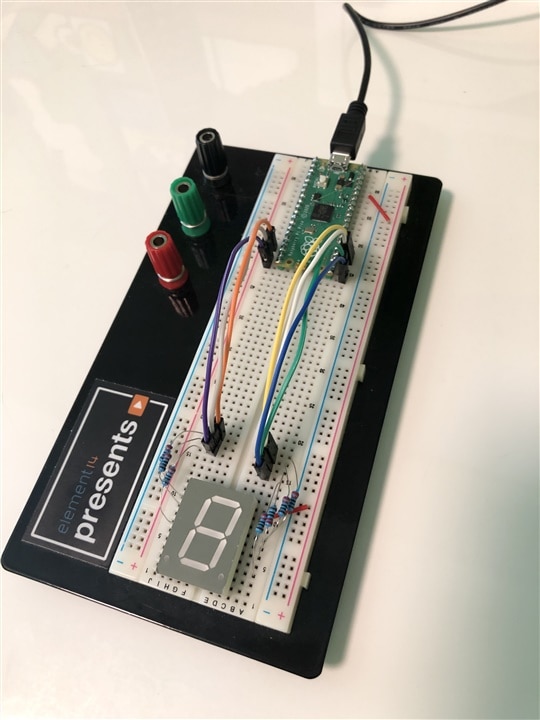
So pick some pins on the Pi Pico and hook it all up.
You can sort of get away without adding the resistors, but then the display will vary in brightness depending on how many segments are lit up. Some of my beginner projects from a decade ago had that issue, and it took me this long to figure that out 
I used 220 Ohm resistors, which gave a nice amount of light. You can use pretty much whatever you have handy, keeping in mind that lower values will give a brighter display and higher values give a dimmer display - all within reason, of course, as you might end up having it so dim you can't see it, or not limited enough to where the Pico can't power them all reliably.
The cool thing is that, before hooking the wires up to the Pi Pico, you can simply use a little 3v button cell battery (like the CR2032) to test which segment each wire is hooked up to. So even if you didn't have a spec sheet for the display, you could probably figure out which pin is common just with some trial and error. These displays seem to always have one pin per segment and dot, and then one pin that connects to the other side of all of them.
The button cell test is also a way to determine which way the segments are hooked up - in my case the common pin requires the 3v VCC, with each of the segment pins going to ground. Keep this in mind when you hook it up to the Pico - your display might need a common ground with each pin providing power. That would only require one wire change (common to ground instead of the 3.3v pin), and a small update in the code.
Speaking of the code, I've kept it as simple and readable as possible. It is, of course, possible to shrink the code considerably by using a byte to represent each digit, with each bit within that byte representing a segment. In my case I thought it would be more clear to define each part separately. This likely takes more space and is less efficient, but for what we are building I think clarity is more important at this point.
That said, I hope what's easy for me to read is also easy for new developers to figure out!
Here it is then:
#
# Basic 7-segment display test
#

from machine import Pin
import time


# For my 7-segment display, the common wire connects to VCC
#  -> Note that this means we have to turn a pin "off" to light the segment LED, and "on" to turn it off
# The 3.3v pin 36, combined with 220R resistors light the segments well enough
# You can test the display by using a small 3.3v button battery (CR2032 seems cheap and plentiful)
# Hopefully the display you have will have a model number you can look up to find the pinout.

# Define the segment GPIO connections
# hook up the segments of the display to the pins on the Pi Pico as per the defined constants below
# Use a current limiting resistor for each segment (you'll need 7!). I used 220 Ohm resistors.
# The resistors are also necessary to keep a constant brightness on the display
SEG_A_PIN = 13  # pi pico pin GP13
SEG_B_PIN = 19
SEG_C_PIN = 17
SEG_D_PIN = 16
SEG_E_PIN = 15
SEG_F_PIN = 14
SEG_G_PIN = 18

# I'm not using the 2 dots for this example, but they would simply add another GPIO pin each.

# Python allows us to define global variables anywhere all willy-nilly,
#   but for clarity lets define them here at the top like good little programmers
#   The type is here just for clarity too - Python allows us to change it at any time
DIGITS :[Pin] = []

def setup():
    # Define each segment
    SEG_A = Pin(SEG_A_PIN, Pin.OUT)
    SEG_B = Pin(SEG_B_PIN, Pin.OUT)
    SEG_C = Pin(SEG_C_PIN, Pin.OUT)
    SEG_D = Pin(SEG_D_PIN, Pin.OUT)
    SEG_E = Pin(SEG_E_PIN, Pin.OUT)
    SEG_F = Pin(SEG_F_PIN, Pin.OUT)
    SEG_G = Pin(SEG_G_PIN, Pin.OUT)

    # Define which segments make up each digit
    DIGIT_0 = [SEG_A, SEG_B, SEG_C, SEG_D, SEG_E, SEG_F       ]
    DIGIT_1 = [       SEG_B, SEG_C                            ]
    DIGIT_2 = [SEG_A, SEG_B,        SEG_D, SEG_E,        SEG_G]
    DIGIT_3 = [SEG_A, SEG_B, SEG_C, SEG_D,               SEG_G]
    DIGIT_4 = [       SEG_B, SEG_C,               SEG_F, SEG_G]
    DIGIT_5 = [SEG_A,        SEG_C, SEG_D,        SEG_F, SEG_G]
    DIGIT_6 = [SEG_A,        SEG_C, SEG_D, SEG_E, SEG_F, SEG_G]
    DIGIT_7 = [SEG_A, SEG_B, SEG_C                            ]
    DIGIT_8 = [SEG_A, SEG_B, SEG_C, SEG_D, SEG_E, SEG_F, SEG_G]
    DIGIT_9 = [SEG_A, SEG_B, SEG_C, SEG_D,        SEG_F, SEG_G]

    # Note that we are not limited to decimal digits. We could continue to add A through F for hexadecimal

    global DIGITS
    DIGITS = [DIGIT_0, DIGIT_1, DIGIT_2, DIGIT_3, DIGIT_4, DIGIT_5, DIGIT_6, DIGIT_7, DIGIT_8, DIGIT_9]


def displayDigit(digit):
    #start by turning off all the segments
    displayOff()

    for segment in digit:
        segment.off() # gpio "off" turns on the LED


def displayOff():
    for segment in DIGITS[8]:
        segment.on() # gpio "on" turns off the LED


# Start main code
setup()

while True:
    for digit in DIGITS:
        displayDigit(digit)
        time.sleep(0.5)
        displayOff()

    time.sleep(1)
The main thing to keep in mind is that a 7-segment display is really nothing more than some LEDs stuck together to look like a digit. You could very well just update the Blink example to blink one of the segments instead of the usual kind of LED.
What the code does is try to organize which LED goes where in the 7-segment digit, and then defines what segments need to be lit up to show a specific decimal number from 0 to 9.
The loop at the bottom then simply steps through all the digits to test that I've got things wired up correctly, and in the code declared correctly.
And that's it!
Here's some video fun:
You might wonder why I left space on the breadboard between the Pi Pico and the display?
That's because I happen to have a couple of 74LS47 chips that are supposed to be able to take a digital input and convert it to the 7-segment display pins. That would save us a handful of GPIO pins on the micro controller - the Pi Pico has so many extra GPIO pins that it's not really an issue right now, but it seems like the sort of thing I should try out next... assuming I'm not too busy doing nothing all day
It might also simplify the code a fair bit, by allowing us to directly use integer representations of each digit instead of having to go through all the trouble of defining all the details manually.
Part Two, using the 74LS47 chip: Pi Pico With 7-segment display and 74ls47 chip
-Nico

