


The moment you come to the scary Door, if you are chosen you will see...

1. Scary Door
Using Computer Vision Deep Learning model, camera can detect your appearance and start rocking this scary pumpkin just before the SCARY DOOR.

2. How to Build
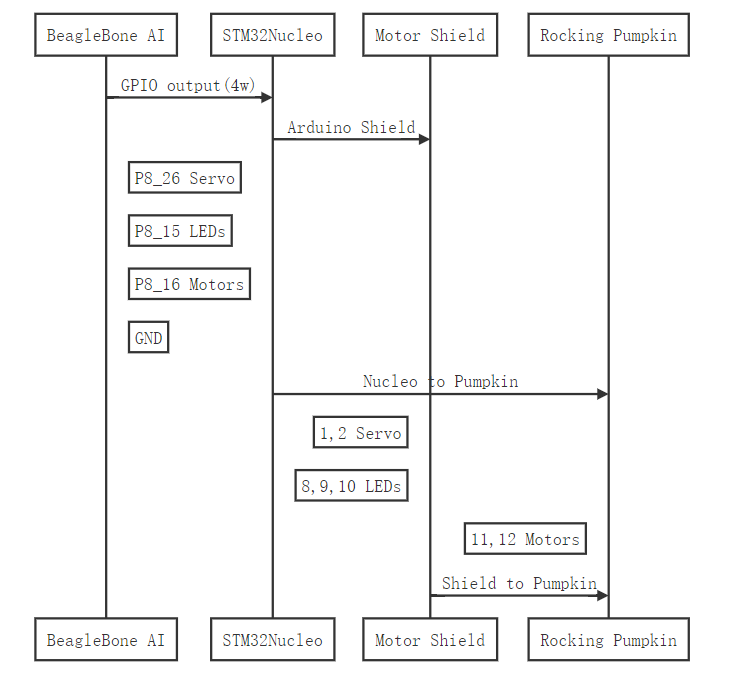
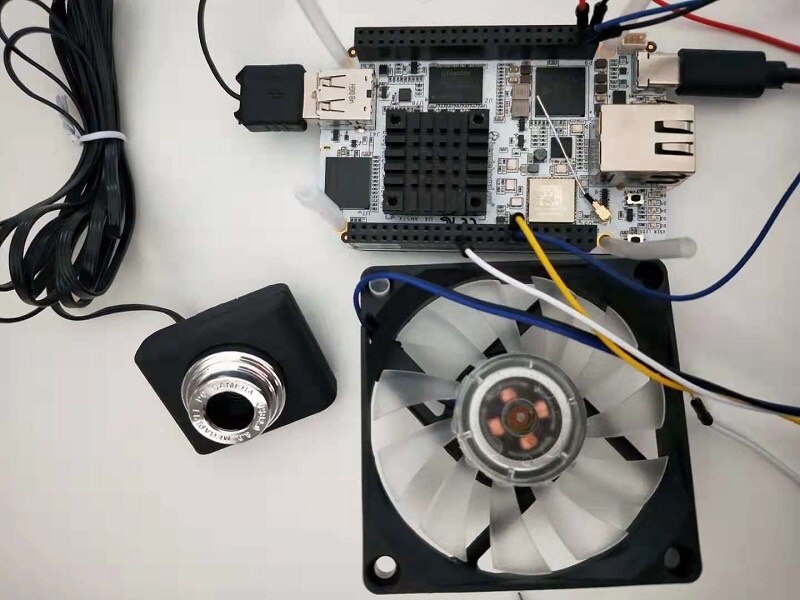
- First, the camera can detect human approaching with CNN classification capabilities,With BeagleBone AI dev board and one usb camera, classification model runs on A15 core and change GPIO output as signals for Servo, LEDs and DC motor.
- Then the pumpkin lightup and the eyes on the door rolls.The Nucleo-STM32L496 is triggered with GPIO input to start Servo, LEDs and DC motor with DFRobot Arduino Motor Shield. Then the pumpkin is active now.
- If you are chosen, the eyeball is cushed with bleeding blood. (Sure, but fake ones. )Optional part is the pop eyeball and crushed bleeding eyeball.
* the Nucleo-STM32L496 is not neccessary in the whole project, but the DFRobot Arduino Motor Shield is easy to be used if with this arduino-compatible board. And I have blackouted the Beaglebone AI board when wiring the DC motor directly with the GPIO for quick test. The fact is that STM32L496 is more cheap and durable. {;-}
3. Software and Code
All the codes are done on C9 BeagleBone AI and arduino for nucleo-STM32-64.

3.1 BeagleBone AI part
PRU startup,
#include <stdint.h>
#include <pru_cfg.h>
#include "resource_table_empty.h"
#include "prugpio.h"
#include<math.h>


#define SHARED_RAM_ADDRESS 0x10000
unsigned int volatile __far * const SHARED_RAM = (unsigned int *) (SHARED_RAM_ADDRESS);


volatile register unsigned int __R30;
volatile register unsigned int __R31;


void servo(uint32_t ouputpin, uint32_t servoangle );
void outputon(uint32_t ouputpin );


void main(void) {
uint32_t outputpin, servoangle;
unsigned int value = 0;
/* Set the SHARED_RAM value to 0 */
*SHARED_RAM = 0;
uint32_t gpio = P8_26 |  P8_16 | P8_15  ;
while(1) {
if(value != *SHARED_RAM) {
/* Flip every other bit and write the value back */
value = *SHARED_RAM;
//value ^= 0xAAAAAAAA;
//*SHARED_RAM = value;
// Turn servo pin
outputpin=P8_26;
servoangle=50;
servo(outputpin, servoangle);
// Put LEDs and Motor into On state;
outputpin=P8_16;
outputon(outputpin);
outputpin=P8_15;
outputon(outputpin);
}
__halt();
}
}


void outputon(uint32_t ouputpin ){
__R30 |= ouputpin; // Set the GPIO pin to 1
__delay_cycles(1000000000/5);    // Wait 1 second
__R30 &= ~ouputpin; // Clear the GPIO pin
//__delay_cycles(1000000000/5);
}


void servo(uint32_t ouputpin, uint32_t servoangle ){
servoangle=0;
int i,j,x,y;
// 1 second=10^9/5 & 1 degree angle=20000/5;
x=25+servoangle;
y=1000-x;
for(i=0; i<1000; i++) {
__R30 |= ouputpin; // Set the GPIO pin to 1
for(j=0; j<x; i++) {
__delay_cycles(20000/5);    // Wait 0.02ms second
};
__R30 &= ~ouputpin; // Clear the GPIO pin
for(j=0; j<y; i++) {
__delay_cycles(20000/5);
};
}
for(i=0; j<10; i++) {
__delay_cycles(2000000/5);    // Wait 2ms
};
return;
}
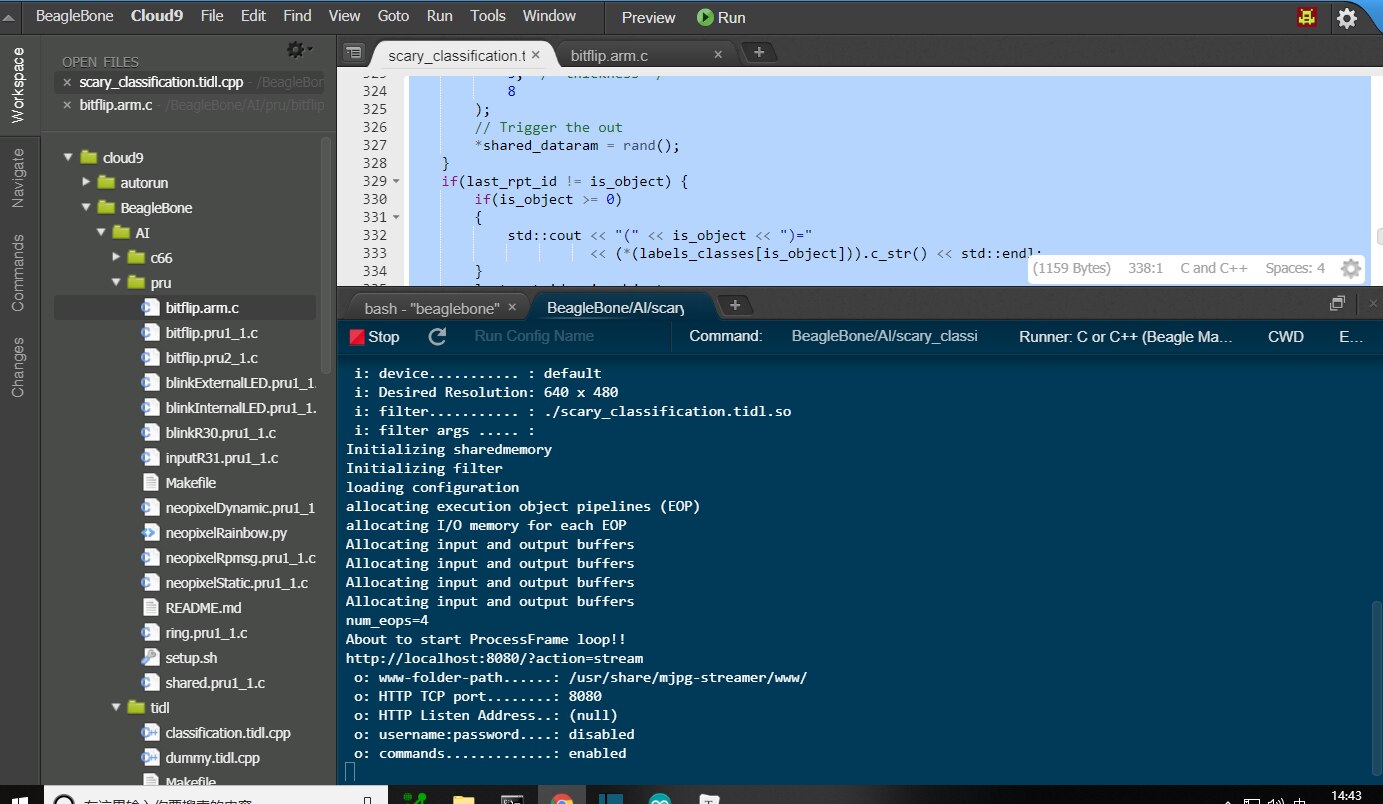
LINUX A15 core TIDL startup,Main part of Code for CV_process, after put the results in *shared\_dataram.
bool ProcessFrame(ExecutionObjectPipeline* eop, Mat &src)
{
    if(configuration.enableApiTrace)
        std::cout << "preprocess()" << std::endl;
    imgutil::PreprocessImage(src,
                             eop->GetInputBufferPtr(), configuration);
    eop->ProcessFrameStartAsync();

    return false;
}


void DisplayFrame(const ExecutionObjectPipeline* eop, Mat& dst)
{
    if(configuration.enableApiTrace)
        std::cout << "postprocess()" << std::endl;
    int is_object = tf_postprocess((uchar*) eop->GetOutputBufferPtr());
    if(is_object >= 0)
    {
        cv::putText(
            dst,
            (*(labels_classes[is_object])).c_str(),
            cv::Point(15, 60),
            cv::FONT_HERSHEY_SIMPLEX,
            1.5,
            cv::Scalar(0,255,0),
            3,  /* thickness */
            8
        );
        // Trigger the out
        *shared_dataram = rand();
    }
    if(last_rpt_id != is_object) {
        if(is_object >= 0)
        {
            std::cout << "(" << is_object << ")="
                      << (*(labels_classes[is_object])).c_str() << std::endl;
        }
        last_rpt_id = is_object;
    }
}
3.2 FreeRTOS shall be used in STM32-Nucleo board with different types of LEDs, servos and motors.
FreeRTOS makes the complex logic easy. Refer to the main part of the codes for details,
#include <STM32FreeRTOS.h>
#include <Servo.h>


// Motor Shield
const int E1 = 3; ///<Motor1 Speed
//const int E2 = 11;///<Motor2 Speed
//const int E3 = 5; ///<Motor3 Speed
//const int E4 = 6; ///<Motor4 Speed
const int M1 = 4; ///<Motor1 Direction
//const int M2 = 12;///<Motor2 Direction
//const int M3 = 8; ///<Motor3 Direction
//const int M4 = 7; ///<Motor4 Direction


//LEDs
const int LED1 = 13; ///<
const int LED2 = 5; ///<
const int LEDR = 6; ///<
const int LEDG = 7; ///<
const int LEDB = 8; ///<


// Servos
Servo myservo;  // create servo myservo.attach(9)
Servo rockX;
Servo rockY;
int pos = 0;    // variable to store the servo position


// Buttons
const int buttonPin = 2;     // the number of the pushbutton pin
int btnvalue=0;
int buttonState=1;


//Tasks
void TaskSample( void *pvParameters );
void bkLEDonce(int leds,int millisec);
void TaskBlinkLED1( void *pvParameters );
void TaskBlinkLED2( void *pvParameters );
void TaskBlinkLEDRGB( void *pvParameters );
void TaskSERVORUN( void *pvParameters );
void TaskSERVORocking( void *pvParameters );
void servoSweep(int angle);


void TaskSample( void *pvParameters ){
  (void) pvParameters;
  for (;;) // A Task shall never return or exit.
  {
  }
}

void setup() {
    // initialize serial communication at 9600 bits per second:
  Serial.begin(9600);
  while (!Serial) {  }
    // Pin Setting
  pinMode(buttonPin, INPUT);
  myservo.attach(9);  // attaches the servo on pin 9 to the servo object
  rockX.attach(10);
  rockY.attach(11);
  pinMode(LED1, OUTPUT);
  for(int i=3;i<9;i++)  pinMode(i,OUTPUT);
  //Tasks
  xTaskCreate(TaskSERVORUN,  (const portCHAR *)"SERVORUN" ,  128 ,  NULL ,  1 ,  NULL );
  xTaskCreate(TaskSERVORocking,  (const portCHAR *)"SERVORUN" ,  128 ,  NULL ,  1 ,  NULL );
  xTaskCreate(TaskBlinkLED1,  (const portCHAR *)"BlinkLED1" ,  128 ,  NULL ,  2 ,  NULL );
  xTaskCreate(TaskBlinkLED2,  (const portCHAR *)"BlinkLED2" ,  128 ,  NULL ,  2 ,  NULL );
  xTaskCreate(TaskBlinkLEDRGB,  (const portCHAR *)"BlinkLEDRGB" ,  128 ,  NULL ,  2 ,  NULL );
  vTaskStartScheduler();
  Serial.println("Insufficient RAM");
  //while(1);
}


void loop(){
  // Empty Loop body
}
4. Hardware and Wiring
Total,
- 3 x 5V USB power
- 4x jumper wires from BBAI
- 1x breadboard
- 11x jumper wires from Nucleo+Shield
- 3x r-y-b LEDs for pumpkin Eye-blinking
- 2x servo for pumpkin head turn-around
- 1x motor for pumpkin eye movement

5. Summary
This project can add some fun for this Halloween.