


This blog post is also the Part of PSoC
6 WiFi-BT Pioneer Kit (CY8CKIT-062-WIFI-BT) - Review Product LinkProduct Link (Figure 1). This post is also related to previous ones so for better understanding kindly take a look at those too.
Figure 1: PSoC6 WiFi-BT Pioneer Kit (details)

In the previous posts we have learn how to successfully build and test the Hello World project based on UART_printf example and then modified it to read the ADC value to get data from onboard ambient light sensor. And also created a new project of Blinky LED without using any pre-built examples. Now we will built learn how to read ADC of PSoC6 MCU.
CapSense Tuner (PSoC Creator Tuner)
CapSense is easy to use and advance touch sensor module of PSoC6 MCU (figure 2). PSoC Creator has builtin GUI based CapSense tuner tool. CapSense tuner can work over USB to I2C, SPI or UART bridge interface. It provide graphical view of touch inputs in real time and allow user to adjust the threshold value for various touch inputs and later these values can be incorporated into project. Therefore it enable us to adjust all the parameters of touch input by only one time programming the PSoC6. All the steps required to enable the CapSense tuning and then using the Tuner in real time to obtain the optimal threshold values and how to update the original values, testing and results are shown below. (Here I am assuming that you are already familiar with creating new project, building and programming the PSoC6 using PSoC Creator) You will get an error on building this example code but solution of this error is also given below.

Figure 2: Different CapSense Inputs Available on PSoC6 pioneer board
Create a new CapSense Tuner UART project from examples
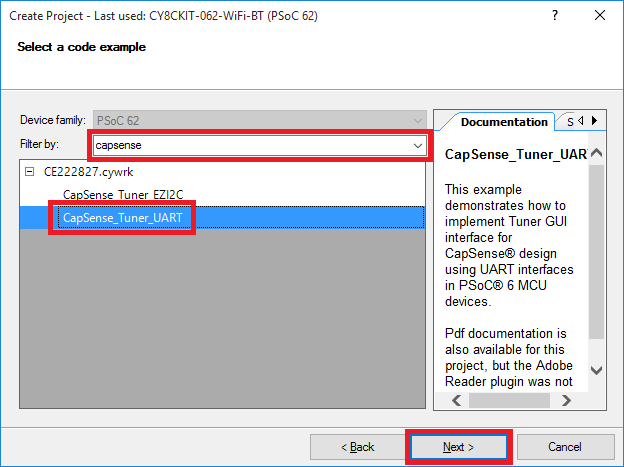
Rename or change the project location and click Finish to create a new project

After successful new project creation you will this this view in PSoC Creator IDE
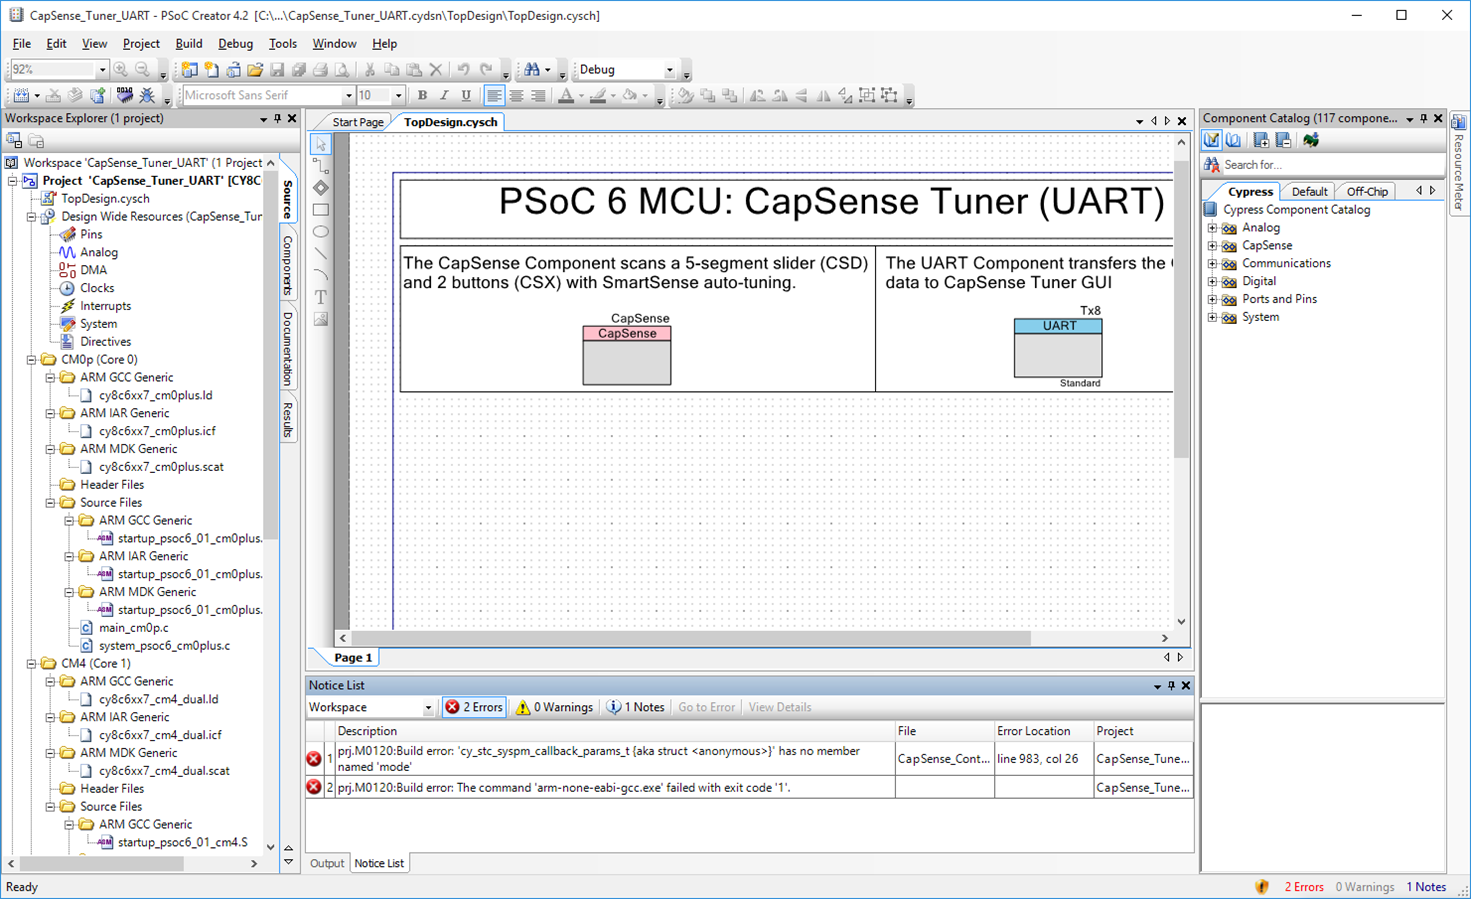
Build the Project and You can get this Error and building will fail. Double click the error and it will open the Error Location in code as shown above.

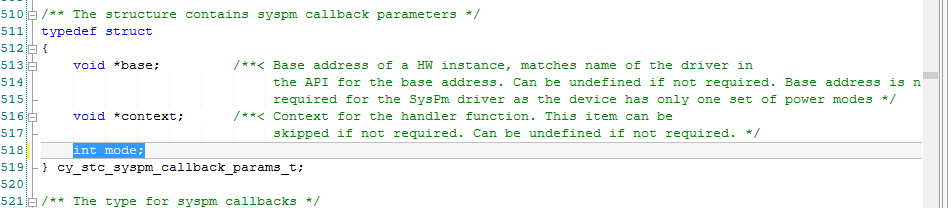
Right Click on Error struct and Go to Definition to further investigate the reason behind this error.
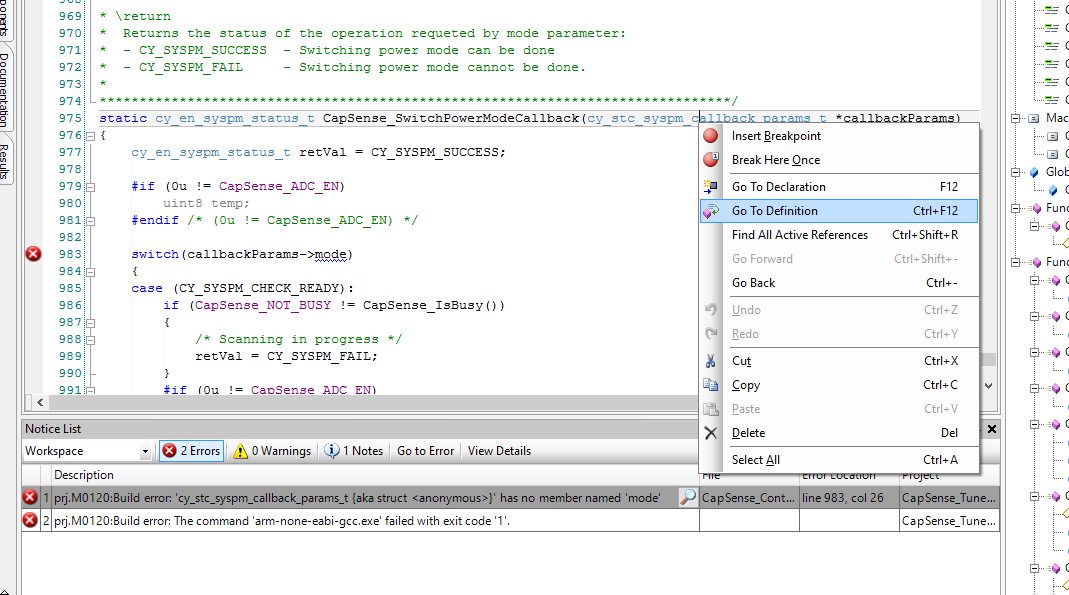
As you can see there is no integer member named "mode" of this structure. We got this error because we are using integer member named "mode" in switch statement in "static cy_en_syspm_status_t CapSense_SwitchPowerModeCallback(cy_stc_syspm_callback_params_t *callbackParams)" function inside CapSense_Control.c file
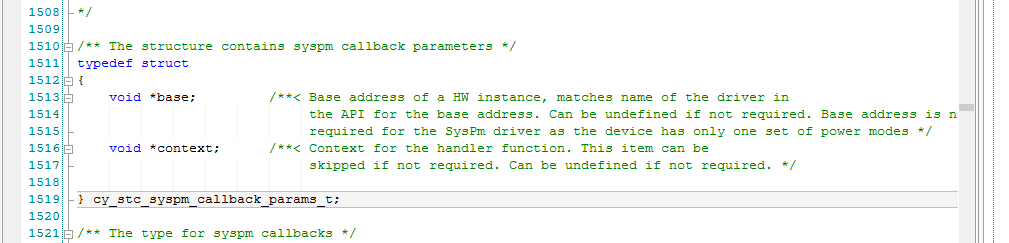
To solve this Error, modify the Structure definition by adding a new member "mode" of "int" datatype as shown.
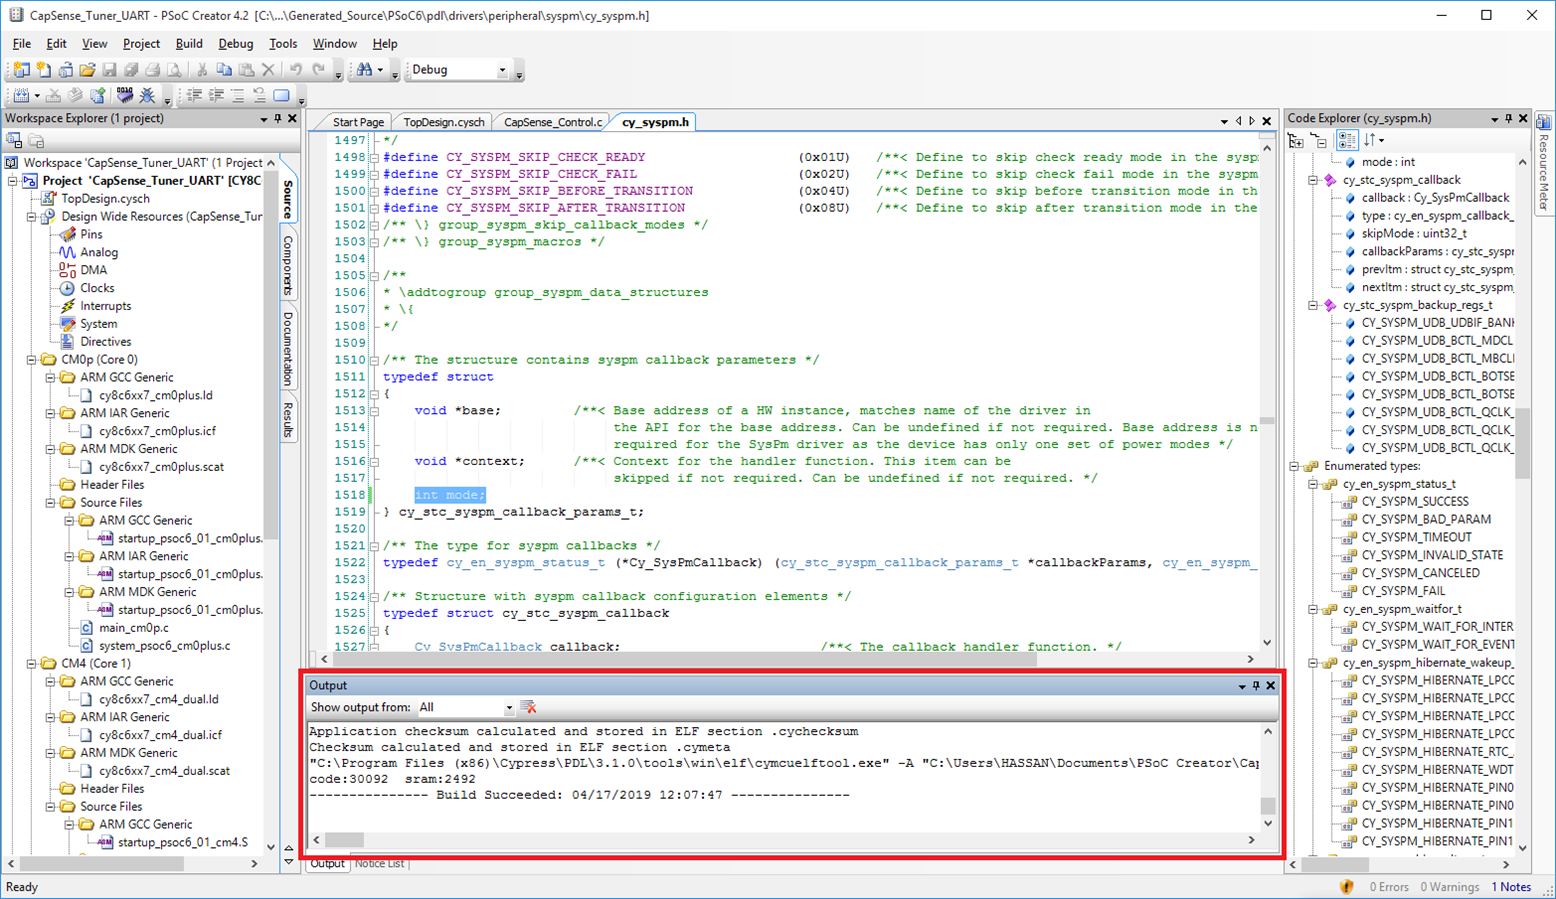
Build the program after modification of structure definition and now build will succeed without any error
Program the PSoC6 (CM4) to run the CapSense Tuner UART
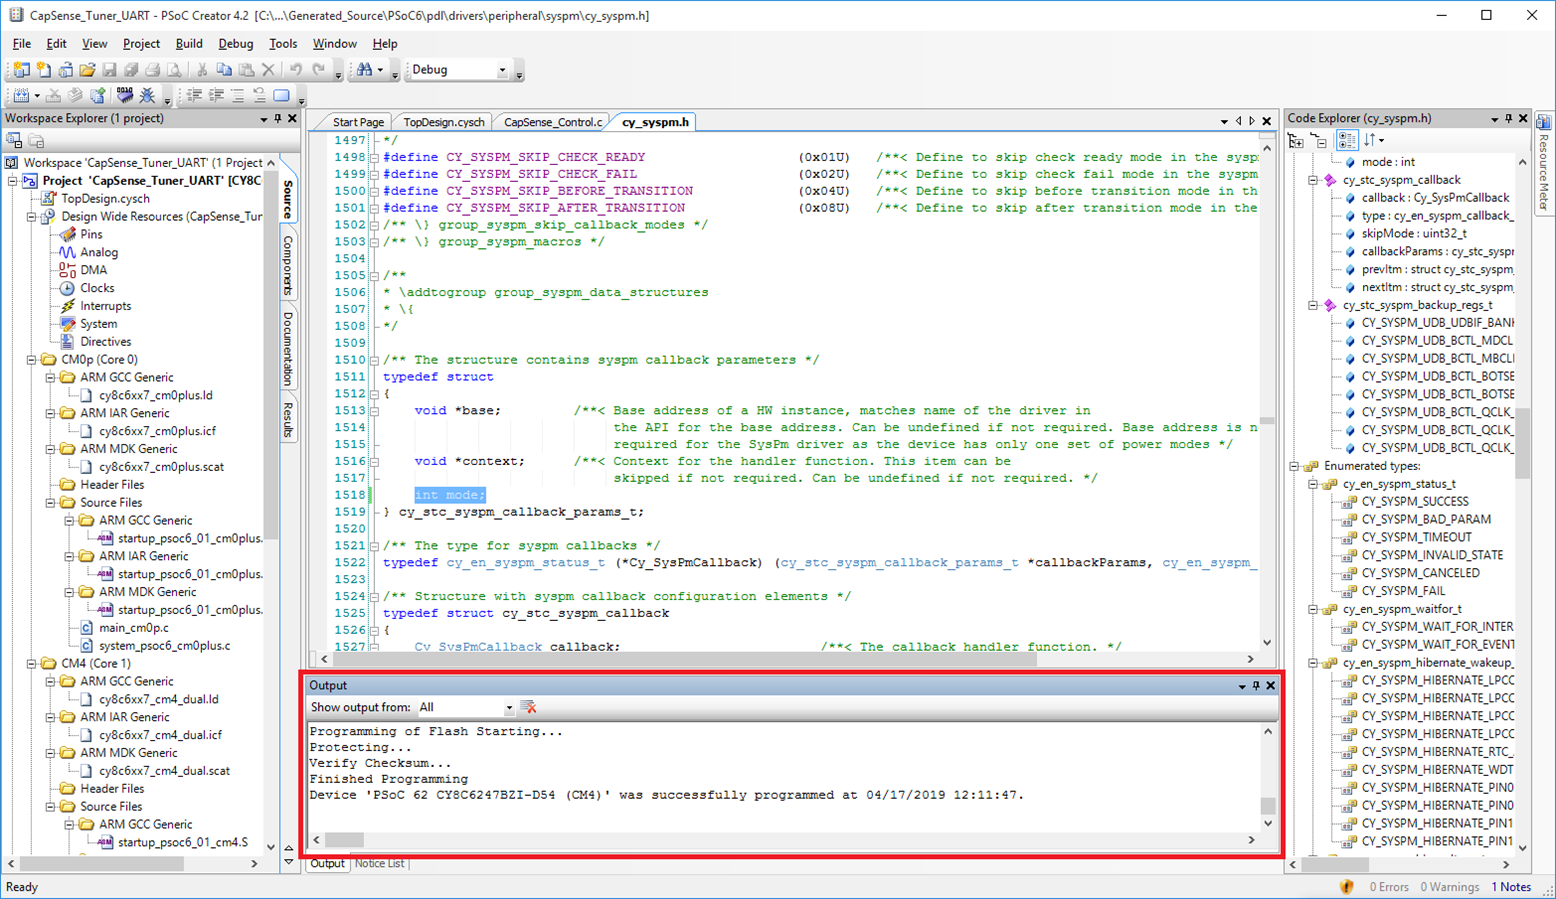
After successful programming the PSoC6 we can now launch the CapSense Tuner.

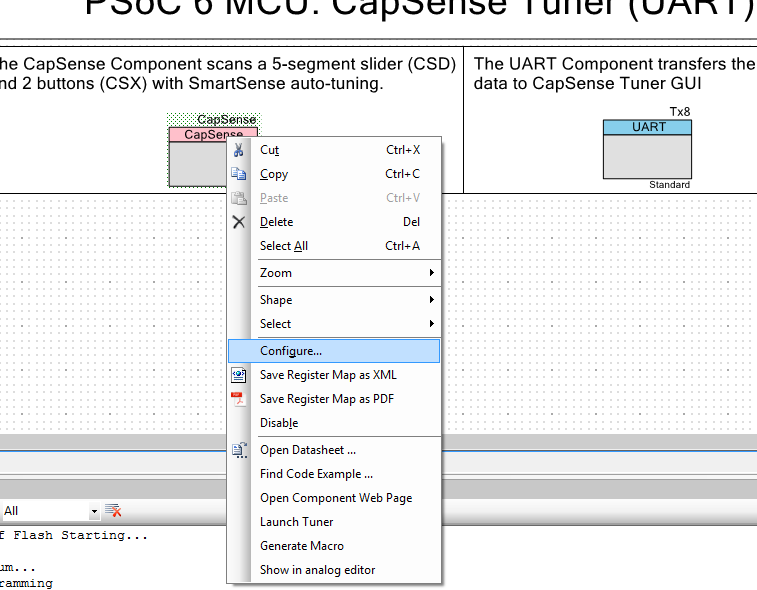
We can also launch the CapSense Tuner from TopDesign schematic by right clicking the CapSense component in selecting the "Launch Tuner"

After selecting either of the above option we will see this during PSoC Creator Tuner launching

PSoC Creator CapSense Tuner - Main Interface
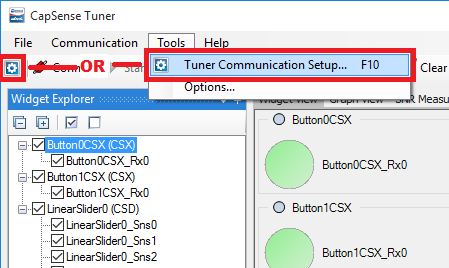
Launch tuner communication setup to choose and setup the appropriate communication protocol
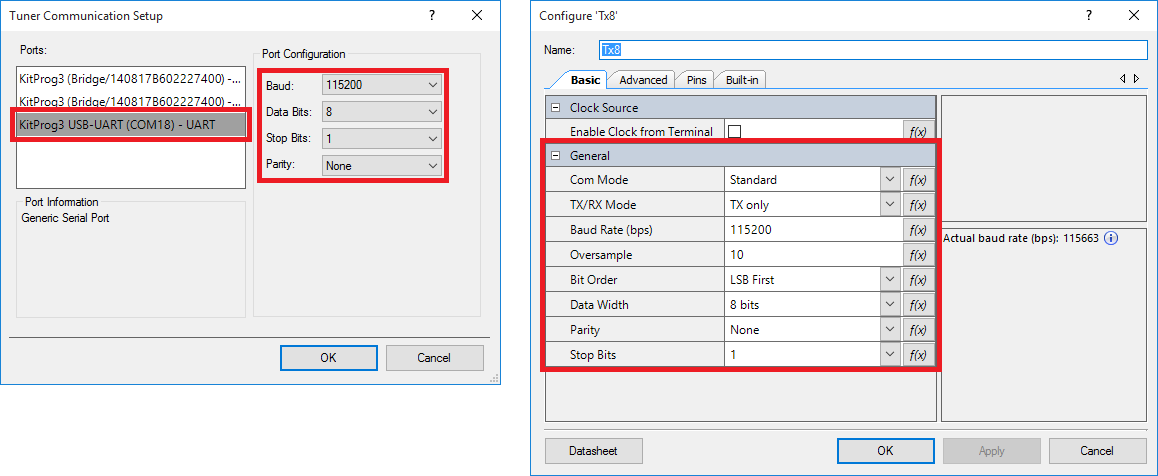
Select the "UART" port and change the port configuration such that it become same as the UART configuration of PSoC6 MCU
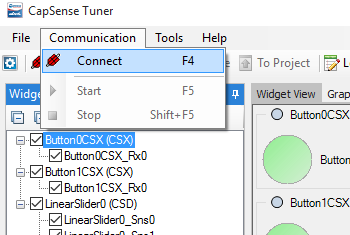
Connect the PSoC CapSense Tuner tool with PSoC6
Successful connection is established with hardware
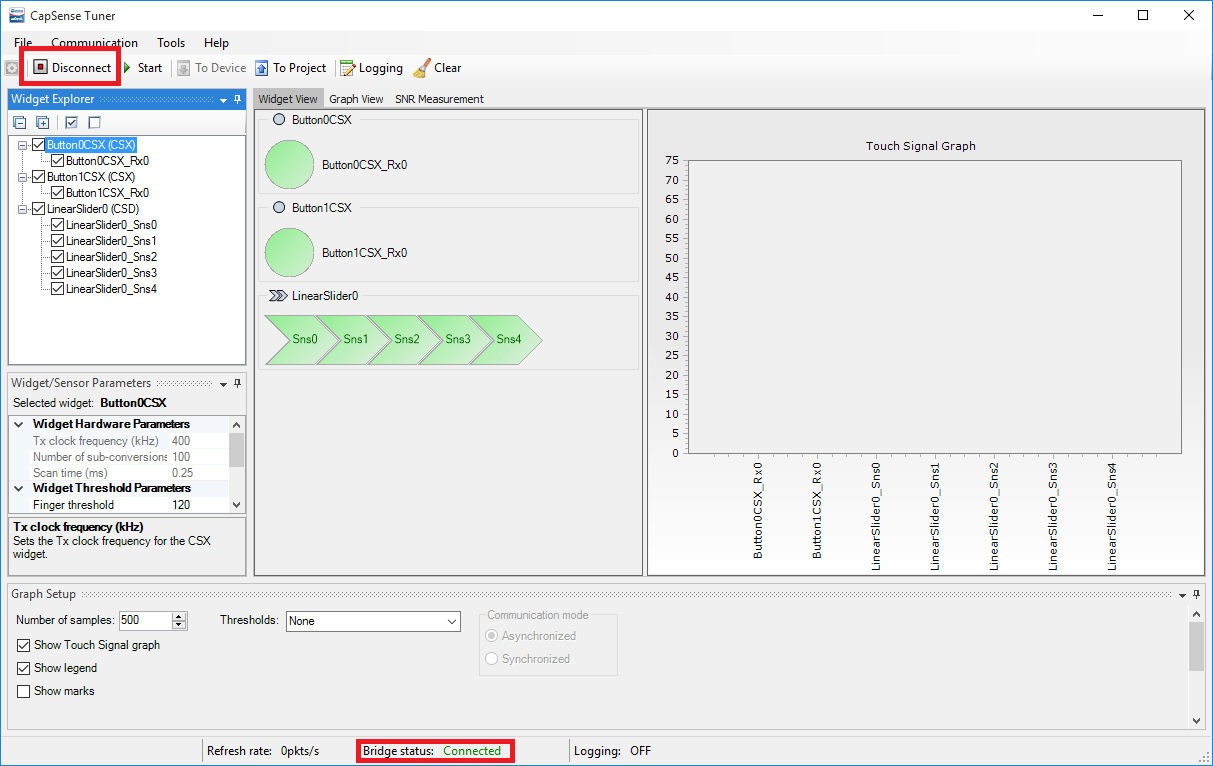
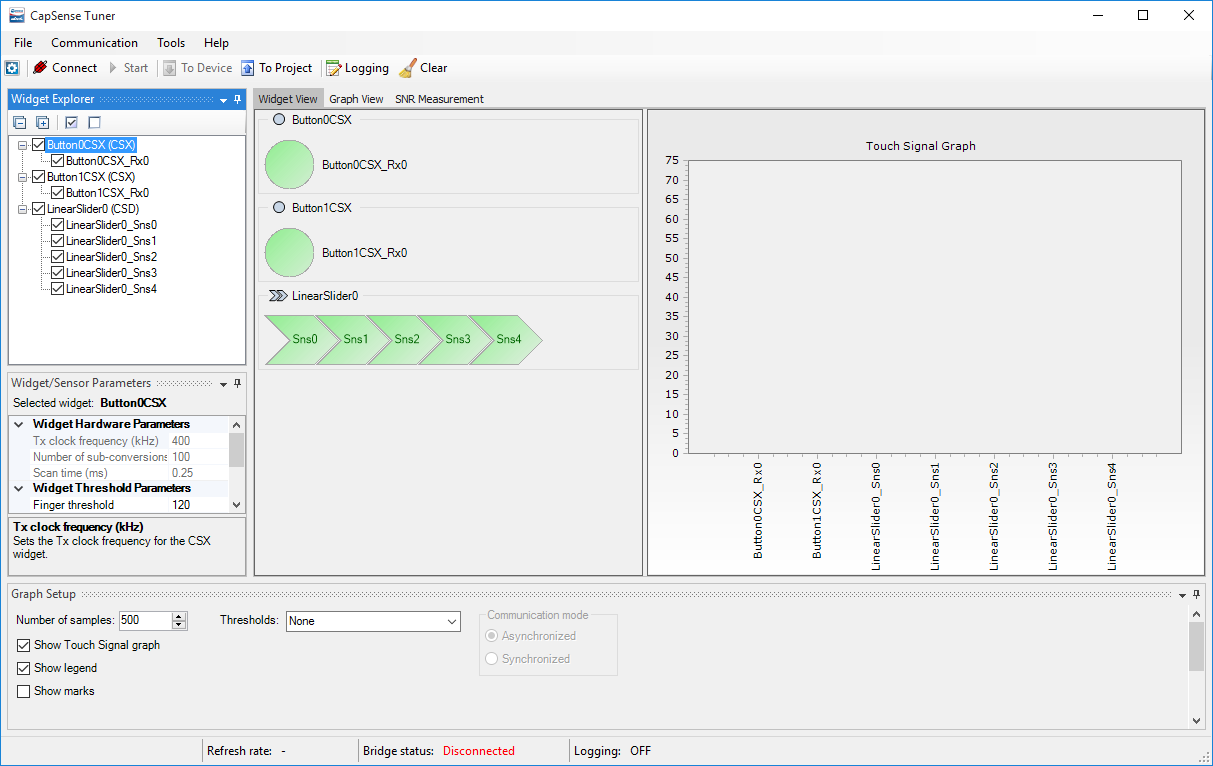
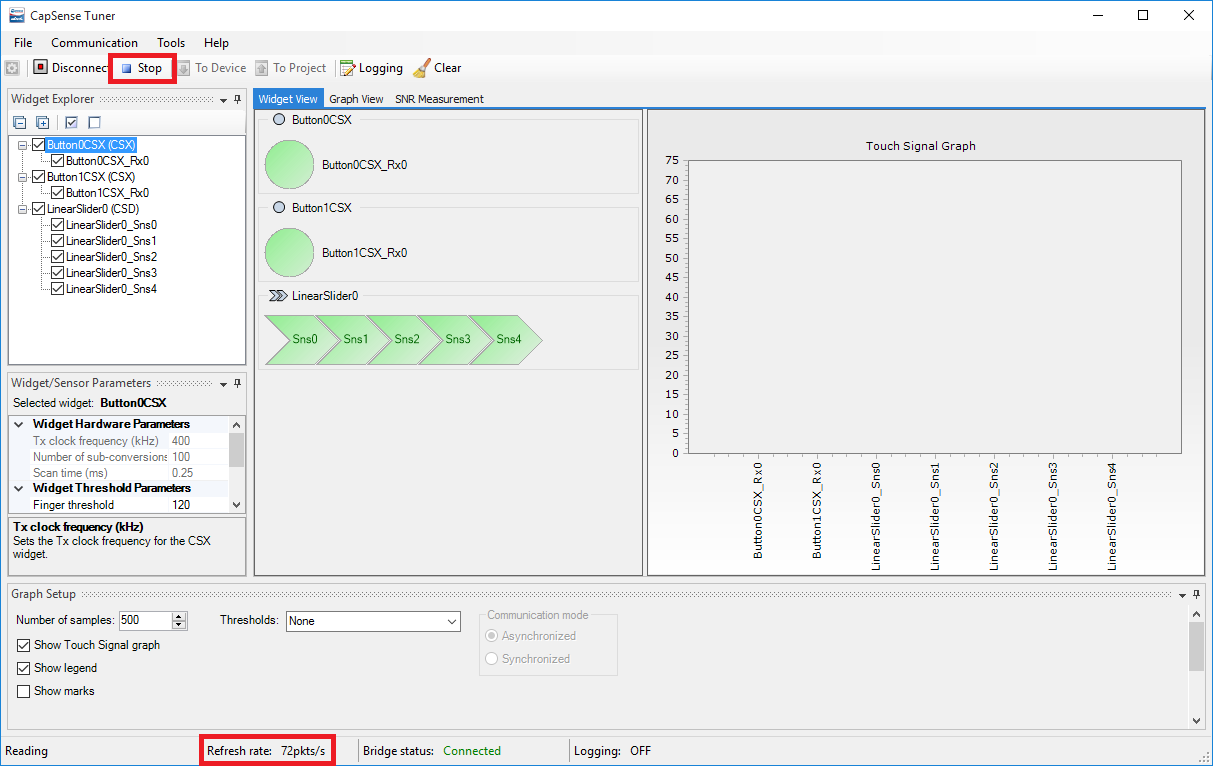
Start the PSoC Tuner tool to receive the CapSense touch input data in real time. You can see the ongoing communication rate in bottom bar.
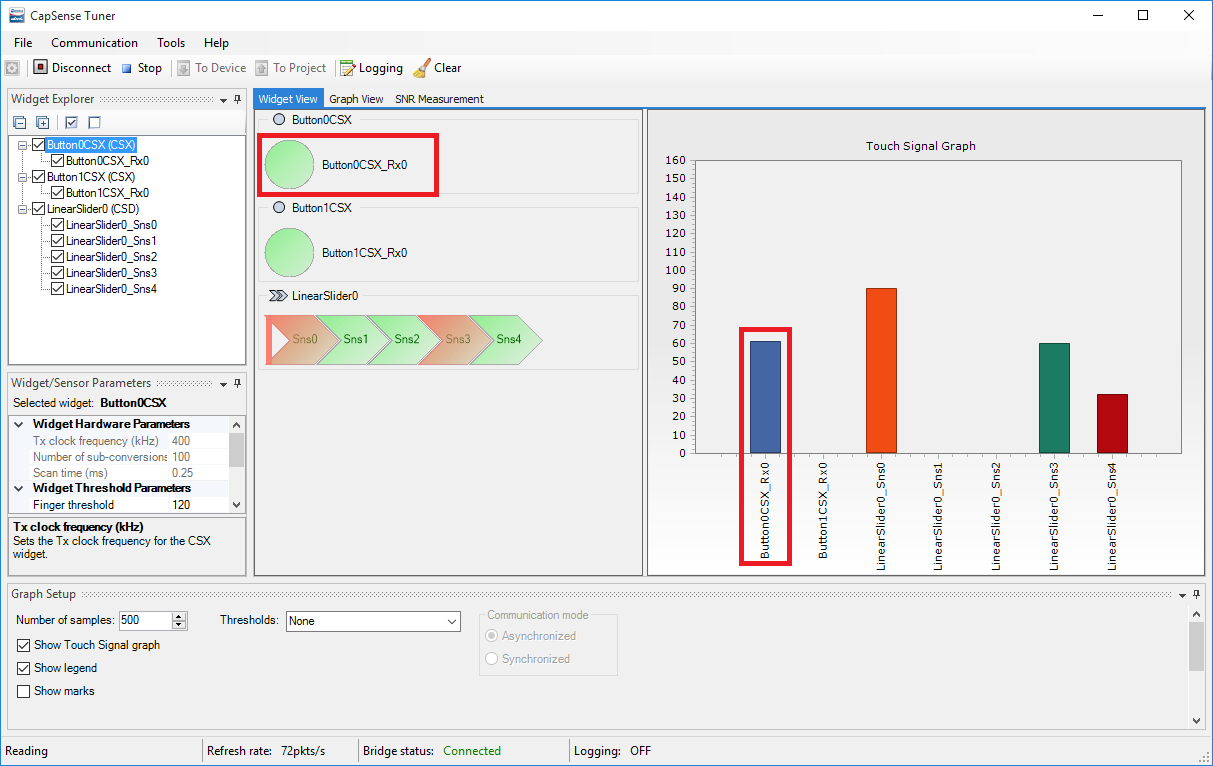
By touch the CapSense Slider and Button on actual hardware we can see the input values in chart and also the touch detection or not in Center widget. CapSense Slider is working normally but buttons is not detected even though there is some touch value from "Button0". The reason behind this problem is high touch parameter values as compared to actual values.
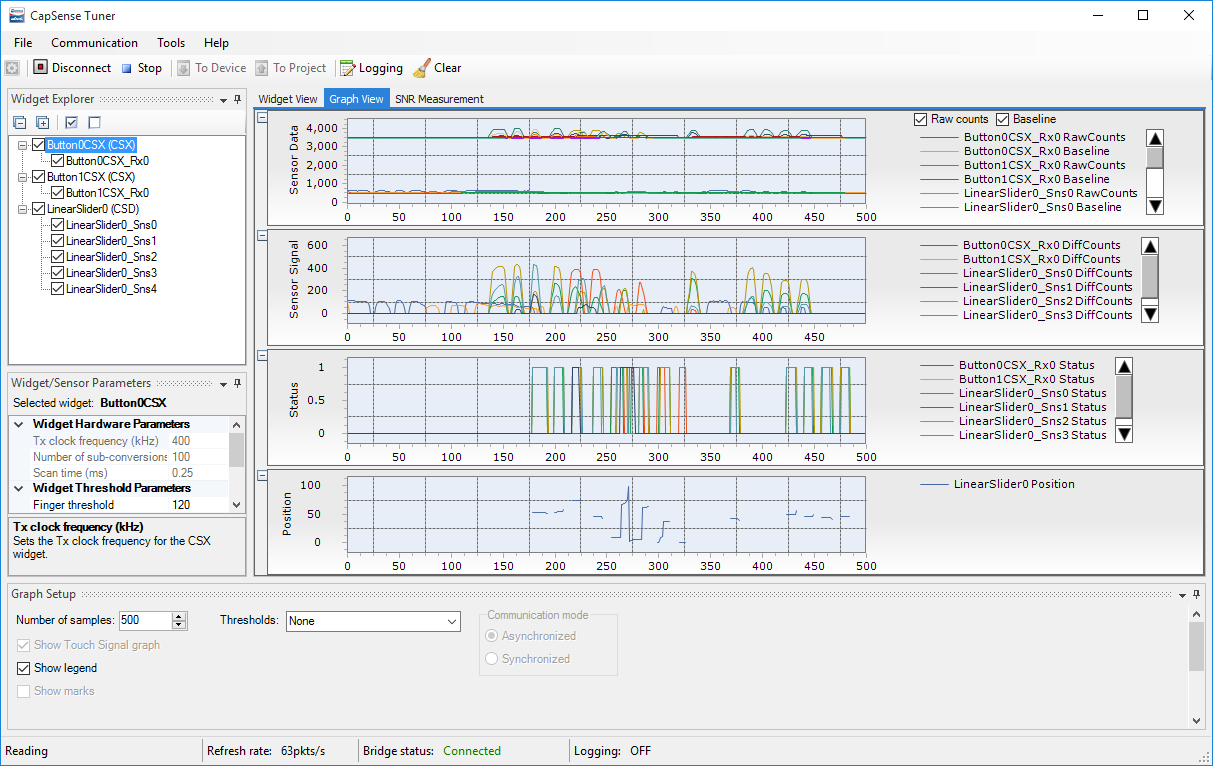
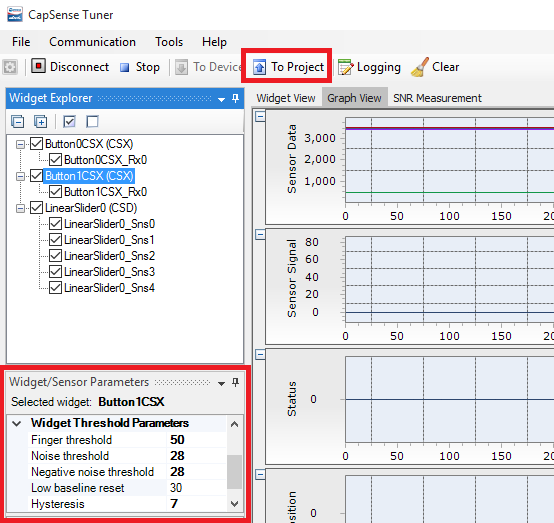
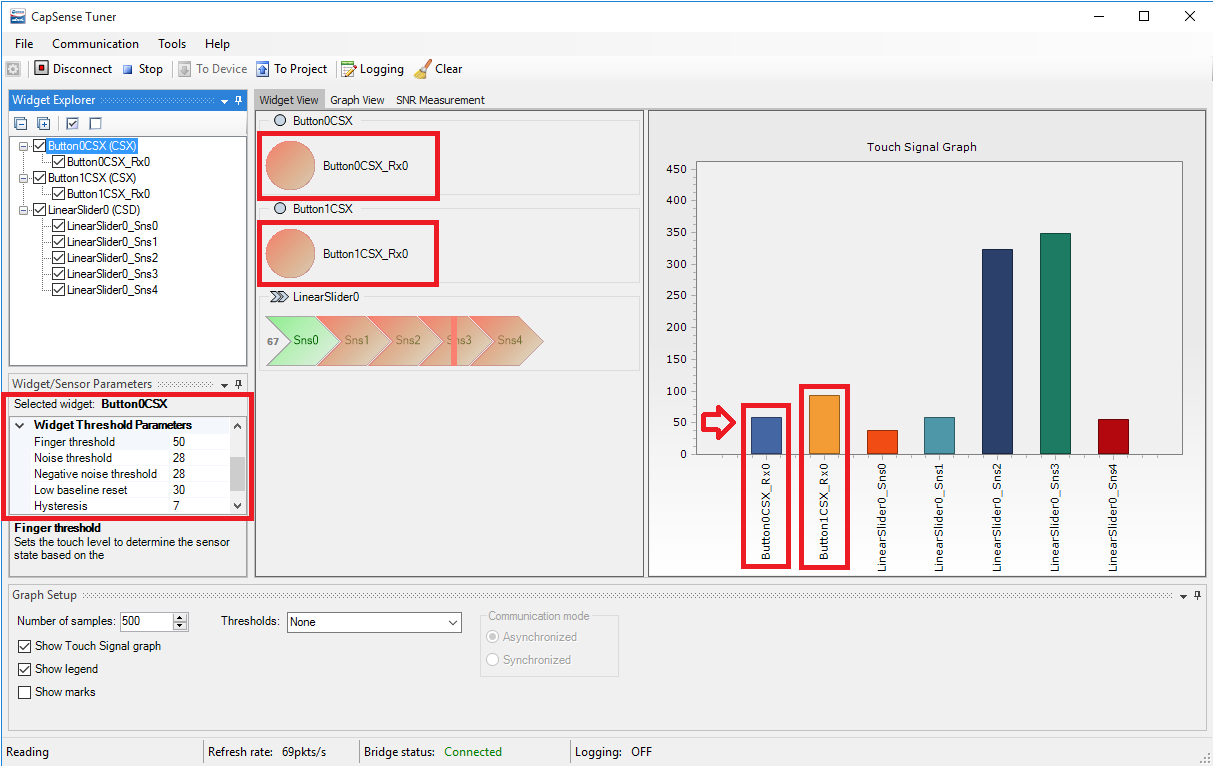
We can also view all the data in graphical form. Go to "Graph View" tab to view CapSense Touch Input Values and Touch Detection Status in graphs.
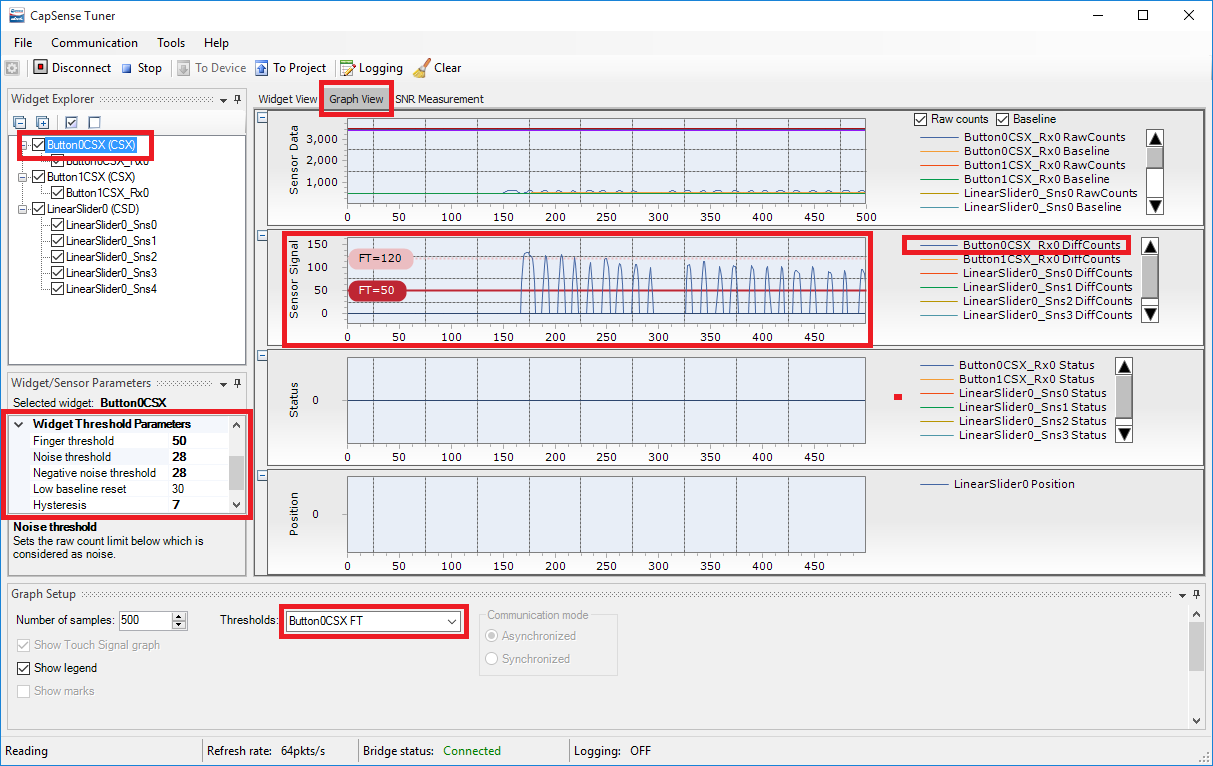
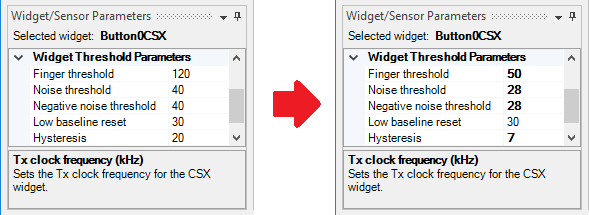
Select "Button 0" in Widget Explorer and Change its parameters as shown in the image. Initially the Finger threshold value was 120 and we will change to (50) that value which is below the normal touch value. Noise Threshold value should be less than the difference of Finger Threshold value and Hysteresis value. In Graph Setup Select the Button0CSX FT from threshold drop down menu. this will draw a line on Sensor Signals graph at previous and new Finger threshold value. This will help us in finding the optimal values for CapSense Button 0. Similarly we will change the value of Button 1. Now every time we touch any of these two buttons the sensor signal value should be more than Finger threshold value.
Original (Left side) and New (Right Side) parameter values for CapSense touch buttons.
After updating the values for both buttons we can transfer these changes to the project.
We also manually configure the CapSense Parameter Values by right clicking the CapSense component and selecting the Configure or by simply double left clicking it.
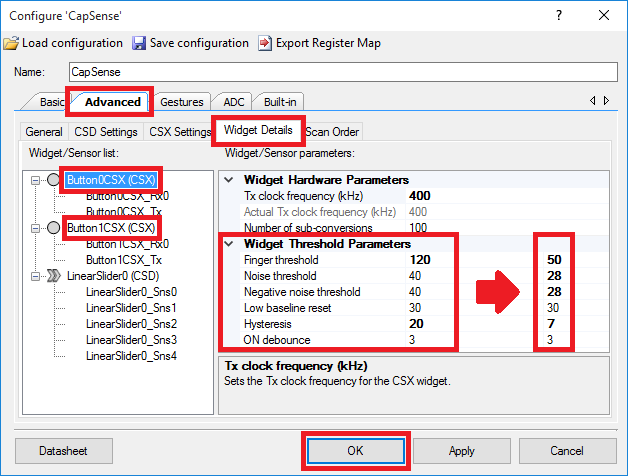
To manually update the values of Both CapSense touch buttons using CapSense configure dialog, go to Advanced tab and then select Widget Details. Under widget details we can update the parameter values for both buttons as shown in the image.
After finding the optimal CapSense parameter values we can build, program and verify the results in PSoC Tuner. Now we can clearly see the change in status of Button 0 and Button 1 of PSoC6 CapSense module.
We have successfully built and tested the CapSense Tuner program. Then learn how to use PSoC Creator Tuner tool to fine tune the threshold values for CapSense inputs. After adjusting the threshold values we tested and verified the result through PSoC Creator tuner tool.