


Table of Contents
Introduction and Motivation
Recently, I started to grow some plants at my home terrace. These are plants for some vegetables and salads. I have started to Grow Spinate, Basils, Broccoli, etc. Now I usually go everyday upstairs and water my plants. But this might not be possible always. For example, if I am outside of home for some work or travel then there is no one to take care of my plants. Hence, I decided to do some automation.
The issue that I have mentioned above has been faced by many people. They are out for some days, and they forget to water their plants, and the plants are gone once they return back to home. Recently, one of our neighbors also faced this situation and asked me to water their plants. I did that but that is not always the case with everyone. Especially when your plants are at your terrace and nobody can go there easily to water the plants.
Normally, people use some kind of soil moisture sensors to water their plants remotely. I also have these sensors. But I have heard that they suffer from corrosion effect and get bad after some days of working. I did not want that effect for my project. So, I decided to use camera modules to look at the plant condition remotely and then decide based on that weather I want to water my plants or not. This way I can look at my plants directly and decide based on that. Also, using camera for this task has other advantages as well. For example, I can use camera to run TinyML models and also use it for security purposes to detect movement, presence, etc. One of the recent advantages is also that camera modules are getting cheaper day by day. For example, the Xiao ESP32 sense with OV2620 camera module is less than 15 USD. So, using 5 different cameras to do this task would also be possible. Comparatively using Raspberry pi and camera or other similar device would be way more expensive.
Hence, I have decided to use multiple tiny camera modules and a Raspberry pi to access these camera modules feed remotely from anywhere in the world. I can then and trigger events for each of them remotely like start the pump to water the plants. I can use Raspberry Pi as central hub for these devices and control their activities like I can turn them ON/OFF, or put them in some low-power mode, run ML models, trigger relay for pump, turn on lights, Detect movements, etc. The possibilities are limitless. But this project is for addressing key point that is how to accurately water the plants remotely?
For the software part, there are some requirements such as ngrok or other similar services or VPN to access the raspberry Pi remotely.
Hardware Requirements
I would need and make use of the following hardware components for this project.
- 24 VDC Power supply
- 24 VDC to 12 VDC step down converter
- A 12-V pump
- Relay module optionally Automation HaT from Pimorini
- Raspberry Pi 4
- ESP32-S3 based camera module i.e. Xiao esp32s3-sense, DFRobot AI camera, etc
- Water storage bucket & tiny pipes
- Some other sensors such as mmWave radar for presence detection
- Weather sensor data
Camera Remote access
For remote access of the cameras that I have, I can make use of local network and then expose the network to the internet using Raspberry Pi. For that I can make use of ngrok or other such services that can route the local HTTP traffic for remote access. This setup will remove the need for complex port forwarding setup and NAT wall issues. Also, my ISP is very strict in terms of security, and they may block the stream. Instead, using services such as Ngrok, ZeroTier, etc would be more effective.
Basically, I am using couple of ESP32 cameras, and they serve the camera stream over HTTP on different ports. I can setup Ngrok to give me a public URL that I can share with anyone, and they will be able to stream the respective camera feed. That is all. Very simple and effective. I can assign each camera static IP in my local network so that it makes easy for me to generate public link.
You can see the following representative image to understand the overall architecture.

ESP-Rainmaker configurations
I am going to use ESP-Rainmaker to control the pumps remotely from anywhere in the world to water my plants.
ESP-Rainmaker is a device to cloud platform for ESP32 devices. It can work with internet connection, and we can operate the nodes remotely from anywhere in the world. It has some standard profiles such as switch, LED, temperature sensor and other similar options.
The idea is to use Rainmaker mobile application to switch on/off the pump. To do that the user will first login to Raspberry pi remotely or use the public link that was generated by ngrok and watch the status of plants using the ESP32 camera module. If the plants need water, then user can use Rainmaker Android application to turn on the pump and water the plants.
Also, I am using the Rainmaker application to start the Raspberry Pi remotely to save power. Otherwise, the Raspberry Pi will have to remain on for prolonged periods of time without any work. For raspberry Pi, there is a pin called Run that can do this. This pin if grounded for some milliseconds could start the Raspberry Pi from shutdown state.

Here is a small clip that shows how I can start the Raspberry Pi remotely using the Rainmaker Application. I can use this application from anywhere in the world. Only need is having internet connection at both ends.
The Raspberry Pi Run pin is controlled using the Xiao ESP32C3 module. A tiny transistor is connected to the GPIO of ESP32 module to bring the Run pin from Raspberry Pi to GND level for some milliseconds (approx. 50ms). This will trigger the Raspberry pi and it will turn on.
Rainmaker Software
In the software part, the rainmaker is relatively simple. Basically, one can look at the examples that the rainmaker project provides. And then adapt the code. The rainmaker software allows us to create device and their parameters. Both the devices and the parameters can be standard or custom. One can create parameters and devices of their own choice.
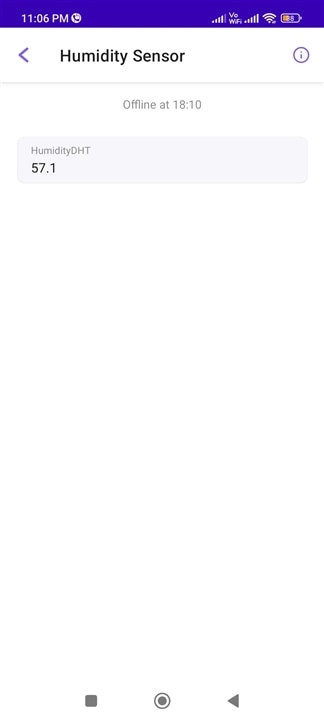
For example, the following code is for creating a custom device called Humidity Sensor. Then optionally adding a callback function to handle the device events. The I adding a custom parameter called HumidityDHT of type float that I can read and write to. This device is then added to the node to appear in Rainmaker application.
    /* Create a custom device and add parameters to it */
    custom_device = esp_rmaker_device_create("Humidity Sensor", NULL, NULL);
    //esp_rmaker_device_add_cb(custom_device, write_cb_one, NULL);
    esp_rmaker_param_t *custom_param = esp_rmaker_param_create("HumidityDHT", "ESP_PARAM_HUMIDITY_DHT", esp_rmaker_float(0.0f), PROP_FLAG_READ  | PROP_FLAG_WRITE | PROP_FLAG_PERSIST);
    esp_rmaker_device_add_param(custom_device, custom_param);
    esp_rmaker_node_add_device(node, custom_device);
    /*
For measuring the humidity from the DHT22 sensor, there is a code that runs based on timer. This timer will measure and update the humidity value. The following code is for that.
esp_err_t app_sensor_measure_humidity_and_temperature() {

    esp_err_t ret = ESP_OK;

    humidity_timer = xTimerCreate("app_humidity_update_tm", (60 * 1000) / portTICK_PERIOD_MS,
                            pdTRUE, NULL, app_humidity_update);

    if(humidity_timer) {
        xTimerStart(humidity_timer, 0);
    }

    return ret;
}
static void app_humidity_update(TimerHandle_t xTimer) {

    int ret;

    dht_read_float_data(SENSOR_TYPE, 4, &humidity_v, &temperature_v);

    vTaskDelay(100);

    esp_rmaker_param_update_and_report(
            esp_rmaker_device_get_param_by_type(custom_device, "ESP_PARAM_HUMIDITY_DHT"),
            esp_rmaker_float(humidity_v));
}
In this manner we can create the devices and parameters that we want and then add them to the rainmaker device. The rainmaker also supports Alexa interaction by default. So, now I can control the devices using Alexa commands like the following.
"Alexa, what is the humidityDHT value?"
"Alexa Turn on the Pump-1"
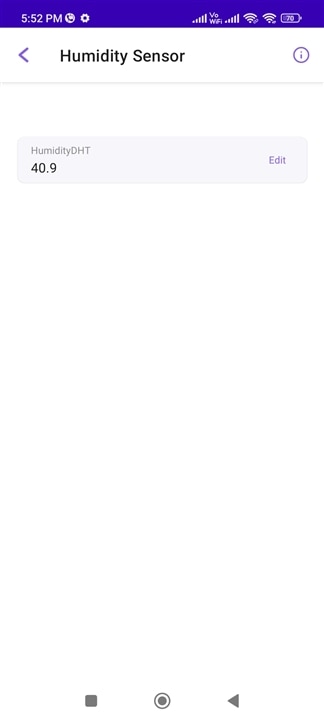
The following screenshoot shows us how the code that we write above has created in the Rainmaker application UI. The Humidity Sensor is added and the parameter is called HumidityDHT.
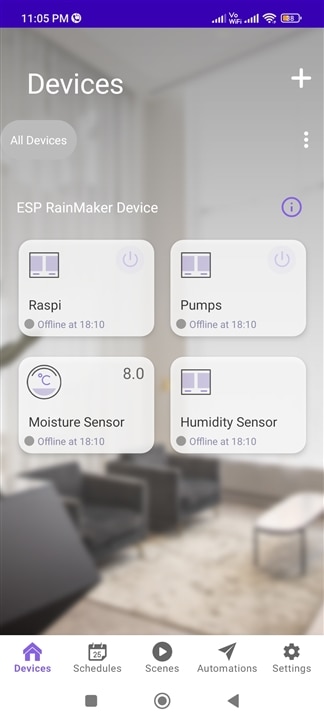
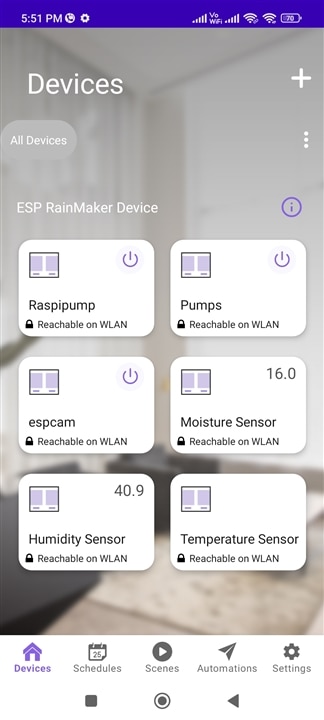
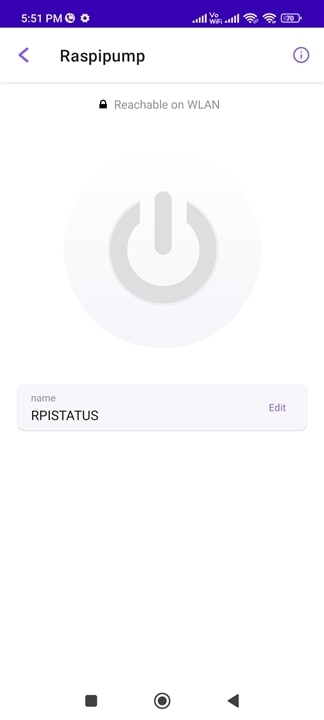
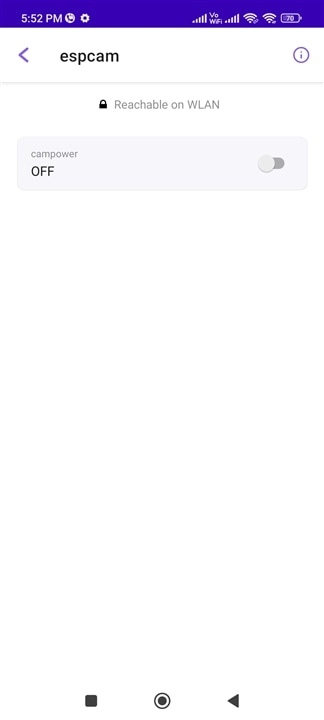
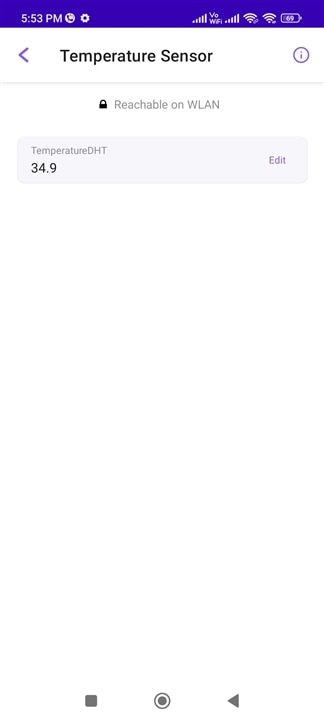
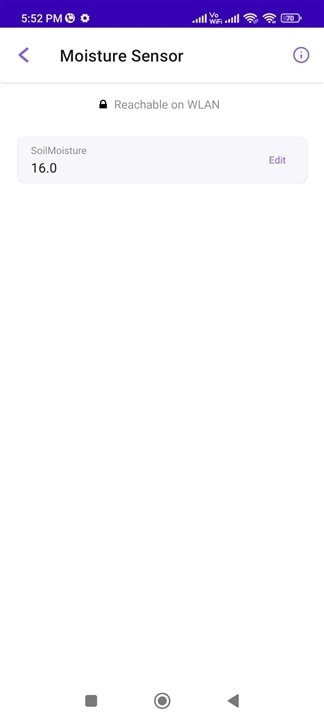
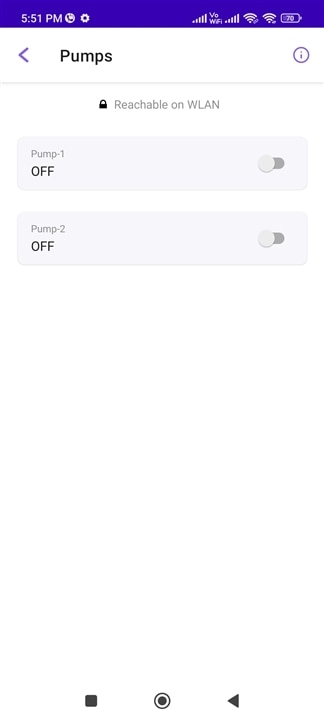
Finally, after adding all the devices that I want for this project, I have the following screenshots of devices with their parameters, UI type and values.
I have a push-button for Raspberry Pi running status, a on/off switch for espcam and pump devices and values for Humidity, Temperature and Moisture sensor devices.
Automation HaT mini
The Automation HaT mini from Pimorini is Raspberry Pi compatible add on board with many important features. For example, the Hat has relay capable of driving up to 24VDC load using the Raspberry Pi. It has 24 VDC tolerant Inputs and Outputs. It also has tiny colorful LCD display.
For this project I am particularly interested in digital outputs that can drive the pumps that runs on 12VDC. These Digital outputs on Automation Hat are sinking in nature. Meaning that when connected to the load they sink currents. Hence, they can be connected with 12VDC --> LOAD --> Output configurations. When Output is turn on it will run the pumps too.
The Automation Hat also has relay that can turn on the camera modules or other loads that are upto 24VDC. I am going to use relay to turn on the camera modules. This way these camera modules are not running when the relay is turned off and saves the power.
Finally, I am going to use the Automation hat inputs to sense the input terminal voltage so that I can use the ESP-Rainmaker to control the pumps and their respective running status using GPIO that is connected between the ESP32 and Raspberry Pi.
To get started with Automation Hat one needs to install the python library. This library can then be used to control the Digital Inputs/Outputs, the Analog inputs, relay and the LCD module.
The first task after installing the Python library is to activate the virtual environment.
source ~/.virtualenvs/pimoroni/bin/activate
After that one can run some of the sample applications that can for example turn on the relay module or sense the analog input pins voltage and display it on the LCD screen.
Once we have automation hat setup, we can create a simple Python code and run it @reboot using crontab.
Then we can use the following code to start the respective pumps. The code also starts the relay to start the camera modules. These cameras can then be used to stream the camera feed from anywhere in the world. Then a mobile rainmaker application can also be used to trigger pumps and camera. The app can also boot the Raspberry Pi remotely. So the only device that keeps powered on always is ESP32 rainmaker device. Hence, we can save power for our devices and keep them off when not needed.
import automationhat
import time
import st7735
from PIL import Image, ImageDraw, ImageFont
# Create ST7735 LCD display class.
disp = st7735.ST7735(
    port=0,
    cs=st7735.BG_SPI_CS_FRONT,
    dc=9,
    backlight=25,
    rotation=270,
    spi_speed_hz=4000000
)

disp.begin()

WIDTH = disp.width
HEIGHT = disp.height

value = automationhat.analog.one.read()
print(value)

image = Image.open("/home/pi/scpp.jpg")
disp.display(image)
draw = ImageDraw.Draw(image)

while(1):
    # read analog inputs value
    analog1 = automationhat.analog.one.read()
    analog2 = automationhat.analog.two.read()
    analog3 = automationhat.analog.three.read()

    if(analog1 > 3.0):
        automationhat.relay.one.on()
    else:
        automationhat.relay.one.off()

    time.sleep(0.5)

    if(analog2 > 3.0):
        automationhat.output.one.on()
        time.sleep(5)
        automationhat.output.one.off()

    if(analog3 > 3.0):
        automationhat.output.two.on()
        time.sleep(5)
        automationhat.output.two.off()
The LCD on automation hat will display the image of the project14 theme. This way, I can also verify that the code is working on boot.

Automation HaT Wiring
The wiring side is simple. I am using the Analog Input channels (A1-A3) to connect to ESP32 GPIO pins. Then I can use these values in the Python code to start Pump1, Pump2 and the camera module. If the GPIO pin is high then I start the pump and camera else I switch them OFF. I am using the GND pin to connect the ground from 12VDC power supply and from the ESP32 board to have a common ground pin. This is very necessary for functionality that I am using.
Then I am using the sinking outputs to have connection from the two pumps that I have. So the GND of the Pumps are connected to these pins. Whenever I trigger the output it will start the respective pump. This way I can use Automation Hat to control any device that can operate up to 24VDC.
In the last I am using the Relay NO/NC pins to connect my camera from DFRobot. This camera module is capable of operating upto 15 VDC.
Raspberry Pi Configurations
On Raspberry Pi we need to run ngrok to access the camera remotely. Ngrok will give us a link that we can use to get the local HTTP stream from the ESP32 camera over to internet. We can then get the camera access from anywhere in the world.
The following screenshot shows the ngrok and the link that is created.
The command to get the http link is ngrok http IPADDRESS:PORT. This will eventually give us a link.
ngrok http 192.168.0.107:80

Remote access to Raspberry Pi
For remote access to Raspberry Pi, we can use ngrok but it is not available on free plan. So I decided to use something more official. It's called Pi-Connect. This software can connect to the Raspberry pi remotely. All you need is to install and enable the software. After that you can use it as normal ssh connection.
I will use this connect to create links for my cameras and then see the video. OR I can use the desktop environment from Pi-Connect and use the browser to see different video feeds from ESP-CAM modules. Then I can use Rainmaker to trigger events.


Testing of the demo
This is a demo video of my setup before I actually deploy it on the terrace. Don't be scared of wirings . The demo is working as expected.!
Actual project deployment
It would always be a requirement to test the project setup in real field. For that I have tried this on my terrace garden where I am growing some plants.
Conclusion and Future work
This project works as expected as I found it very funny and interesting to see how I can use tiny pumps to automate my garden watering task. It takes efforts at first but my hope is that it can save time at latter point of time. It is also very helpful to people who are living alone and often travel and could not water their plants. For the software part there are some key things that needs to be considered. First, this project uses the ESP-Rainmaker, ESP-HTTP camera stream and Raspberry Pi remote access software to get plants watering done. One might argue that there is no need for these camera modules and one can simply use pumps and/or sensor data to water their plants. The point here is to get the feedback from the garden and make user assure that their plants are watered and are safe. Also, one can make sure that both Raspberry and ESP32 are working okay if they respond. So, with this project scaling would be much easier and effective. Also, if one is at home he/she can use Alexa to water their plants instead of going onto the terrace.
This project can be further improved if one uses a custom PCB and with proper connection terminals. This will simplify the wiring and other connections that are at the moment on breadboard or soldered together.