


Hi makers!
Introduction
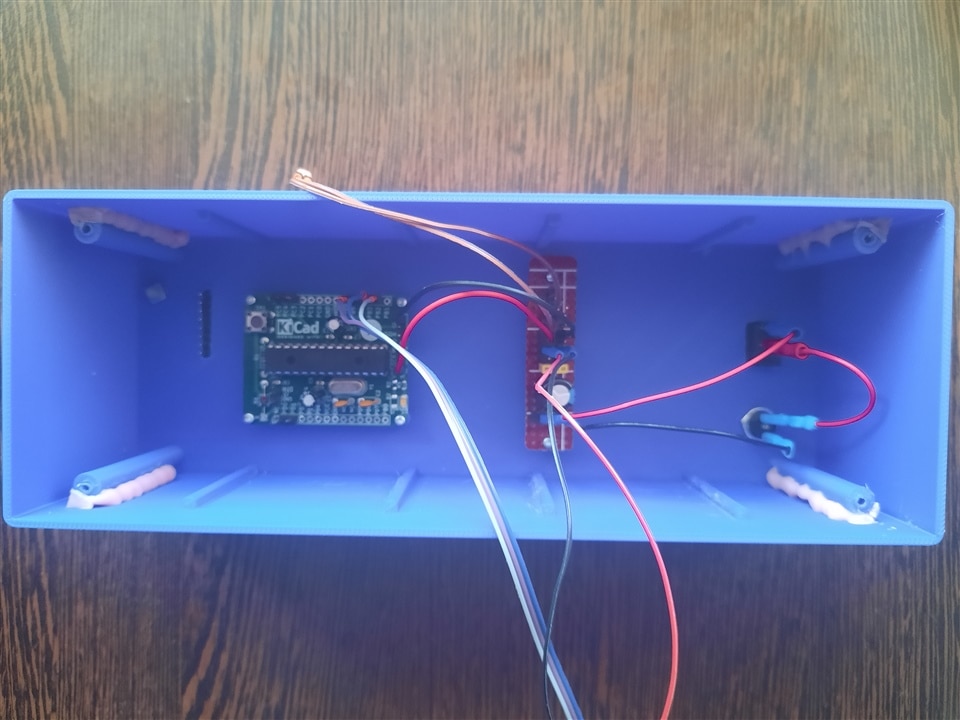
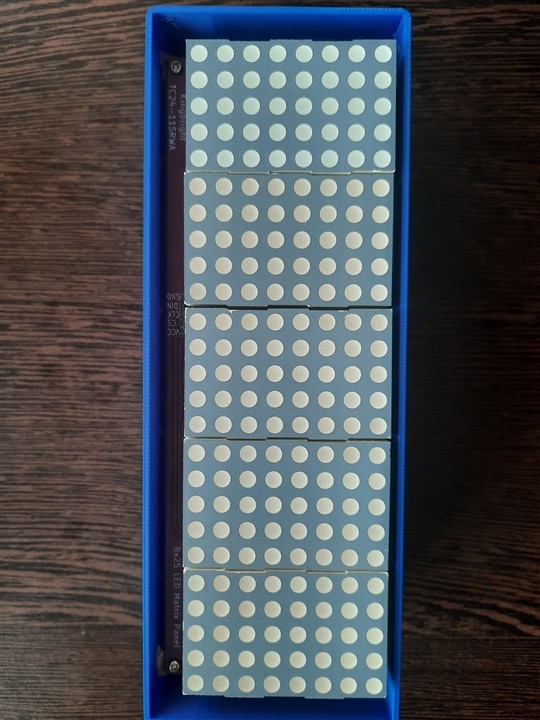
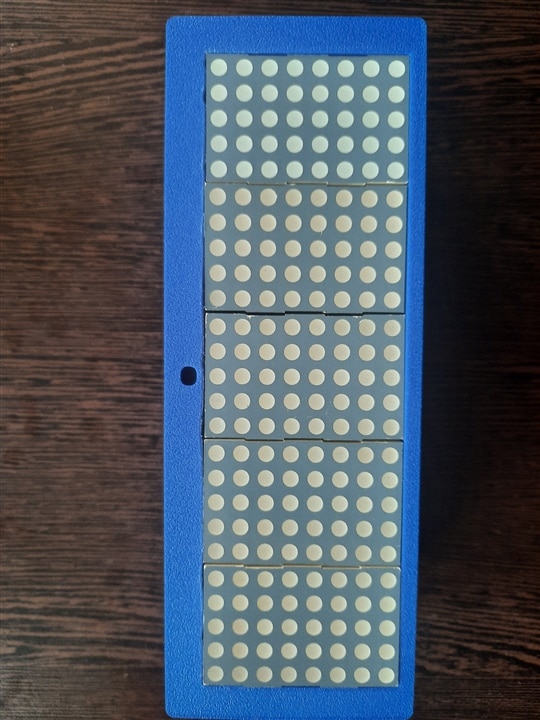
As I said in the title, my project is not yet ready to fully show itself, but it is not far off. You will see in the following pictures what components I want to use, and you will probably understand the project more easily. It is a project that involves LEDs, as they are still the most "colorful" components.
And now, let's do a short introduction, first a visual one.
| {gallery}Visual intro |
|---|
|
IMAGE TITLE: Interior |
|
IMAGE TITLE: Back view |
|
IMAGE TITLE: Placing the display |
|
IMAGE TITLE: Front view |

Purpose
My goal is to create an offline project, and here I mean not using internet connections, because I don't have any others, to monitor the environment, but at the same time I don't want it to be so banal, so I switched from DHT22 to a module that also incorporates ENS160. And that's not all, I want to have a more animated display. 
Components used:
Mostly, the necessary parts are:
• microcontroller (I use the "old" ATMega328);
• a matrix panel (I use 8x25);
• ENS160+AHT21 (temperature, humidity, air quality index);
• wires and connectors or courses;
• and a bit of manual work. 
At the electronic diagram level we have something like this:
I know it's a minimal representation, but given the number of components, I don't think you can really put it in any difficulty. The actual connections to the MCU are up to you, but you can easily deduce them from the program below.
The microcontroller is a well-known one, ATMega328, which I soldered onto a minimal board (I've used it on other projects before). There's not much to say about it, or maybe there is 
 .
.
ENS160 is a compact solution for monitoring indoor air quality by detecting VOC and AHT21 by measuring temperature and humidity. It connects quickly to boards like Arduino and other platforms via I2C or SPI, plus it operates at 5V with low consumption of approximately ~10mA.
The display is made up of 5 8x5 LED matrix pieces (I think I've presented PCB v1 here before, homemade virianta) with MAX7219 as driver. I would say that the display is unique, in the sense that it is not found in stores, but after all, that's the pleasure of building.
I also added a resistive divider with LDR to automatically adjust the display's brightness, a pretty handy method, so I don't think another module is needed.
Programming
I use Arduino IDE for programming.
Here begins the battle, the reason why I did not finish the project is related to the program, with which I ended up exceeding the available memory on the MCU. The "anchor" is represented by the display effects, but since I fixed their use from the beginning, I am not okay to give them up. As a result, during this period if I do not obtain or modify something in the program, considerably, I will look to change the MCU, and it is good that I do not need something "high end" because the project is an ambient monitor and does not involve complex circuits.
At the moment the program displays, using the effects provided, the data:
• temperature as 12.3°C
• humidity as 12.3%
• AQI in 5 steps (as Excellent, Good, etc).
Let me not forget, it took some experiments with the display control, using internet searches and other forums I finally discovered what to do. Then I made sure that the modified library was attached to the program so that it wouldn't disrupt any displays that I might use in the future (and I plan to).
***Artificial intelligence was used in part to create this program.
/*
  * Display temperature, humidity and AQI through animations.
  * Main components:
	• Arduino
	• 8x25 [8x5] LED Matrix with MAX7219
	• ENS160 + AHT21
 */

/*Use local libraries
  In the MD_MAX72xx.h modify as #define COL_SIZE 5
*/
#include "src/MD_Parola.h"
#include "src/MD_MAX72XX.h"
#include "SparkFun_ENS160.h"
#include <Adafruit_AHTX0.h>
#include <SPI.h>
#include <Wire.h>
#include "Font7Seg.h"
#define ENA_SPRITE 1  // Enables the Pacman animations

// Define the number of devices we have in the chain and the hardware interface
// NOTE: These pin numbers will probably not work with your hardware and may
// need to be adapted
#define HARDWARE_TYPE MD_MAX72XX::DR0CR0RR0_HW
#define MAX_DEVICES 5  // Define the number of displays connected 5x 8x5 type matrices
#define CLK_PIN D8      // CLK or SCK ;
#define DATA_PIN D10    // DATA or MOSI ;
#define CS_PIN D9       // CS or SS ;

// Hardware SPI connection
MD_Parola P = MD_Parola(HARDWARE_TYPE, CS_PIN, MAX_DEVICES);
static uint8_t displayMode = 0;  // Current display mode, temperature or humidity
const uint8_t SPEED_TIME = 75;   // Speed of the transition
const uint8_t PAUSE_TIME = 0;
//const uint8_t MAX_MESG = 20

// ESN160 module and I2C pins
#define SDA_PIN D4
#define SCL_PIN D5

// Objects for ENS160 & AHT21
SparkFun_ENS160 ens;
Adafruit_AHTX0 aht;
float humidity, celsius;
uint8_t aqiValue = 0;    // 1...5
uint16_t tvocValue = 0;  // ppb
uint16_t eco2Value = 0;  // ppm (equivalent; VOC-derived)
// create the degree sign ° as 4 dots in upper level of the matrix
uint8_t degC[] = { 3, 0, 3, 3 };

// AQI Rating Function
const char* aqiText(uint8_t aqi) {
  switch (aqi) {
    case 1: return "Excellent";
    case 2: return "Good";
    case 3: return "Moderate";
    case 4: return "Poor";
    case 5: return "Unhealthy";
    default: return "?";
  }
}

// Ventilation Hint Function
const char* ventHint(uint16_t eco2_ppm) {
  if (eco2_ppm >= 1500) return "Ventilate now";
  if (eco2_ppm >= 1000) return "Consider ventilation";
  return "OK";
}

// Sensor error handling (non-blocking read + threshold)
bool sensorOk = true;                       // true when last successful read within threshold
int errorCounter = 0;                       // consecutive failed read cycles
const int maxConsecutiveErrors = 3;         // show error after this many failed cycles
const int maxRetries = 3;                   // attempts per read cycle
const unsigned long TIMEDHT = 10000UL;      // keep your value
const unsigned long retryInterval = 200UL;  // ms between retries

// Non-blocking read state
bool readInProgress = false;
int attempts = 0;
unsigned long nextRetryMs = 0;
unsigned long timerDHT = 0;  // last scheduled read time
float pendingT = NAN, pendingH = NAN;

// LDR auto-dim
// Photoresistor is connected to GPIO 34 (Analog ADC1_CH6) of ESP32 board or
// Photoresistr is connected to Ao of Arduino board
const int LDR_PIN = A2;                // photoresistor for display auto-brightness, Arduino pin A2 or ESP32 pin 34(ADC6)
const int MIN_LDR = 100;               // calibrate: reading in bright light
const int MAX_LDR = 900;               // calibrate: reading in darkness
const int DISPLAY_MIN_INTENSITY = 1;   // never go below this when auto-dim
const int DISPLAY_MAX_INTENSITY = 12;  // cap brightness to this level
const int HYST_OFF_RAW = 120;          // below this raw → lock to DISPLAY_MIN_INTENSITY
const int HYST_ON_RAW = 150;           // above this raw → resume auto-dim
const int HYST_OFF_BRIGHT = 950;       // raw LDR value to lock at DISPLAY_MAX_INTENSITY
const int HYST_ON_BRIGHT = 900;        // raw LDR value to resume auto-dim
float ldrSmooth = 0.0f;                // this is for the LDR change response
/*
α (alpha) is a constant between 0 and 1 that controls how “fast” you follow changes
When α is small (e.g. 0.05), you weigh history heavily and react more slowly—great for eliminating flicker but slow on big light changes.
When α is large (e.g. 0.5), you react very quickly but let more noise through.
*/
const float alpha = 0.1f;
bool autoDimEnabled = true;  // track on/off
bool maxLockEnabled = false;
uint8_t lastIntensity = 0;

// Buffer
//char szMesg[MAX_MESG + 1] = "";
char szMesg[32];  // big enough for e.g. "-12.3°C" or " 45.6%RH"
// Storing text in SRAM is the fastest way to crash an Arduino Nano. We will move these strings to Flash memory.
const char* projectTitle = "Arduino ENS160 + MAX7219";
const char* sensorError = "Sensor Error!";

// MD_Parola Animations
int counter = 3;
int Animation;

struct sCatalog {
  textEffect_t effect;
  const char* psz;
  uint16_t speed;
  uint16_t pause;
};

sCatalog catalog[] = {
  { PA_PRINT, "", 80, 3000 },
  { PA_SCROLL_UP, "", 80, 3000 },
  { PA_SCROLL_DOWN, "", 80, 3000 },
  { PA_SCROLL_LEFT, "", 80, 3000 },
  { PA_SCROLL_RIGHT, "", 80, 3000 },
  { PA_SPRITE, "", 80, 3000 },
  { PA_SLICE, "", 15, 3000 },
  { PA_MESH, "", 150, 3000 },
  { PA_FADE, "", 250, 3000 },
  { PA_DISSOLVE, "", 500, 3000 },
  { PA_BLINDS, "", 120, 3000 },
  { PA_RANDOM, "", 50, 3000 },
  { PA_WIPE, "", 80, 3000 },
  { PA_WIPE_CURSOR, "", 80, 3000 },
  { PA_SCAN_HORIZ, "", 80, 3000 },
  { PA_SCAN_HORIZX, "", 80, 3000 },
  { PA_SCAN_VERT, "", 80, 3000 },
  { PA_SCAN_VERTX, "", 80, 3000 },
  { PA_OPENING, "", 80, 3000 },
  { PA_OPENING_CURSOR, "", 80, 3000 },
  { PA_CLOSING, "", 80, 3000 },
  { PA_CLOSING_CURSOR, "", 80, 3000 },
  { PA_SCROLL_UP_LEFT, "", 80, 3000 },
  { PA_SCROLL_UP_RIGHT, "", 80, 3000 },
  { PA_SCROLL_DOWN_LEFT, "", 80, 3000 },
  { PA_SCROLL_DOWN_RIGHT, "", 80, 3000 },
  { PA_GROW_UP, "", 80, 3000 },
  { PA_GROW_DOWN, "", 80, 3000 },
};


// Sprite definitions, PACMAN animations
const uint8_t F_PMAN1 = 6;
const uint8_t W_PMAN1 = 8;
static const uint8_t PROGMEM pacman1[F_PMAN1 * W_PMAN1] =  // gobbling pacman animation
  {
    0x00,
    0x81,
    0xc3,
    0xe7,
    0xff,
    0x7e,
    0x7e,
    0x3c,
    0x00,
    0x42,
    0xe7,
    0xe7,
    0xff,
    0xff,
    0x7e,
    0x3c,
    0x24,
    0x66,
    0xe7,
    0xff,
    0xff,
    0xff,
    0x7e,
    0x3c,
    0x3c,
    0x7e,
    0xff,
    0xff,
    0xff,
    0xff,
    0x7e,
    0x3c,
    0x24,
    0x66,
    0xe7,
    0xff,
    0xff,
    0xff,
    0x7e,
    0x3c,
    0x00,
    0x42,
    0xe7,
    0xe7,
    0xff,
    0xff,
    0x7e,
    0x3c,
  };

const uint8_t F_PMAN2 = 6;
const uint8_t W_PMAN2 = 18;
static const uint8_t PROGMEM pacman2[F_PMAN2 * W_PMAN2] =  // ghost pursued by a pacman
  {
    0x00,
    0x81,
    0xc3,
    0xe7,
    0xff,
    0x7e,
    0x7e,
    0x3c,
    0x00,
    0x00,
    0x00,
    0xfe,
    0x7b,
    0xf3,
    0x7f,
    0xfb,
    0x73,
    0xfe,
    0x00,
    0x42,
    0xe7,
    0xe7,
    0xff,
    0xff,
    0x7e,
    0x3c,
    0x00,
    0x00,
    0x00,
    0xfe,
    0x7b,
    0xf3,
    0x7f,
    0xfb,
    0x73,
    0xfe,
    0x24,
    0x66,
    0xe7,
    0xff,
    0xff,
    0xff,
    0x7e,
    0x3c,
    0x00,
    0x00,
    0x00,
    0xfe,
    0x7b,
    0xf3,
    0x7f,
    0xfb,
    0x73,
    0xfe,
    0x3c,
    0x7e,
    0xff,
    0xff,
    0xff,
    0xff,
    0x7e,
    0x3c,
    0x00,
    0x00,
    0x00,
    0xfe,
    0x73,
    0xfb,
    0x7f,
    0xf3,
    0x7b,
    0xfe,
    0x24,
    0x66,
    0xe7,
    0xff,
    0xff,
    0xff,
    0x7e,
    0x3c,
    0x00,
    0x00,
    0x00,
    0xfe,
    0x73,
    0xfb,
    0x7f,
    0xf3,
    0x7b,
    0xfe,
    0x00,
    0x42,
    0xe7,
    0xe7,
    0xff,
    0xff,
    0x7e,
    0x3c,
    0x00,
    0x00,
    0x00,
    0xfe,
    0x73,
    0xfb,
    0x7f,
    0xf3,
    0x7b,
    0xfe,
  };

// This function schedules reads at TIMEDHT intervals and performs up to
// maxRetries attempts per scheduled read without blocking the main loop.
// On success it updates humidity/celsius and resets errorCounter.
// On failure it increments errorCounter; only when errorCounter >= maxConsecutiveErrors
// will the display show the sensorError message.
// We will simplify getTemperature() to handle AHT21 and ENS160 data simultaneously every 10 seconds.
void getTemperature() {
  unsigned long now = millis();
  if (now - timerDHT >= TIMEDHT) {
    timerDHT = now;

    sensors_event_t hEvent, tEvent;
    aht.getEvent(&hEvent, &tEvent);

    pendingH = hEvent.relative_humidity;
    pendingT = tEvent.temperature;

    // Get AQI from ENS160 only when data status is valid
    if (ens.checkDataStatus()) {
      // read all ENS160 outputs when data is ready
      uint8_t newAqi = ens.getAQI();     // 1..5
      uint16_t newTvoc = ens.getTVOC();  // ppb
      uint16_t newEco2 = ens.getECO2();  // ppm equivalent

      // Basic sanity checks before accepting values
      if (newAqi >= 1 && newAqi <= 5) {
        aqiValue = newAqi;
      } else {
        Serial.print("ENS160: invalid AQI read: ");
        Serial.println(newAqi);
      }

      // Accept tvoc/eco2 if within reasonable ranges (tunable)
      if (newTvoc <= 60000) tvocValue = newTvoc;
      if (newEco2 <= 60000) eco2Value = newEco2;

    } else {
      // Data not ready: keep previous aqiValue/tvocValue/eco2Value
      Serial.println("ENS160: data not ready, skipping read.");
    }

    // Defensive checks: ensure values are finite
    bool validH = !isnan(hEvent.relative_humidity) && (hEvent.relative_humidity >= 0.0f) && (hEvent.relative_humidity <= 100.0f);
    bool validT = !isnan(tEvent.temperature) && (tEvent.temperature > -40.0f) && (tEvent.temperature < 125.0f);

    if (validH && validT) {
      pendingH = hEvent.relative_humidity;
      pendingT = tEvent.temperature;
      // accept immediately
      humidity = pendingH;
      celsius = pendingT;
      sensorOk = true;
      errorCounter = 0;
      Serial.print("AHT: T=");
      Serial.print(celsius);
      Serial.print(" H=");
      Serial.println(humidity);
    } else {
      // Do not overwrite good values with invalid ones
      Serial.println("AHT: invalid reading, skipping.");
      errorCounter++;
      if (errorCounter >= maxConsecutiveErrors) sensorOk = false;
    }
  }
}  // End getTemperature()


void setup(void) {
  Serial.begin(115200);
  //Wire.begin(SDA_PIN, SCL_PIN);
  Wire.begin();
  // The I2C bus is at 400kHz for faster sensor response.
  Wire.setClock(400000);

  // Initialize the ENS160
  // ENS160 init with warm-up polling
  Serial.println("ENS160: init...");
  if (ens.begin()) {
    ens.setOperatingMode(SFE_ENS160_STANDARD);
    unsigned long start = millis();
    const unsigned long ensTimeout = 5000UL;
    while (millis() - start < ensTimeout) {
      if (ens.checkDataStatus()) {
        Serial.println("ENS160: ready.");
        break;
      }
      delay(100);
    }
  } else {
    Serial.println("ENS160: begin() failed.");
  }

  // Initialize the AHT11
  if (!aht.begin()) {
    Serial.println("AHT: begin() failed");
    sensorOk = false;
  } else {
    Serial.println("AHT: initialized");
  }
  pinMode(LDR_PIN, INPUT);
  ldrSmooth = analogRead(LDR_PIN);

  P.begin();
  P.setZone(0, 0, MAX_DEVICES - 1);
  P.setFont(0, numeric7Seg);
  P.displayZoneText(0, szMesg, PA_CENTER, SPEED_TIME, 0, PA_PRINT, PA_NO_EFFECT);
  P.addChar('$', degC);
#if ENA_SPRITE
  P.setSpriteData(pacman1, W_PMAN1, F_PMAN1, pacman2, W_PMAN2, F_PMAN2);
#endif
}

void loop(void) {
  getTemperature();

  //Auto-brightness: read & smooth LDR
  int raw = analogRead(LDR_PIN);
  ldrSmooth = ldrSmooth * (1 - alpha) + raw * alpha;

  // Hysteresis for low light
  if (raw < HYST_OFF_RAW) {
    autoDimEnabled = false;
  } else if (raw > HYST_ON_RAW) {
    autoDimEnabled = true;
  }
  // Hysteresis for high light
  if (raw > HYST_OFF_BRIGHT) {
    maxLockEnabled = true;
  } else if (raw < HYST_ON_BRIGHT) {
    maxLockEnabled = false;
  }

  // Compute intensity
  uint8_t intensity;
  if (!autoDimEnabled) {
    intensity = DISPLAY_MIN_INTENSITY;
  } else {
    intensity = map((int)ldrSmooth, MIN_LDR, MAX_LDR, 0, 15);
    intensity = constrain(intensity, 0, 15);
    if (maxLockEnabled && intensity > DISPLAY_MAX_INTENSITY) {
      intensity = DISPLAY_MAX_INTENSITY;
    }
  }
  // Only update if changed
  if (intensity != lastIntensity) {
    P.setIntensity(intensity);
    lastIntensity = intensity;
  }

  P.displayAnimate();
  if (P.getZoneStatus(0)) {
    // pick a random animation
    Animation = random(0, sizeof(catalog) / sizeof(catalog[0]));

    // Show sensor error only when errorCounter has reached the configured threshold.
    // This avoids flashing the error message for transient single-cycle failures.
    if (!sensorOk) {
      // Persistent failure: show the explicit error message you defined
      P.setFont(0, NULL);  // Use default font for letters
      P.displayZoneText(0, sensorError, PA_CENTER, SPEED_TIME, PAUSE_TIME, PA_SCROLL_LEFT, PA_SCROLL_LEFT);
    }

    else {
      switch (displayMode) {

        // Project title
        case 0:
          //Display just a simple text, project title
          P.setFont(0, NULL);  // use default font that supports letters
          // or set to a font that contains letters, not numeric7Seg
          P.displayZoneText(0, projectTitle, PA_LEFT, SPEED_TIME, PAUSE_TIME, PA_SCROLL_LEFT, PA_SCROLL_LEFT);
          displayMode = 1;  // get back to temperature display
          break;

        // Temperature
        case 1:
          // Use snprintf to avoid buffer overflow and render custom degree glyph ($)
          // Format width ensures alignment; adjust as needed for your font/display
          if (!isnan(celsius)) {
            //dtostrf(celsius, 3, 1, szMesg);  // width=3, precision=1
            //strcat(szMesg, "$C");            // '$' is your custom degree sign
            // Replace strcat() with snprintf(szMesg, sizeof(szMesg), "%.1f$C", celsius); to avoid overflow.
            snprintf(szMesg, sizeof(szMesg), "%.1f$C", celsius);
          } else {
            // If we don't yet have a valid reading, show placeholder
            strcpy(szMesg, "--.-$C");
          }
          P.setFont(0, numeric7Seg);
          P.displayZoneText(
            0, szMesg, PA_CENTER,
            catalog[Animation].speed,
            catalog[Animation].pause,
            catalog[Animation].effect,
            catalog[Animation].effect);
          displayMode = 2;  // humidity display next
          break;

        // Humidity
        case 2:
          if (!isnan(humidity)) {
            //dtostrf(humidity, 3, 1, szMesg);  // width=3, precision=1
            //strcat(szMesg, " %");
            //Replace strcat() with snprintf(szMesg, sizeof(szMesg), "%.1f$%%", humidty); to avoid overflow.
            snprintf(szMesg, sizeof(szMesg), "%.1f%%", humidity);
          } else {
            strcpy(szMesg, "--.- %");
          }
          P.setFont(0, numeric7Seg);
          P.displayZoneText(
            0, szMesg, PA_LEFT,
            catalog[Animation].speed,
            catalog[Animation].pause,
            catalog[Animation].effect,
            catalog[Animation].effect);
          displayMode = 3;  // Title project is displayed next
          break;

        // AQI / Ventilation status
        case 3:
          {
            // If eCO2 indicates poor ventilation, show ventilation hint; otherwise show AQI text
            const char* baseMsg;
            if (eco2Value >= 1000) {
              baseMsg = ventHint(eco2Value);
              // "Ventilate now" / "Consider ventilation" / "OK"
              snprintf(szMesg, sizeof(szMesg), "%s", baseMsg);
            } else {
              // aqiText returns a short word like "Excellent", "Good", etc.
              baseMsg = aqiText(aqiValue);
              // Compose "Excellent air conditions" safely into the buffer
              // Reserve space and avoid overflow: "%s air conditions"
              snprintf(szMesg, sizeof(szMesg), "%s air conditions", baseMsg);
            }

            // Use a font that supports letters
            P.setFont(0, NULL);
            P.displayZoneText(
              0, szMesg, PA_CENTER,  // center alignment
              80,                    // speed for the status message
              0,                     // pause, none, just keep going
              PA_SCROLL_LEFT,        // scrolling effect
              PA_SCROLL_LEFT         // exit effect
            );
            displayMode = 0;  // wrap back to title/temperature
            break;
          }

        default:
          // Reset to a known state if displayMode somehow gets out of range
          displayMode = 0;
          break;
      }                 // end switch case
    }                   // end sensorOK handling
    P.displayReset(0);  // Reset display zone
  }
}  // end loop()
Housing
The case is 3D printed, I used FreeCad to build it according to my needs, quite large, it is about 216mm*78mm*67mm. The material used is PLA, quite widely used and strong enough. At the moment I am just starting out with 3D design and as a result I did not make the most solid case but I learned a few things by experimenting, and for the next one I know how to make it more rigid.
Thank you and I will be back soon!