


Health care is one of the necessities or a basic need for every human being. But many developing countries fail to meet the requirements due to the scarcity of medical health professionals or doctors and hygienic places hospitals. These are the major challenges that need to be addressed as soon as possible.

The experimental setup
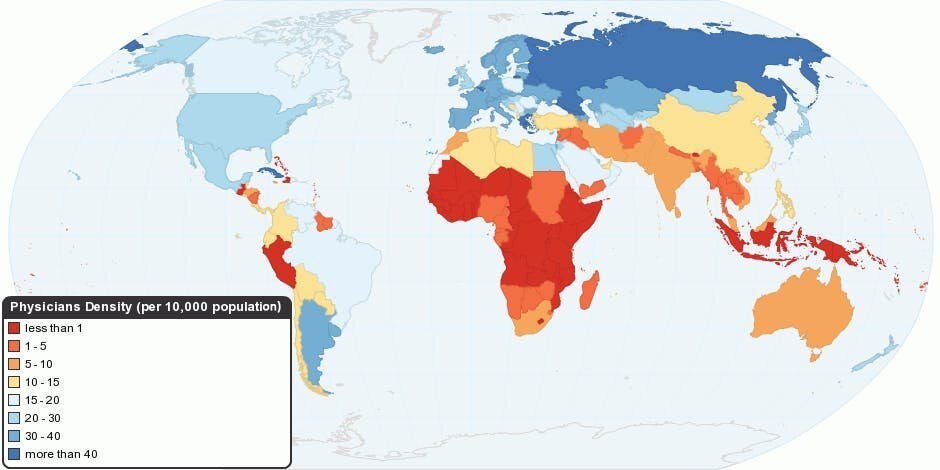
Image Source: Wikipedia
With the growing technology and very high-speed internet connectivity, it is possible for us to communicate with anyone on the other side of the globe almost instantaneously or in real-time. But developing nations still lack a lot of infrastructures like cell phone towers and fibre internet connectivity. Satellite-based internet aims to address these issues. However, the deployment of satellites to provide internet access to the whole globe will be a challenging task.
“One billion people live in developing countries on less than US$1 a day, and 2.5 billion are living on less than $2 a day; more than 2.6 billion people lack access to toilets and other sanitation facilities; and 30, 000 children under five years of age die every day, mainly from dehydration, undernourishment, and preventable diseases.” – Bale, Global Economic Symposium. Improving Access to Health Care for the Poor, Especially in Developing Countries
Low- and middle-income countries bear 90% of the world’s diseases but compose only 12% of the world’s health expenditures, according to a 2008 article in the Annals of the New York Academy of Sciences.
In this project, I would like to demonstrate, by using simple electronic components and microcontrollers how we can address major healthcare challenges in the world.
Let's get started,
STEP 1: The architecture
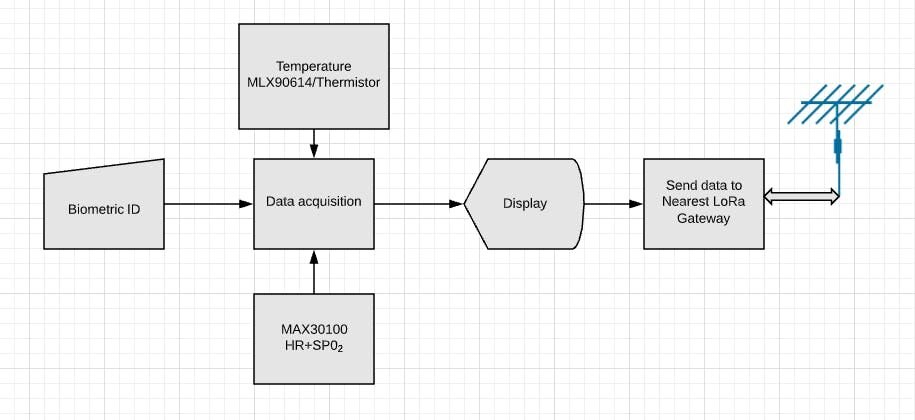
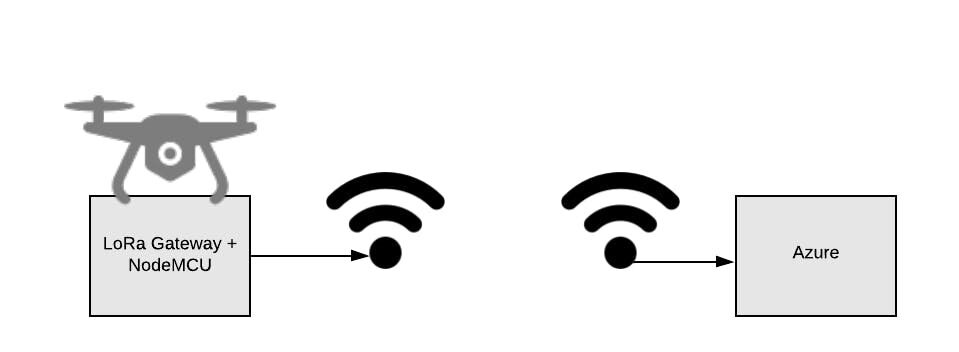
The basic block diagram of the system is as shown in the below figure, there are two major blocks in the system one data acquisition and transmission system and one reception system which will be placed at the location where there is internet connectivity. The transmission between the node and the gateway will be done with the help of LoRa technology which can transmit and receive information
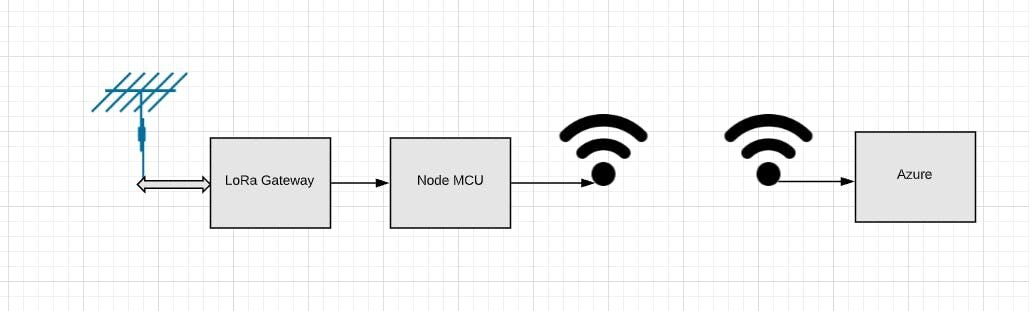
The gateway with internet connectivity will directly update the information on the Azure cloud. Which can be diagnosed by Doctors sitting anywhere on the globe. A person with a basic understanding of English and some education can help these unprivileged people to get basic health care access. For demonstration and Proof of concept [POC] purpose, I'm using the simple Heartrate and Blood Oxygen measurement system, This can be upgraded to many more sensors and other data acquisition systems.
STEP 2: Required components
Get all the required components.
I'll be using a thermistor
Note: I'll be using Arduino Mega 2560 as the main brain of the system as the Atmel chip on the Arduino Mega is manufactured by the Microchip which is one of the contest rules.
Also, I need to interface multiple sensors I would need something like Mega to cater to my memory needs.
STEP 3: Connection Diagram
The connection diagram for the data acquisition and transmission system is as shown in the figure below,

Here the Arduino Mega has a serial connection to the biometric fingerprinting device and I2C connection to the temperature sensor in the case of MLX90614 and MAX30100 IC for the heart rate and the blood oxygen level measurement. The display is used for representation purpose.
Note that 1k resistors are needed as the display 1.44 inch is of low voltage standard i.e 3.3V
The whole setup can be connected to a portable power bank which can run the whole device till months [20000mAh]
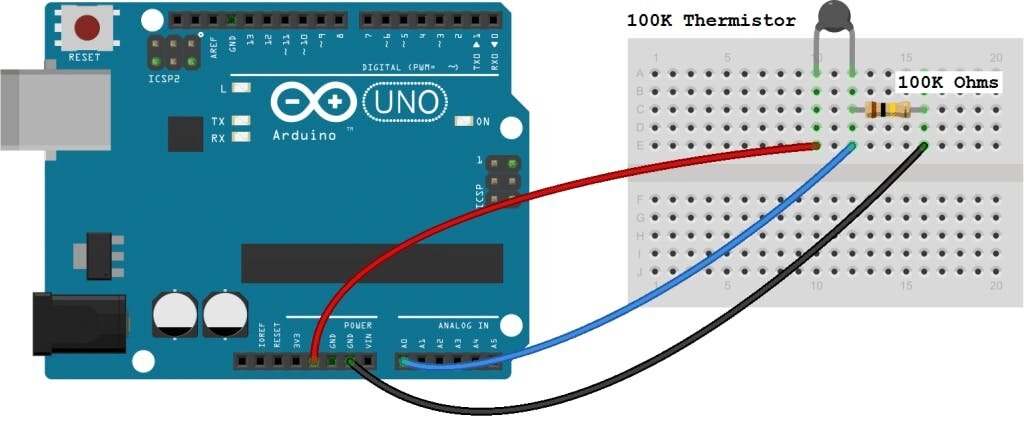
Temperature sensor:
-
Thermistor +ve to 5V
-
Thermistor -ve to 10k resistor
-
Resistor to ground
-
Junction of thermistor and resistor to A0.
The calculation will be like this:
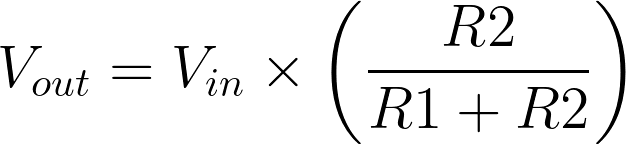
In terms of the voltage divider in a thermistor circuit, the variables in the equation above are:

Vo = analogRead(ThermistorPin);
R2 = R1 * (1023.0 / (float)Vo - 1.0);
logR2 = log(R2);
T = (1.0 / (c1 + c2*logR2 + c3*logR2*logR2*logR2));
T = T - 273.15; T = (T * 9.0)/ 5.0 + 32.0;
The Receiver:

The receiver consists of a LoRa receiver device along with a nodeMCU (ESP8266) to send the data to the Azure cloud
STEP 4: Programming
I have chosen the Arduino Mega running in an Arduino environment because the project can be replicated easily as it is very easy to implement using Arduino IDE and most of the materials are easily available. I had applied for the hardware and got CEC1702 but could not write and complete the required libraries within the contest period hence I saw the rule saying this "Use any Microchip product in your project to qualify for the contest!"
Basically, the code involves the interfacing of different sensor devices and acquiring data and sending it to the nearest gateway.
The Idea of involving LoRa is to increase the range of communication. The amount of infrastructure to setup LoRa communication is far lesser than that of Mobile communication using cell phone towers.
In the case there is no way to deploy the gateways then the gateways can be mobile and can serve using drones flying
Setting up Azure IoT is simple and can be done using tutorials available on Github and various other platforms.
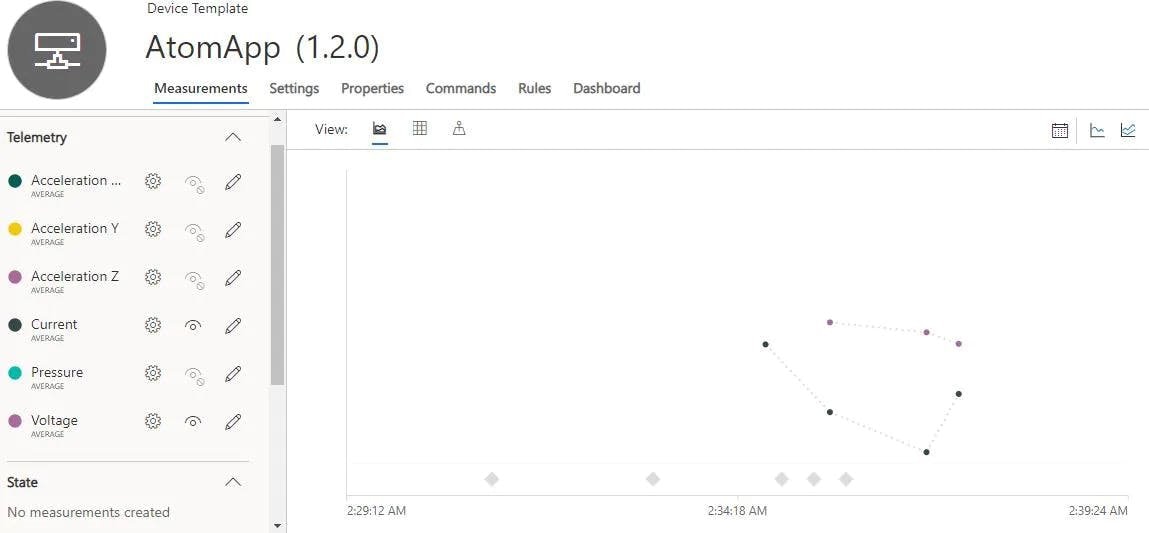
Once the communication is established we can make a dashboard for recording and visualising the parameters such as temperature, blood oxygen level, heart rate etc.
STEP 5: Testing and deploying.
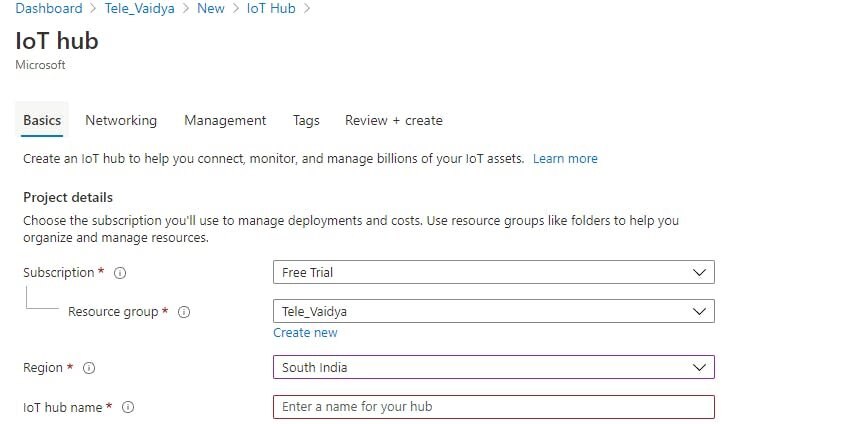
Setting up Azure IoT Hub,
Register using the given link to get one-month free access.
-
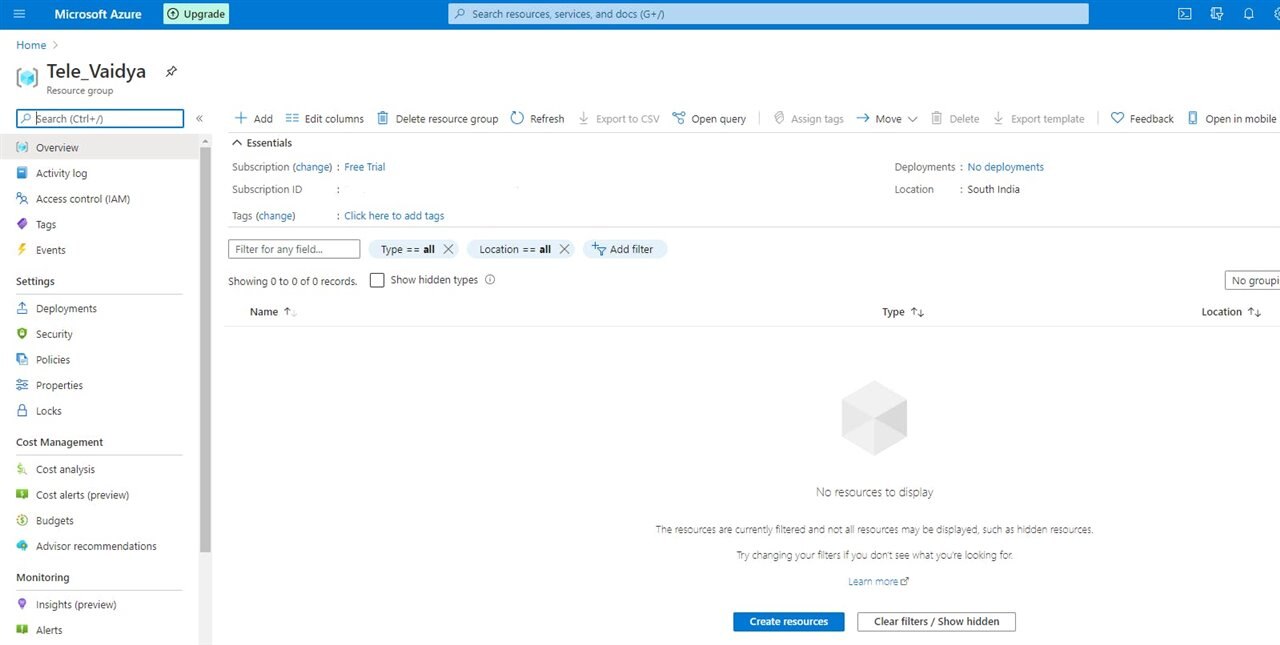
Create a new resource group under resource groups and name it. for eg. NodeMCU
-
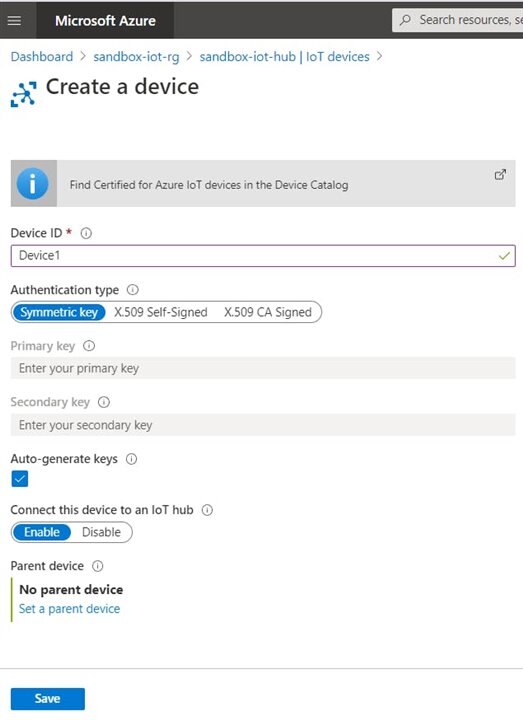
Once the IoT hub is provisioned, go to the resource. Select the IoT device under Explorer and Add a new device.
Here's the working video containing the demonstration of the whole project
These are thing needed to be filled in the code once you create the device.
Installing Device Explorer twin
Device explorer twin is a graphical tool for interacting with and test your devices with Azure IoT hub. After Installing the tool on your local machine you can connect to the IoT hub and view the telemetry, the devices are sending. use this tool to send messages to the device and receive messages from the device.
You can download the Device explorer install package from the below link.
Creating a SAS token with Device Explorer
Open the device explorer that you have installed in the previous steps and connect it to the Azure IoT Hub using the connection string from the Azure portal. Get the connection string by navigating to the IoT hub and from Shared access policies => iothubowner => Connection string — primary key.
//Azure IoT Hub Credentials const char* THUMBPRINT = "xxxxx";
const char* DEVICE_ID = "xxxxx";
const char* MQTT_HOST = "xxxxx.azure-devices.net";
const char* MQTT_USER = "xxxxx.azure-devices.net/<device-name>/?api-version=2018-06-30";
const char* MQTT_PASS = "SharedAccessSignature sr=xxxxx.azure-devices.net%2Fdevices%2F<device-name>&sig=xxxxx&se=xxxxx";
const char* MQTT_SUB_TOPIC = "devices/<device-name>/messages/devicebound/#";
const char* MQTT_PUB_TOPIC = "devices/<device-name>/messages/events/";

Demo video:
STEP 6: Future Enhancements
-
Adding GSM/GPRS connectivity at the gateway to enhance connectivity
-
Adding LoRa satellite-based unit for hassle-free connection to the network
-
Improving battery life by implementing sleep functions
-
Adding Solar panel for charging