1. Build with Arduino Micro
Thanks for the gift from Element14,
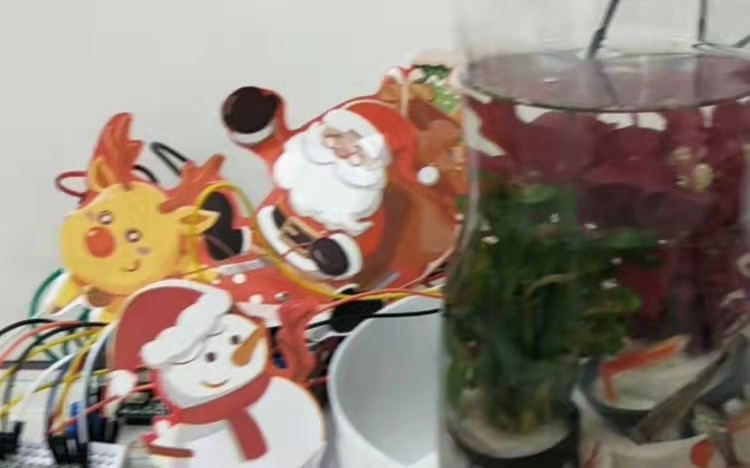
I build the Mini Aquarium with Arduino Micro
2. The Code
Build with Arduino IDE

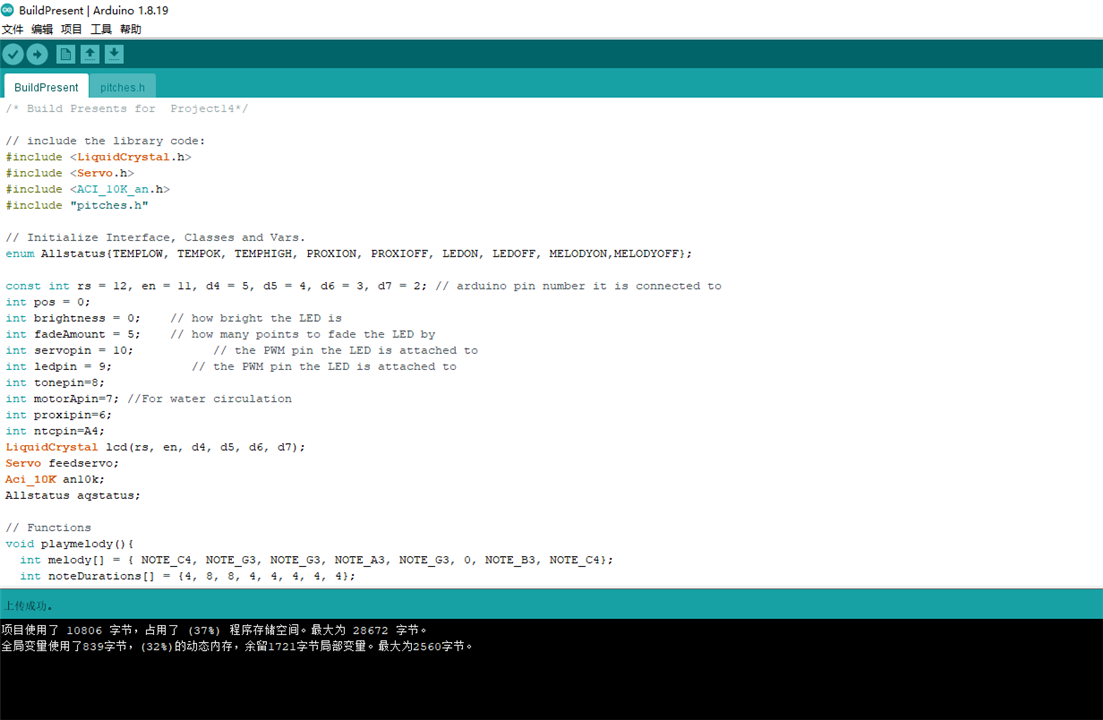
/* Build Presents for Project14*/
// include the library code:
#include <LiquidCrystal.h>
#include <Servo.h>
#include <ACI_10K_an.h>
#include "pitches.h"
// Initialize Interface, Classes and Vars.
enum Allstatus{TEMPLOW, TEMPOK, TEMPHIGH, PROXION, PROXIOFF, LEDON, LEDOFF, MELODYON,MELODYOFF};
const int rs = 12, en = 11, d4 = 5, d5 = 4, d6 = 3, d7 = 2; // arduino pin number it is connected to
int pos = 0;
int brightness = 0; // how bright the LED is
int fadeAmount = 5; // how many points to fade the LED by
int servopin = 10; // the PWM pin the LED is attached to
int ledpin = 9; // the PWM pin the LED is attached to
int tonepin=8;
int motorApin=7; //For water circulation
int proxipin=6;
int ntcpin=A4;
LiquidCrystal lcd(rs, en, d4, d5, d6, d7);
Servo feedservo;
Aci_10K an10k;
Allstatus aqstatus;
// Functions
void playmelody(){
int melody[] = { NOTE_C4, NOTE_G3, NOTE_G3, NOTE_A3, NOTE_G3, 0, NOTE_B3, NOTE_C4};
int noteDurations[] = {4, 8, 8, 4, 4, 4, 4, 4};
for (int thisNote = 0; thisNote < 8; thisNote++) {
int noteDuration = 1000 / noteDurations[thisNote];
tone(tonepin, melody[thisNote], noteDuration);
int pauseBetweenNotes = noteDuration * 1.30;
delay(pauseBetweenNotes);
noTone(tonepin);
}
}
void sweepServo(int dg){
for (pos = 0; pos <= dg; pos += 1) { // goes from 0 degrees to 180 degrees
// in steps of 1 degree
feedservo.write(pos);
delay(15);
}
for (pos = dg; pos >= 0; pos -= 1) {
feedservo.write(pos);
delay(15);
}
delay(1500);
}
void blinky() {
int tickcnt, tick;
tickcnt= 250 ;
for ( tick = 0; tick >= tickcnt ; tick += 1) {
analogWrite(ledpin, brightness);
brightness = brightness + fadeAmount;
if (brightness <= 0 || brightness >= 255) {
fadeAmount = -fadeAmount;
}
delay(15);
}
delay(1500);
}
void tmpSupervision() {
float gttmp;
int settmp;
settmp= 22 ;
gttmp = an10k.getTemp(analogRead(ntcpin));
//gttmp = an10k.getTemp(analogRead(4)); //Aci_10K an10k(3.3,12);support for 3.3 volt board and/or 12bit analog read resolution
if (gttmp < settmp - 2) {
aqstatus = TEMPLOW;
}
else if (gttmp > settmp + 2) {
aqstatus = TEMPHIGH;
}
else {
aqstatus = TEMPOK;
}
delay(1500);
}
void motor() {
int motoronoff=0;
switch (aqstatus) {
case TEMPLOW:
Serial.println("Case TEMPLOW");
break;
case TEMPHIGH:
Serial.println("Case TEMPHIGH");
break;
case PROXION:
Serial.println("Case PROXION");
break;
case PROXIOFF:
Serial.println("Case PROXIOFF");
break;
default:
Serial.println("Case default, all off.");
break;
}
}
void setup() {
pinMode(ledpin, OUTPUT);
pinMode(proxipin, INPUT);
feedservo.attach(servopin);
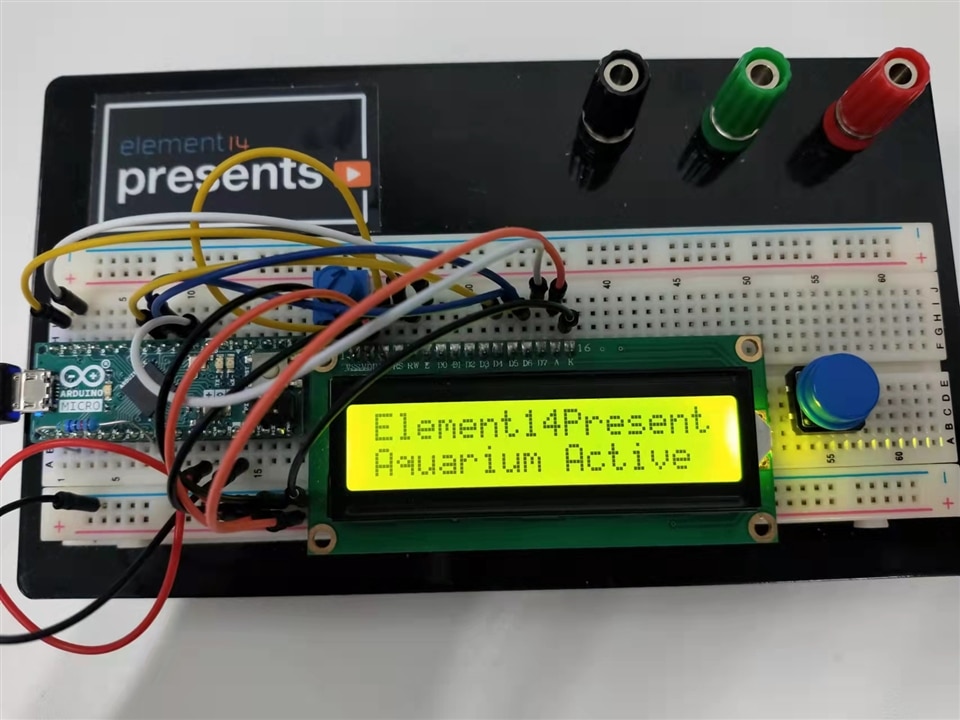
lcd.begin(16, 2); // set up the LCD's number of columns and rows:
lcd.clear();
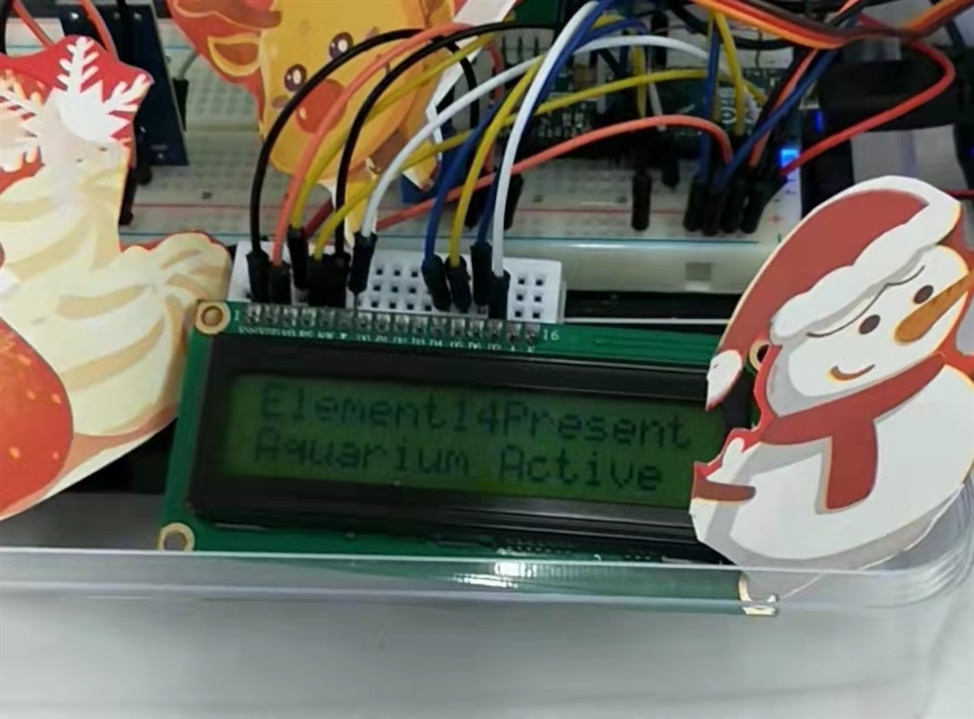
lcd.print("Element14Present");
lcd.setCursor(0, 1);
lcd.print("Aquarium Active");
delay(3000);
}
void loop() {
int rdinput;
lcd.clear();
lcd.setCursor(0, 0);
lcd.print("Aquarium Active");
lcd.setCursor(16, 1);
lcd.print("Temp=");
Serial.print("Present temperature: ");
Serial.println(an10k.getTemp(analogRead(4)));
tmpSupervision();
proxipin= digitalRead(proxipin);
if (proxipin){
blinky();
sweepServo(30);
playmelody();
}
delay(1000);
}
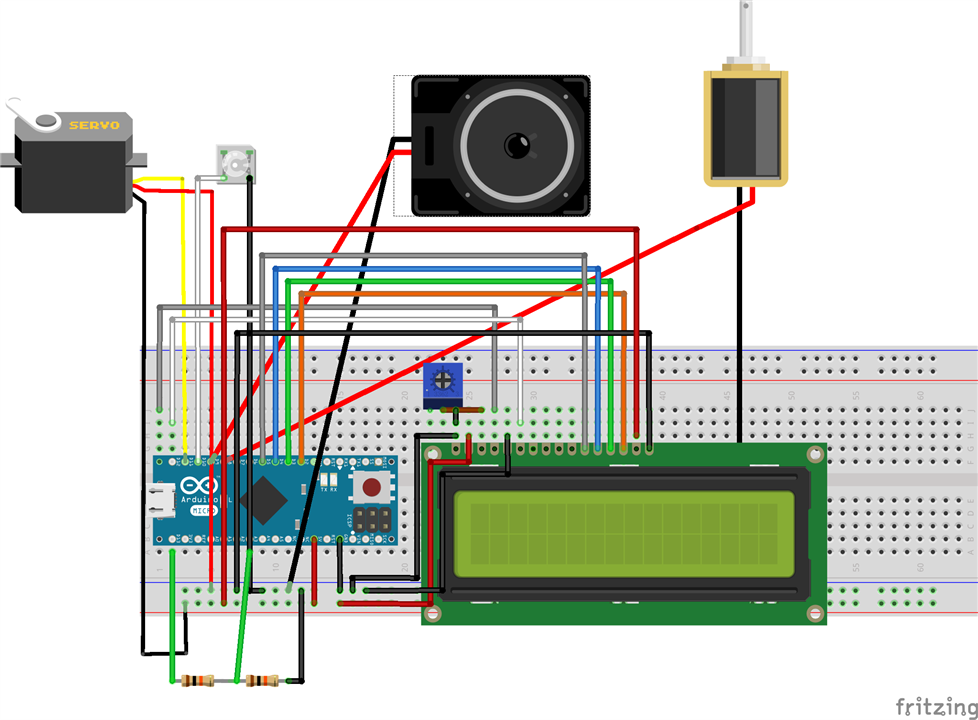
There are as many as port to be used for temperature, led, lcd1602, servo, beeper, with space for water circulation pump and heater to keep temperature warm.
While selected pump is too big not good to be put into mini aquarium. So the code is empty for illustration only.
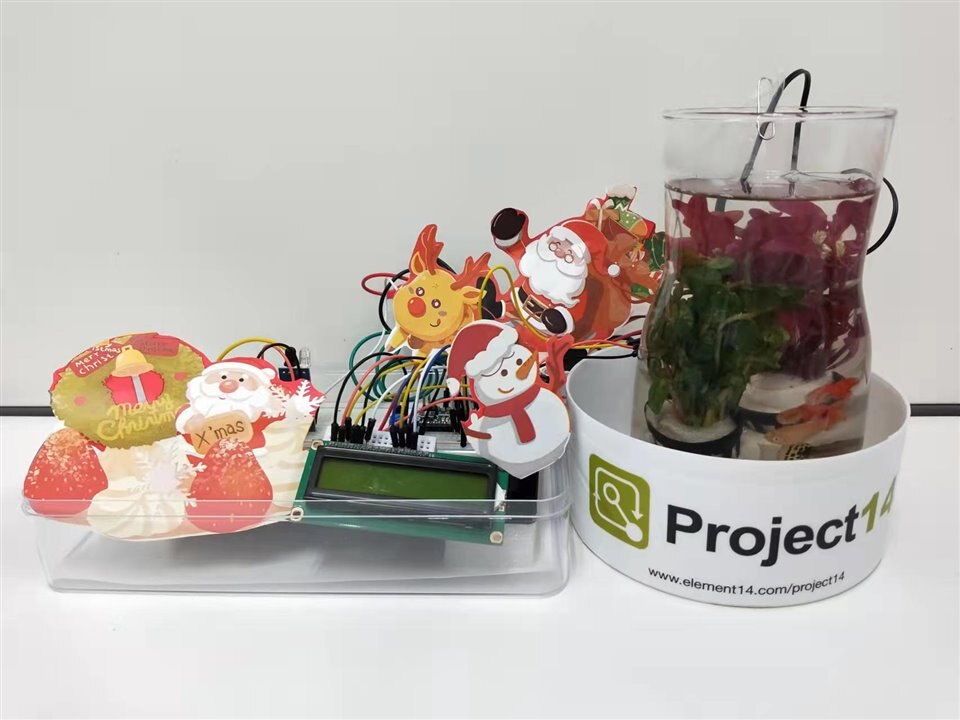
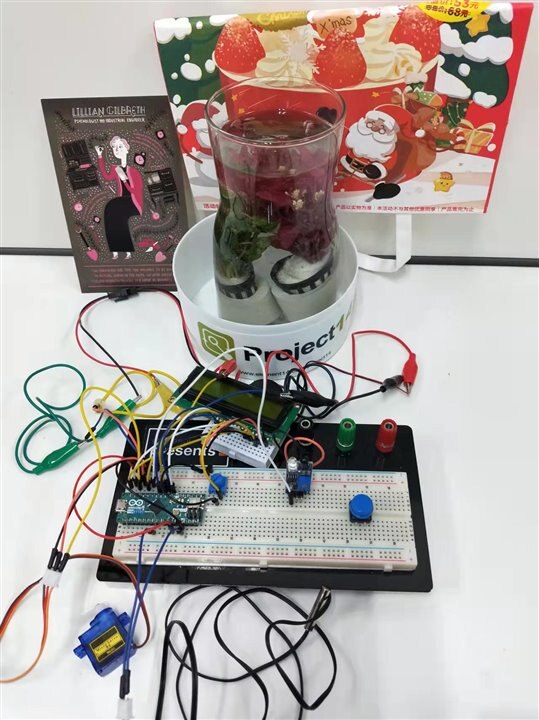
The wiring is as follows,
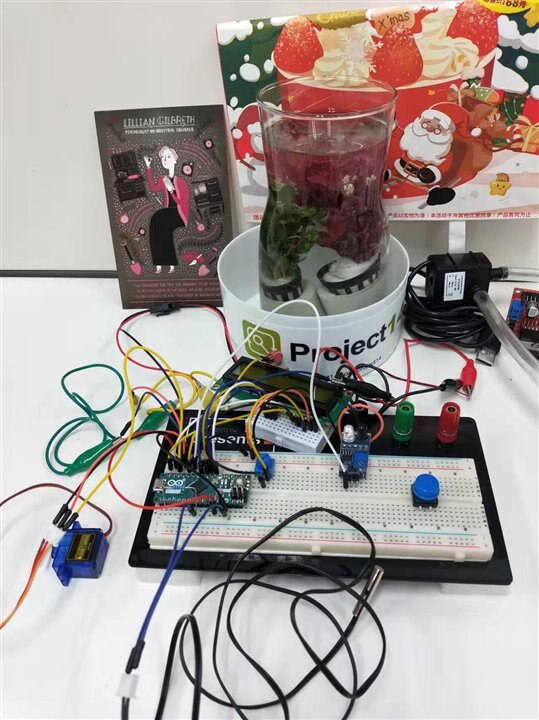
All the hardware connected together,
Closer look,
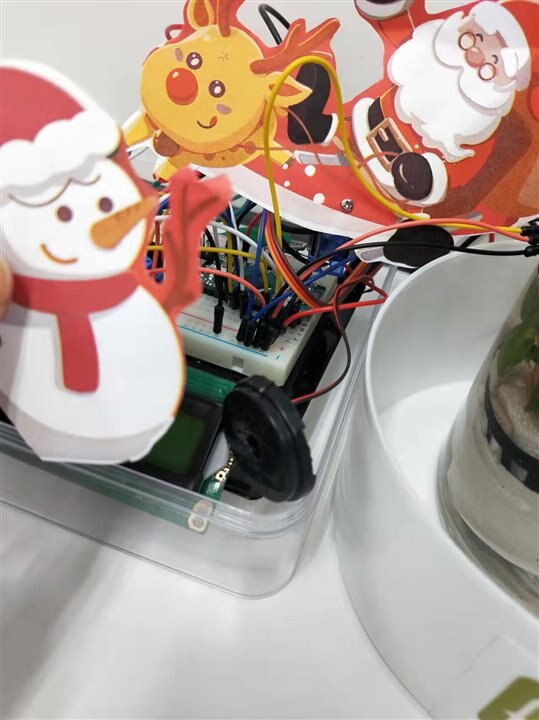
With decorations,

3. Plug and Run
Ready
Then Run
4. Hints
Arduino is really great invention for hobby and education. No too much skill needed to build things as you like. This was mean to design for artists like you.
Here is some hints on how to build this project in one hours.
4.1 Download and install arduino , in windows or in linux(Ubuntu 18.04), refer to the screenshot.

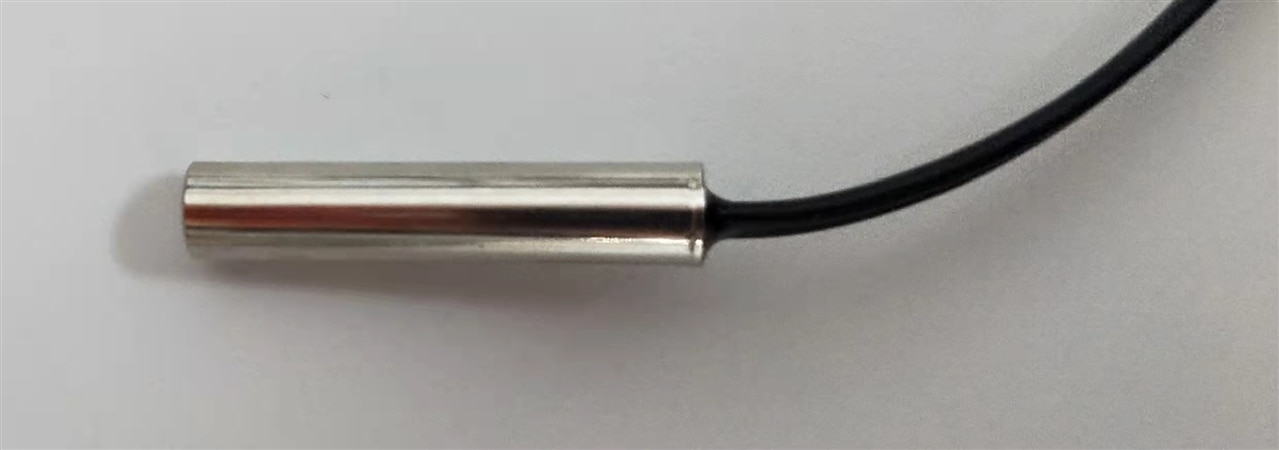
4.2 Install libraries with the hardware at hands. For this NTC therm-sensor,
search NTC in library manager and press install

Just use code like this

first include the lib, then start aninstance and read from ADC port 0 as defined below.
#include <ACI_10K_an.h>
Aci_10K an10k; //start an instance of the library
Serial.println(an10k.getTemp(analogRead(0)));
For 10K NTC thermo-sensor, here is resister-temperature curves

Hard wiring as follows
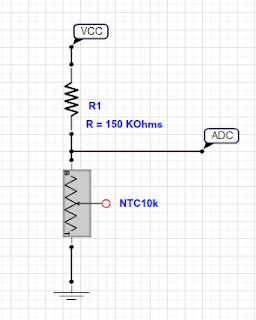
In this lib. 10k high precise resistor is recommendated. If I used 100k resistor, change the defined value in "ACI_10K_an.h" to 100,000.
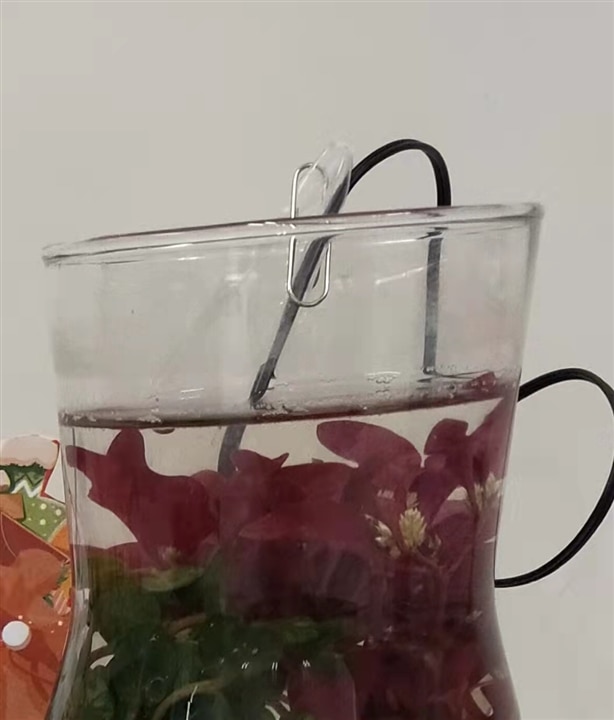
In this project, I put the ntc sensor in one straw and dipped into to water to check water temperature regularly. I shall need heater to heat the water for this small warm water fish need range of 18~24 Celsius degree.
4.2 LCD 1602 is standard library in arduino, just include the library code:
#include <LiquidCrystal.h>
Wiring the pins
The circuit:
* LCD RS pin to digital pin 12
* LCD Enable pin to digital pin 11
* LCD D4 pin to digital pin 5
* LCD D5 pin to digital pin 4
* LCD D6 pin to digital pin 3
* LCD D7 pin to digital pin 2
* LCD R/W pin to ground
* 10K resistor:
* ends to +5V and ground
* wiper to LCD VO pin (pin 3)
The pin 15-A and pin 16-K is for back-light, fix resistor 1k-2k-3k can be good and other value are not visible in 5V .

If not power on
coding is easy, set up the pins,
const int rs = 12, en = 11, d4 = 5, d5 = 4, d6 = 3, d7 = 2;
LiquidCrystal lcd(rs, en, d4, d5, d6, d7);
lcd.begin(16, 2); // set up the LCD's number of columns and rows:
then
clear panel -- lcd.clear();
set position -- lcd.setCursor(0, 1);
show text -- lcd.print("hello, world!");
4.3 Sweep the Santa sledge with servo, the servo force is 9g, for smaller one can choose 6g.
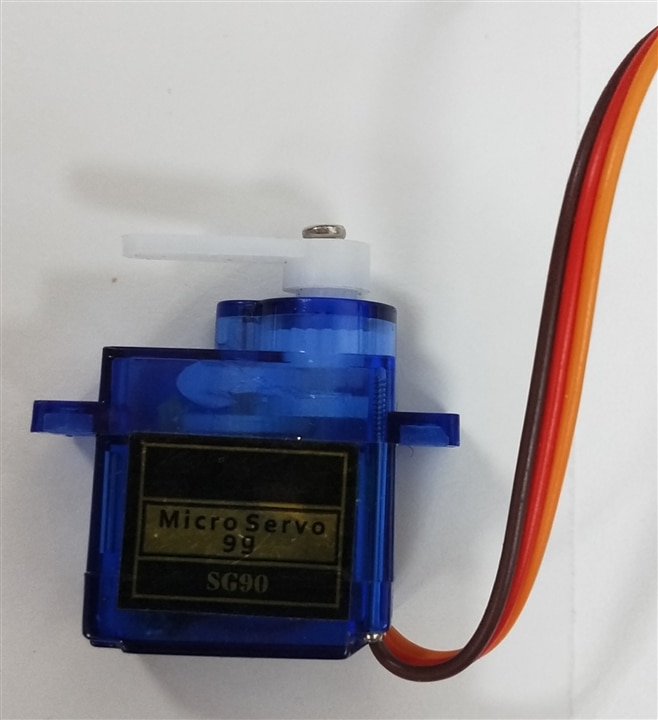
Routine, include the library, and start the servo instance, attached the servo to pin 9 in software part,
#include <Servo.h>
Servo myservo;
myservo.attach(9);
Then, change the number in 0~180
myservo.write(pos);
Then the sledge sweep
void sweepServo(int dg){
for (pos = 0; pos <= dg; pos += 1) { // goes from 0 degrees to 180 degrees
// in steps of 1 degree
feedservo.write(pos);
delay(15);
}
for (pos = dg; pos >= 0; pos -= 1) {
feedservo.write(pos);
delay(15);
}
delay(1500);
}
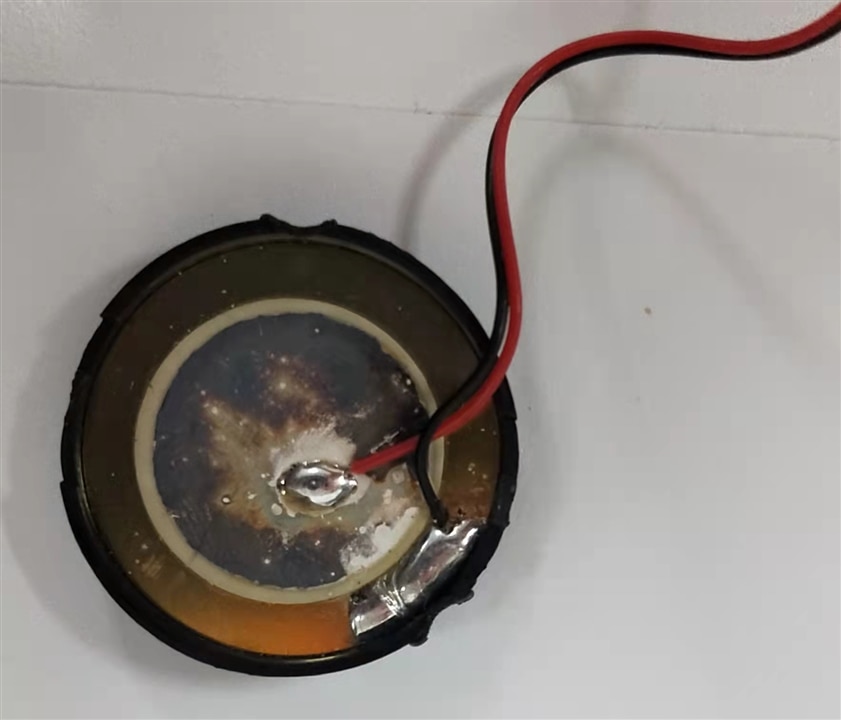
4.4 Beep and Tone, to make the music, the arduino micro is strong in driving 4ohm speaker, I use this pizzo-buzzer, not
import library to play pitches, this use PWM square wave of different frequency, for harmonic melody, need more complex frequency range.
#include "pitches.h"
Just set the tone and duration
int melody[] = { NOTE_C4, NOTE_G3, NOTE_G3, NOTE_A3, NOTE_G3, 0, NOTE_B3, NOTE_C4};
int noteDurations[] = { 4, 8, 8, 4, 4, 4, 4, 4};
Then the melody is played in pin 8,
tone(8, melody[thisNote], noteDuration);
In this project, code for playmelody()
void playmelody(){
int melody[] = { NOTE_C4, NOTE_G3, NOTE_G3, NOTE_A3, NOTE_G3, 0, NOTE_B3, NOTE_C4};
int noteDurations[] = {4, 8, 8, 4, 4, 4, 4, 4};
for (int thisNote = 0; thisNote < 8; thisNote++) {
int noteDuration = 1000 / noteDurations[thisNote];
tone(tonepin, melody[thisNote], noteDuration);
int pauseBetweenNotes = noteDuration * 1.30;
delay(pauseBetweenNotes);
noTone(tonepin);
}
}
4.5 The GPIO can drive LED and digital on/off extension module,
LED module can be lighted up or goes in breath mode with analogueWrite,

void blinky() {
int tickcnt, tick;
tickcnt= 250 ;
for ( tick = 0; tick >= tickcnt ; tick += 1) {
analogWrite(ledpin, brightness);
brightness = brightness + fadeAmount;
if (brightness <= 0 || brightness >= 255) {
fadeAmount = -fadeAmount;
}
delay(15);
}
delay(1500);
}
This is near range detector, adjust the resistor, the out pin can be drive HIGH when obstacles like hands or body reach out, in this project, the sound and melody can be triggered by this module.
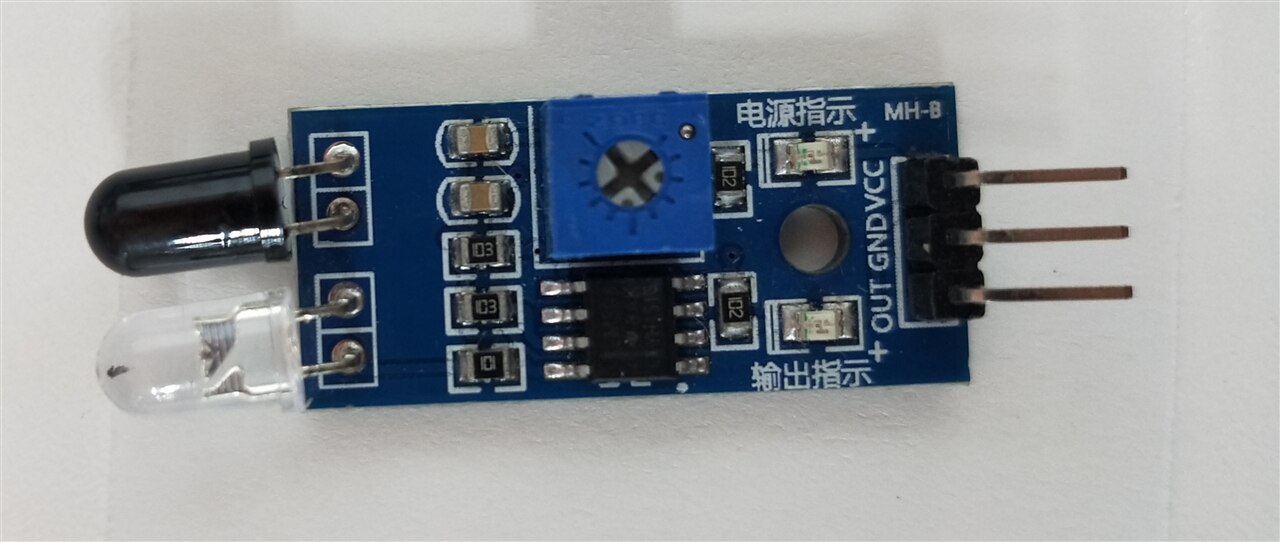
Here is the code using this module,
proxipin= digitalRead(proxipin);
if (proxipin){
blinky();
sweepServo(30);
playmelody();
}
4.5 I have use as many pin-out available in arduino micro. There still some pins available for function upgrade and more fun is awaiting.