element14 Community
element14 Community
    Register Log In
  • Site
  • Search
  • Log In Register
  • About Us
  • Community Hub
    Community Hub
    • What's New on element14
    • Feedback and Support
    • Benefits of Membership
    • Personal Blogs
    • Members Area
    • Achievement Levels
  • Learn
    Learn
    • Ask an Expert
    • eBooks
    • element14 presents
    • Learning Center
    • Tech Spotlight
    • STEM Academy
    • Webinars, Training and Events
    • Learning Groups
  • Technologies
    Technologies
    • 3D Printing
    • FPGA
    • Industrial Automation
    • Internet of Things
    • Power & Energy
    • Sensors
    • Technology Groups
  • Challenges & Projects
    Challenges & Projects
    • Design Challenges
    • element14 presents Projects
    • Project14
    • Arduino Projects
    • Raspberry Pi Projects
    • Project Groups
  • Products
    Products
    • Arduino
    • Avnet Boards Community
    • Dev Tools
    • Manufacturers
    • Multicomp Pro
    • Product Groups
    • Raspberry Pi
    • RoadTests & Reviews
  • Store
    Store
    • Visit Your Store
    • Choose another store...
      • Europe
      •  Austria (German)
      •  Belgium (Dutch, French)
      •  Bulgaria (Bulgarian)
      •  Czech Republic (Czech)
      •  Denmark (Danish)
      •  Estonia (Estonian)
      •  Finland (Finnish)
      •  France (French)
      •  Germany (German)
      •  Hungary (Hungarian)
      •  Ireland
      •  Israel
      •  Italy (Italian)
      •  Latvia (Latvian)
      •  
      •  Lithuania (Lithuanian)
      •  Netherlands (Dutch)
      •  Norway (Norwegian)
      •  Poland (Polish)
      •  Portugal (Portuguese)
      •  Romania (Romanian)
      •  Russia (Russian)
      •  Slovakia (Slovak)
      •  Slovenia (Slovenian)
      •  Spain (Spanish)
      •  Sweden (Swedish)
      •  Switzerland(German, French)
      •  Turkey (Turkish)
      •  United Kingdom
      • Asia Pacific
      •  Australia
      •  China
      •  Hong Kong
      •  India
      •  Korea (Korean)
      •  Malaysia
      •  New Zealand
      •  Philippines
      •  Singapore
      •  Taiwan
      •  Thailand (Thai)
      • Americas
      •  Brazil (Portuguese)
      •  Canada
      •  Mexico (Spanish)
      •  United States
      Can't find the country/region you're looking for? Visit our export site or find a local distributor.
  • Translate
  • Profile
  • Settings
Circuit Prototype Techniques
  • Challenges & Projects
  • Project14
  • Circuit Prototype Techniques
  • More
  • Cancel
Circuit Prototype Techniques
Blog WRONGCO Interlocked Power Distribution PWBs - premade standard prototype family
  • Blog
  • Forum
  • Documents
  • Events
  • Polls
  • Files
  • Members
  • Mentions
  • Sub-Groups
  • Tags
  • More
  • Cancel
  • New
Join Circuit Prototype Techniques to participate - click to join for free!
  • Share
  • More
  • Cancel
Group Actions
  • Group RSS
  • More
  • Cancel
Engagement
  • Author Author: robogary
  • Date Created: 20 Jan 2022 1:54 AM Date Created
  • Views 6787 views
  • Likes 14 likes
  • Comments 0 comments
  • vehicles
  • robots
  • raspberry pi
  • circuitprototypingch
  • arduino
Related
Recommended

WRONGCO Interlocked Power Distribution PWBs - premade standard prototype family

robogary
robogary
20 Jan 2022

Hi to all my friends , fans, and future admirers in E14 land.

RoboGary from WRONGCO here .....just in time.......to influence and speed your next prototype project with an innovative but SIMPLE premade PWB concept.

Before sharing that concept, ask yourself:  

When making an Arduino, Raspberry Pi Pico, Raspberry Pi, project or one with your favorite SOC or controller du jour,  the project has various voltages needed fed to controllers, sensors, LCD screens, periherals, output devices and their drivers,.etc, etc. etc.....how do you get power to all of them ?

1) There are never enough tie points for voltage distribution and commons.

Daisy chains running all over for power supply commons can drive you nuts to troubleshoot if one comes loose.

The first simple solution is to use a WRONGCO power distribution board, which you premake yourself easily. 

Just make these boards in advance and keep and inventory.

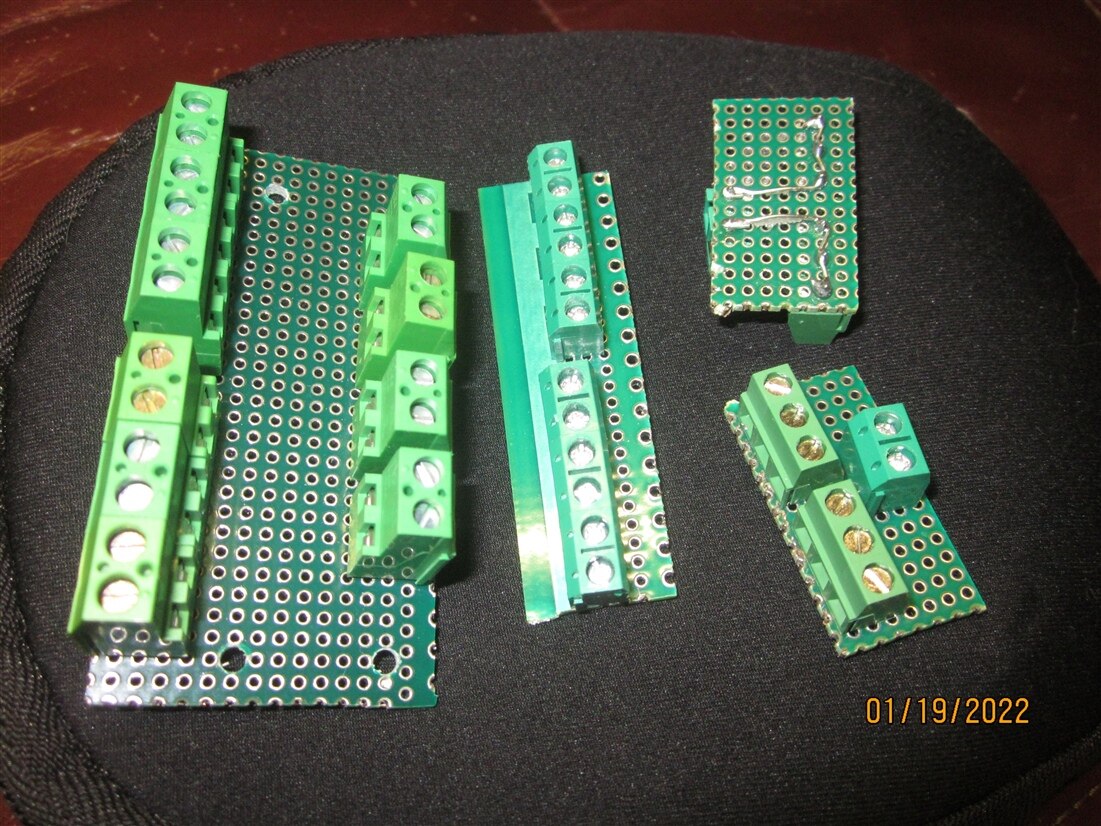
I keep a couple different form factors and terminal board sizes on hand for small jobs and big jobs. They can be hand wired and soldered PWBs, wire wrapped, or premade PCBs.  My preference is the .1 thru hole.

This is a link for the PWB for example:

https://www.newark.com/c/tools-production-supplies/prototyping-tools-breadboards/prototyping-boards

This is a link for the terminal board points as an example:

https://www.newark.com/multicomp-pro/mc000026/tb-wire-to-brd-r-a-2pos-12awg/dp/64T3384?st=multicomp%20pro%20%20wire-to-board%20terminal%20block,%205%20mm,%202%20positions,%2026%20awg,%2012%20awg,%20screw

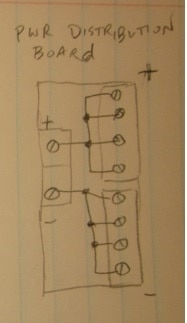
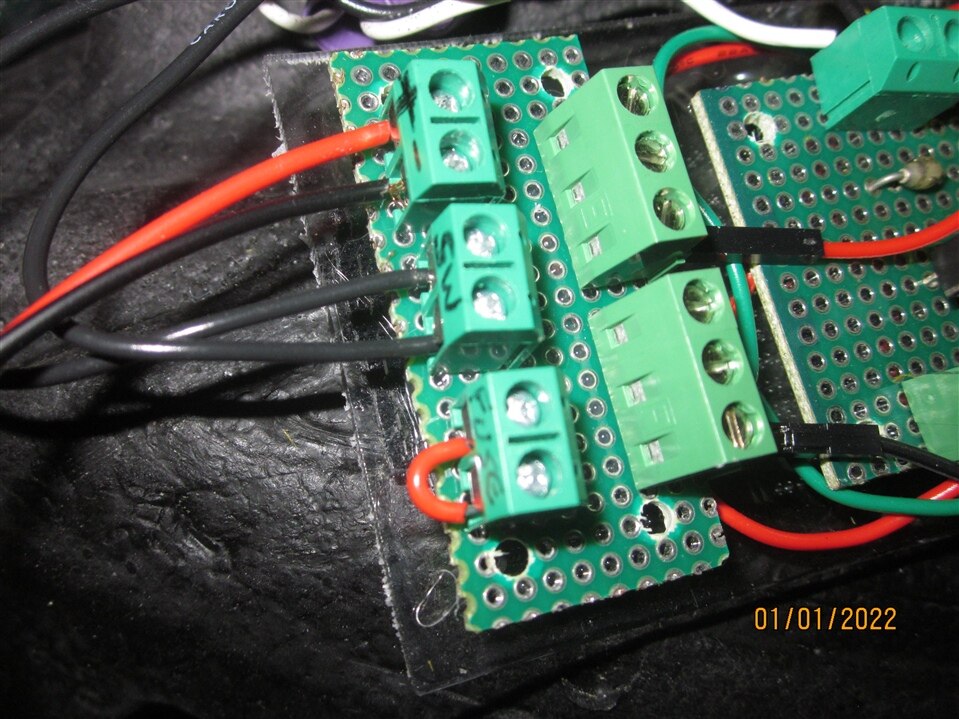
The input side has a 2 position terminal board , one for +  and one for - . The output side has 3 to 6 terminal boards points from the + input , and  3 to 6 terminal boards points from the - input. Simple and saves you a ton of time trying to find more power supplies and common points.

Here is a schematic. I make some that have the TB points side by side in the situtations where the TB is mounted by a hard enclosure wall, no access to both sides of the TB.  

The output side also has screws that can be used to apply a capacitor or TVSS.  

imageimage

A single prototype may have several of these boards installed, one for each voltage level needing distributed: 3V, 5V, 6V, 7.4V , 12V   etc...

2) Alot of times, the power source has series interlocks/devices needed upstream before distribution. WRONGCO has that easy easy packaged solution for you too ! 

The INTERLOCKED Power Distribution Board. 

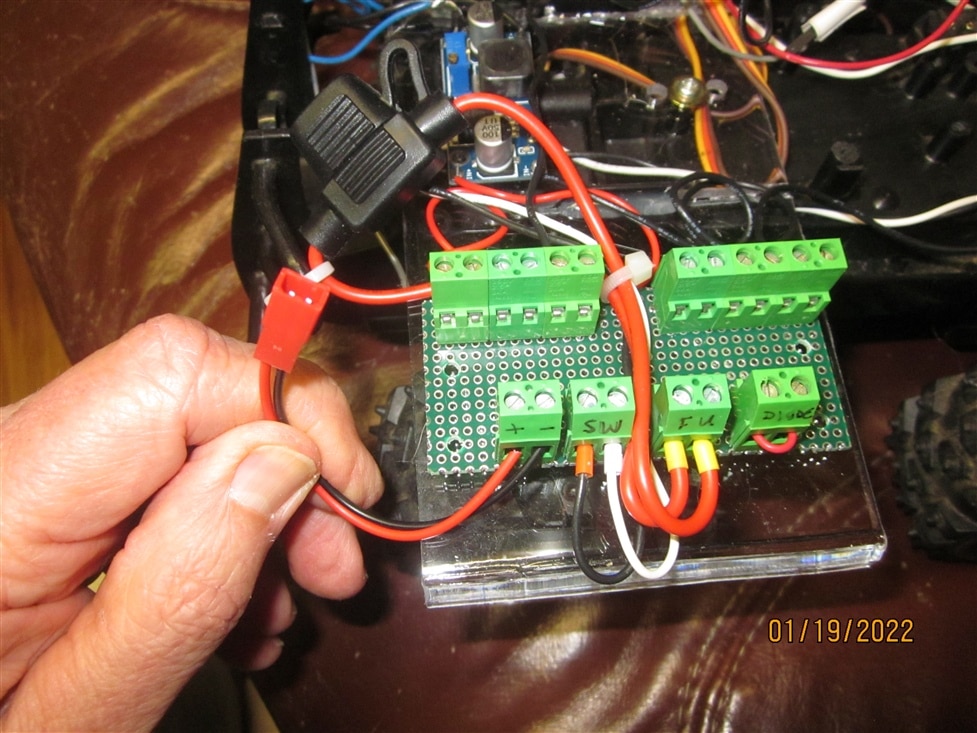
Especially battery powered projects need a central place to input a battery pigtail, a ON/OFF switch, a fuse, another generic permissive switch, or a series blocking diode before distributing its power. 

Built in advance and kept on hand , when you build a project, just pull the prebuilt interlocked power distribution board from the inventory drawer, and wire it up. It makes moving devices later so much easier too.

Here is a schematic to help clarify:  


image

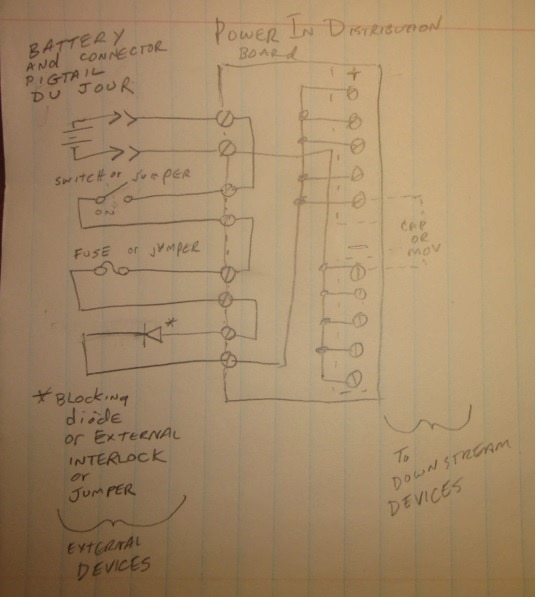
If a series device isnt needed, just install a jumper in that spot.  That device can be added later by removing the jumper.

If your design moves the on/off switch location, battery, fuses, etc. just pop out its 2 terminals and go. So E-Z ! 

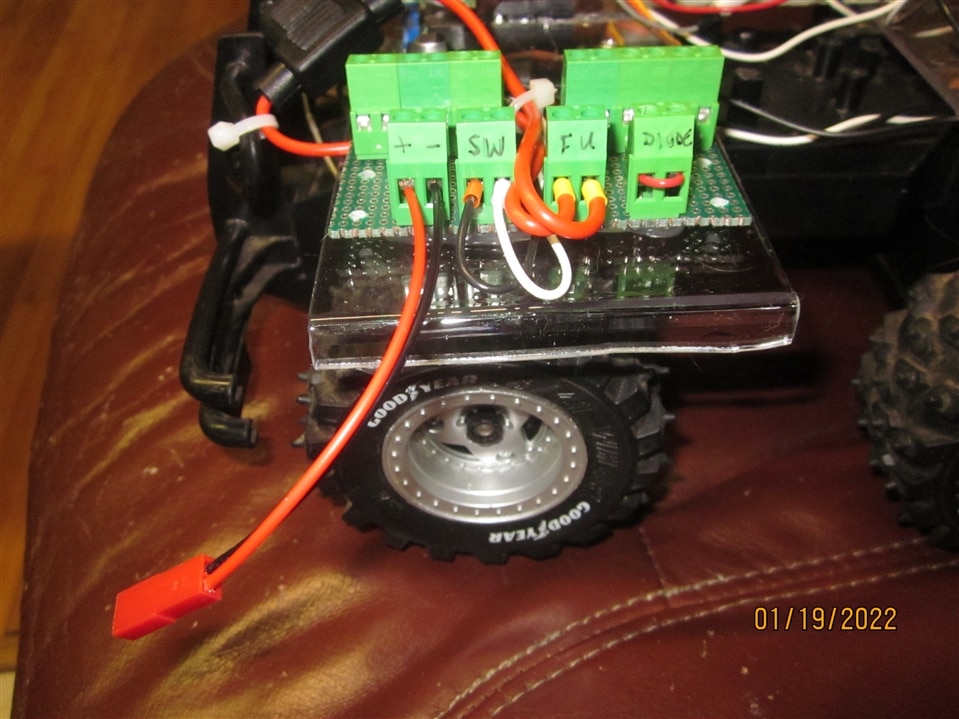
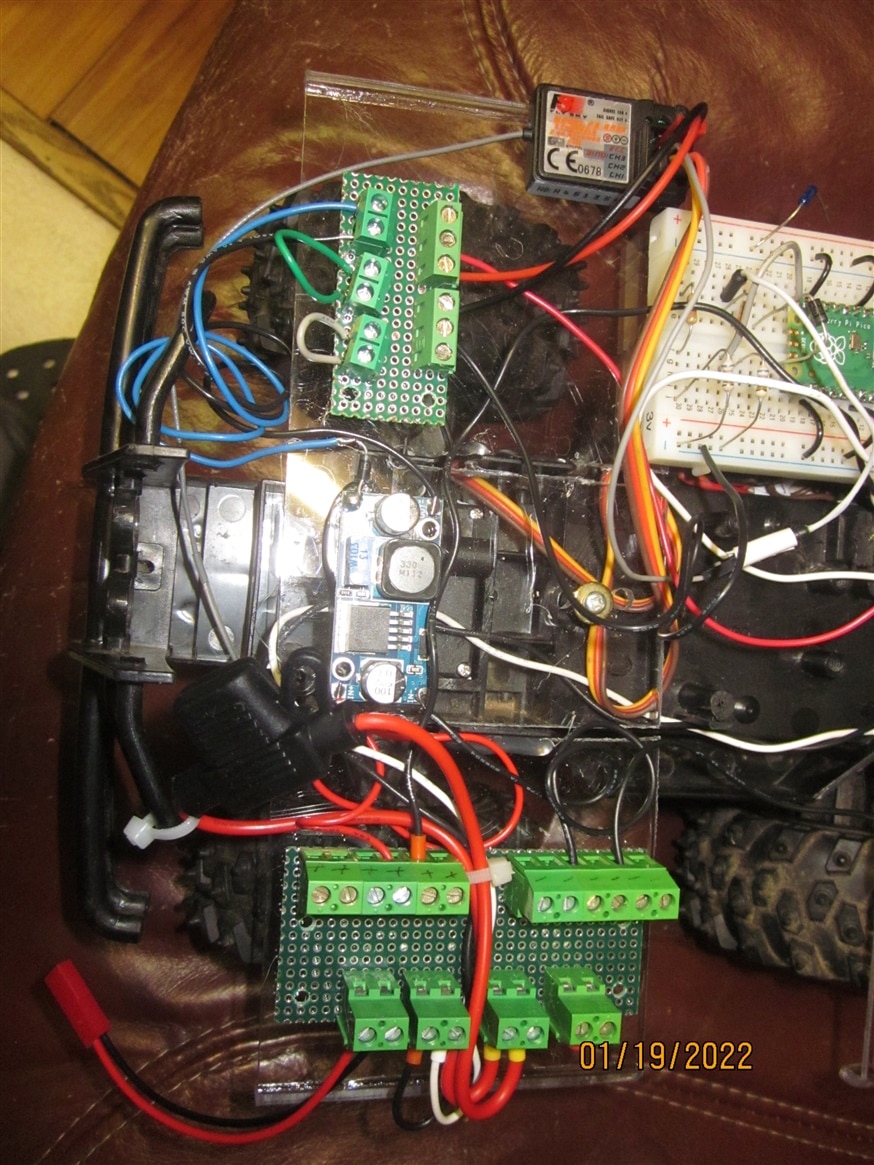
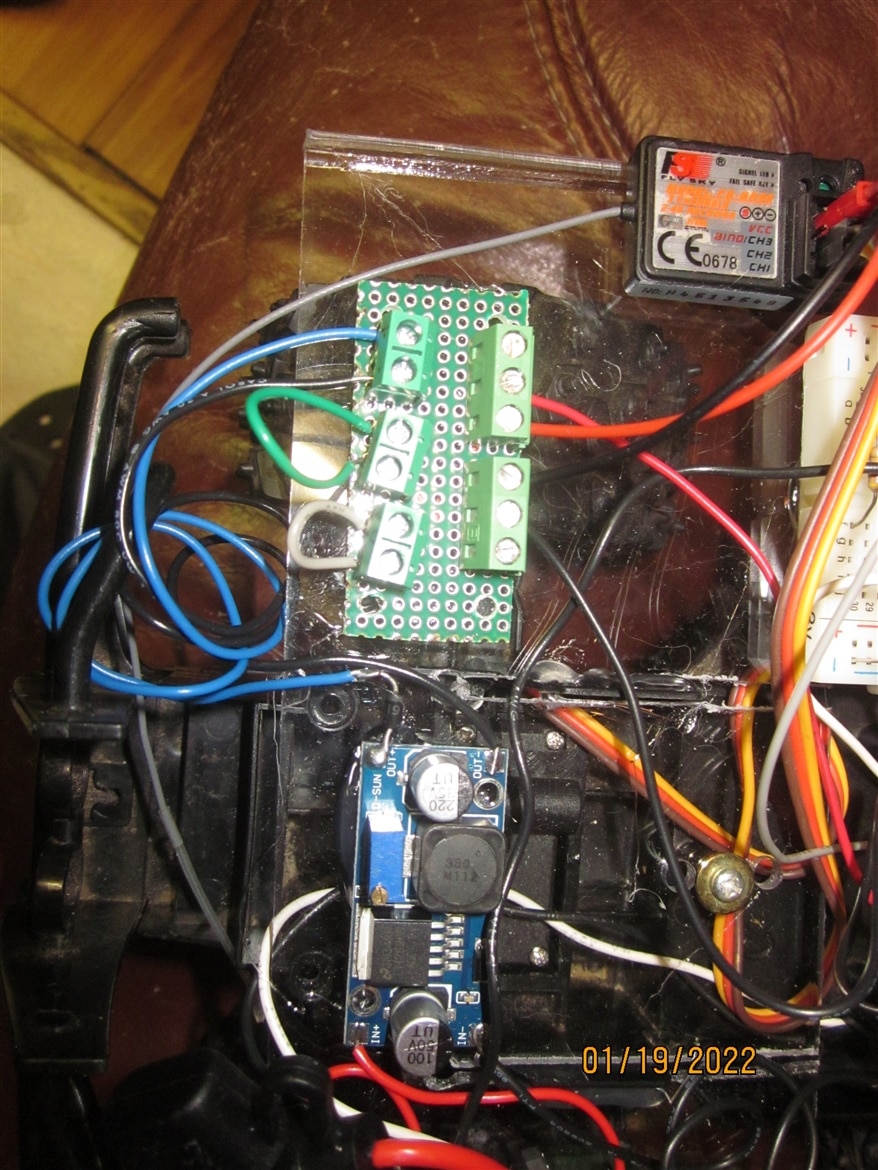
Here are some example photos of prototype projects using these Interlocked power distribution boards as well as the simple power distribution boards in the same project:

image image

image    imageimage

THANK YOU FOR READING THIS BLOG POST AND REMEMBER........If its WRONGCO, it's just gotta be right. 

  • Sign in to reply
element14 Community

element14 is the first online community specifically for engineers. Connect with your peers and get expert answers to your questions.

  • Members
  • Learn
  • Technologies
  • Challenges & Projects
  • Products
  • Store
  • About Us
  • Feedback & Support
  • FAQs
  • Terms of Use
  • Privacy Policy
  • Legal and Copyright Notices
  • Sitemap
  • Cookies

An Avnet Company © 2025 Premier Farnell Limited. All Rights Reserved.

Premier Farnell Ltd, registered in England and Wales (no 00876412), registered office: Farnell House, Forge Lane, Leeds LS12 2NE.

ICP 备案号 10220084.

Follow element14

  • X
  • Facebook
  • linkedin
  • YouTube