


 | Enter Your Electronics & Design Project for a chance to win a $200 shopping cart! Back to homepage | Project14 Home |
| Monthly Themes | ||
| Monthly Theme Poll |

Introduction
This project aims to create a yogurt maker in order to produce a delicious yogurt at home.
Obviously, I will devote myself to the construction of the temperature controller. The purpose of this work is to create a circuit that produces a constant temperature of 42 degrees centigrade.
I will use 10W resistors to generate the heat needed to heat an aluminum cooling fin and an NTC to measure the temperature.
The aim of this project is to have a temperature as constant as possible and we will use various methods to obtain it. The main components of this project are the NTC sensor, the heating element, and the control board.
The sensor: NTC
When we want to measure temperature in a "common" range, that is around ten degrees centigrade, the most convenient and simple solution, also taking into account the temperatures we are dealing with, is certainly to use a temperature and humidity sensor such as DHT11 or DHT22 which provide precise values without the need for additional calibrations and circuits. We will use an NTC in this project due to its very small size (we will insert the NTC resistor inside the heatsink) and ease of use.

The NTC resistor is a passive electronic component that varies its resistance according to the temperature in which it is found. It is a sensor which, as the temperature increases, decreases its resistance and vice versa.
To be able to use it we will have to create a simple voltage divider and read the analog value obtained in the internal node through the analog input A0 of the Arduino Mega. Since the link between the temperature and the resistance of the NTC does not follow a linear law, it will be the task of the control board to calculate the temperature by calculating it thanks to the Steinhart-Hart equation, a non-linear equation that can be well calculated using an Arduino Mega.
Arduino Schematics and Code
The circuit diagram is very simple. We will only have to connect the resistive divider with the NTC sensor and the relay to the Arduino Mega and supply current to the control board via the USB cable.
int ThermistorPin = 0;
int OutPin = 3;
int Vo;
float R1 = 10000;
float MaxTemp = 42;
float logR2, R2, T;
float c1 = 1.009249522e-03, c2 = 2.378405444e-04, c3 = 2.019202697e-07;


void setup() {
  Serial.begin(9600);
  pinMode(3, OUTPUT);
}


void loop() {
  Vo = analogRead(ThermistorPin);
  R2 = R1 * (1023.0 / (float)Vo - 1.0);
  logR2 = log(R2);
  T = (1.0 / (c1 + c2*logR2 + c3*logR2*logR2*logR2));   //Steinhart-Hart equation
  T = T - 273.15;
  Serial.println(T);
  if (T <= MaxTemp) {
      digitalWrite(OutPin, 1);
  } else{
      digitalWrite(OutPin, 0);
    }
 delay(1000);
}

The heating element
As a test, I will use the CPU cooler from an old PC and use a series of current-carrying power resistors to heat this cooler. It has a large mass of aluminum and it will therefore be necessary to apply voltage to the resistances for several minutes to raise the temperature.
In this case, we will not use any driver and our control will simply consist of powering the resistors until the temperature reaches the desired value and then stop the current flow. When the heatsink temperature drops below the desired value, the resistive load will be powered again, heating the heatsink again. When fully operational, we expect the temperature on the heatsink to remain around the chosen temperature value.

ON-OFF control
The first solution that you can think of, and also the simplest is to use an ON-OFF control to heat the heatsink up to 42 degrees. The temperature sensor made by an NTC will be used to obtain the temperature instant by instant and, when the measured temperature exceeds 42 degrees centigrade, the power supply of the heating element will be turned off. When the temperature drops below 42 degrees, the power will be turned on again in order to bring the temperature back to the desired value. This is a simple example of a classic ON-OFF control that is made with great ease even if it has not very performing characteristics.
The circuit that creates this configuration is very simple: a simple relay will allow the heating element to be connected to the supply voltage, opening and closing the circuit to ensure a constant temperature.
It will be the Arduino Mega, once it detects a temperature above 42 degrees, to manage the power supply of the power resistors.
Construction
The construction of the heating and measurement unit was done in a rather rough way as I had to use (or rather recycle, as our friend Enrico Miglino taught us in his 3 webinars Vintage Upcycling with Raspberry Pi and Arduino: Part 1: Pi Rotary ) material that I had at home. The work was a lot of fun and, often, I felt almost as brilliant as Wile E. Coyote.
| {gallery} The construction |
|---|
|
|
|
|
|


From the photos, you can see the solutions that I tried to re-scale the prototype. Obviously, the yogurt maker will be the last step to take, for now, I would like to obtain a system that, powered at 12V, will provide me with temperature as constant as possible.
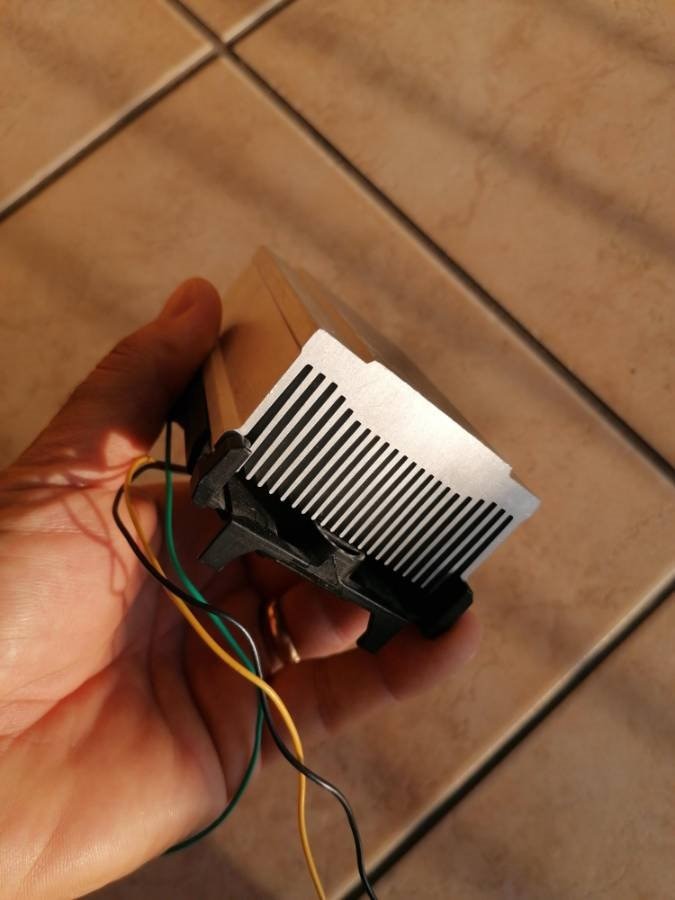
As support I used a heatsink from an old PC of mine, it still mounts its fan but, for this first test I will not use it, I will keep it in consideration for a second time when I might want to minimize the overshoot of the temperature compared to the desired value.
I fixed 8 resistors having a value of 18 Ohm and 11W on the heatsink and I fed them to 12V to obtain a heating element with a large surface and with a fixed heating profile. The resistors are tightened to the heatsink by 3 tight iron wires and the heat conduction is optimized using a silicone thermal grease.
The sensor (NTC) is very small and has been inserted by pressure between two blades of the heatsink after having insulated the leads with heat-shrink tubing.
As soon as the heating elements are connected to the 12V power supply, the heat generated by the Joule effect will heat the heatsink in a few minutes, bringing it to the desired temperature.
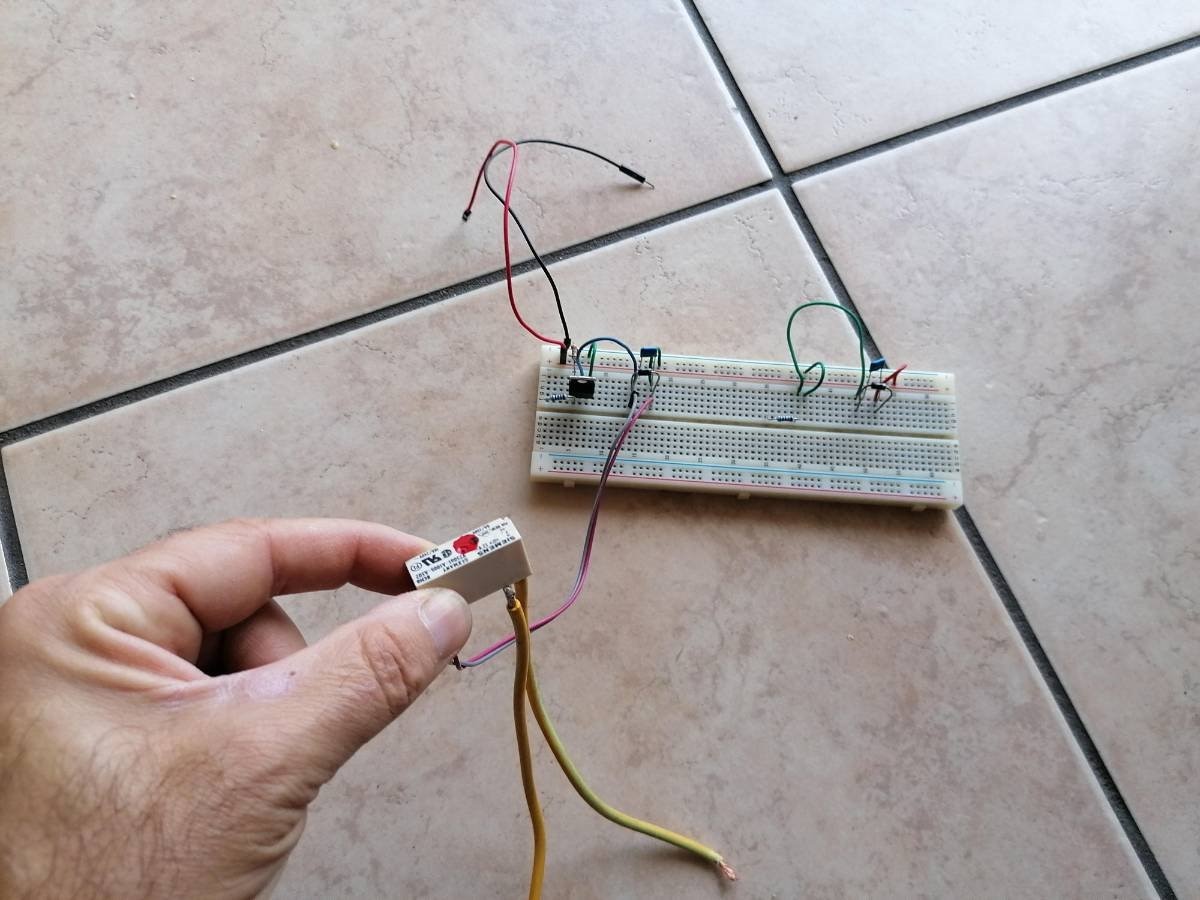
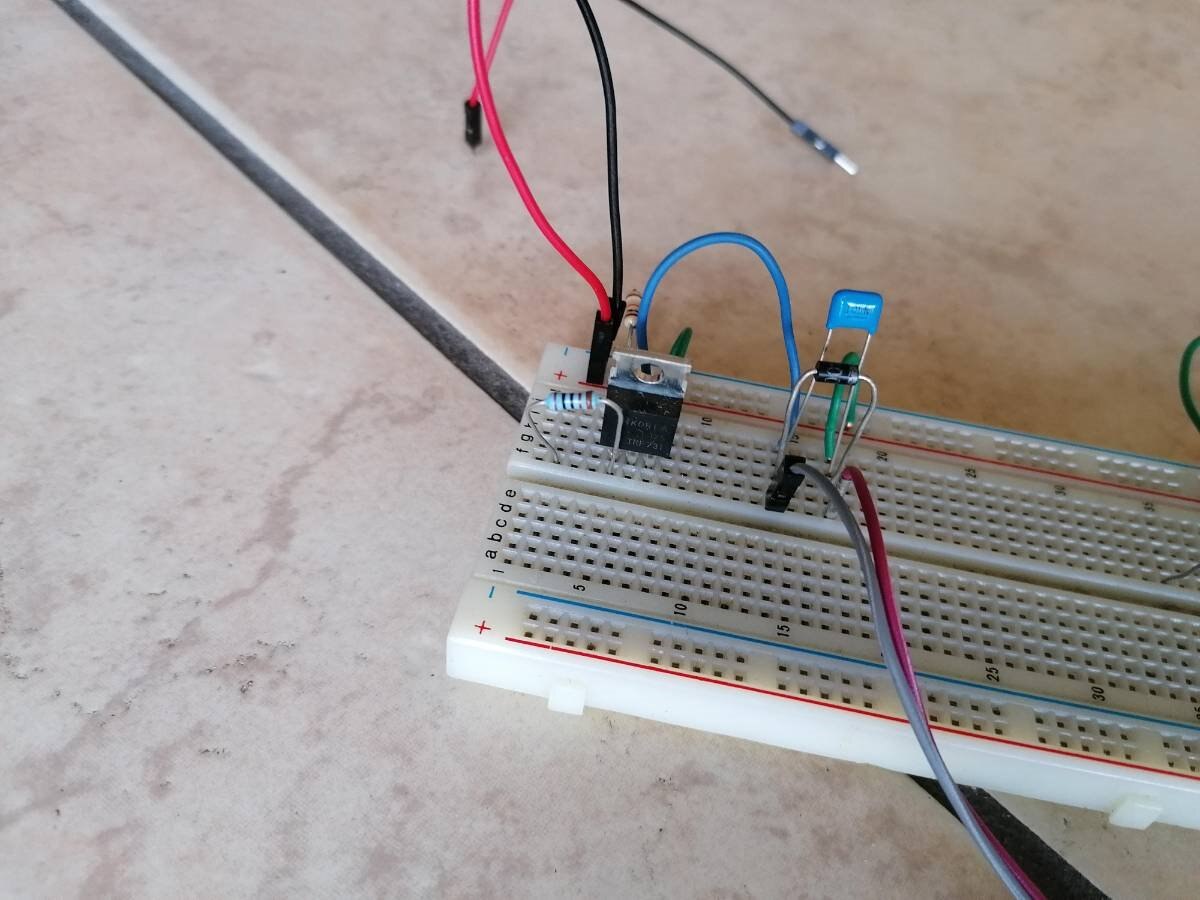
The voltage at the resistances is controlled by a relay which will let the current flow until the desired temperature is reached.
The relay will be driven by a MOSFET with a classic driver circuit.

| {gallery} Let's Start |
|---|
|
|
|

The temperature value will be sent from Arduino Mega to the serial port and, thanks to the use of the Putty software, it will be saved in a text file and subsequently displayed and graphed with a spreadsheet.
2215 readings were made, equal to about 36 consecutive minutes. In the ordinate axis, we will find the temperature in degrees Centigrade.

You can see how the control works quite well even with this very simple control scheme.
In the beginning, the temperature rises exceed the desired threshold and continue with a considerable overshoot, after which oscillations of less and less amplitude begin around the desired temperature.
Obviously, in this case, we are realizing the control of an intrinsically slow physical quantity such as temperature. The same control scheme would have much worse behavior in the case of physical phenomena with faster dynamics. We, therefore, have an answer similar to that of a second-order system like the one in the figure.

It would have been didactically useful to see now an example of proportional control in order to reduce or completely eliminate the overshoot, you could use the classic system of feedback as in the figure and use the Arduino to calculate, at each iteration, the error (the difference between the output of the system, i.e. the measured temperature, and the desired one) and based on the error, perform a correction of the heat generated by the heating element ...


...but school has started and my time is short, too short.
I hope to soon realize the second part of this work.
Thanks everyone for your attention.
Top Comments