


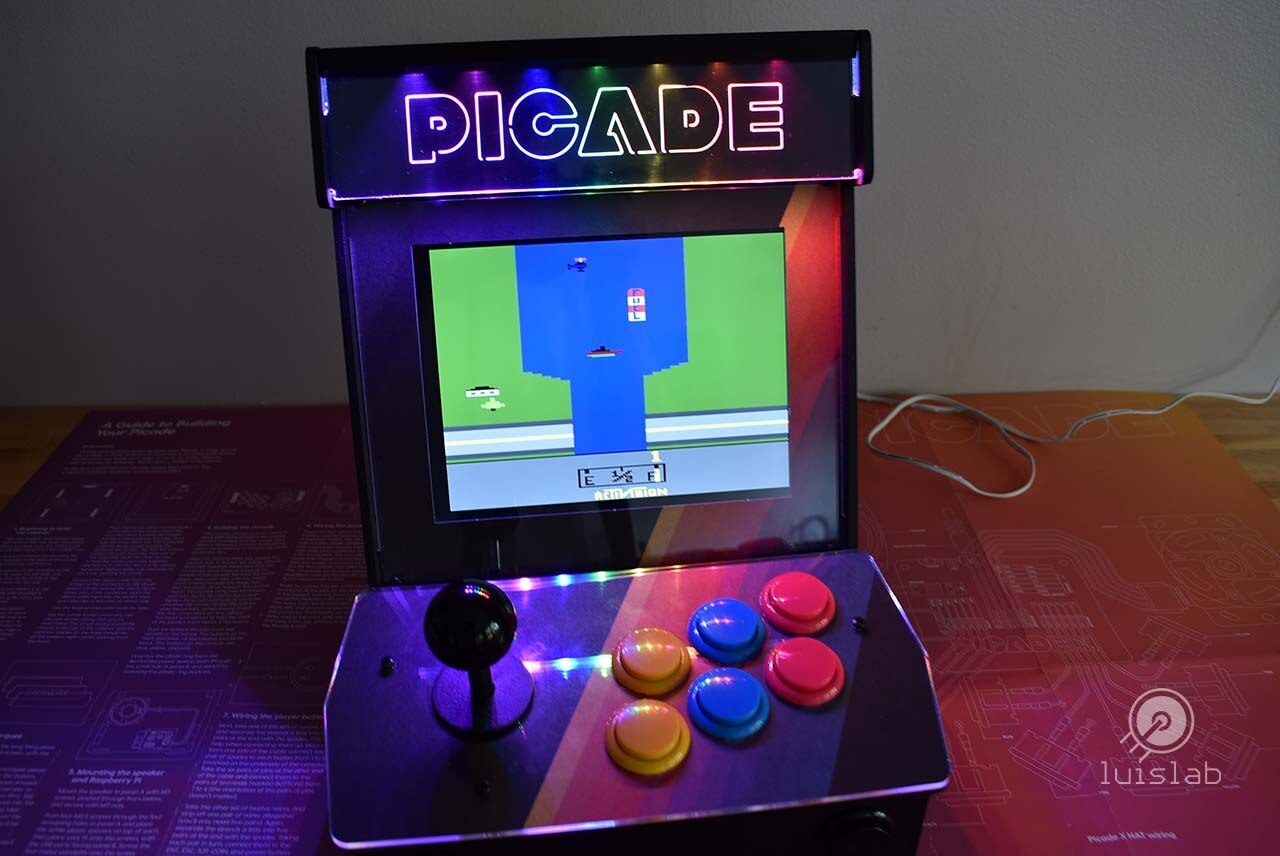
Not long ago, I got a Picade: a retro arcade machine built around a Raspberry Pi. Few seconds after appreciating the marquee, I saw an opportunity to improve the looks of it using Individually Addressable LEDs, so an LED edge lit marquee was born.
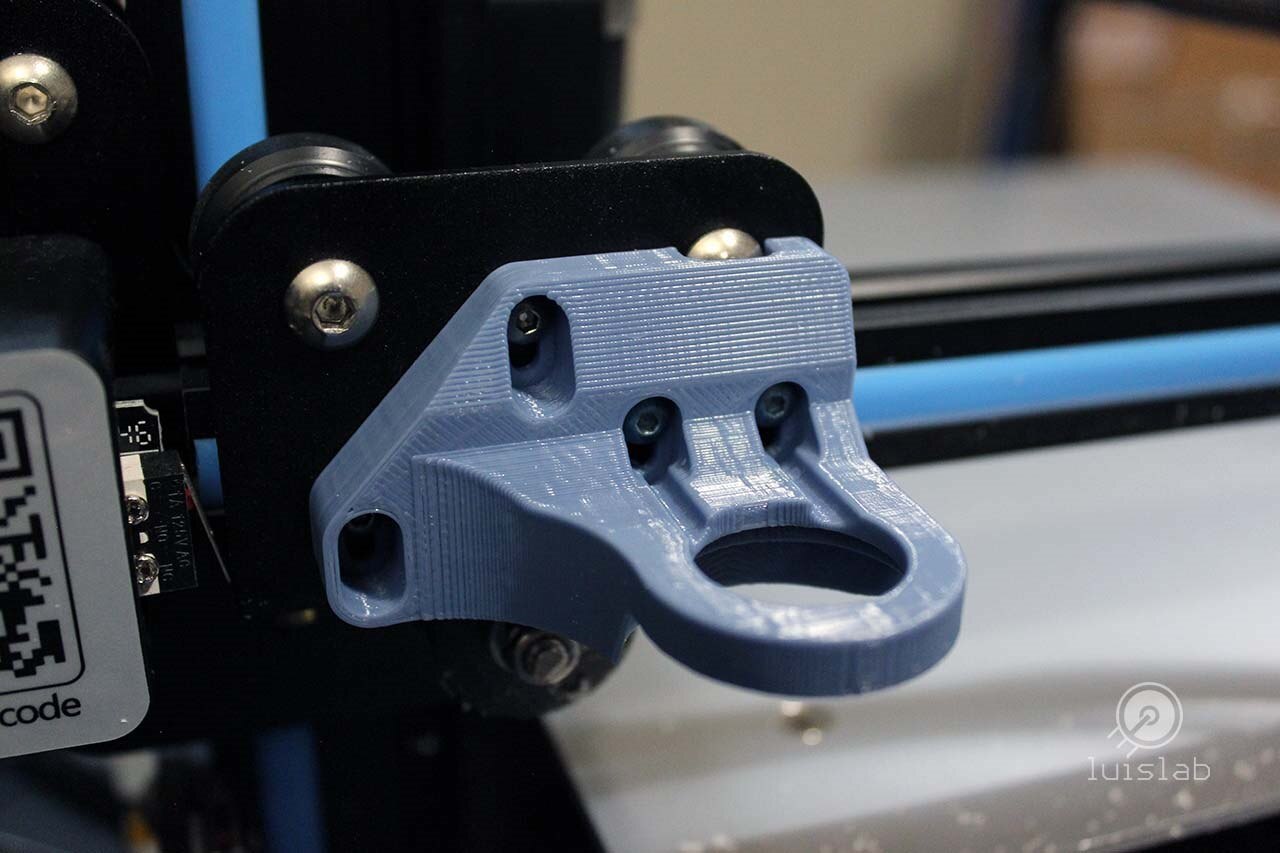
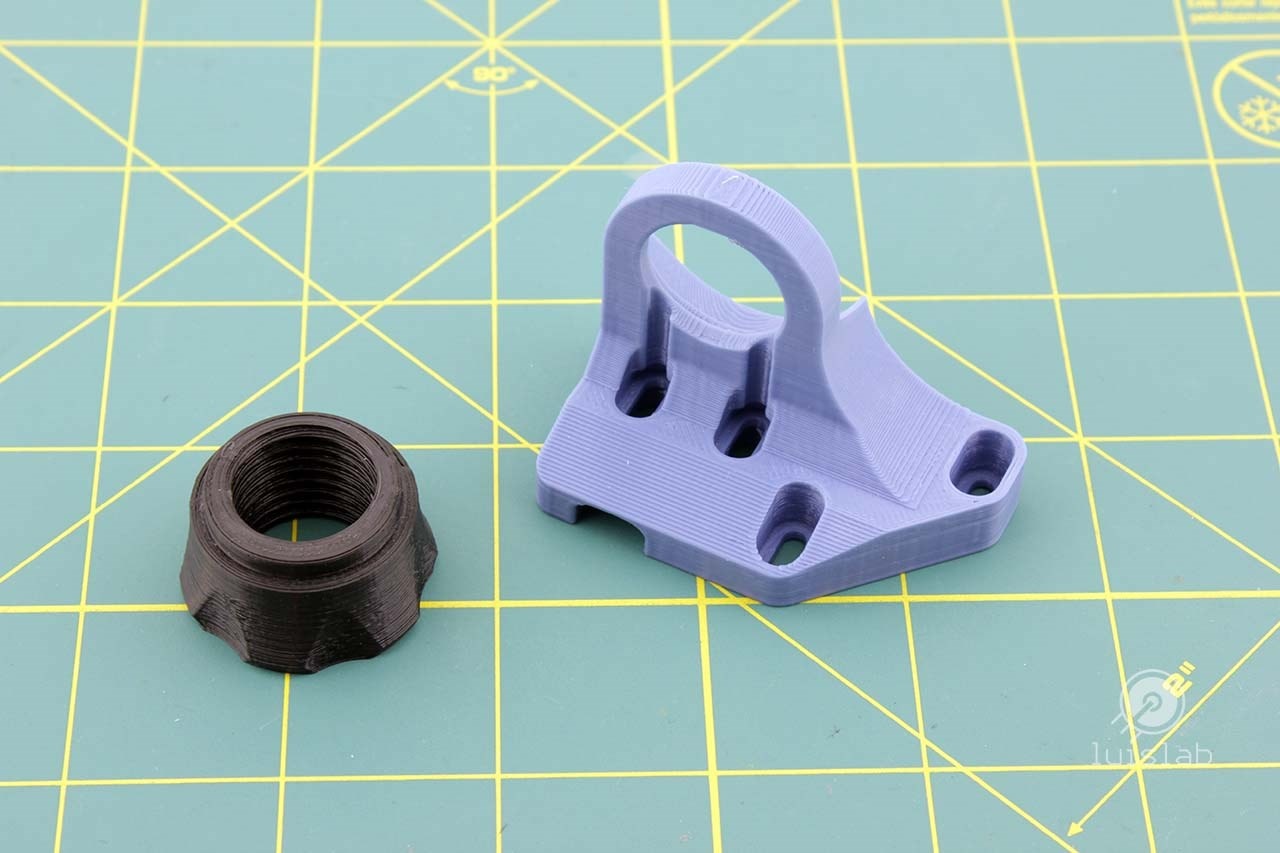
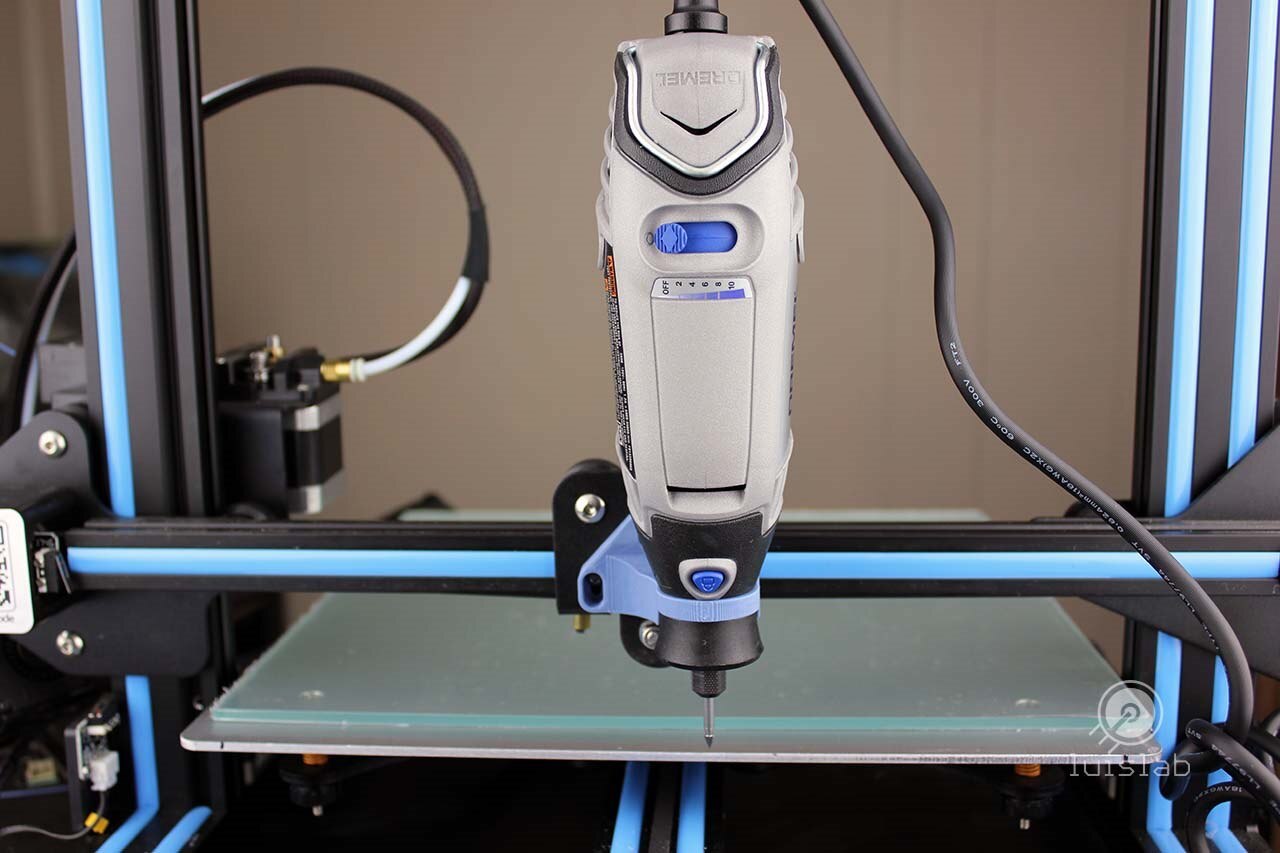
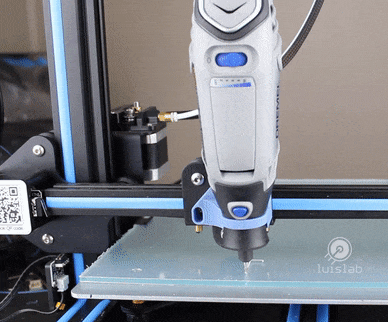
Since I don't have easy/cheap access to a laser engraver (or CNC mill/router) I ended up with an extra challenge, designing a mount for my Creality CR-10S 3D printer to fit a Dremel Rotary tool which to my surprise, worked very well!.
| {gallery:width=960,height=768,autoplay=false} Dremel Mount for Creality CR-10S |
|---|
|
Dremel Mount: Dremel Mount for Creality CR-10S |
|
Dremel Mount: Dremel Mount for Creality CR-10S |
|
Dremel Mount: Dremel Mount for Creality CR-10S |
|
Dremel Mount: Dremel Mount for Creality CR-10S |
|
Dremel Mount: Dremel Mount for Creality CR-10S |


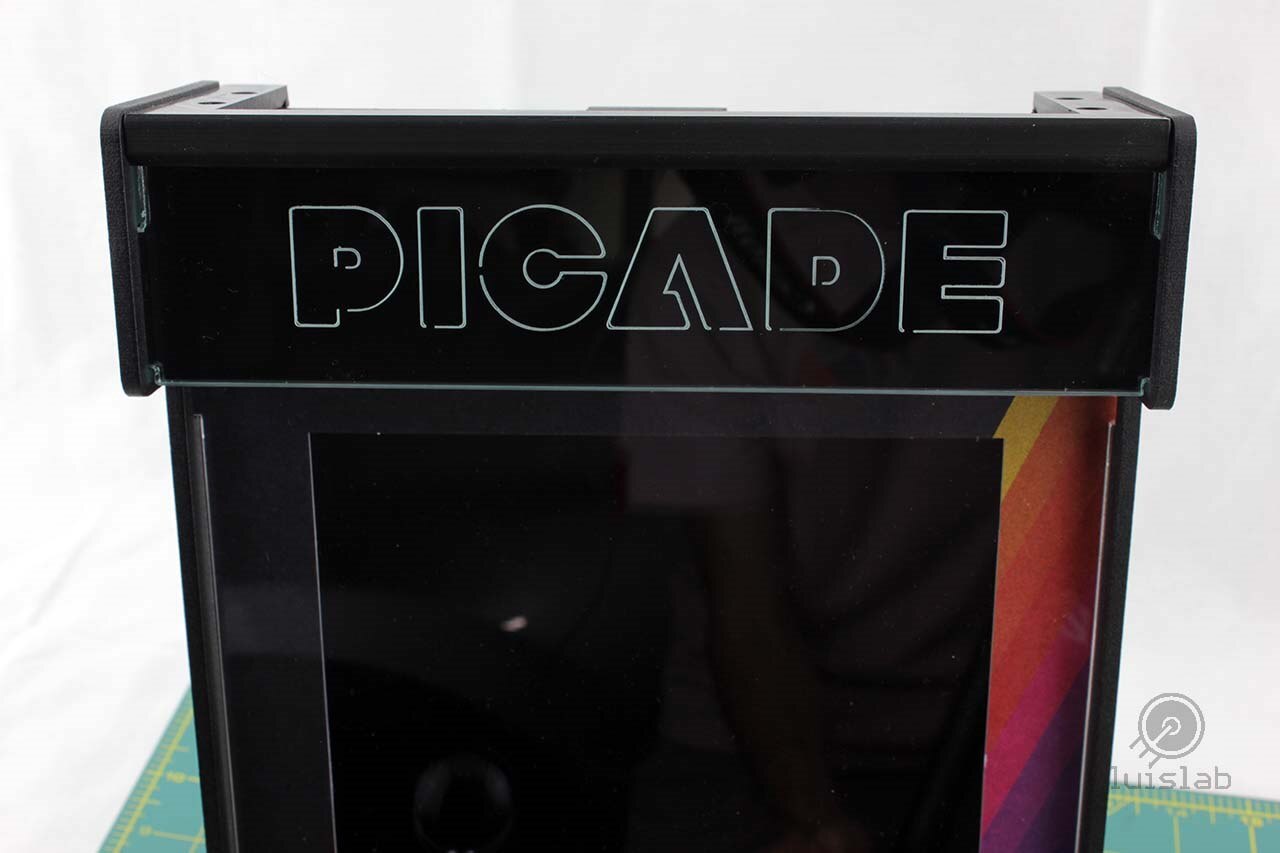
Engraving the PICADE Logo
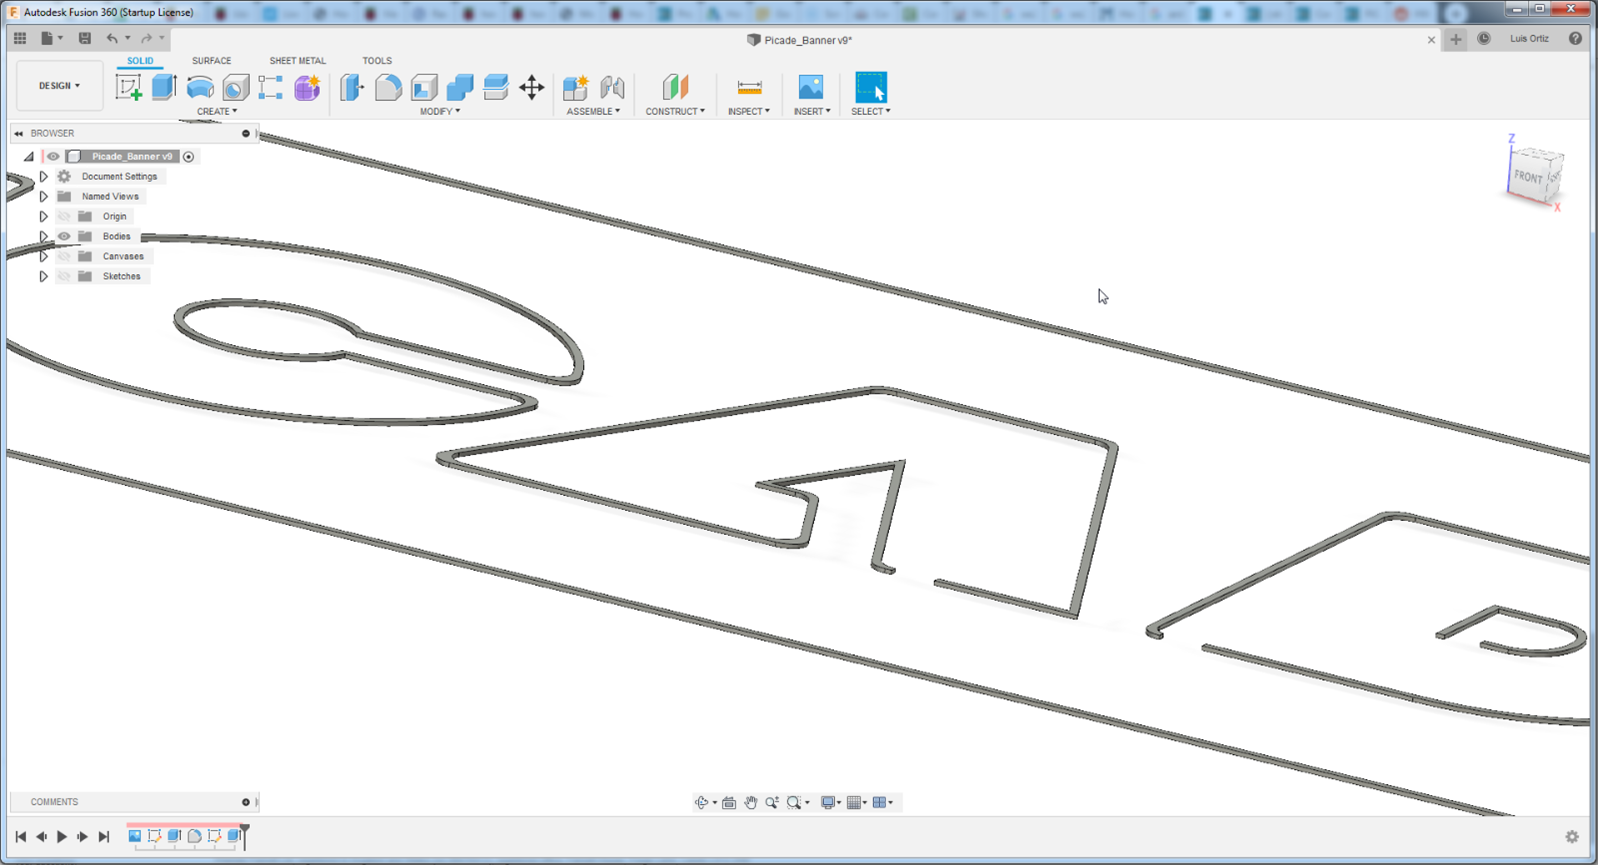
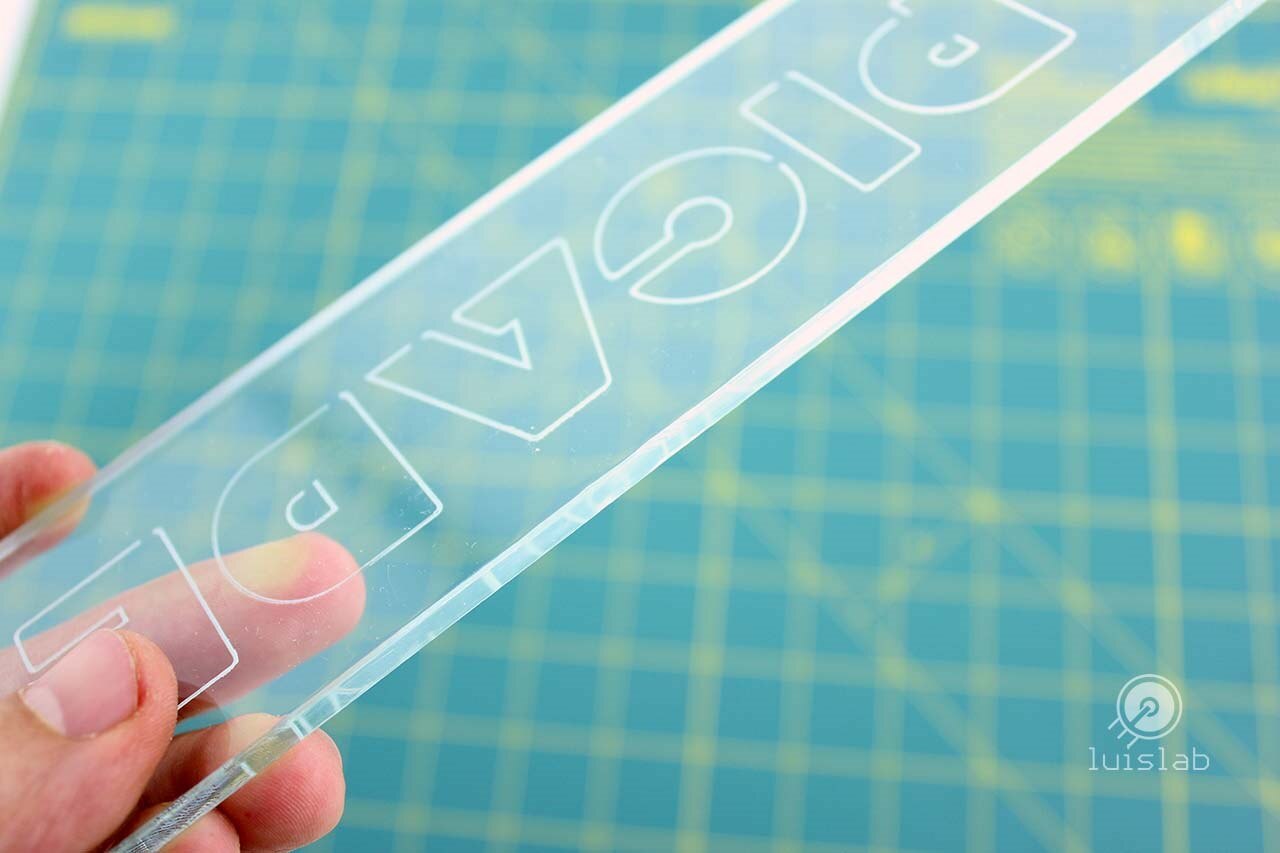
I designed the Picade logo in Fusion 360 with just a trace of material 0.2mm tall -equivalent to the layer height of my 3-D print settings- and the same width as the nozzle diameter, this generated perfect results and thanks to this approach I didn't have to to use a different firmware and/or software on my 3D printer to use it as an engraver.
| {gallery:width=960,height=768,autoplay=false} Engraving with Creality CR-10S |
|---|
|
Picade Logo: Picade Logo in Fusion 360 |
|
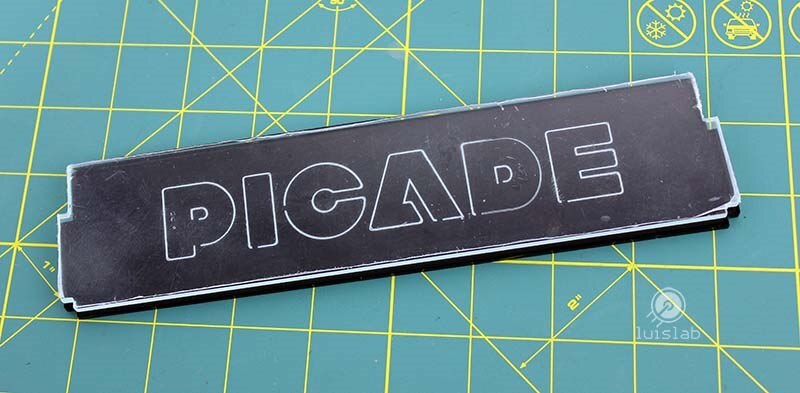
Picade Marquee: Picade Marquee on 4.5mm Acrylic |
|
Picade Marquee: Picade Marquee on 4.5mm Acrylic |
Electronics
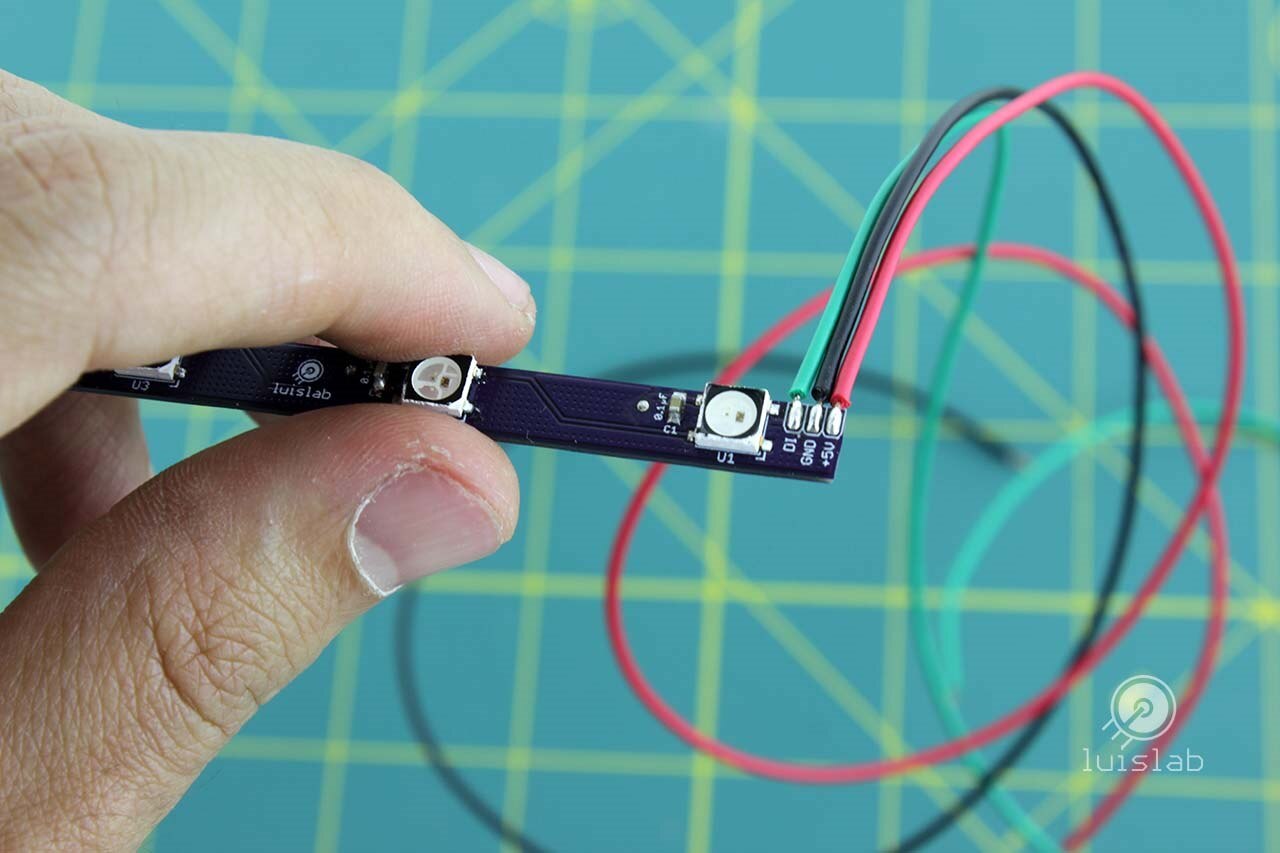
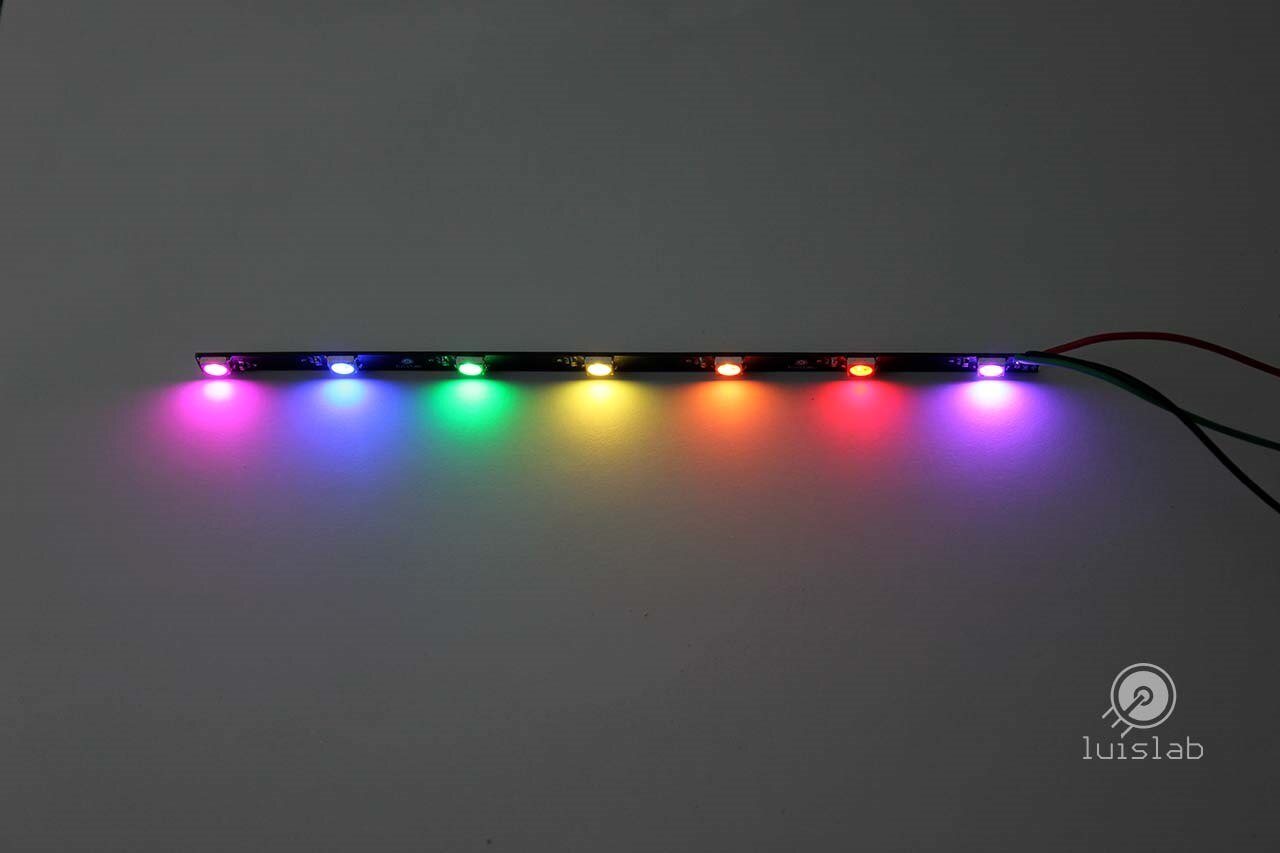
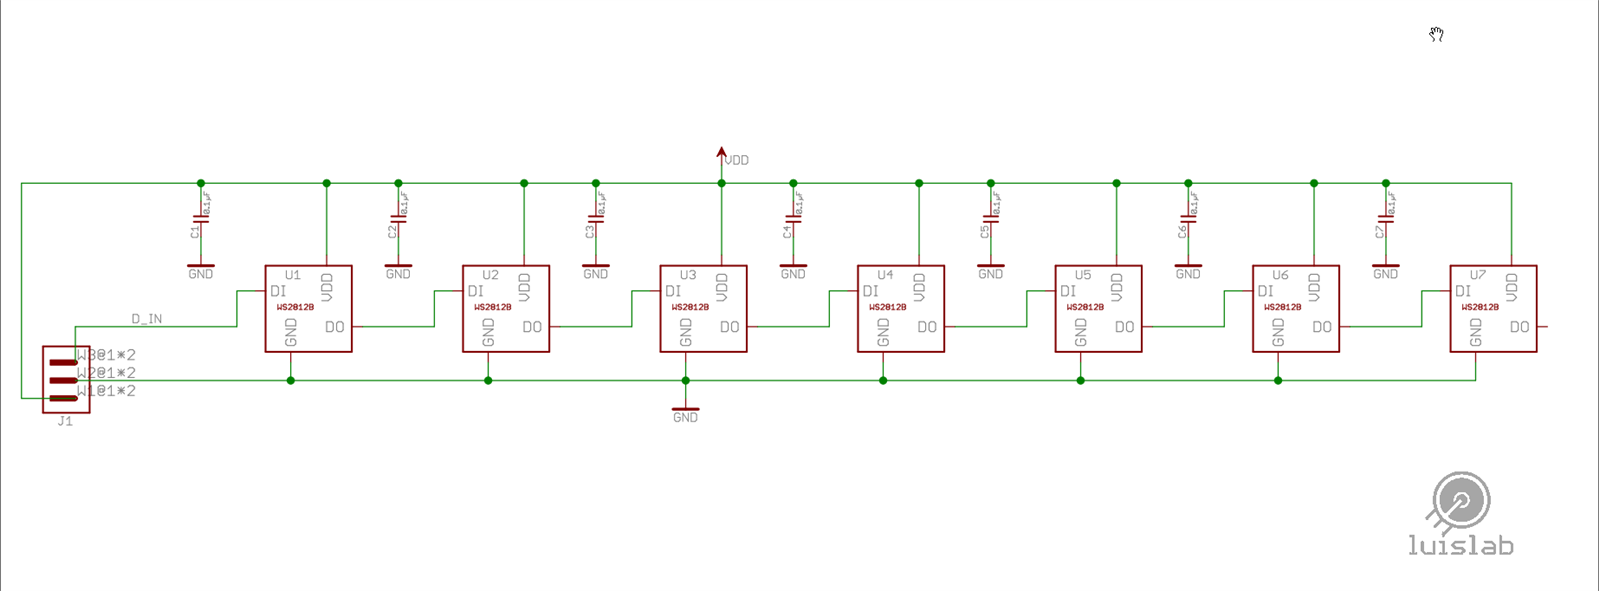
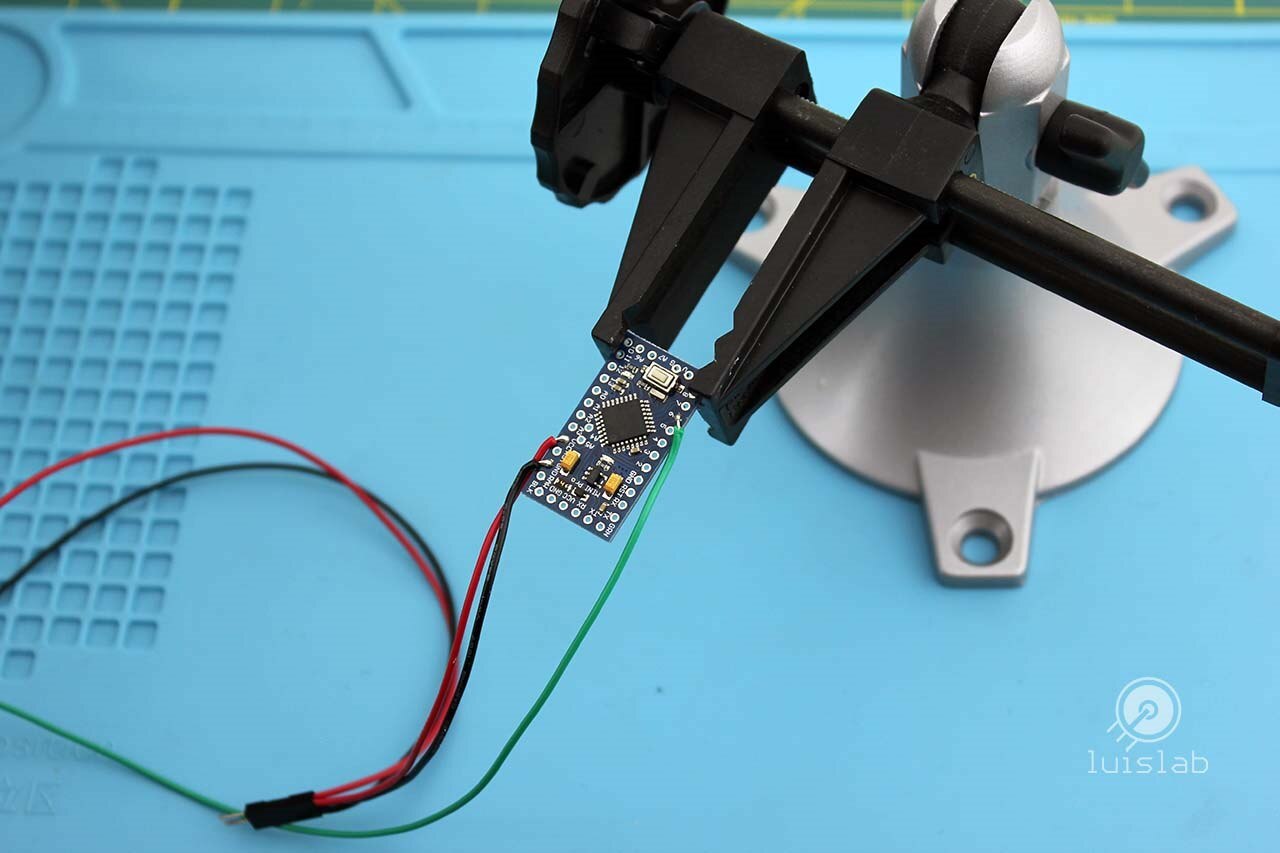
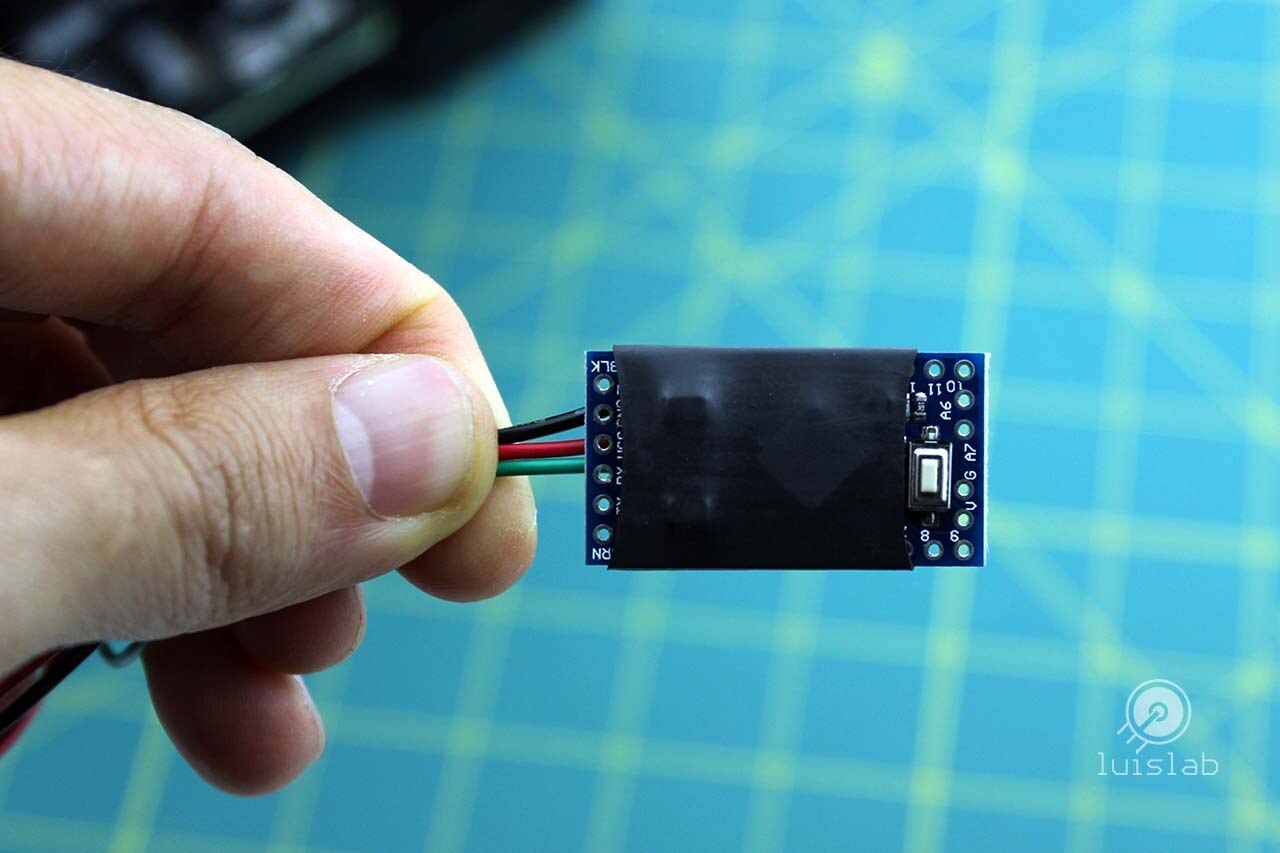
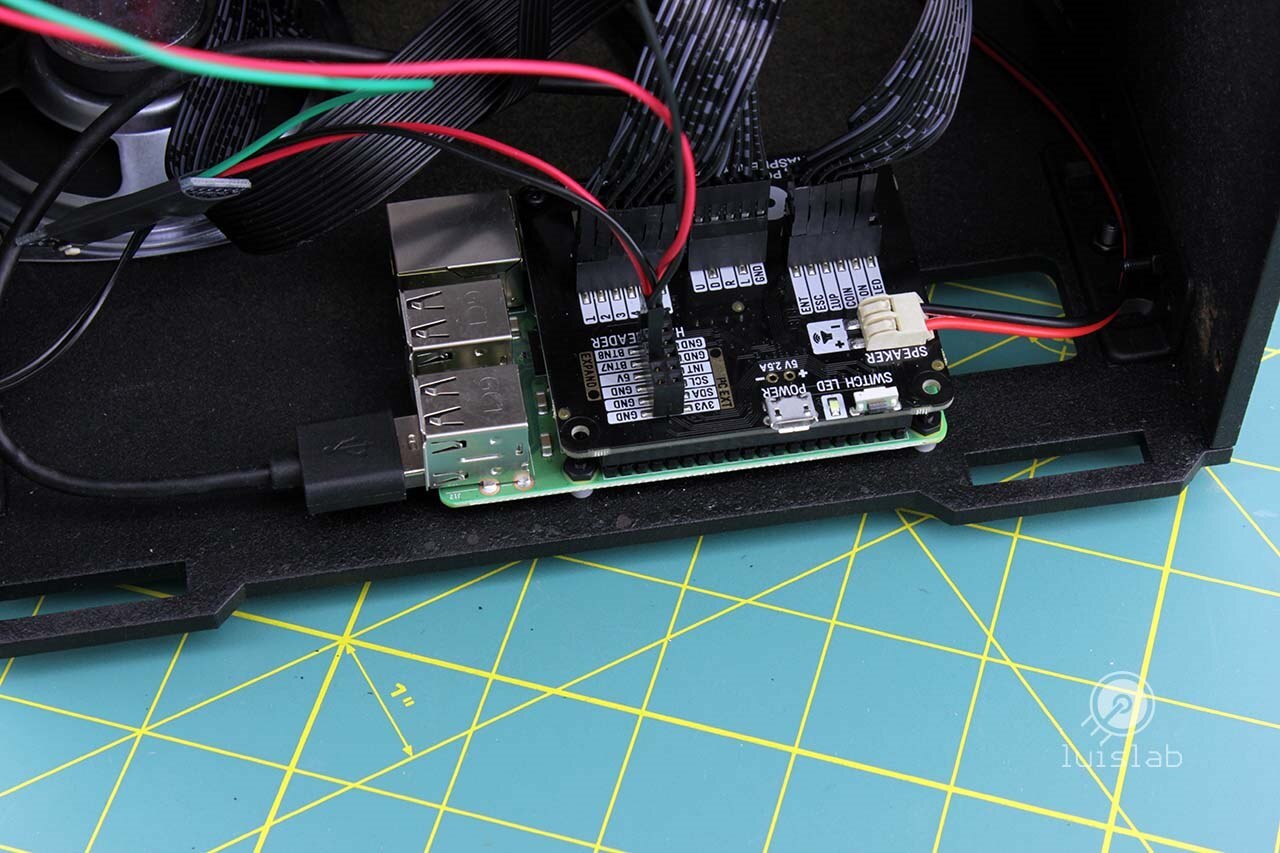
The electronics for the project are very simple. A custom made PCB with 7 individually addressable RGB LEDs (WS2812B) connected to an Arduino Pro Mini - 5V that will control all the light effects (Digital Pin 6). Everything is then connected to the 5V and GND pins of the Picade's Hack Header.
| {gallery:width=960,height=768,autoplay=false} Picade Edge Lit Marque - Electronics |
|---|
|
Picade Edge Lit Marquee: Custom made PCB |
|
Picade Edge Lit Marquee: Electronics assembly |
|
Picade Edge Lit Marquee: Testing the electronics |
|
Picade Edge Lit Marquee: PCB Eaglecad |
|
Picade Edge Lit Marquee: RGB lights schematic |
|
Picade Edge Lit Marquee: Arduino Pro Mini - 5V |
|
Picade Edge Lit Marquee: Arduino Pro mini - 5V |
|
Picade Edge Lit Marquee: Connecting the lights to the Picade's Hack Header |


Arduino Code
I made various effects that can be tweaked changing the values of some variables. The most important part of the sketch is the RGB array which will define the different colors that will be displayed during all the effects; I decided to start with the classic rainbow colors.
// Luis Ortiz - luislab.com
// September 14, 2019
// Light effects for the Picade's Edge Lit Marquee


#include <Adafruit_NeoPixel.h>


#define LED_PIN           6 //Digital pin for WS2812B Data In
#define LED_COUNT         7 //Number of LEDs in the strip
#define MAX_TRANSITIONS  35 //Max number of transitions
#define LED_BRIGHTNESS  255 //Max brightness for all the effects


Adafruit_NeoPixel strip(LED_COUNT, LED_PIN, NEO_GRB + NEO_KHZ800);


byte rgb[LED_COUNT][3] = {
  {0xFF, 0x00, 0x00},
  {0xFF, 0x1F, 0x00},
  {0xF7, 0x82, 0x00},
  {0x00, 0x80, 0x00},
  {0x00, 0x00, 0xFF},
  {0xFF, 0x00, 0x62},
  {0x8F, 0x00, 0xFF}
};


void staticRainbow (byte firstLED = 0) {
  byte i = 0;
  for (i=0; i<LED_COUNT; i++)
    strip.setPixelColor((firstLED + i) % LED_COUNT, rgb[i][0], rgb[i][1], rgb[i][2], LED_BRIGHTNESS);
  strip.show();
}


void setup() {
  strip.begin();
  strip.show(); // Initialize all pixels to 'off'
  randomSeed(analogRead(0));


  for (byte i=0; i<10; i++) { // Turn ON/OFF randomly a few times
    staticRainbow(0);
    delay(random(1,50));
    strip.fill(0, 0, 0);
    strip.show();
    delay(random(1,400));
  }
}


void oneAtATime(byte index = 0) {
  for (byte i=0; i<LED_COUNT; i++)
    strip.setPixelColor(i, 0x00, 0x00, 0x00, LED_BRIGHTNESS);
  strip.setPixelColor(index, rgb[index][0], rgb[index][1], rgb[index][2]);
  strip.show();
}


void buildUp() {
  byte i = 0;
  byte j = 0;


  strip.fill(0, 0, 0);
  strip.show();
  for (i=0; i<LED_COUNT; i++)
    for (j=0; j<LED_COUNT-i; j++) {
      strip.setPixelColor(j, rgb[i][0], rgb[i][1], rgb[i][2], LED_BRIGHTNESS);
      if ( j >= 1)
        strip.setPixelColor(j-1, 0x00, 0x00, 0x00, LED_BRIGHTNESS);
      strip.show();
      delay(250);
    }
}


void fade(byte index = 0, byte fadeInOut = 1) { //0 = Fade In, 1 = Fade Out
  float rRatio;
  float gRatio;
  float bRatio;


  for (int i=0; i<=LED_BRIGHTNESS; i++) {
    for (byte j=0; j<LED_COUNT; j++) {
      rRatio = rgb[j][0] * abs((LED_BRIGHTNESS * fadeInOut - i)) / LED_BRIGHTNESS;
      gRatio = rgb[j][1] * abs((LED_BRIGHTNESS * fadeInOut - i)) / LED_BRIGHTNESS;
      bRatio = rgb[j][2] * abs((LED_BRIGHTNESS * fadeInOut - i)) / LED_BRIGHTNESS;
      strip.setPixelColor((j + index) % LED_COUNT, floor(rRatio), floor(gRatio), floor(bRatio), LED_BRIGHTNESS);
    }
    strip.show();
    delay(10);
  }
}


void softTransition (byte index = 1, byte transitionNo = 0, byte maxTransitions = 5) {
  int newR;
  int newG;
  int newB;


  byte nIndex;
  byte cIndex;

  ++transitionNo;


  for (byte i = 0; i<LED_COUNT; i++) {
    cIndex = (index + i) % LED_COUNT;
    nIndex = (cIndex + 1) % LED_COUNT;

    newR = rgb[cIndex][0] + ((rgb[nIndex][0] - rgb[cIndex][0]) * transitionNo / maxTransitions) ;
    newG = rgb[cIndex][1] + ((rgb[nIndex][1] - rgb[cIndex][1]) * transitionNo / maxTransitions) ;
    newB = rgb[cIndex][2] + ((rgb[nIndex][2] - rgb[cIndex][2]) * transitionNo / maxTransitions) ;


    strip.setPixelColor(i, newR, newG, newB, LED_BRIGHTNESS);

  }

  strip.show();
}


void switchColors (byte firstLED = 0) {


  for (byte i =0; i<LED_COUNT; i++)
    strip.setPixelColor((i + firstLED) % LED_COUNT, rgb[i][0], rgb[i][1], rgb[i][2], LED_BRIGHTNESS);
  strip.show();
}


void loop() {
  strip.fill(0, 0, 0);
  strip.show();

  byte i=0;


  // Fade In
  fade(0, 0);
  delay(500);


  // Color switch
  for (i=0; i<100; i++) {
    switchColors(i);
    delay(225 - i*2);
  }
  delay(500);


  // Fade Out
  fade(i - 1, 1);
  delay(250);


  // Soft rainbow transition
  byte trnNo   = 0; // Transition index number
  byte nextLED = 0;


  fade(LED_COUNT - 1, 0);  // Fade In
  delay(500);


  for (int z=0; z<(MAX_TRANSITIONS*LED_COUNT)*5; z++) {
    if (trnNo == 0)
      nextLED = ++nextLED % LED_COUNT;
    softTransition(nextLED, trnNo, MAX_TRANSITIONS);
    delay(20);

    trnNo = ++trnNo % MAX_TRANSITIONS;
  }


  // Fade Out
  fade(LED_COUNT - 1, 1);
  delay(500);


  // One-at-a-time on each direction
  for (i=0; i<LED_COUNT; i++) {
    oneAtATime(i);
    delay(250);
  }

  for (i=1; i<=LED_COUNT; i++) {
    oneAtATime(LED_COUNT-i);
    delay(250);
  }
  delay(500);


  //Build up
  buildUp();
  delay(2000);


  strip.fill(0, 0, 0);
  strip.show();
  delay(500);
}
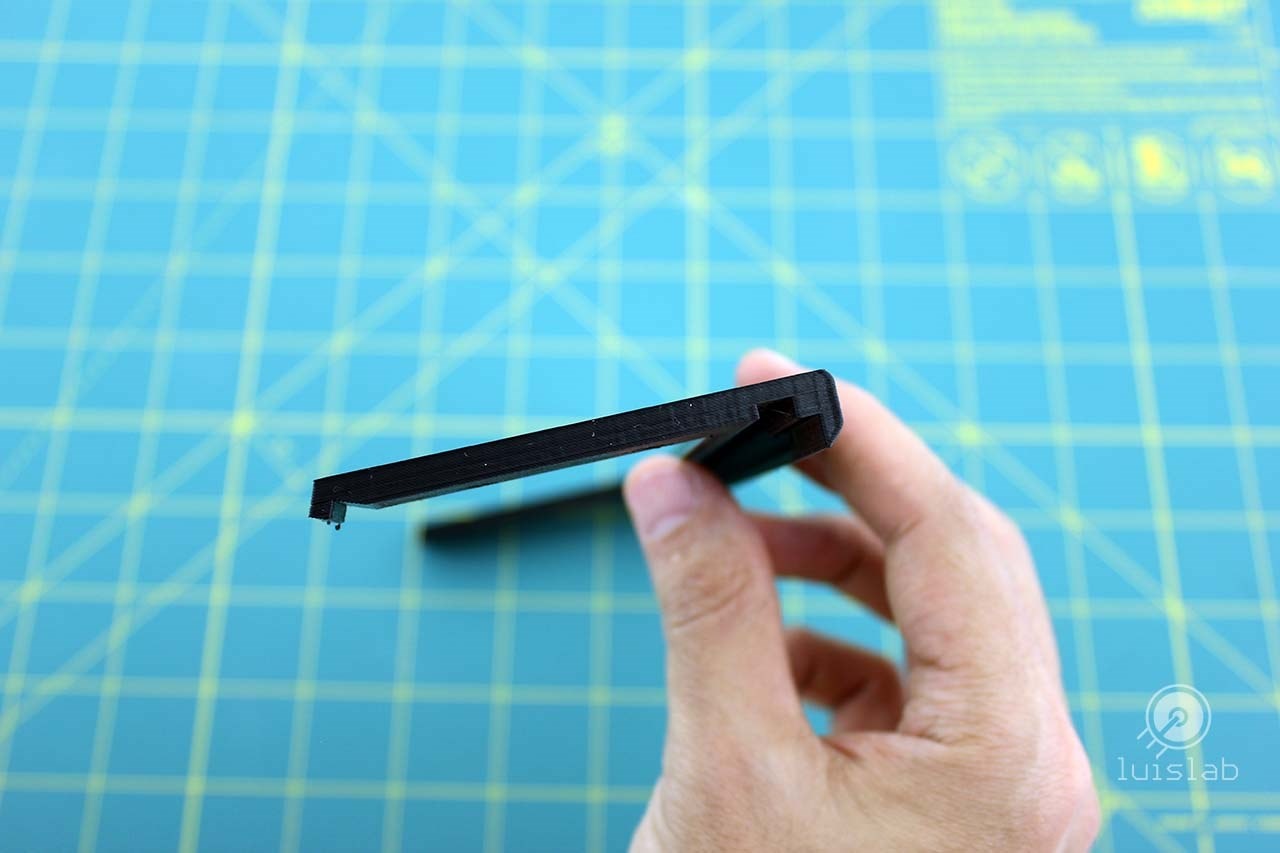
Final assembly
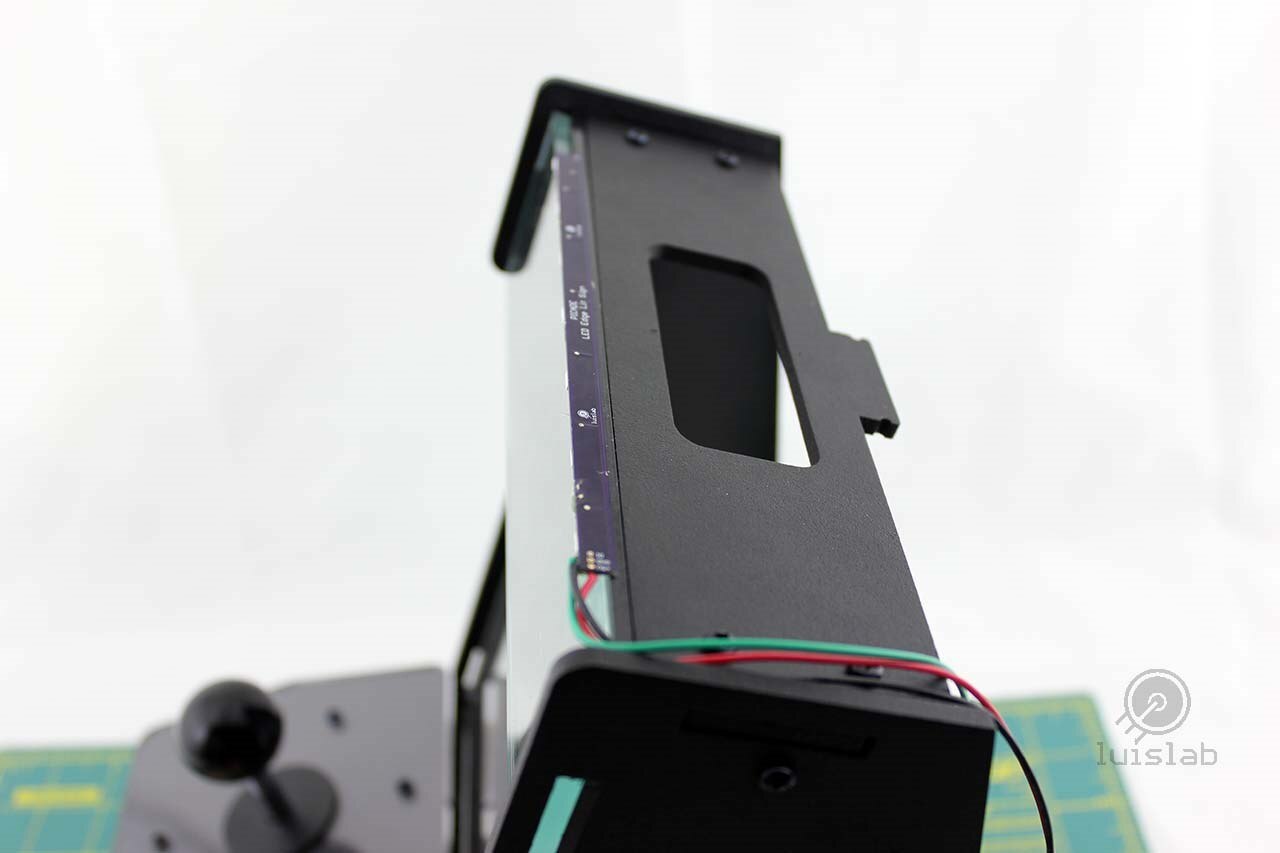
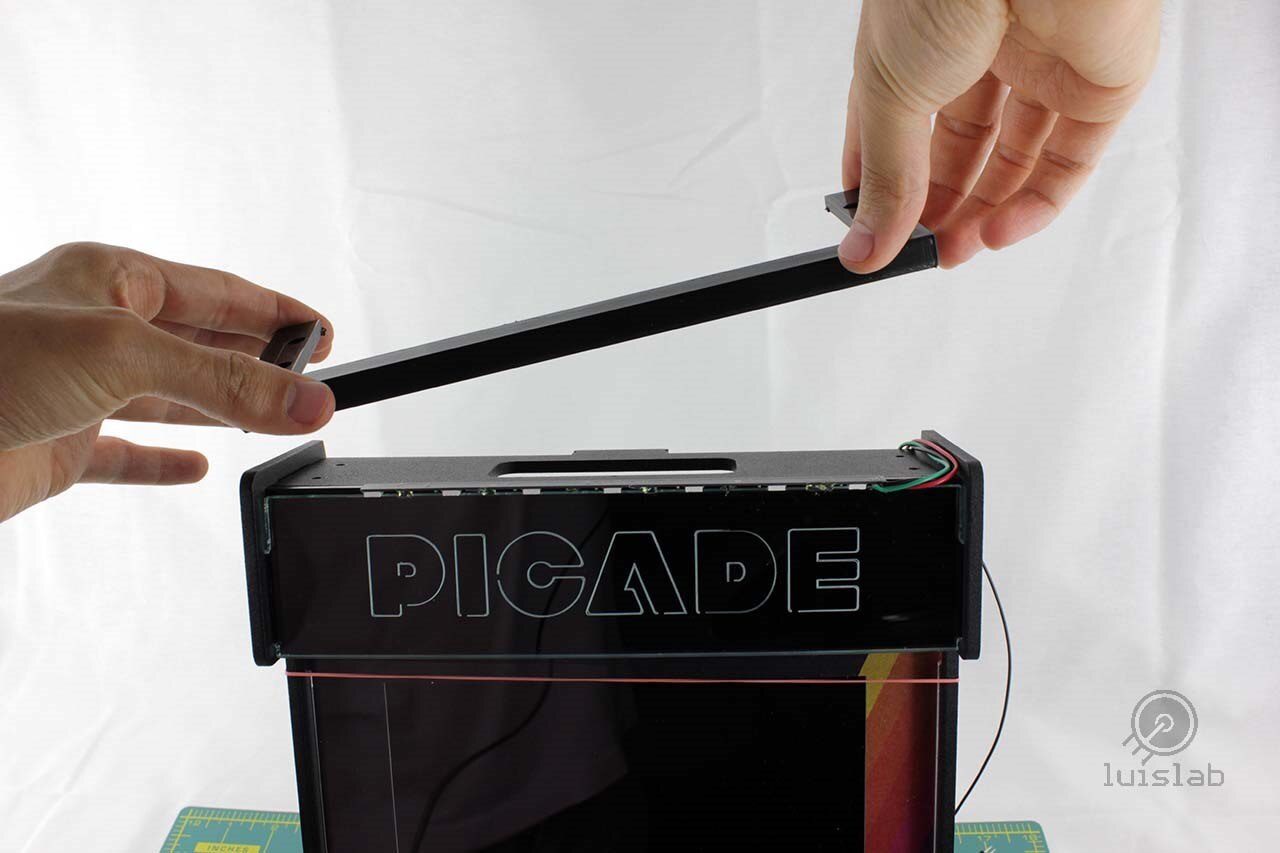
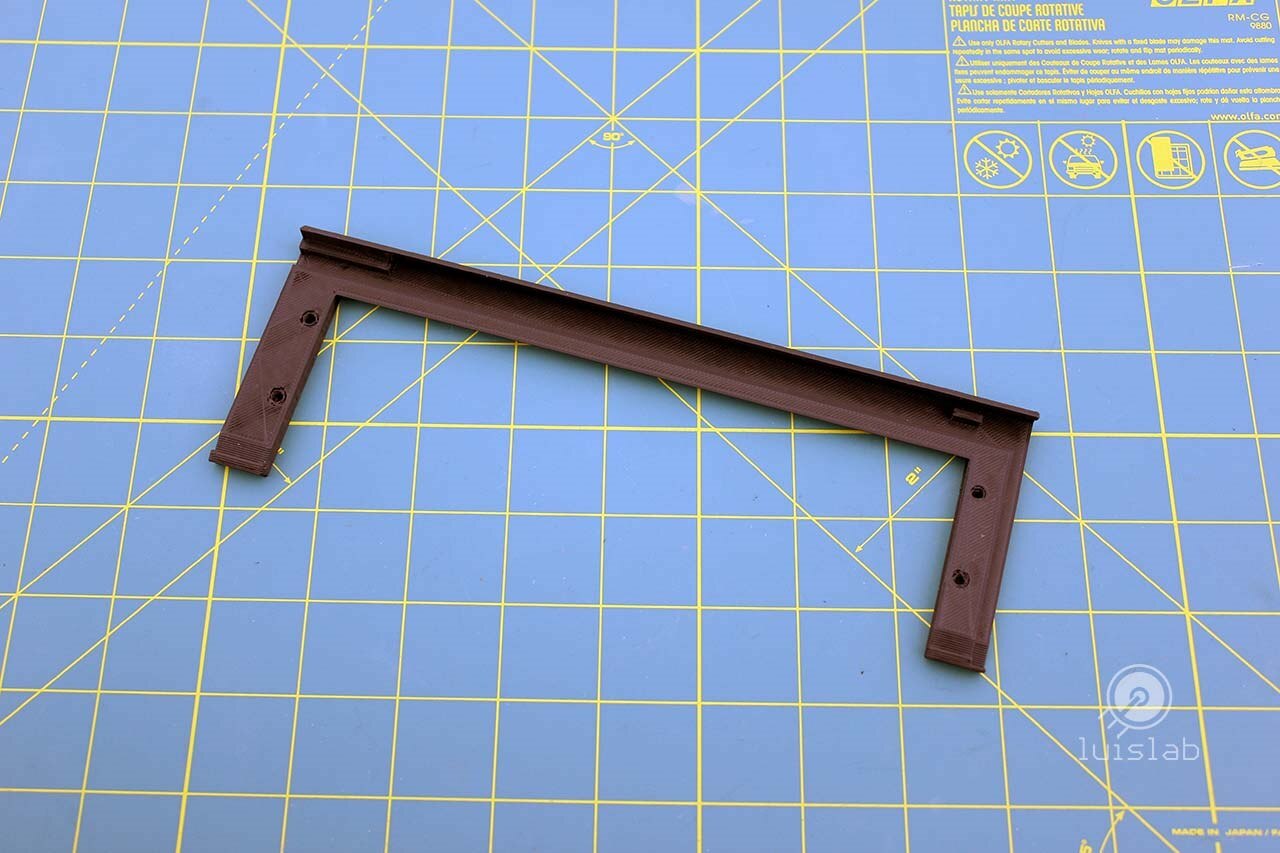
To cover the custom made PCB, I designed and 3D printed a black cover with room for routing the wires. It was designed to use the same mounting hardware used to tighten the top of the PICADE without any modifications.
| {gallery:width=960,height=768,autoplay=false} Picade LED Edge Lit Marque Assembly |
|---|
|
Picade Marquee: Engraved marquee assembly |
|
Picade Marquee: custom made PCB assembly |
|
Picade Marquee: Top 3D printed cover |
|
Picade Marquee: Top 3D printed cover |
|
Picade Marquee: Top 3D printed cover |
|
Picade Marquee: Top 3D printed cover |

3-D Print settings
Settings used:
- Printer: Creality CR-10S
- Material: PLA Black
- Infill: 20%, triangles
- Adhesion: Skirt
- Supports: No
- Layer height: 0.2mm
Final thoughts
Overall I'm very happy with the results, it looks amazing, in fact the lights are so bright that they can illuminate all the Picade without the need of external lights.
Thank you for reading along!. All the resources to reproduce this project are attached to this blog entry.
Luis
Top Comments