


Hello There
Thanks for taking a moment to read my blog post for this year's Hack-The-Holiday competition. As you all know, Santa works hard all year round to make sure he has an accurate list of children who are naughty or nice. This project should be a good "Santa-Hack" to make his job easier. (: This year I went with a fun project that uses AI to recognize faces, determine the emotion of the face, and then perform an action depending on the data received. This project will not be very complicated on the hardware side, as my output will just be some LEDs in a sign. The main focus of this blog is to give an easy tutorial of using image AI in python, and how AI is now accessible and really quite fun to play with.
A quick note, originally my project would have run on a Jetson Nano, but mine decided to have bootloader problems and is unable to import the required packages for this project, so I instead will be using an ESP32-CAM. The ESP32-CAM is a much cheaper option, and as I will show it works well for this application.
The Idea Explained
Here is a simple flow chart of the Server's process and the ESP32-CAM's process.

Here is the sketch I used for the ESP32-CAM.
#include <HTTPClient.h>
#include <Arduino.h>
#include "esp_camera.h"
#include "WiFi.h"

// Pin definition for CAMERA_MODEL_AI_THINKER
#define PWDN_GPIO_NUM     32
#define RESET_GPIO_NUM    -1
#define XCLK_GPIO_NUM      0
#define SIOD_GPIO_NUM     26
#define SIOC_GPIO_NUM     27
#define Y9_GPIO_NUM       35
#define Y8_GPIO_NUM       34
#define Y7_GPIO_NUM       39
#define Y6_GPIO_NUM       36
#define Y5_GPIO_NUM       21
#define Y4_GPIO_NUM       19
#define Y3_GPIO_NUM       18
#define Y2_GPIO_NUM        5
#define VSYNC_GPIO_NUM    25
#define HREF_GPIO_NUM     23
#define PCLK_GPIO_NUM     22

// Variables
camera_fb_t * fb = NULL;
//if we need to take a picture (server driven)
bool takePicture = false;
//your wifi's name and password
const char* ssid = "NETGEAR38";
const char* password = "mightygiant995";
//your server POST url
const char* serverURL = "http://192.168.1.12:5757/poster";
unsigned long lastButtonPress = 0;

//led's IO pins
#define Right 13
#define Left 14
//time before LEDs turn off in milliseconds
#define TurnOffTime 30000
//pin for button
#define ShutterButton 12
#define ShutterDelay 0
//setup gpio, camera and wifi
void setup() {

  //setup pins
  pinMode(Right,OUTPUT);
  pinMode(Left,OUTPUT);
  pinMode(ShutterButton,INPUT_PULLUP);

  //set leds to off
  digitalWrite(Left,LOW);
  digitalWrite(Right,LOW);

  //start talking to computer if connected
  Serial.begin(115200);

  //configure camera
  camera_config_t config;
  config.ledc_channel = LEDC_CHANNEL_0;
  config.ledc_timer = LEDC_TIMER_0;
  config.pin_d0 = Y2_GPIO_NUM;
  config.pin_d1 = Y3_GPIO_NUM;
  config.pin_d2 = Y4_GPIO_NUM;
  config.pin_d3 = Y5_GPIO_NUM;
  config.pin_d4 = Y6_GPIO_NUM;
  config.pin_d5 = Y7_GPIO_NUM;
  config.pin_d6 = Y8_GPIO_NUM;
  config.pin_d7 = Y9_GPIO_NUM;
  config.pin_xclk = XCLK_GPIO_NUM;
  config.pin_pclk = PCLK_GPIO_NUM;
  config.pin_vsync = VSYNC_GPIO_NUM;
  config.pin_href = HREF_GPIO_NUM;
  config.pin_sscb_sda = SIOD_GPIO_NUM;
  config.pin_sscb_scl = SIOC_GPIO_NUM;
  config.pin_pwdn = PWDN_GPIO_NUM;
  config.pin_reset = RESET_GPIO_NUM;
  config.xclk_freq_hz = 10000000;
  config.pixel_format = PIXFORMAT_JPEG;

  if (psramFound()) {
    config.frame_size = FRAMESIZE_UXGA;
    config.jpeg_quality = 10;
    config.fb_count = 1;
  } else {
    config.frame_size = FRAMESIZE_SVGA;
    config.jpeg_quality = 12;
    config.fb_count = 1;
  }

  // Init Camera
  esp_err_t err = esp_camera_init(&config);
  if (err != ESP_OK) {
    Serial.printf("Camera init failed with error 0x%x", err);
    return;
  }

  //wifi setup
  WiFi.begin (ssid, password);
  WiFi.mode(WIFI_STA);
  while (WiFi.status() != WL_CONNECTED) {
    Serial.print(".");
    delay(500);
    yield();
  }
  Serial.println("WiFi connected");

   // Print the IP address of the ESP32
  Serial.println(WiFi.localIP());
}

//MAIN CODE
void loop() {
  //when button is pressed, take a picture and send it
  byte buttonState = digitalRead(ShutterButton);
  if (buttonState == LOW) {
     delay(ShutterDelay);
     sendImage();
  }

  //if we have recieved a call from the server to take a picture, do so
  if(takePicture)
  {
    Serial.println("Got message to take picture from server");
    sendImage();
  }

  //if TurnOffTime seconds has elapsed with a press of the button, turn off the led's
  if((millis() - lastButtonPress) >= TurnOffTime)
  {
    digitalWrite(Right,LOW);
    digitalWrite(Left,LOW);
  }

  //update takePicture variable
  updateTakePicture();

  delay(10);
}

//send image to python app
void sendImage() {
 Serial.println("Taking picture...");
  // Get the camera frame buffer
  camera_fb_t *fb = esp_camera_fb_get();
  if (!fb) {
    // Failed to get the frame buffer
    Serial.println("CAM FAILED");
    return;
  }
  digitalWrite(4,LOW);
  // Get the image data and size from the frame buffer
  uint8_t *data = fb->buf;
  size_t dsize = fb->len;

  // Set up the HTTP client
  HTTPClient http;

  // Send an HTTP POST request to the server
  http.begin(serverURL);
  http.setTimeout(10000);
  //specify what type of image we are sending
  http.addHeader("Content-Type", "image/jpeg");
  //post the request
  int httpCode = http.POST(data,dsize);
  Serial.println("Waiting for server...");
  //if the post request went through...
  if (httpCode > 0) {
    // HTTP request was successful
    String response = http.getString();
    // print the response from the server
    Serial.println(response);
    //updateStatus(response);
    //turn LED's on or off depending on sserver's response
    if(response == "happy")
    {
      //update lights
      digitalWrite(Right, HIGH);
      digitalWrite(Left,LOW);
    }
    //any other emotion
    else if(response == "sad" || response == "angry" || response == "suprised" || response == "disgust"|| response == "fear"|| response == "neutral")
    {
      //update lights
      digitalWrite(Left,HIGH);
      digitalWrite(Right,LOW);
    }
    else //in case of server failing
    {
      //turn off lights
      digitalWrite(Right,LOW);
      digitalWrite(Left,LOW);
    }
    //get the current time and save it, so we know when this last run
  lastButtonPress = millis();
  }
  else
  {
    // HTTP request failed
    Serial.println("FAILED");
    Serial.println(httpCode);
    //turn off lights
    digitalWrite(Left,LOW);
    digitalWrite(Right,LOW);
  }

  // Close the connection
  http.end();

  // Release the frame buffer
  esp_camera_fb_return(fb);
}


//calls /esptakepictureupdate to update takePicture variable
void updateTakePicture()
{
  Serial.println("updating takePicture");
  // Set up the HTTP client
  HTTPClient Updatehttp;

  // Send an HTTP GET request to the servers update url
  Updatehttp.begin("http://192.168.1.12:5757/esptakepictureupdate");

  //post the request
  int httpCode = Updatehttp.GET();

  //if everything is good, update the variable
  if(httpCode > 0)
  {
   String takePictureString = Updatehttp.getString();
   if(takePictureString == "True")
   {
    //check if True or False
    if(takePictureString == "False")
    {
      takePicture = true;
    }
    else if(takePictureString == "False")
    {
      takePicture = false;
    }
   }
  }
  else
  {
    Serial.println("Uh oh..");
    Serial.println(httpCode);
   }
}
As you can see, it takes a picture using the built in esp_camera_fb_get() method in the esp_camera library to get the picture, and then uses HTTPClient to setup a connection to the python server and send the picture with the POST method. If you have any questions about the code or want to learn more about HTTPClient, see these websites: Arduino Reference + HTTPClient Tutorial. If you are following along and want to set this up yourself, here is a quick tutorial on setting up the ESP32-Cam for programming.
Here is the final code for the Python Server:
from flask import Flask, request
from deepface import DeepFace
from PIL import Image
import datetime

#change to where you want image to be saved
imagePath = 'image.jpg'

#this stores weather or not the user has asked to take a picture via the /takepicture page
takePicture = False

#define app
app = Flask(__name__)

#set route to POST and define a method to be run
@app.route('/poster', methods=['POST'])
def handle_post_request():
    #Reset variable
    takePicture = False
    # Get the image data from the request
    image_data = request.data

    #print(image_data);
    # Get the Content-Type header
    content_type = request.headers.get('Content-Type')

    # Process the image data based on the Content-Type
    if content_type == 'image/jpeg':
        print("saving file: "+imagePath)
        # Save the image data to a file so we can use it
        with open(imagePath, 'wb') as f:
            f.write(image_data)

        #pre processing, to make the image straight (rotates 90deg)
        processing = Image.open(imagePath)
        processedImage = processing.rotate(90,expand=True)
        #processedImage.show()
        processedImage.save(imagePath)

        #put detection in try-catch since it will throw an error if no face is found
        try:
            #use deepface to get an emotion from photo, I used 'ssd' as it had the fastest results for me.
            emotion = DeepFace.analyze(img_path = imagePath, actions = ['emotion'], detector_backend = 'ssd')['dominant_emotion']
        except Exception as e:
            print(e)
            return "0"

        print(emotion)
        #return the dominant emotion, so that the ESP32-CAM can know what to light up
        return emotion

    else:
        # Unsupported image format
        return "Unsupported image format", 415

    # Return 0 to clear lights if the file was somehow corrupted
    return "0"

#GET request for user to ask sign to manually take picture
@app.route('/takepicture',methods=['GET'])
def handle_take_picture():
    #user wants to take picture, so change the variable takePicture to True
    global takePicture
    takePicture = True
    #return an html page saying we took a picture at the current time
    return "<html> <body> <form> <p>Picture is being taken. "+str(datetime.datetime.now()) +" </p> </form> </body> </html>"


#ESP32-CAM calls this to check if it needs to take a picture
@app.route('/esptakepictureupdate',methods=['GET'])
def handle_esp_update():
    #return the takepicture variable
    return str(takePicture)

#starts server
app.run(host='0.0.0.0',port=5757)
The python server uses the library Flask to manage the POST requests, with can be installed with pip3 install flask in a terminal. As you see, it defines a flask app and then adds a method to it for handling POST requests. Within said method it can get the data from the ESP32 and process it with AI.
To set up the Flask server, you'll need to install the Flask library. You can follow the instructions on the Flask website to install Flask and set up a basic server (https://flask.palletsprojects.com/en/2.1.x/quickstart/).
The AI
Let's take a moment and break down the AI part of the server. For this project I was able to find a library that is very reliable with emotion classification, called Deepface. A word of warning, this does require tensorflow, which installs easily on a Linux computer with the command:
pip install tensorflow.
It may not install well on windows. If you are on windows, try using pip, not pip3, as pip3 will not always install it. Also make sure your computer can run tensorflow, as some older CPUs and GPUs can't. Deepface can then be installed with the command:
pip3 install deepface
You may need to run pip show deepface, and then copy the path it is installed at in and append it to sys.path in the IDLE shell, like this: import sys, sys.path.append("your//path//here") This allows it to be found by the python IDLE. If it only works in that shell, then try adding those lines to the top of your file. We are now ready to write our code.
app = Flask(__name__)

#set route to POST and define a method to be run
@app.route('/poster', methods=['POST'])
def handle_post_request():

...
#start server
app.run(host='0.0.0.0',port=5757)
In the first part of the server script, we setup the flask app by specifying where we want it to run, (In my case 0.0.0.0 for it to be accessed within my Wi-Fi and at port 5757, as nothing uses this port) and adding a method to be run when we get a POST request. Within it we get the image data, save the bytes as an image, then run that image through the deepface network on the line:
#use deepface to get an emotion from photo, I used 'ssd' as it had the fastest results for me.
            emotion = DeepFace.analyze(img_path = imagePath, actions = ['emotion'], detector_backend = 'ssd')['dominant_emotion']
We can specify in this line what information about the image we want. For this project I only need to find the emotions, and then get the dominant emotion from that. Some of the other attributes you can get are age, race, and gender. For me race and gender were accurate 99% of the time, but age was never even near the person's real age. This might change depending on what model you use, which you can set with the detector_backend argument. Here is the documentation for the deepface library, if you want to learn more.

As you can see above, both the ESP32-CAM and server are working well.
The frame construction
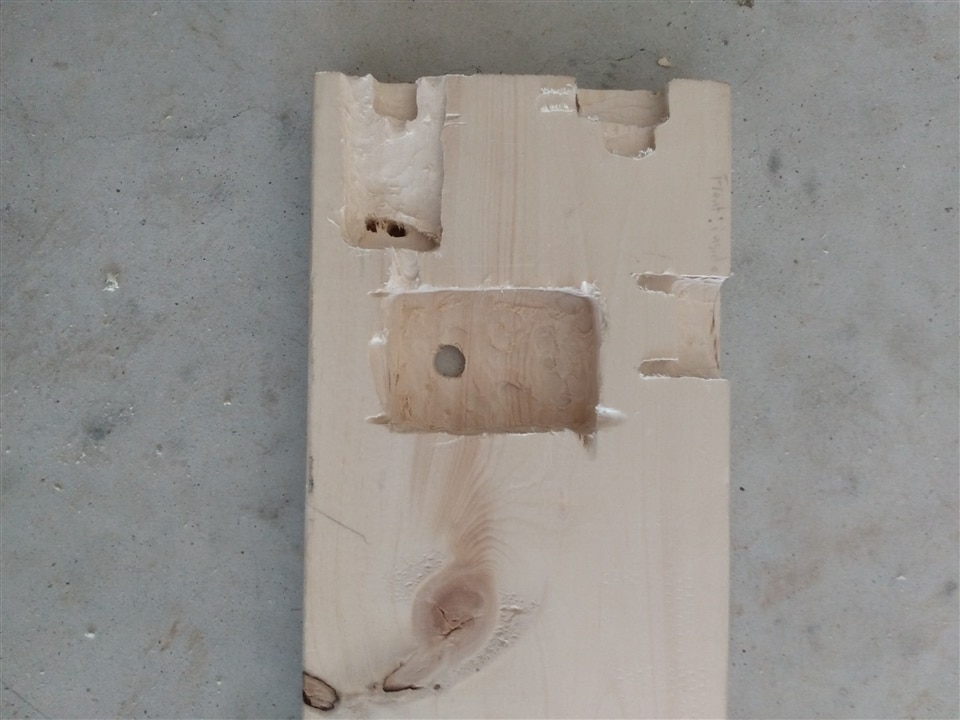
Our next step is to construct the sign, which I made from a piece of 1"x4" (25.4mm x 101.6mm) wood, cut into two pieces, 18" (457.2mm) in length.

I still needed a spot for the components, so I proceeded to grind away wood with a Dremel tool I have, as well as drill holes for LEDs, till I was covered in a fine snow of wood flakes. For the LEDs I used a drill to make holes and held them in place with hot glue. Here is the result:
This reminded me I need to improve my wood working skills and made me wish I had a router.  I had a can of left-over wood stain, so I stained the wood a beautiful dark oak color,
and then placed the components and soldered them according to this circuit diagram:

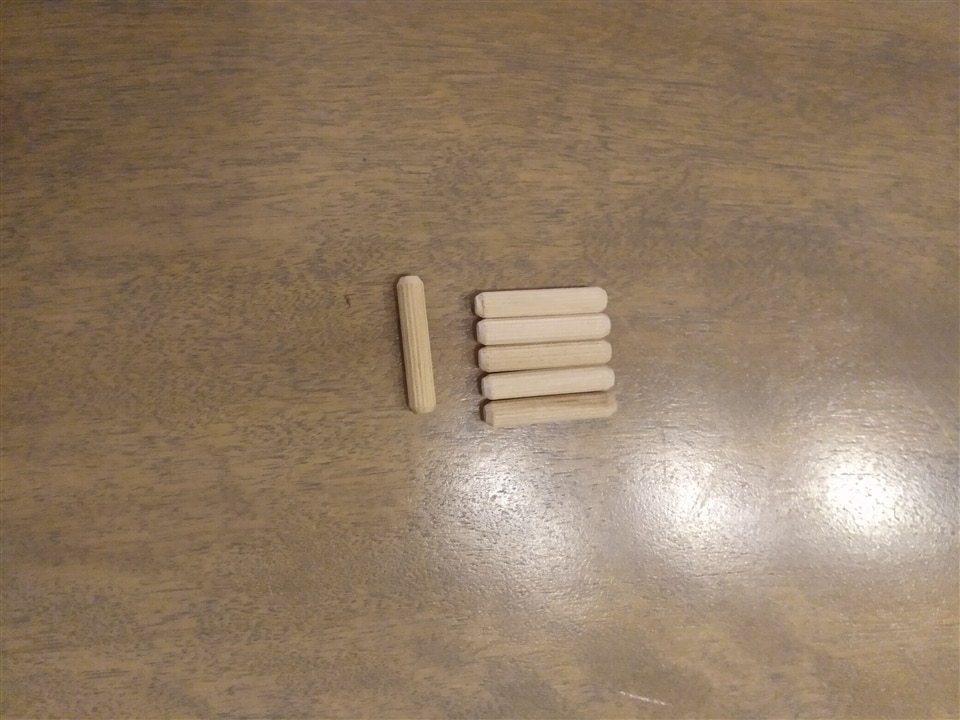
I then sealed the two halves together with small wooden pegs, to make a sturdy 2"x4" (5.08mm x 10.16) that can be taken apart again in an emergency.
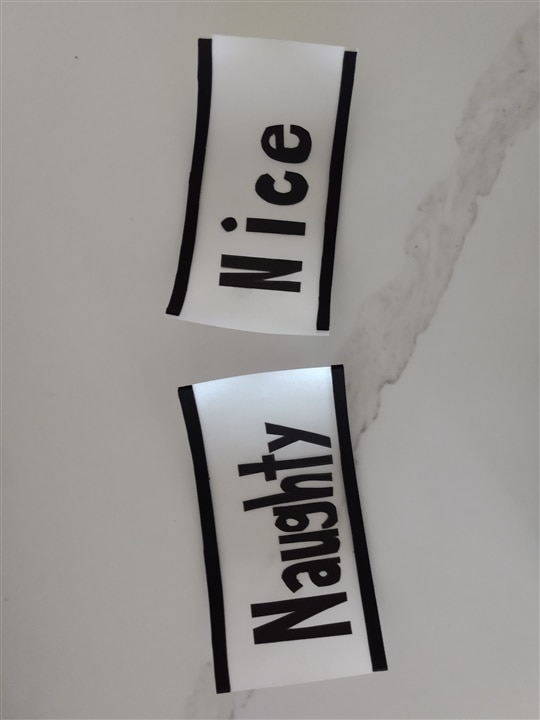
Last thing to do is way to attach the front words of the sign to the base. I made two removeable signs with black cardstock letters on the front that Leds could shine through and added support with foam strips. I considered using magnets to hold the words on the front, but ended up going with wood slots made of scrap wood to hold the cards:


Starting to look like what I imagined. After uploading the code here is the result: (Sorry about camera shake, I don't have an amazing camera)
Just barely squeaked it in, one day before the competition closes. I am sad I wasnt able to use it this year for Christmas, but the fact that the word cards are removable allows me to use them for Halloween, or other holidays throughout the year.
I hope you liked this blog about my project, if you have any questions, please feel free to ask in the comments. Thank you.
Top Comments