


 | Enter Your Project for a chance to win an Arduino MKR WAN 1300 Kit with a Compatable Lora Gateway or an MKR 1400 GSM with a Shield Combo + a $100 shopping cart! | Project14 Home |
| Monthly Themes | ||
| Monthly Theme Poll |

The next steps are to configure and test the HDMI Display touch screen and to create a simple GUI with a few buttons to verify the interface is working.
I am using a "Juvtmall TFT LCD Display 5 Inch 800×480 Touch Screen Monitor HDMI" that I got from Amazon: https://www.amazon.com/gp/product/B072558KZ4/ref=ppx_yo_dt_b_asin_title_o04_s00?ie=UTF8&psc=1. This is a somewhat generic display that is sold by multiple vendors. It uses an XPT2046 Touch Controller. There is a Wiki that has the documentation and drivers: http://www.lcdwiki.com/5inch_HDMI_Display. All the files required for installation are on github: https://github.com/goodtft/LCD-show. There are multiple displays supported by this repository with different configurations for each size.
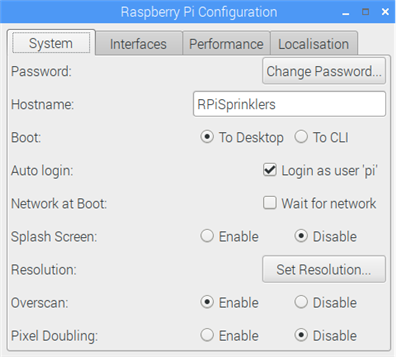
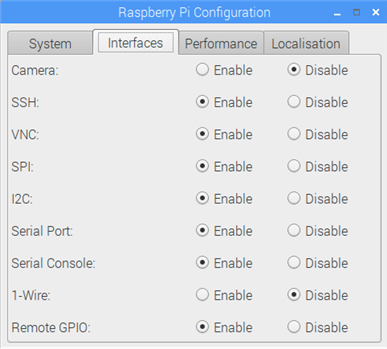
RPi Configuration
- Clean install of Raspbian (2018-11-13) on 16GB microSD card
- Set localisation parameters and timezone
- Change Hostname ("RPiSprinklers")
- Set static ipaddr for wlan0
- Enable interfaces (SSH,VNC,SPI,I2C)
- Change user pi password
- Check for software updates
I think the process of RPi configuration is well documented so I won't rehash it here. I enabled SSH so I could operate the system remotely (I use Putty on a Win10 PC). I enabled VNC so that I could do the GUI development remotely. I'll disable the Desktop in actual use. I'll boot into the Sprinkler Control GUI.
Display/Touch Interface Installation
The Display setup is reasonably straightforward. You open a terminal on the RPi, copy files from github, and then execute the appropriate installation shell script. In my case it is "LCD5-show" for the 5 inch LCD.
sudo rm -rf LCD-show
git clone https://github.com/goodtft/LCD-show.git
chmod -R 755 LCD-show
cd LCD-show/
sudo ./LCD5-show
There was one glitch in the process. The installation script tries to verify that it is running on an RPi before it installs the touch interface files. It does that by checking for the Hostname "raspberrypi". Of course, I had changed it to "RPiSprinklers" so the script just changed the display resolution and rebooted without installing the touch interface. I edited the script to look for my hostname and everything installed correctly.
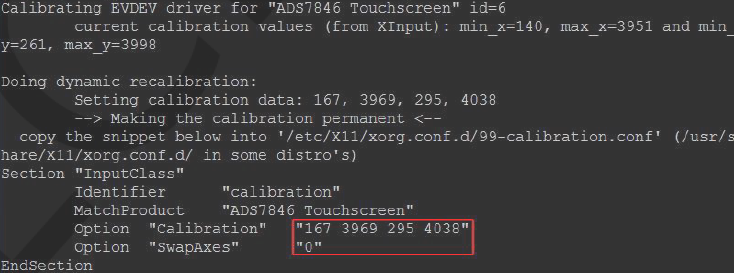
Installing the touch calibration program requires an additional step. The install script has already been downloaded into the LCD-show directory, you just need to execute it.
sudo dpkg -i -B xinput-calibrator_0.7.5-1_armhf.deb
After that you can run it in the terminal window
DISPLAY=:0.0 xinput_calibrator
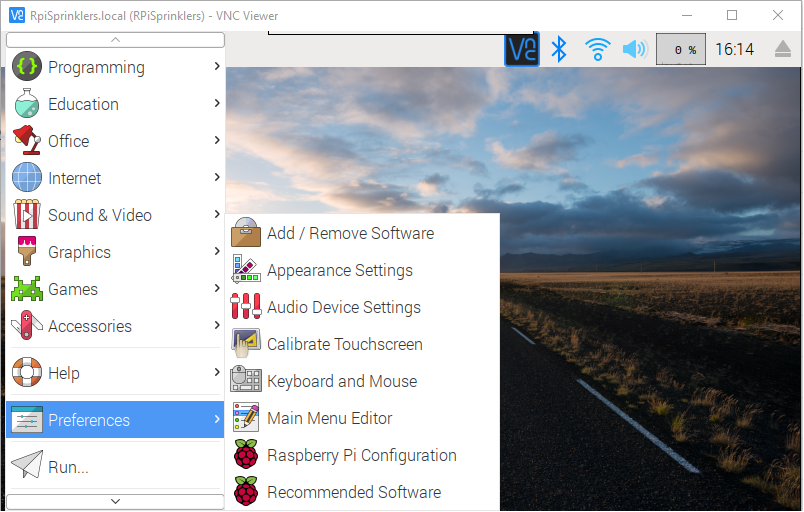
It will now also show up in the Preferences Menu.
The calibration just uses 4 points and requires that you use the stylus provided for best accuracy. First point is shown.
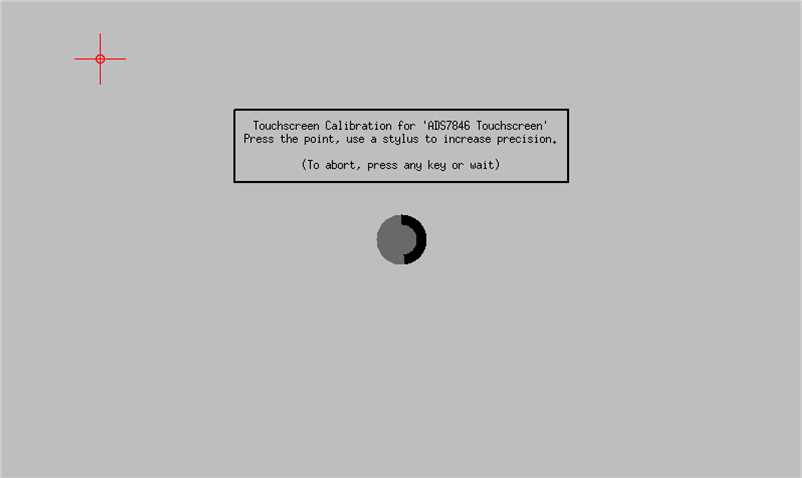
After calibration you need to manually add the calibration data into the file: "/etc/X11/xorg.conf.d/99-calibration.conf"
tkinter installation
I am going to do the GUI programming using tkinter and python3. tkinter is a python module based on Tcl/Tk that is used to create simple GUIs. The good news is that tkinter comes with python3 by default so there is no installation required (python3 is installed in the Raspbian image). You just need to import the module in your program. The one thing that I learned to watch for is that the module is named Tkinter (with a capital "T") in python2 and tkinter (with a lower case "t") in python3. So, if you use example programs written for python2 you'll need to rename the imported module.
For the purposes of this initial test I am going to create a minimal GUI with toggle buttons that change color to indicate that they have been pressed. That should prove that the GUI interface functions correctly on the touch display.
I created a window with 4 Zone buttons. Each button has a command (callback) function associated with it that gets called on button pressed. For this test the function just toggles the button color.
Here's the python code:
from tkinter import *

window = Tk()
window.title("Sprinkler Controller")

window.geometry("800x400")

def z1Toggle():
    if z1Button.config("bg")[-1] == "white":
        z1Button.config(bg="green",activebackground="green")
    else:
        z1Button.config(bg="white",activebackground="white")

def z2Toggle():
    if z2Button.config("bg")[-1] == "white":
        z2Button.config(bg="green",activebackground="green")
    else:
        z2Button.config(bg="white",activebackground="white")

def z3Toggle():
    if z3Button.config("bg")[-1] == "white":
        z3Button.config(bg="green",activebackground="green")
    else:
        z3Button.config(bg="white",activebackground="white")

def z4Toggle():
    if z4Button.config("bg")[-1] == "white":
        z4Button.config(bg="green",activebackground="green")
    else:
        z4Button.config(bg="white",activebackground="white")

z1Button = Button(text="Zone 1",bg="white",activebackground="white",command=z1Toggle,height=5,width=10)
z1Button.place(x=180,y=30)

z2Button = Button(text="Zone 2",bg="white",activebackground="white",command=z2Toggle,height=5,width=10)
z2Button.place(x=300,y=30)

z3Button = Button(text="Zone 3",bg="white",activebackground="white",command=z3Toggle,height=5,width=10)
z3Button.place(x=420,y=30)

z4Button = Button(text="Zone 4",bg="white",activebackground="white",command=z4Toggle,height=5,width=10)
z4Button.place(x=540,y=30)

window.mainloop()
And here is a short video showing the touchscreen operating.
Top Comments