element14 Community
element14 Community
    Register Log In
  • Site
  • Search
  • Log In Register
  • About Us
  • Community Hub
    Community Hub
    • What's New on element14
    • Feedback and Support
    • Benefits of Membership
    • Personal Blogs
    • Members Area
    • Achievement Levels
  • Learn
    Learn
    • Ask an Expert
    • eBooks
    • element14 presents
    • Learning Center
    • Tech Spotlight
    • STEM Academy
    • Webinars, Training and Events
    • Learning Groups
  • Technologies
    Technologies
    • 3D Printing
    • FPGA
    • Industrial Automation
    • Internet of Things
    • Power & Energy
    • Sensors
    • Technology Groups
  • Challenges & Projects
    Challenges & Projects
    • Design Challenges
    • element14 presents Projects
    • Project14
    • Arduino Projects
    • Raspberry Pi Projects
    • Project Groups
  • Products
    Products
    • Arduino
    • Avnet Boards Community
    • Dev Tools
    • Manufacturers
    • Multicomp Pro
    • Product Groups
    • Raspberry Pi
    • RoadTests & Reviews
  • Store
    Store
    • Visit Your Store
    • Choose another store...
      • Europe
      •  Austria (German)
      •  Belgium (Dutch, French)
      •  Bulgaria (Bulgarian)
      •  Czech Republic (Czech)
      •  Denmark (Danish)
      •  Estonia (Estonian)
      •  Finland (Finnish)
      •  France (French)
      •  Germany (German)
      •  Hungary (Hungarian)
      •  Ireland
      •  Israel
      •  Italy (Italian)
      •  Latvia (Latvian)
      •  
      •  Lithuania (Lithuanian)
      •  Netherlands (Dutch)
      •  Norway (Norwegian)
      •  Poland (Polish)
      •  Portugal (Portuguese)
      •  Romania (Romanian)
      •  Russia (Russian)
      •  Slovakia (Slovak)
      •  Slovenia (Slovenian)
      •  Spain (Spanish)
      •  Sweden (Swedish)
      •  Switzerland(German, French)
      •  Turkey (Turkish)
      •  United Kingdom
      • Asia Pacific
      •  Australia
      •  China
      •  Hong Kong
      •  India
      •  Korea (Korean)
      •  Malaysia
      •  New Zealand
      •  Philippines
      •  Singapore
      •  Taiwan
      •  Thailand (Thai)
      • Americas
      •  Brazil (Portuguese)
      •  Canada
      •  Mexico (Spanish)
      •  United States
      Can't find the country/region you're looking for? Visit our export site or find a local distributor.
  • Translate
  • Profile
  • Settings
Making Time
  • Challenges & Projects
  • Project14
  • Making Time
  • More
  • Cancel
Making Time
Blog Spectrum Clock
  • Blog
  • Forum
  • Documents
  • Events
  • Polls
  • Files
  • Members
  • Mentions
  • Sub-Groups
  • Tags
  • More
  • Cancel
  • New
Join Making Time to participate - click to join for free!
  • Share
  • More
  • Cancel
Group Actions
  • Group RSS
  • More
  • Cancel
Engagement
  • Author Author: maxpowerr
  • Date Created: 12 Jan 2021 9:43 PM Date Created
  • Views 2307 views
  • Likes 7 likes
  • Comments 8 comments
  • makingtimech
  • holidayspecial20ch
Related
Recommended

Spectrum Clock

maxpowerr
maxpowerr
12 Jan 2021

image


Intdroduction

    I got the idea to represent time as a spectrum of colors. There are already similar ideas on the Internet, but they are a little difficult to accurately determine the time. I wanted to make a simpler and more understandable clock. To represent the time, I decided to use two hue wheels, one for the hour and one for the minutes and seconds. In the center, I decided to place the yin and yang symbol, the upper part of which will display hours and the lower part of the minute, two dots, will display seconds.

imageimage


Design

    For the project, I decided to use a WS2812b addressable LED strip (I took 1 meter 144 LEDs), an Arduino Nano and a thin 22AWG wire. I also designed the case and 3D printed it.

imageimage

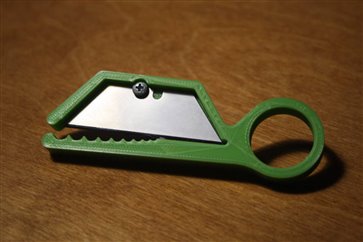
     Since I had to strip a lot of wires, the tool came in handy for me, which I found on Thingiverse.com.

image


Assembly

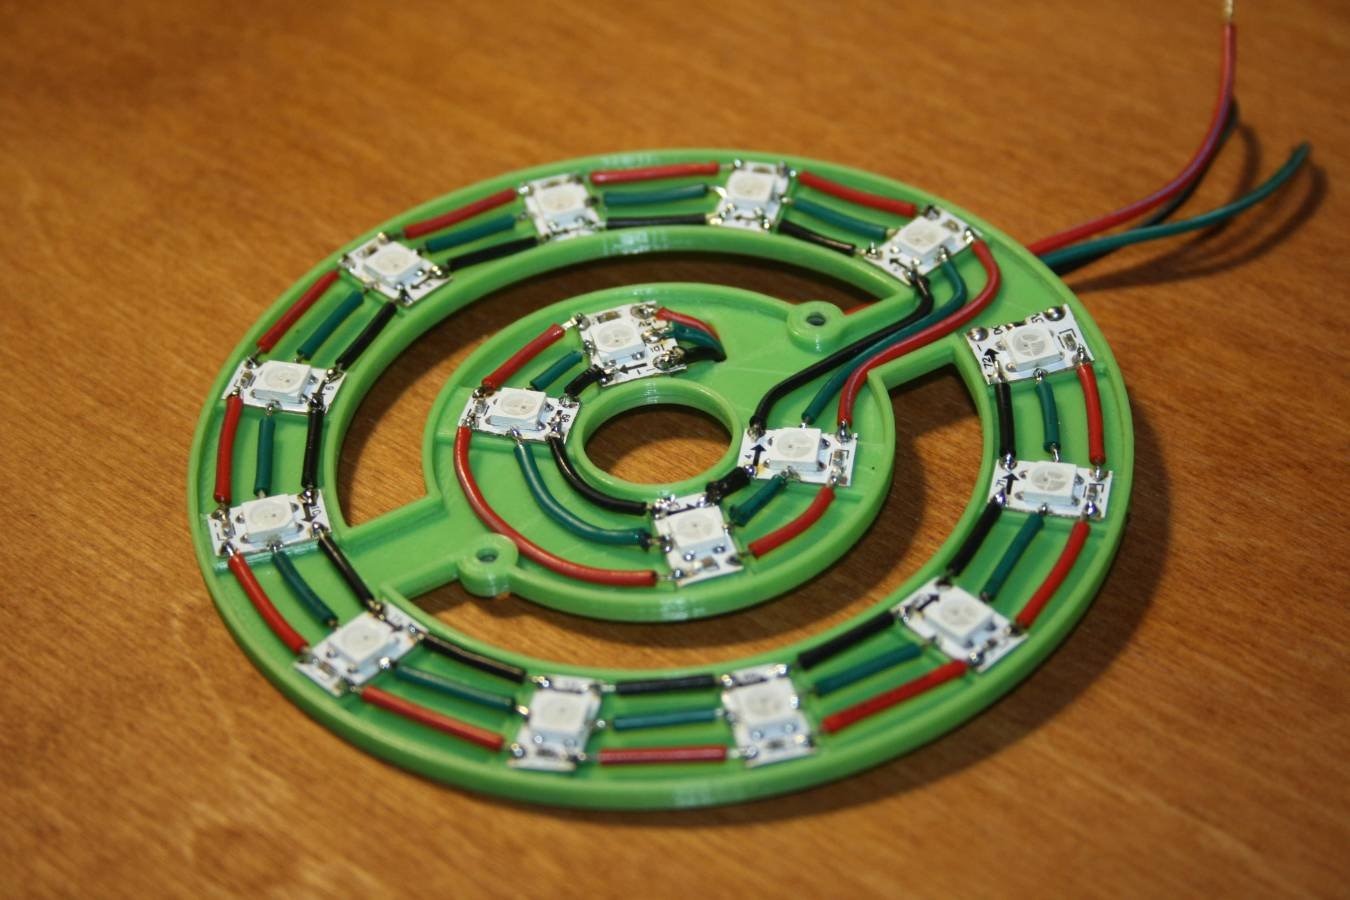
     First you need to cut 60 LEDs with one tape and 16 LEDs one by one. Then you need to tin all the contacts on the LEDs. Next, you should glue 16 LEDs to the convex areas. The main thing when gluing is to observe the sequence so that the plus and the ground do not intersect. Then you should measure the wires, strip them and, most importantly, tin them in advance. When you solder the wires to the contacts of the LEDs, touch the soldering iron for no more than one second in order not to melt the plastic. It should look like the picture below.

image


     Then the panel is screwed to the main body with two small screws. The tape with 60 LEDs fits into the outer ring. The wires from this tape are threaded through a special hole and soldered. It should look like the picture below.

imageimage


    I also had to stick a little foil on the inside to reflect the light better, otherwise it would be dark in this place.
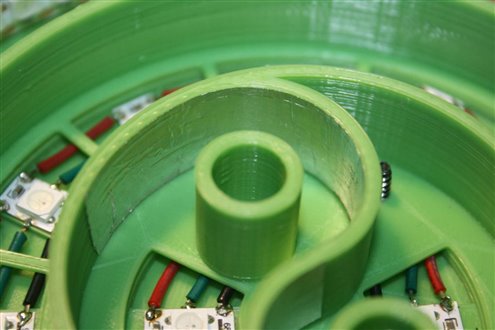
image


Connection

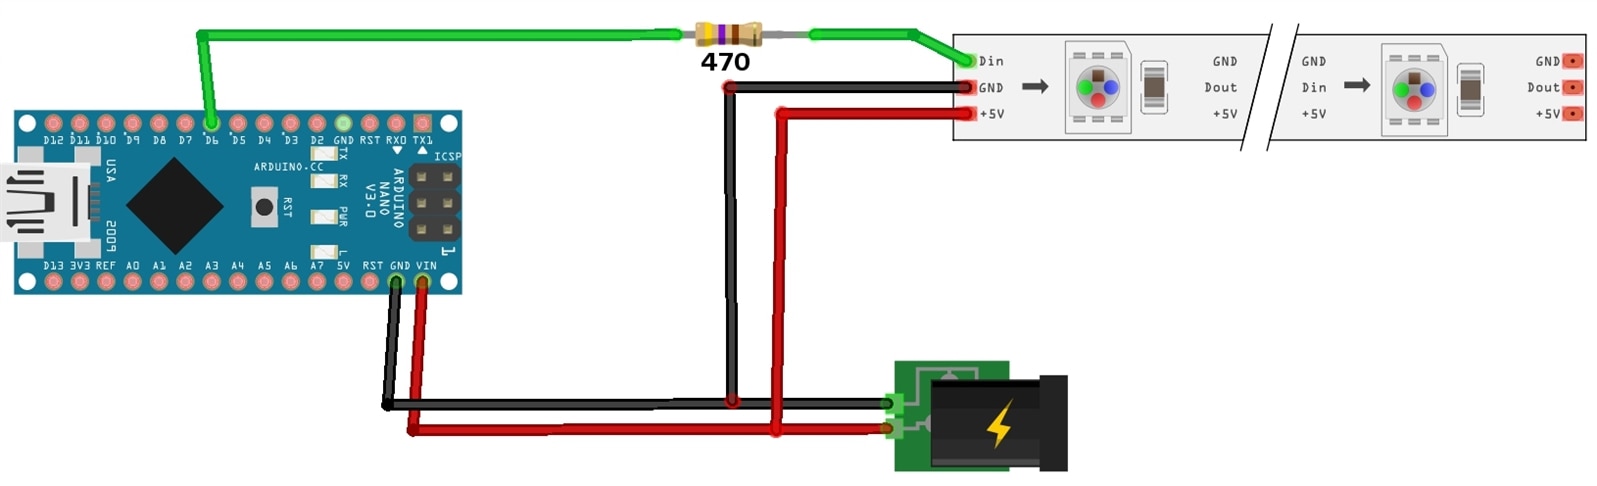
    The control wire from pin D6 of the Arduino to the DIN pin of the LED strip should be connected through a 200-500 ohm resistor (I used 470 ohm). It is also important that the power supply to the LED strip is separate.

image


Code

Coming soon!


Video

     Demonstration of simple chaotic blinking.

You don't have permission to edit metadata of this video.
Edit media
x
image
Upload Preview
image


     Can be used as a Christmas tree toy.

You don't have permission to edit metadata of this video.
Edit media
x
image
Upload Preview
image


     Demonstration of the watch.

You don't have permission to edit metadata of this video.
Edit media
x
image
Upload Preview
image

Links:

3D Models: https://www.thingiverse.com/thing:4724981

  • Sign in to reply

Top Comments

  • dubbie
    dubbie over 4 years ago in reply to skruglewicz +4
    Stephen, You definately do, get a 3D printer immediately - it is so much fun. You can make the widget bits that you actually want. Dubbie
  • robogary
    robogary over 4 years ago +3
    pretty snazzy
  • dubbie
    dubbie over 4 years ago +3
    I like the idea. The 3D printing is pretty good and very neat fixing of the LEDs. Dubbie
  • dubbie
    dubbie over 4 years ago in reply to skruglewicz

    Stephen,


    You definately do, get a 3D printer immediately - it is so much fun. You can make the widget bits that you actually want.


    Dubbie

    • Cancel
    • Vote Up +4 Vote Down
    • Sign in to reply
    • More
    • Cancel
  • maxpowerr
    maxpowerr over 4 years ago in reply to Fred27

    Two outer rings are needed to display the time in different modes and also to create different lighting effects. Large ring for minutes and inner for hours. So far I have been able to come up with two modes. The first mode displays the spectrum on all rings, and on the yin yang sign changes color and displays the time (upper part of hours; lower part of minutes; points are seconds). The second mode displays the time as a simple analog clock with the outer ring of the minute and the inner clock (photo below). This is a prototype, so the design and different modes will be added and improved. It's just that I don't have much time so I haven't had time to post the code yet.

    image

    • Cancel
    • Vote Up +2 Vote Down
    • Sign in to reply
    • More
    • Cancel
  • Fred27
    Fred27 over 4 years ago

    What do the two outer rings do?

    • Cancel
    • Vote Up +3 Vote Down
    • Sign in to reply
    • More
    • Cancel
  • skruglewicz
    skruglewicz over 4 years ago

    Nice build !

    I need to get into 3d Printing

    • Cancel
    • Vote Up +3 Vote Down
    • Sign in to reply
    • More
    • Cancel
  • DAB
    DAB over 4 years ago

    Nice build.


    DAB

    • Cancel
    • Vote Up +3 Vote Down
    • Sign in to reply
    • More
    • Cancel
>
element14 Community

element14 is the first online community specifically for engineers. Connect with your peers and get expert answers to your questions.

  • Members
  • Learn
  • Technologies
  • Challenges & Projects
  • Products
  • Store
  • About Us
  • Feedback & Support
  • FAQs
  • Terms of Use
  • Privacy Policy
  • Legal and Copyright Notices
  • Sitemap
  • Cookies

An Avnet Company © 2025 Premier Farnell Limited. All Rights Reserved.

Premier Farnell Ltd, registered in England and Wales (no 00876412), registered office: Farnell House, Forge Lane, Leeds LS12 2NE.

ICP 备案号 10220084.

Follow element14

  • X
  • Facebook
  • linkedin
  • YouTube