


Project Idea
When I thought to make a robotic drawing machine based on hypocycloids I had a look on the web and found an incredible quantity of ideas, projects, versions, options and more and more and more... So, why to replicate a so popular idea that every maker can make by himself just copying one of these projects? The answer is not difficult; I have found plenty of drawing machines based on the same principle but all are incredibly different. First of all. I excluded the majority of those versions that are hand-moved. Nothing to do with robots. Then another big category to exclude –but a great source of inspiration– are those machines that are sold as expensive and sometimes very expensive educational toys. Pointing the source of inspiration on the designs involving in some way electronics my choice has been dramatically reduced. Almost a comforting result.
Indeed, I continued on developing the project of a drawing machine because there is something that is missed or, at least, I have not found during my night explorations of the web: a sort of development platform, a modular system easy to make and reproduce that can be controlled by almost any kind of microcontroller.
A Detail that Makes the Difference
There is another detail that I found also in those few projects involving a microcontroller: all the drawing machines are based on a – better or worst – predefined design, so the user can just build it and change the pen colors. Last but not least, all the systems I found are moved by a single motor activating a series of gears to create a series of drawing patterns.
Making a modular system instead there is the advantage that some parts can be added or not to create kinds of drawing patterns limited only by fantasy.
Controlling the drawing mechanics with a microcontroller. every wheel can have its own motor with speed and direction controlled independently. The drawing principle is almost simple:
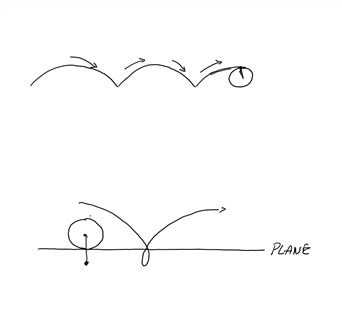
A Cycloid is a curve traced by a point on the rim of a circular wheel rotating along a straight line
(definition in Wikipedia.org)
As shown in the above drawing the moving point represents the pen tip; any variation in the position of the rotating point respect the circular wheel (the second figure) changes the drawing path. What we do with the rotating wheels is to constrain the point movement to a limited portion of a surface instead of a curve drawn along a straight line (the ideal horizontal plane).
The Mechanical Principle

Based on the assumptions described in the previous paragraph the drawing above shows the essential mechanical components to generate the movement. D1 and D2 are the two wheels generating the movement. D1 alter the simple rotation of the wheel D2 that drive the pen in S. The length of the two bars L1 and L2 change the pattern of the drawing, as well as the distance of the center of the two wheels.
Starting from this base form we can add other rotating wheels and bars whose diameter and length create always new patterns of different sizes.
Designing and Making
The design has been conceived to be modular and general purpose. To move the wheels with a good speed control I have used micro geared motors from Kitronik already employed in other projects getting very good performances. Conditioned by the shaft diameter and the motor size I have designed a first draft of the idea, as shown in the sketch below.

The measures in the CAD design remained the same, excluding the pen holder that I changed for a more efficient and practical form-factor. The flat part (transmission bars and wheels) have been laser-cut from a 3mm sheet of Perspex while the other parts have been 3D printed. To design the flat parts I have used Inkscape while for the 3D models I have used Fusion360.
based on a suggestion of shabaz (maybe a couple of years ago) I have designed the motor shaft support for 3D printing so that to insert firmly the motor I have heated the shaft and the plastic part. For small diameters, not bigger than 4-5 mm this solution for me always works fine.
3D Models
Below the rendering of the 3D printed components. The printable STL files are available in the Drawing Machine GitHub repository/
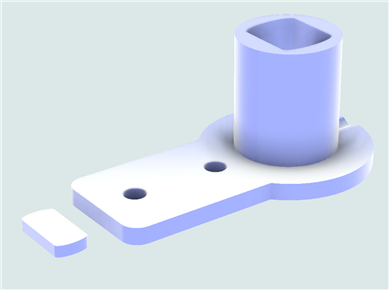
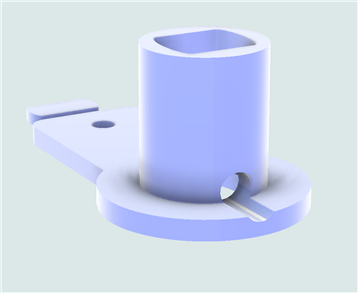
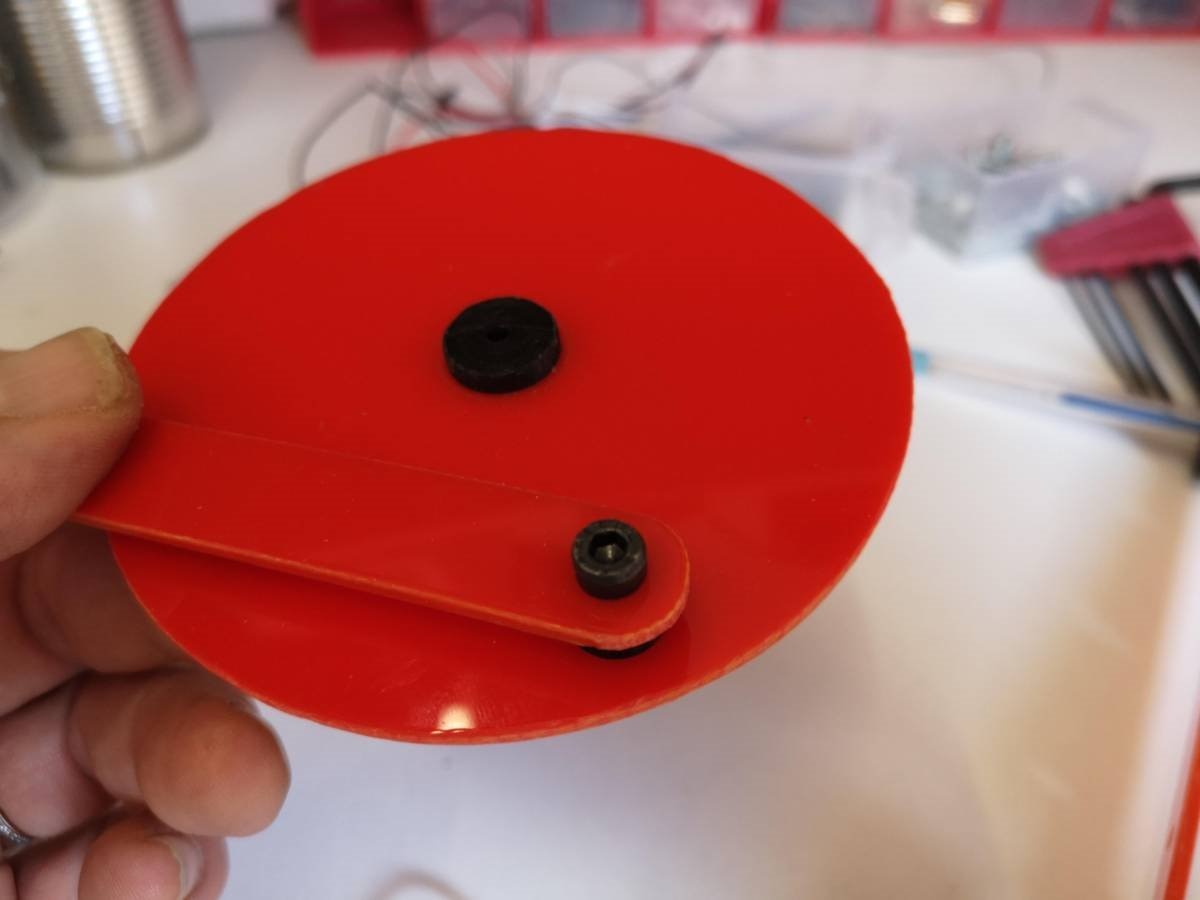
Pen Holder
The Pen support has been simplified and changed respect the initial idea, split into two components. The top part holds the pen with a side hole to keep it firmly in place while drawing. The collar is glued to the bottom side to create a unique block together with the support bar.
Above: the bottom side of the pen holder and the collar
Below: the top side. Note that the pressure screw hole is surrounded by a rectangular hole. It is for the nut to avoid applying too much force on the small plastic component.

Motor Support
The motor support design has been tailored to the dimensions of the body and shaft of the Kitronik micro geared motor with base extension to fix it on any surface. I have also provided two holes for screwing and a 5mm hole to the opposite side of the base for the wires.
Above: base support and opposite side views.
Below: top and bottom view.


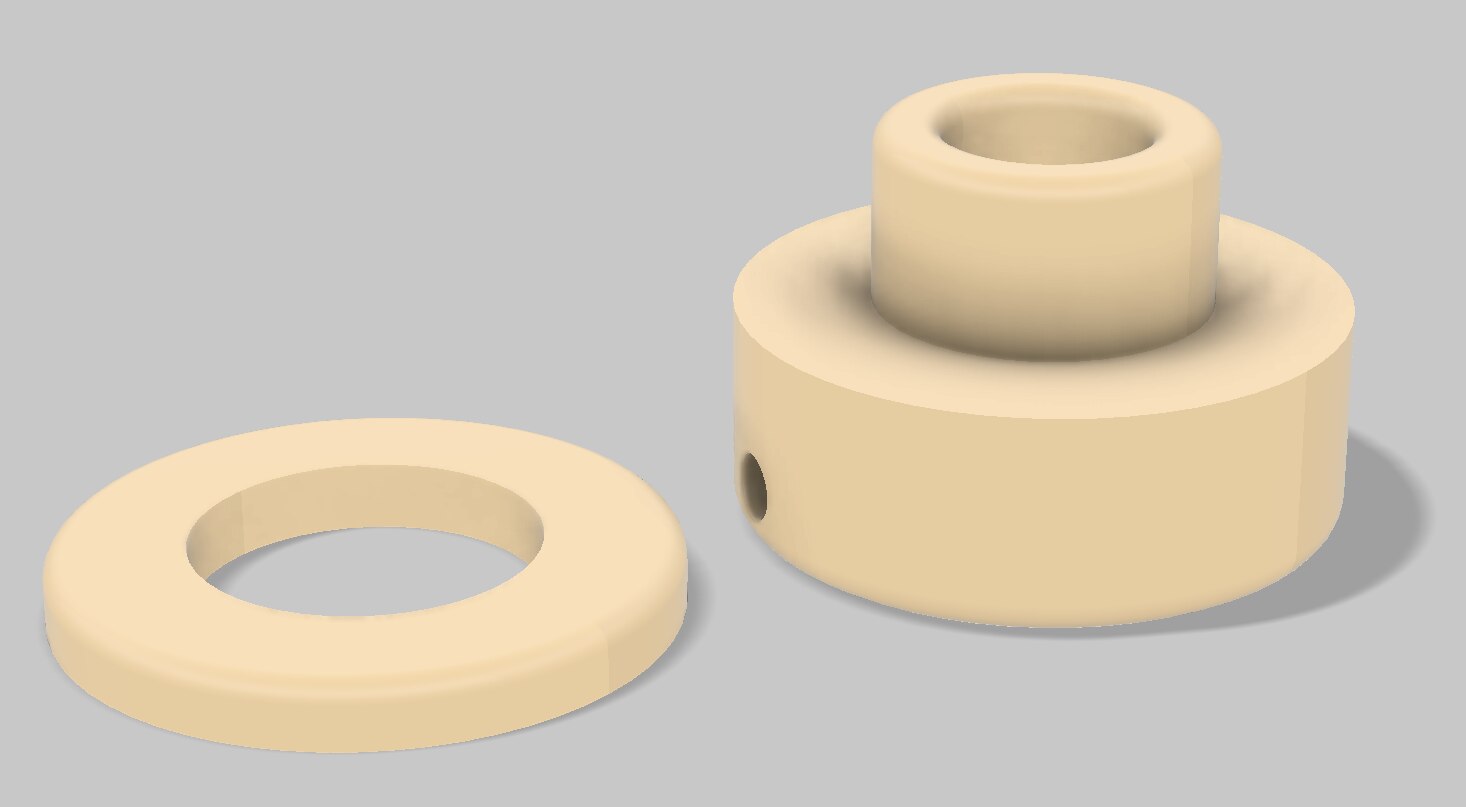
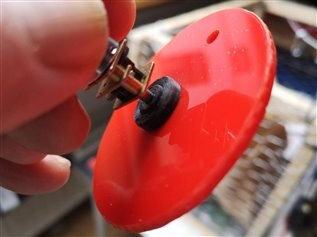
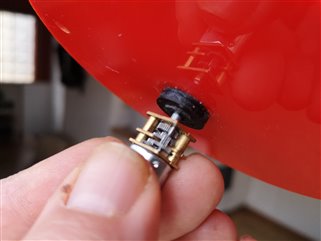
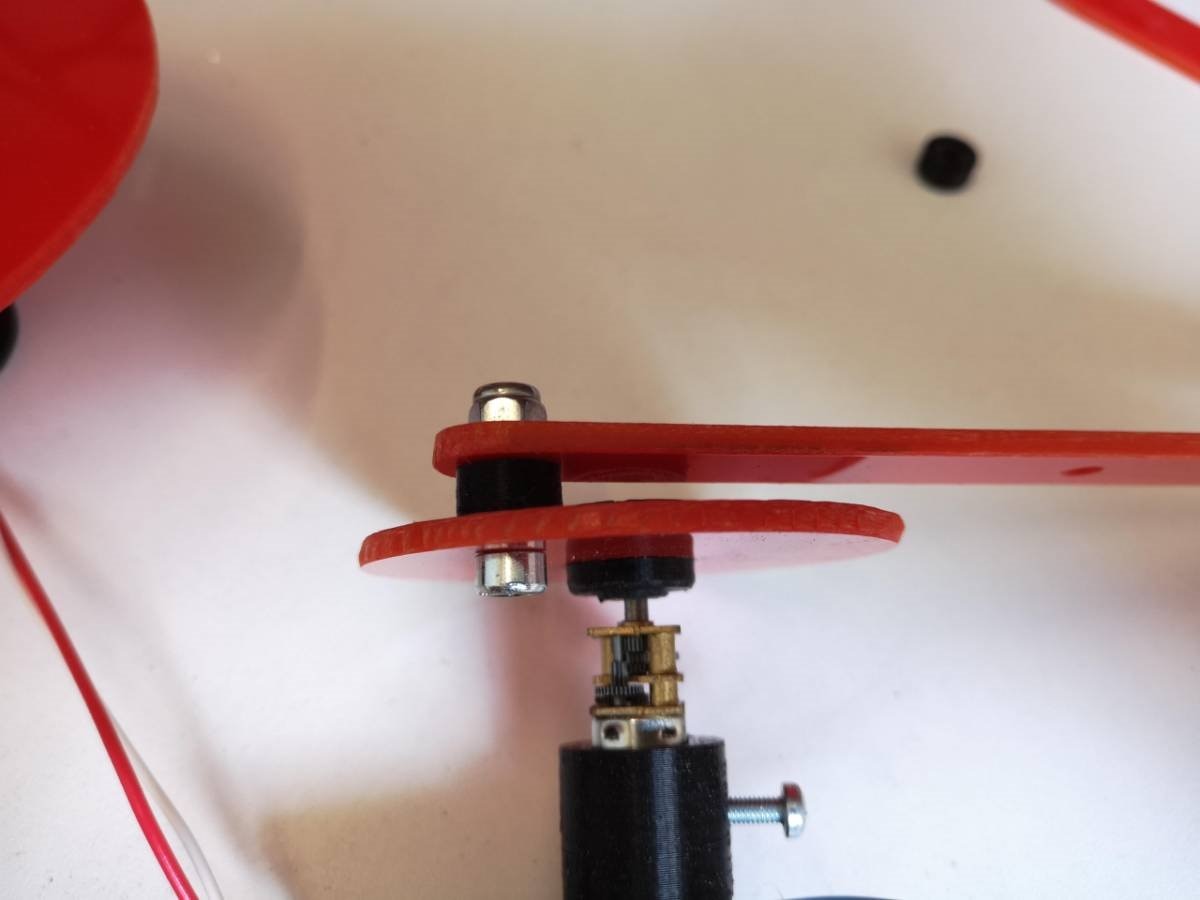
Motor Shaft Holder
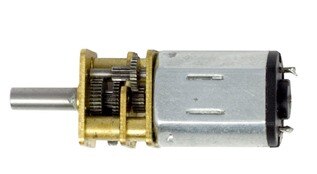
To hold the motor shaft inside of the rotating wheel I have adopted the same technique of the pen holder. a 3D printed top part to insert in the center hole of the wheel and a lock ring to the other side. The image below shows the micro geared motor I have used. Depending on the motor dimensions the motor support and the shaft holder should be modified accordingly.
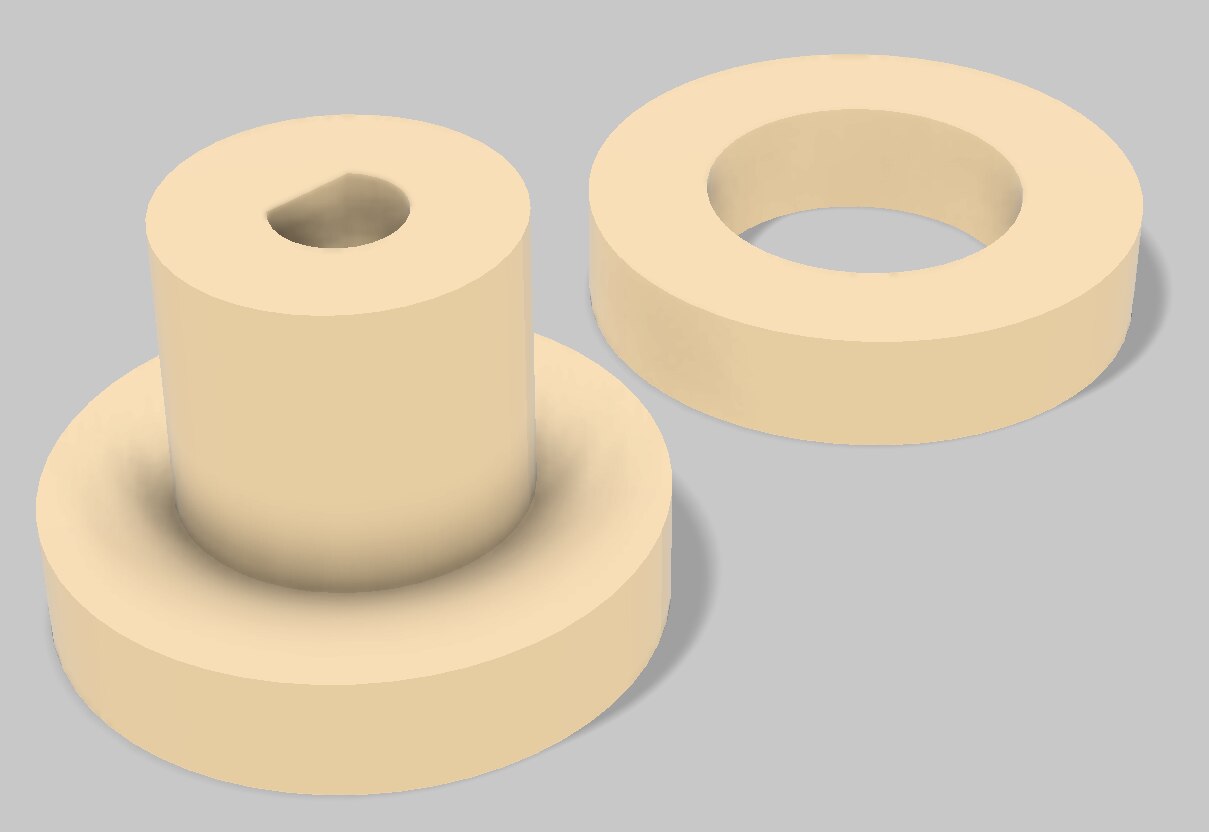
The motor lock rendering two parts. On the left, the support, bottom view; note the hole with the cut side accordingly to the motor shaft profile.
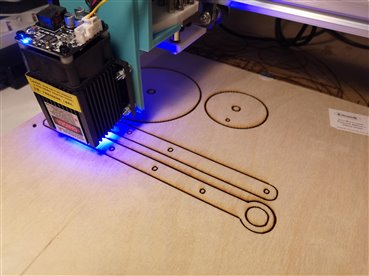
The images below show the flat parts laser cut with 3 mm plywood for the first measure tests, then done with Perspex and a phase of the 3D printing of the motor and pen components.
Assembling the Parts
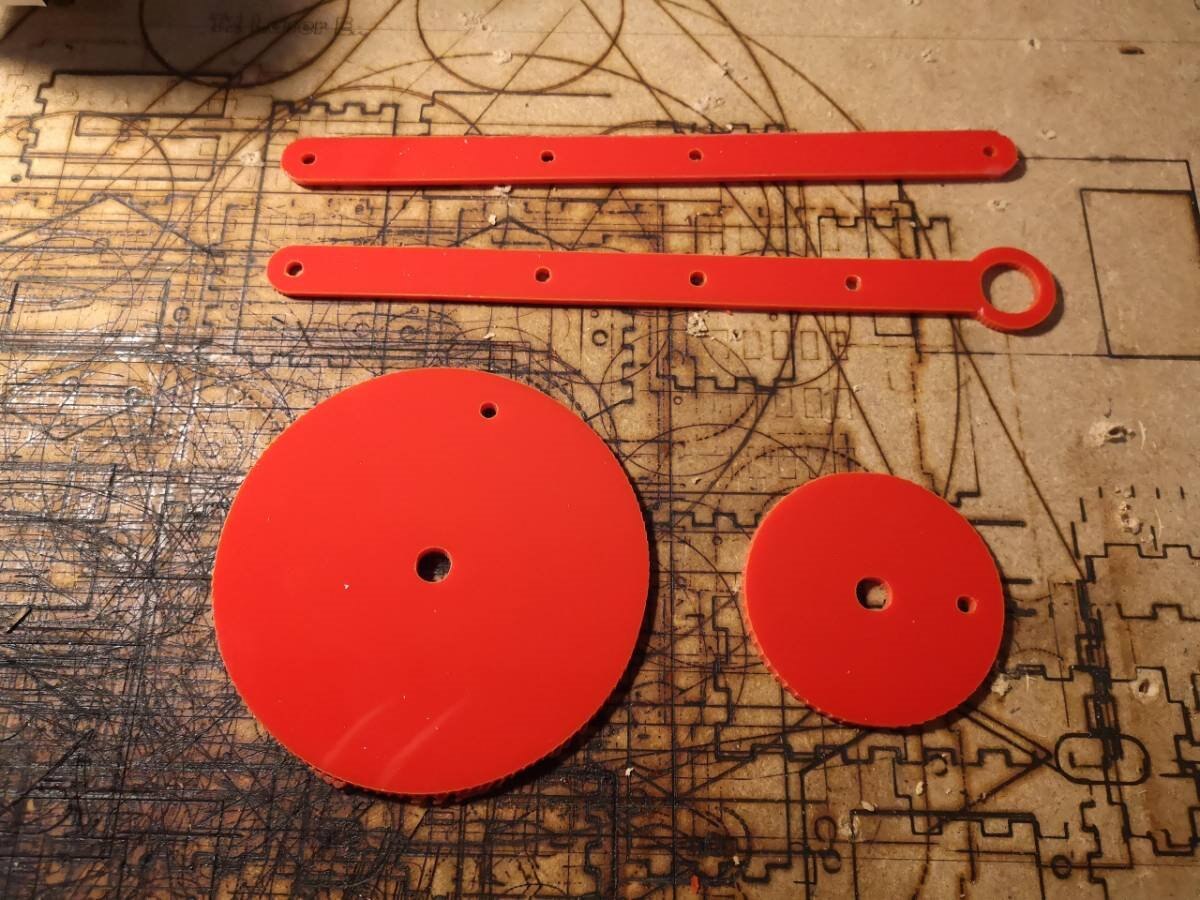
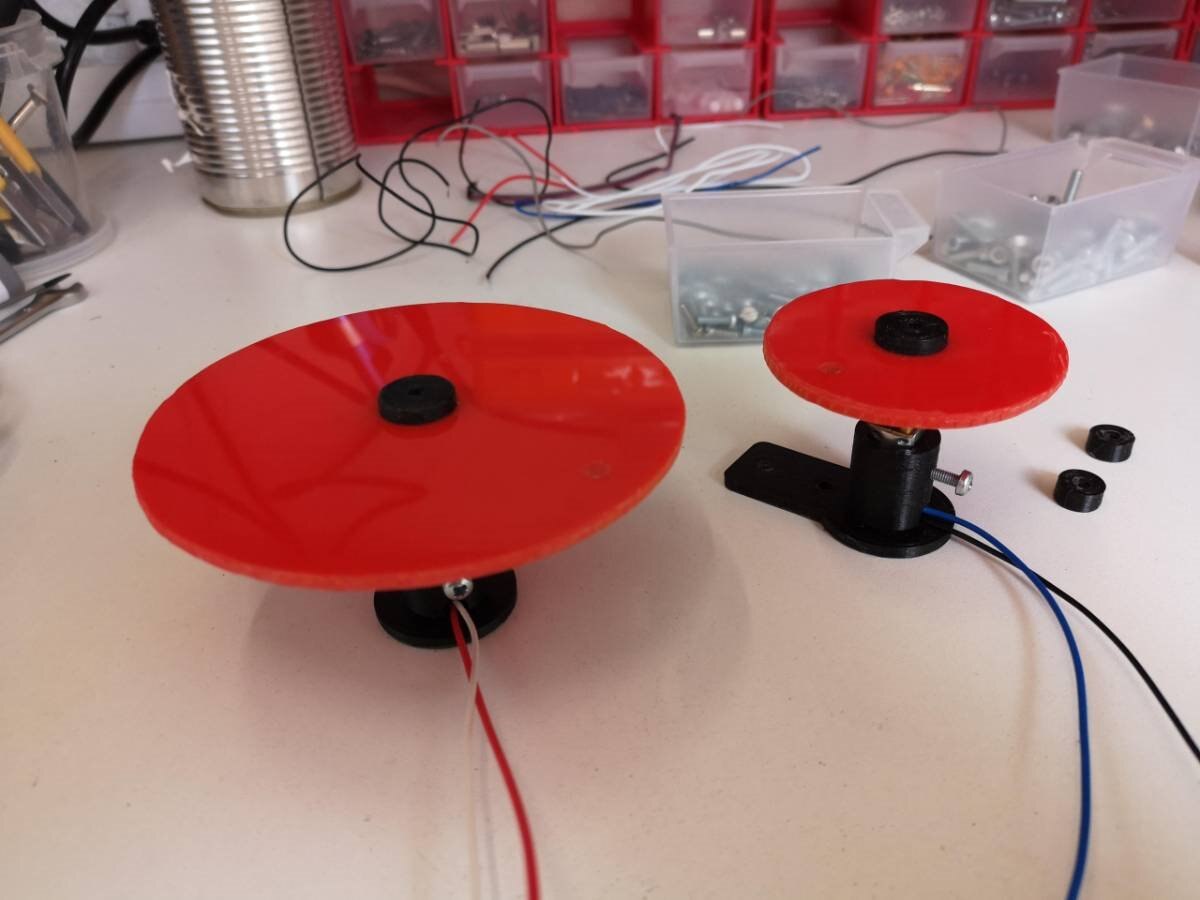
For the final version laser-cut, I have used red Perspex making two different diameters wheels and the motion transmission bars.
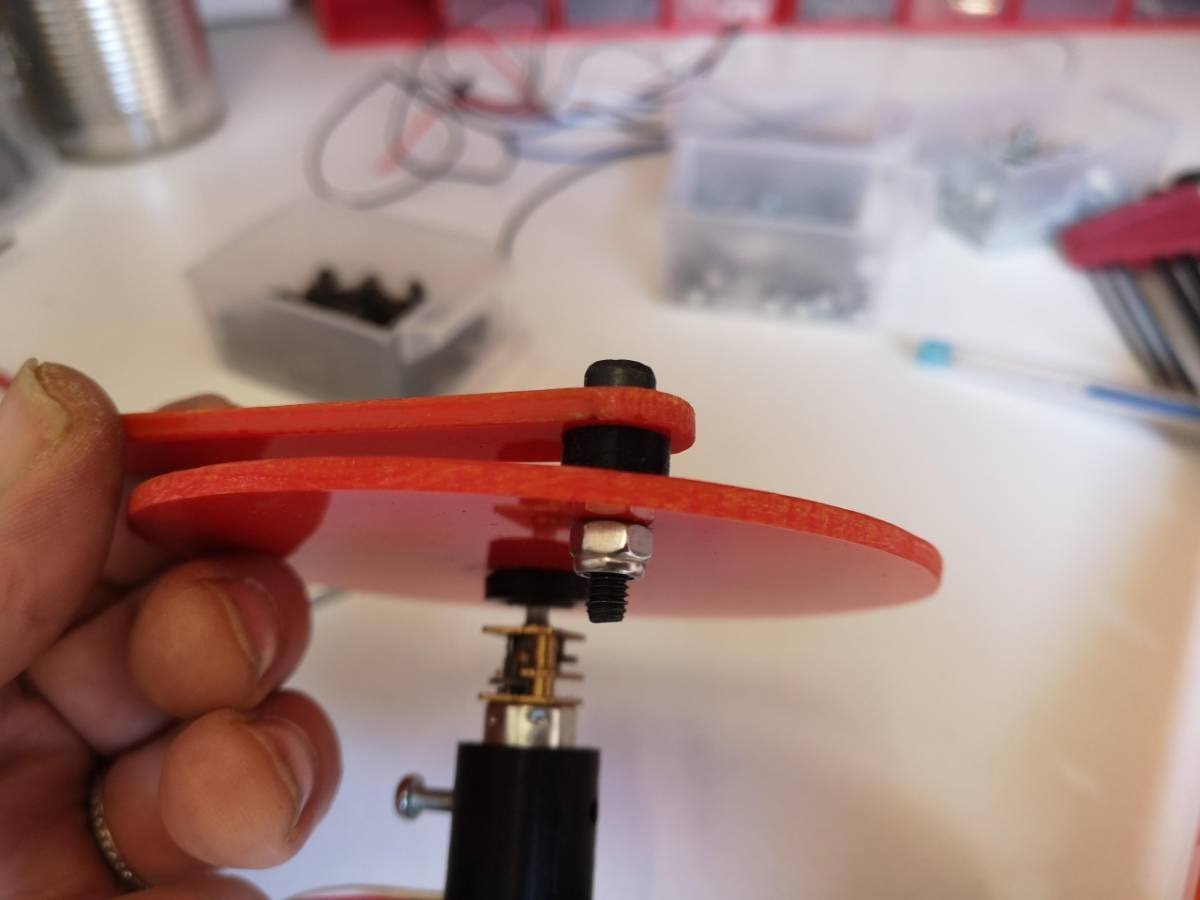
The next step was to set the motor shaft holders to the center of the wheels and the pen holder to the end of the bar with the wider ring on one side. Few drops of cyano-acrylate glue worked perfectly on 3D printed PLA and Perspex.
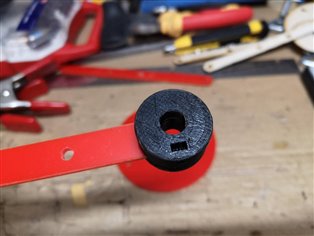

To complete the pen holder with the fixing screw I have forcedly inserted the nut and tested it. The weight of the metal parts helps to keep the drawing pen adherent to the surface while moving


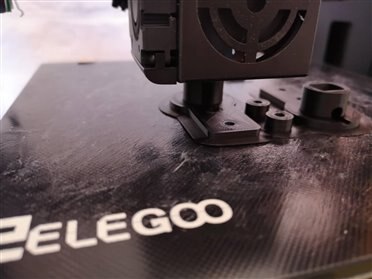
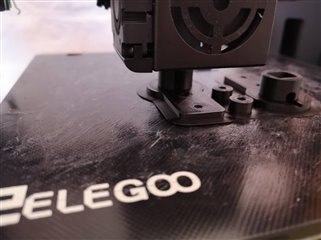
Below: two phases while 3D printing the two motor holders with the Elegoo Neptune 3D printer. The device can reach higher precision, then the more common Prusa 3D printers, up to 0.05 layer thickness but to reduce the print time I have worked with a 0.2 mm layer thickness. This part is a mechanical part that does not need special care to the surface quality.

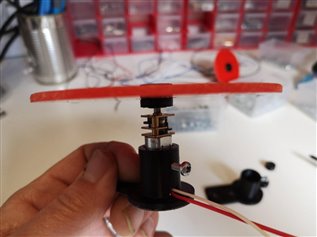
Setup the Motors
After heating a while the motors shaft and the PLA motor holder glued to the center of the wheels I have forced it inside. I have experienced that this technique can last a long time also with a considerable mechanical effort.

After cooling the shaft I have soldered the wires to the motors and put them under rotating test for a while. Thank the screwed connectors on the Kitronik All-in-one robotic board this project only needs the power wires soldered to the motors.

The last step has been assembling the motors in the 3D printeD motor holders.

Note that in the final design I have added a pressure screw to avoid the motors vibrating when drawing. In this case, where the force needed is not strong I have adopted the solution suggested by luislabmo in his blog post Hologram Pi-ramid - 3D printed parts and initial assembly: the screw hole has been threaded directly in the PLA 3D printed support with a 1.8 mm shell thickness.
Putting All Together
| {gallery} Assembling the Drawing Machine |
|---|
|
|
|
|
|
|
|
|
|
|
|
|
|
|
|
|


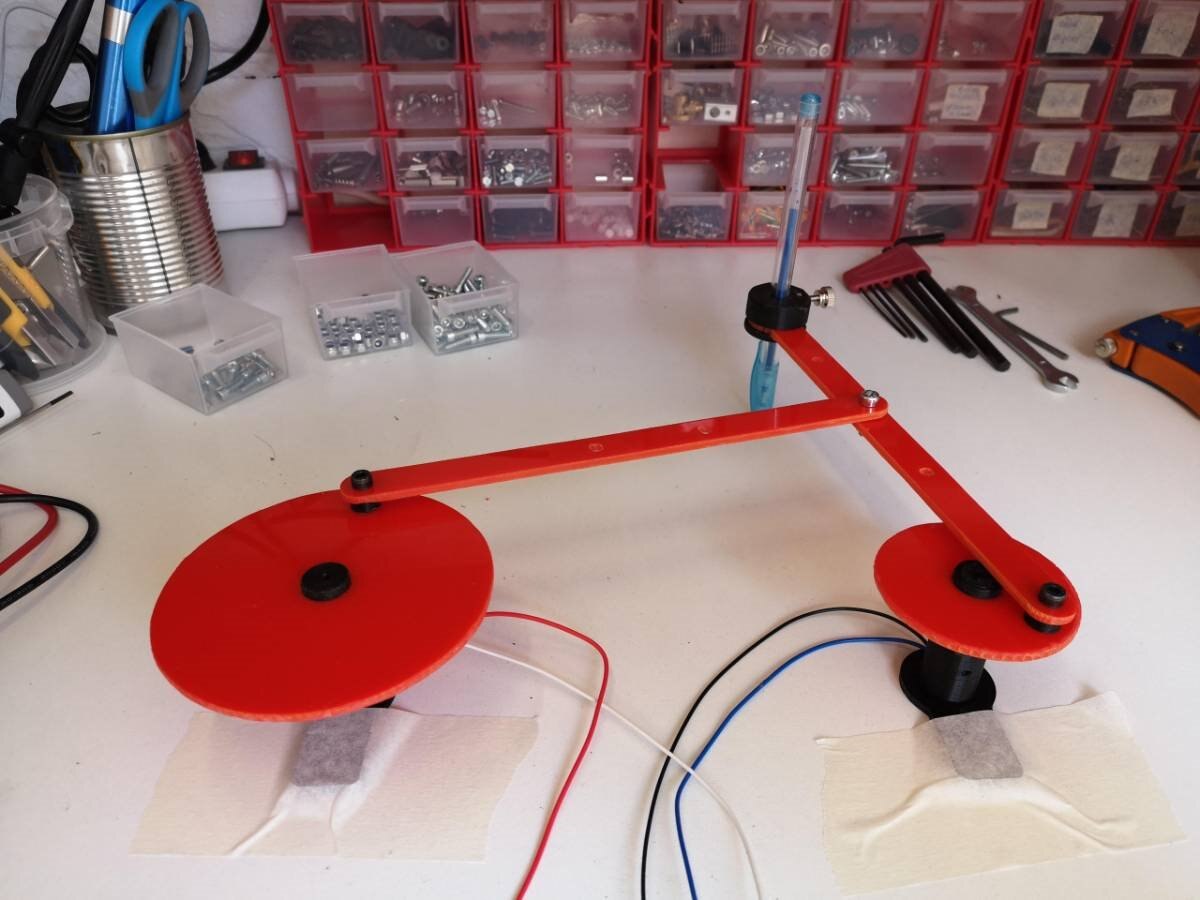
At this point, the drawing machine is ready to be controlled by the BBC micro:bit
Software
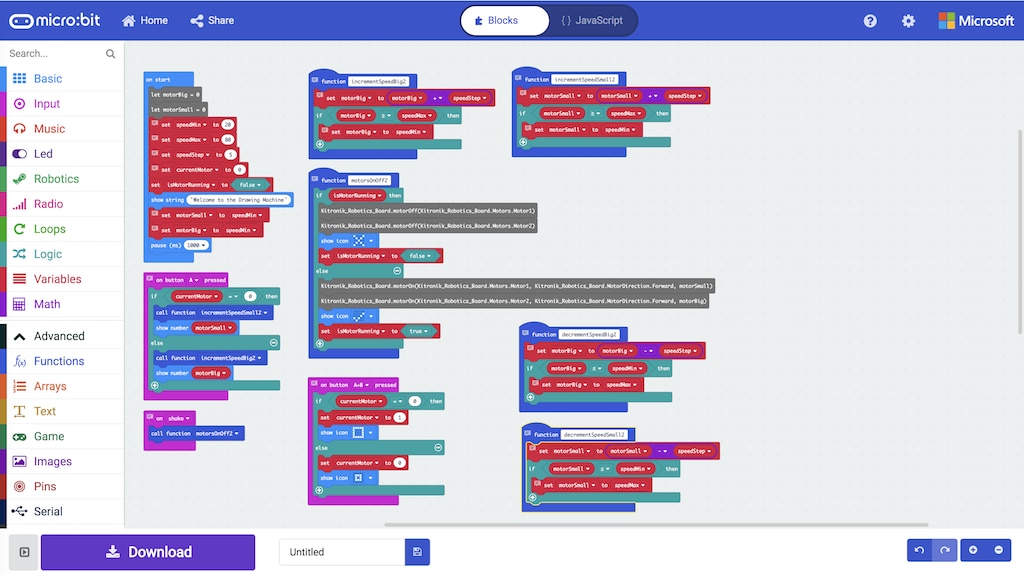
I wrote the code in Javascript for micro:bit to make it compatible with the make code graphical interface. The sources and the code setting instructions are available –together with the STL files to build the components– on the GitHub repository alicemirror.github.io/drawingmachine
Control Features
The drawing process can be controlled by the microbit with the two buttons A and B:
Press Button A+B
Switch between controlling the big wheel of the small wheel
After selecting the desired motor (wheel)
Press Button A
Decrease the motor speed
Press Button B
Increase the motor speed
Shake the board 
Start/stop the drawing process
Testing and Drawing
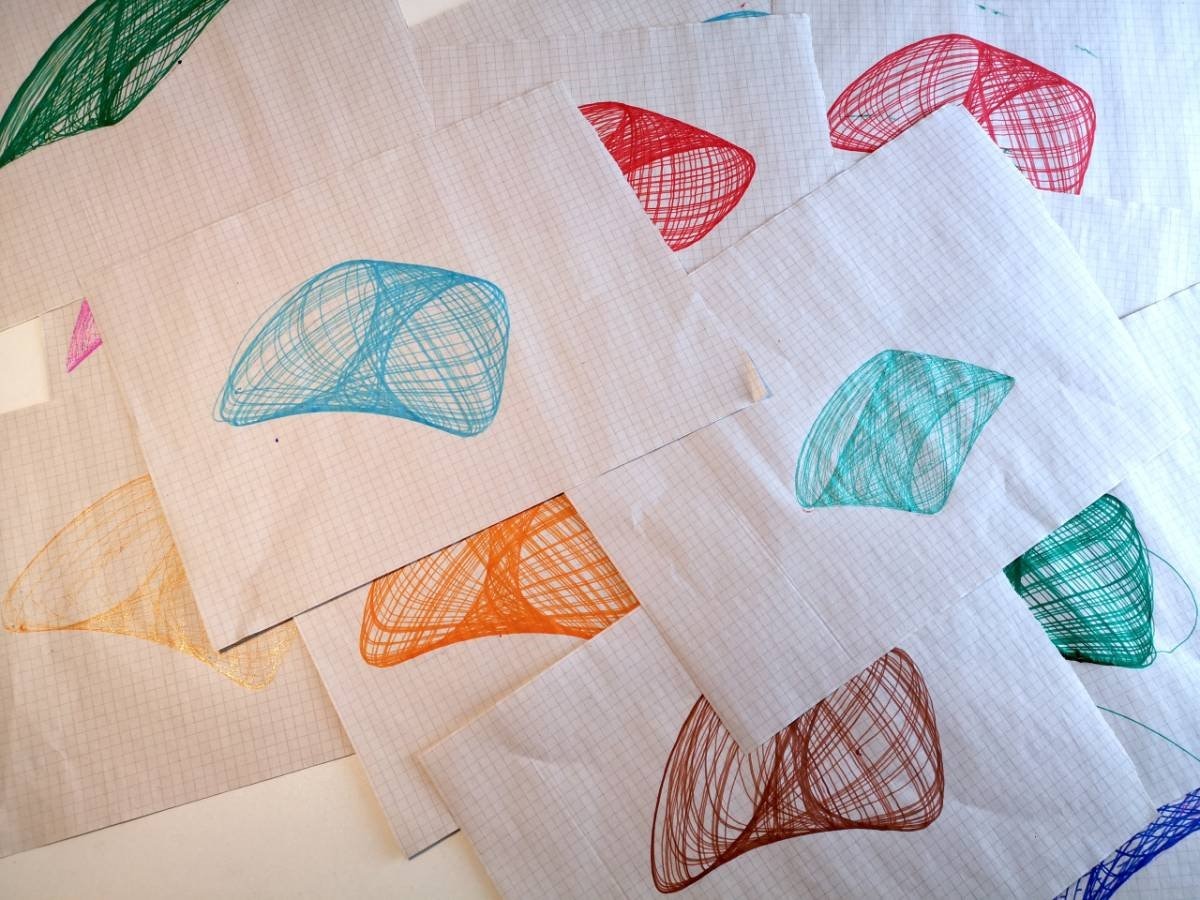
Just need pens, felt tips and a block of paper!
Top Comments
-

14rhb
-
Cancel
-
Vote Up
+5
Vote Down
-
-
Sign in to reply
-
More
-
Cancel
Comment-

14rhb
-
Cancel
-
Vote Up
+5
Vote Down
-
-
Sign in to reply
-
More
-
Cancel
Children