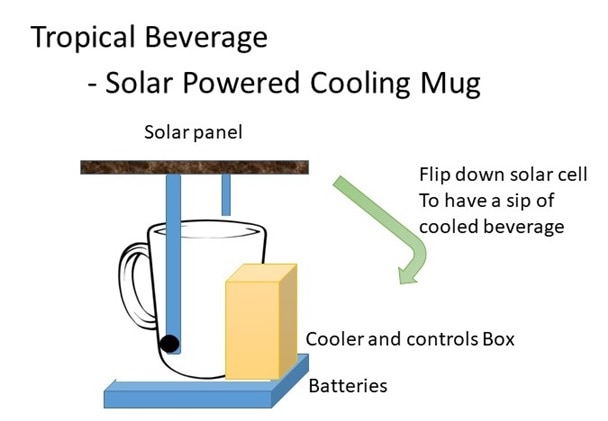
The project is to build a solar powered Tropical Beverage Cooling Mug.

Previous blogs:
Solar Powered Tropical Beverage Cooling Mug -Blog #4 – Learning to cool with Peltier modules
Solar Powered Tropical Beverage Cooling Mug -Blog #3 - the solar charging system
Solar Powered Tropical Beverage Cooling Mug - blog #2 - the solar panel characterization
Solar Powered Tropical Beverage Cooling Mug -Blog #1 - the concept
Lessons learned in Blog 4 included the Peltier module needs a heatsink and fan.
This blog #5:
- This blog shows how a chill plate and fan cooled heatsink assembly was built and tested for a Peltier module.
- The fan used is a DF124020BH-A 12V .25a fan.
- The fan is powered with 5.6V dc for this test to simulate a low battery condition.
- Ambient temperature is a regulated 20C.
- Peltier module resistance varies over time and temperature.
I didnt have any good heatsink paste on hand. Surfed the web for substitutes and found an interesting one, diaper rash ointment. I had a fresh tube with 40% zinc oxide, used that for heatsink paste.
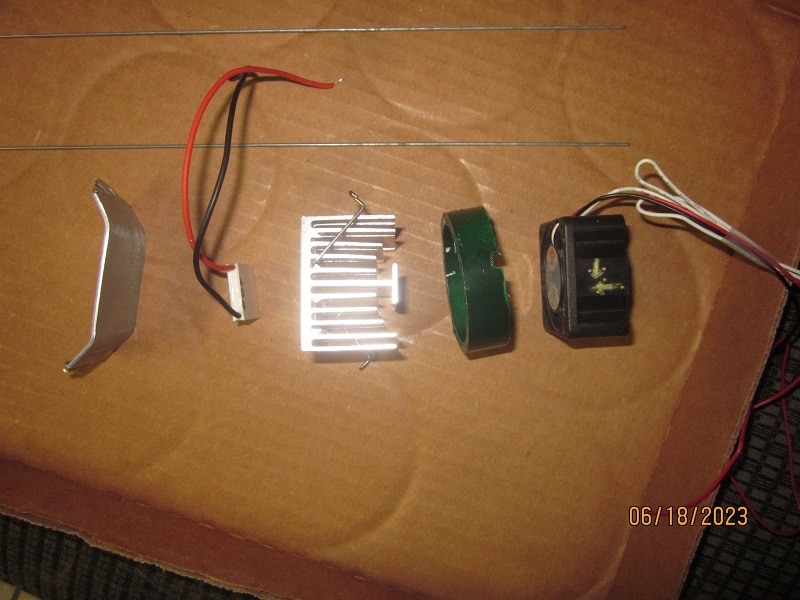
Notice in the photos BOUDREAUXS BUTT PASTE ! for real, and it worked. The heatsink was salvaged from an old PC. The chill plate was a simple metal plate bent in a vice to approximately wrap a beverage container.
This test will also fair better if the cup frame is insulated.
Each test step was 30 minutes long. The peltier module was fed in 1 Volt steps, current recorded, after 30 minutes, the chill plate temperature was recorded and the heatsink hottest spot temperature recorded.
Conclusion: This design will actually work well for chilling small tropical beverages !
The lessons learned can be used to build small dehumidifiers, chillers, of compact heaters.
Likely can reduce size of heatsink and/or eliminate fan
|
Start time (ambient 20C) |
Peltier module Volts=1V |
Peltier module amps=.13A |
|
30 minutes after start |
Chill plate temp=18C |
Heatsink hotspot temp=22C |
|
30 minutes after start |
Increase Peltier module Volts=2V |
Peltier module amps=.73 decreasing to .33 |
|
60 minutes after start |
Chill plate temp=16C |
Heatsink hotspot temp=22C |
|
60 minutes after start |
Increase Peltier module Volts=3V |
Peltier module amps=1.23A decreasing to 1.16A |
|
90 minutes after start |
Chill plate temp=6C |
Heatsink hotspot temp=27C |
|
90 minutes after start |
Increase Peltier module Volts=4V |
Peltier module amps=1.66A decreasing to 1.36A |
|
120 minutes after start |
Chill plate temp=4C |
Heatsink hotspot temp=30C |
|
120 minutes after start |
Increase Peltier module Volts=4.6V |
Peltier module amps=2A (MAX) decreasing to 1.95A |
|
150 minutes after start |
Chill plate temp=4C with significant chill plate condensation |
Heatsink hotspot temp=35C |


significant condensation of ambient air on chill plate

This is the step by step photos for building the chill plate - fan cooled heatsink assembly


Top Comments