Welcome to my project entry for the RFID or NFC competition.
I have an automation system here at home using openHAB onto which I have attached different remote items, either via zigbee or direct RF modulation via custom ESP32 based boards.
That system is configured to send me emails when doors or windows get opened during predetermined hours and this can be activated via the web interface or the Android app.
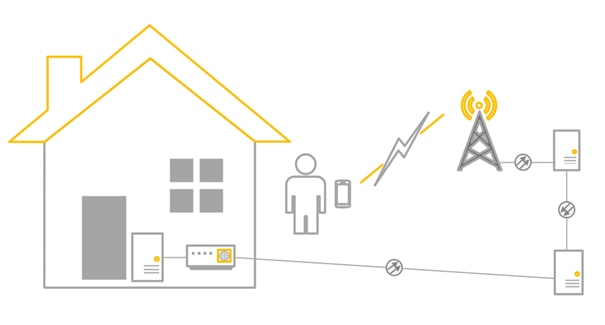
While this works just fine, it is a bit too complex when allowing my friendly neighbors to come water the plants during our holidays. I mean, it requires them to have a smartphone, install the app, and forces me to give them access to just that part of the system which proves quite complicated.
Plus it requires a working internet connection for home and the smartphone which is not really environmentally friendly as it has to go through a lot of infrastructure just to do a simple task:

When looking at commercial alarm system offerings, there usually is a keypad onto which you can type a code or swipe a badge to (de)activate the alarm.
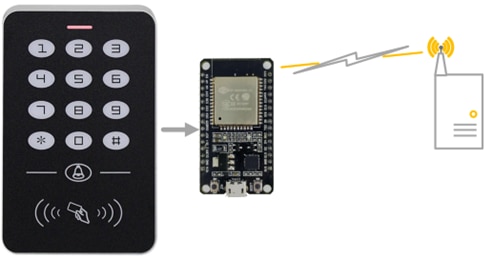
Finding an affordable ready-made solution turned out to be quite a challenge so I settled on making it myself out of a simple door entry keypad system, an OBO HANDS A1 bought for about 10€.
The system handles the entire RFID protocol management, sensing the badges, registering them in its memory and recognizing them when they are presented in front of it.
The idea is then to connect the bell button and relay output to an ESP32 with a tiny bit of code that sends item updates to the openHAB system:

The original idea was to post MQTT messages, but this requires a bit more work on the openHAB side and adds a potential point of failure on the chain of events. Using the already available openHAB REST API thus proves easier, even if it ties this system to a single automation platform.
To make configuration easier, a web portal is available on the ESP32, allowing the input of required values to connect all this together.
Two LEDs show the current status of the alarm system, both being off while it is starting up.
Powering the ESP32 is done by hijacking the undocumented Prog2 connector that thankfully provides a +5V rail that supports enough power for both the original system and the additional board.
The following video shows the system in action, first on the bench powered via USB and then fully integrated in the original case.
Source code is available here: https://github.com/obones/NFCAlarm
I hope you found this presentation interesting, do not hesitate to ask questions in the comments section.
