


Introduction
If you are a plant lover one of the most common problems that you might face is to water the plant on time. To solve the problem I made a very easy automatic solution. I know, watering plant by hand is a enjoyable task and every plant lover do it but what happens if you want to go outside for your home for several days? I am going to my village home for several days and there is no one to look after my plants. So, to keep my plants hydrated during my vacation I made a very low cost plant watering system using some very common parts and electronics. In this blog I am going to share it with all of you. Just following instructions you will be able to easily replicate it.
I am sure you will get some solutions online but those are complex and expensive. Most of the solutions use water pump which is power hungry too.
But I was trying to make an easy and cost effective solution and I believe there should have an easy solution.
So, I did some research and was able to make a watering system for my plant that used some very common and inexpensive electronics but works perfectly. Now I can leave my plants unmaintained for several days.
If you own a plant and are facing the issues like me then I would recommend building this project and don't worry if you are a beginner. I have given step by step instructions with video demonstration to build this. You just need to have some time and have access to a 3D printer.
Before going to the details instructions please watch the video:
What you need?
This is a project I tried to build two years ago. That time I tried with a 12V water pump and I failed to run the project successfully possibly for power issue. But recently I focused it again for my serious need. My main goal is to keep the solution simple and inexpensive. Finally, I did it. I used the following easily available components and parts for my project. The electronics used in this project is easily available on almost all local electronics hobby shops.
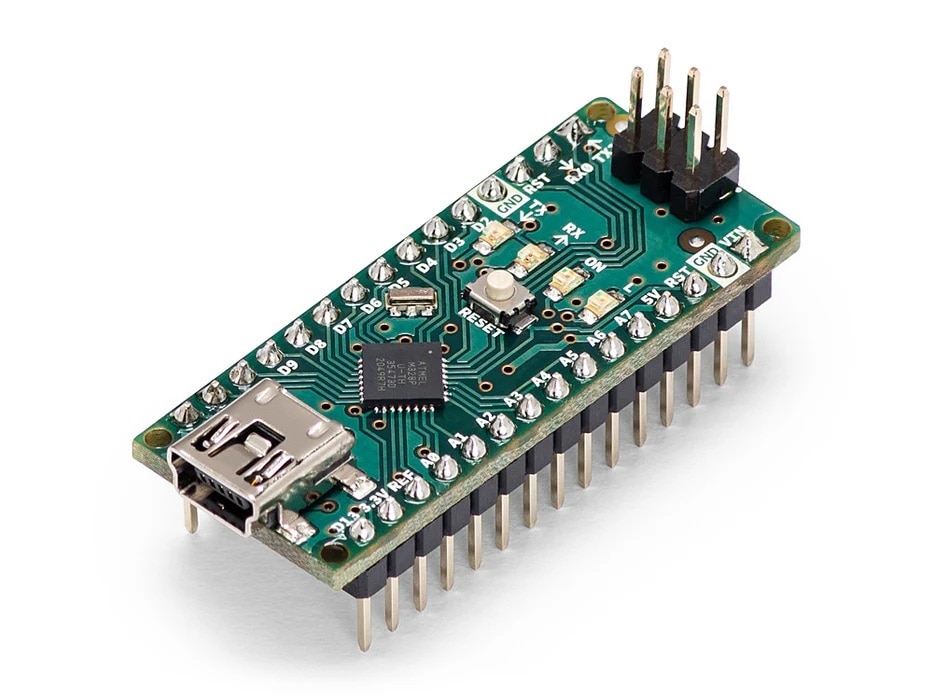
- Arduino Nano
- Arduino Nano I/O Shield (Recommended but not mandatory)
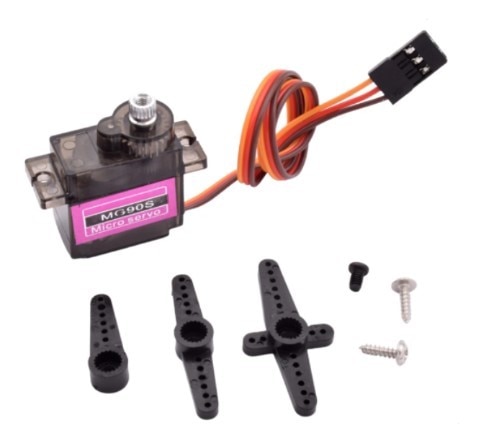
- Micro Servo SG90 (Metal Gear is recommended)
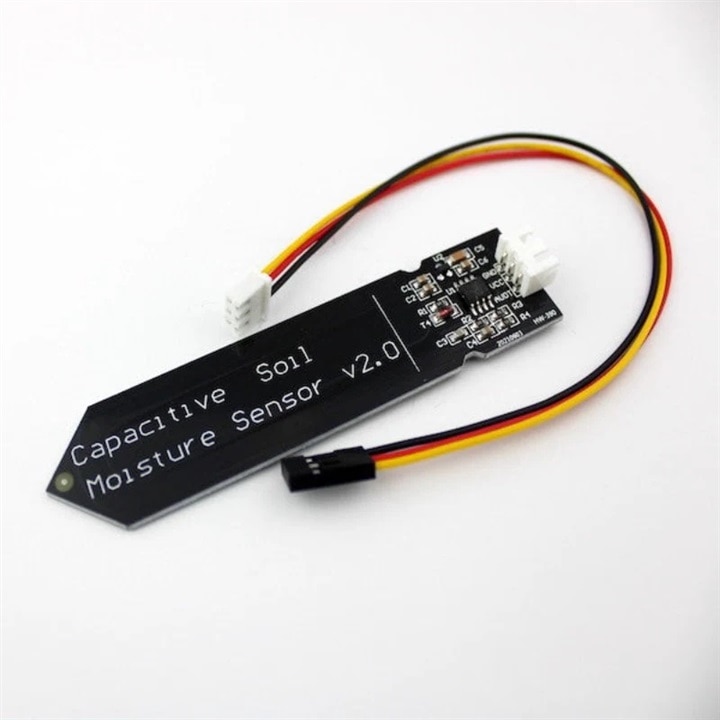
- Capacitive Soil Moisture Sensor
| {gallery}Electronic Components Required |
|---|
|
Arduino Nano |
|
Arduino Nano IO Shield |
|
Capacitive Soil Moisture Sensor |
|
Micro Metal Servo |
|
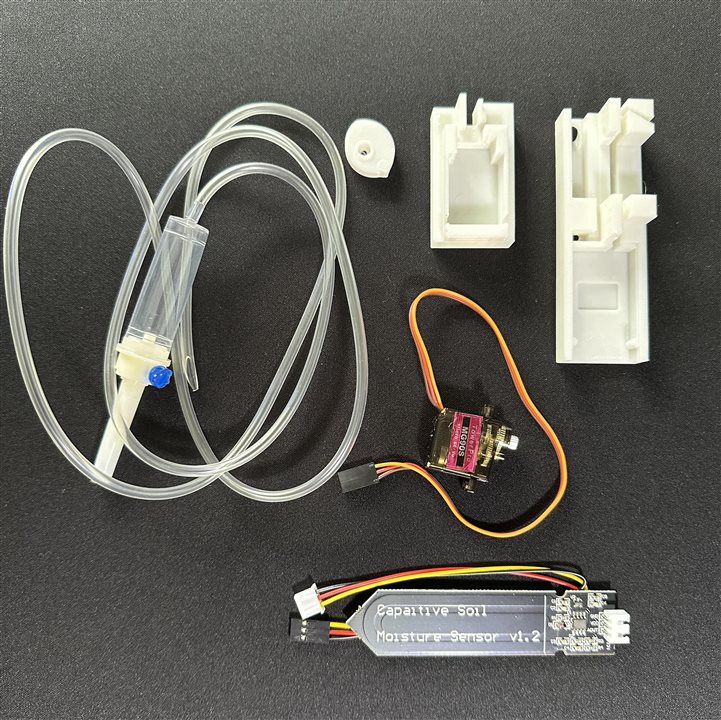
3D Printed Parts and Saline Set Pipe |

Following non-electronics parts are required
- Saline set
- Some 3D printed parts
This part is required to flow the water from the water container. I could use other pipe but saline set is easily available in any drug store at a very low cost.
A water container is required for storing the water. I used a 5liter water bottle as a water container.
3D Design & Printing
Watering can be done at a regular interval or can be based on the soil moisture. I took the second option to save the water and for this a moisture sensor is required. So, I made a 3D model for housing the sensor, a micro servo motor and a path for the water pipe. The logic is that, moisture sensor will read the moisture content of the plant pot and based on the moisture content the servo motor will rotate to block or allow the water flow through the water pipe.
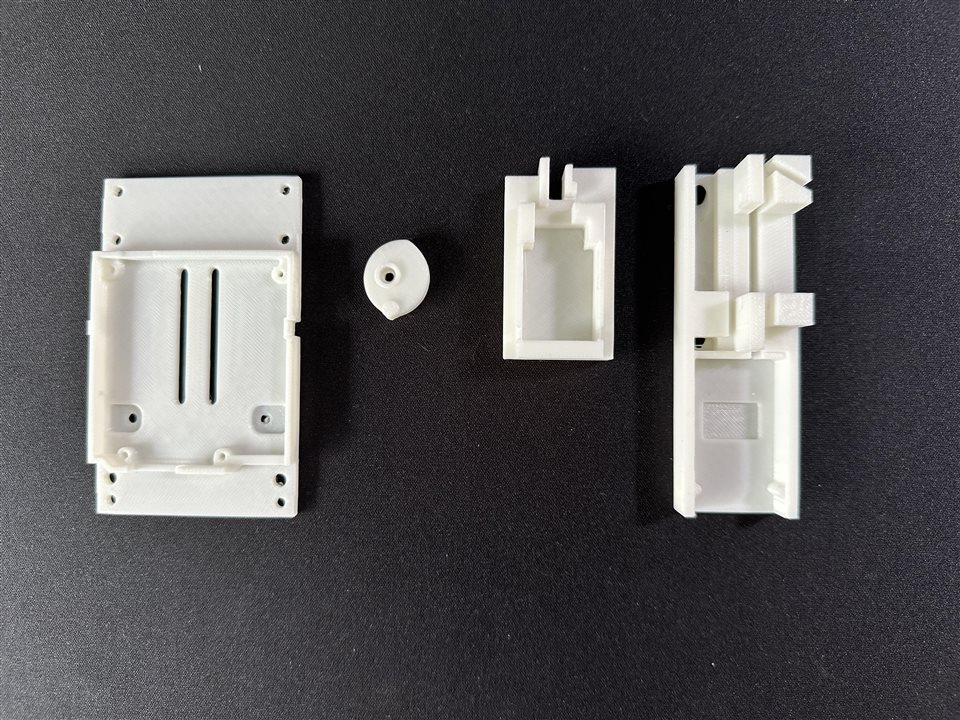
I designed all the 3D file in Tinkercad.com because this is a platform where you can make a 3D design without any training. I uploaded all the design files in thingiverse.com. You can download the file from the link below:
https://www.thingiverse.com/thing:7057009
Assembling
After 3D printing and collecting all the other parts, the next thing is the assemble the parts. Assembling is very easy and I uploaded a assembly video in a later step. To assemble follow the steps below:
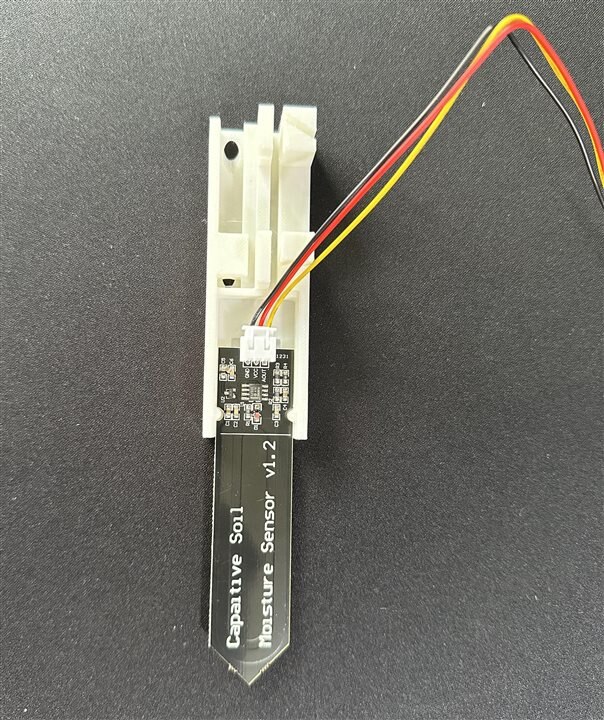
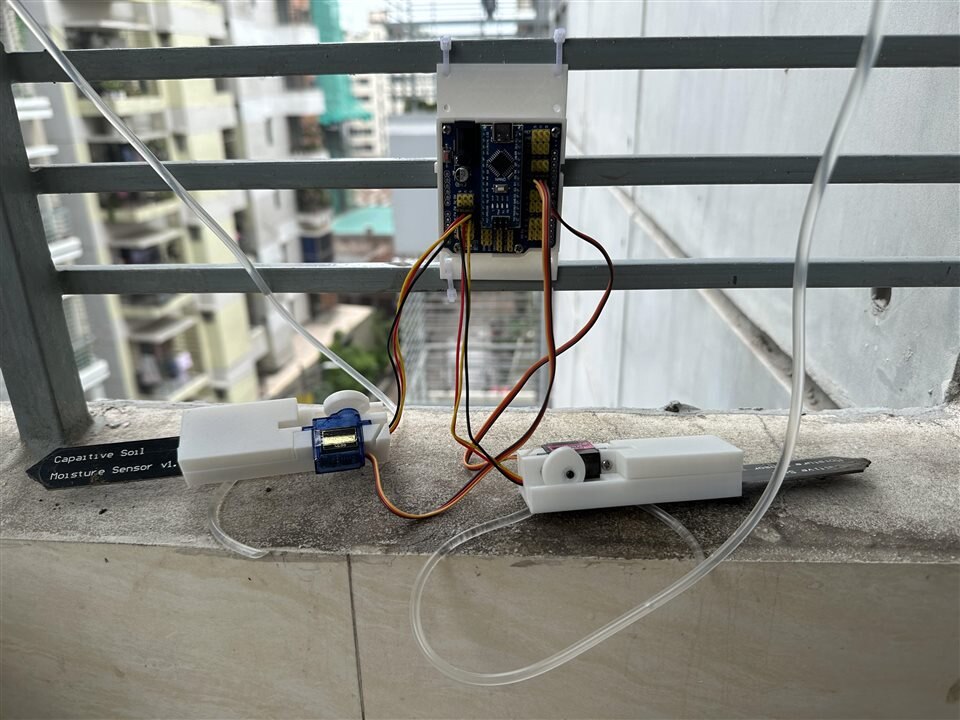
First you need to insert the capacitive soil moisture sensor to the 3D printed base as shown in the images below:
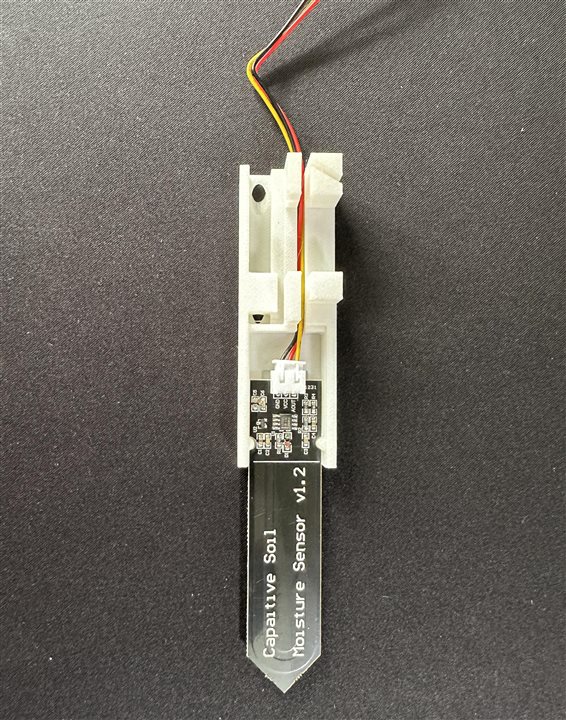
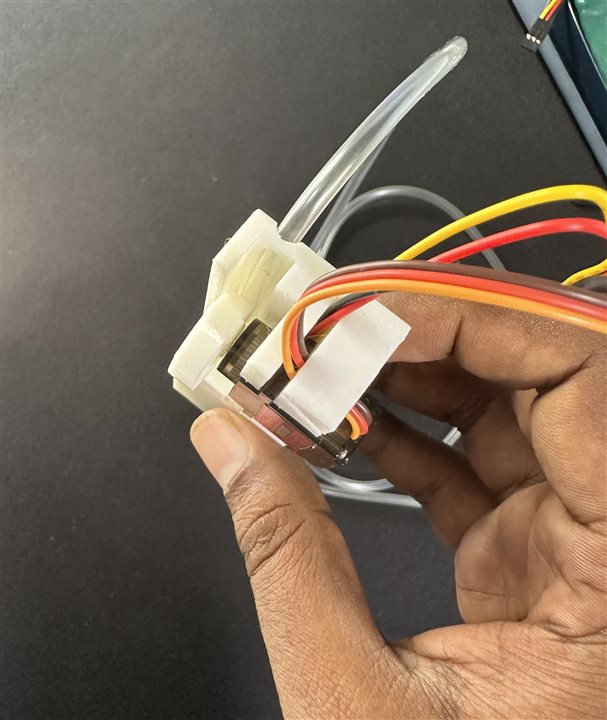
Organize the sensor cable as shown in the image below:
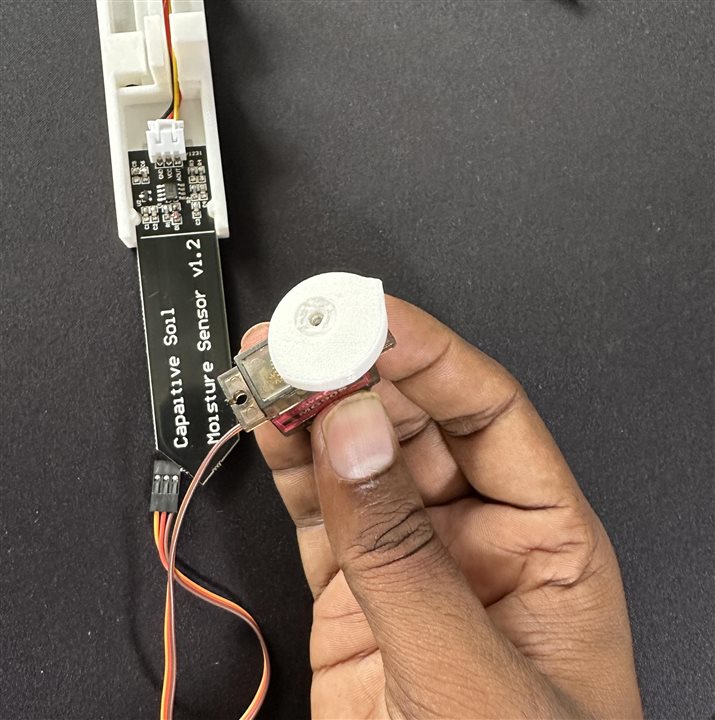
The next step is to insert the pully to the servo motor and adding the screw.
Then you need to place the servo motor to the servo slot and fixed it in the position with two screws:

Now you can place the top cover as shown in the image below:
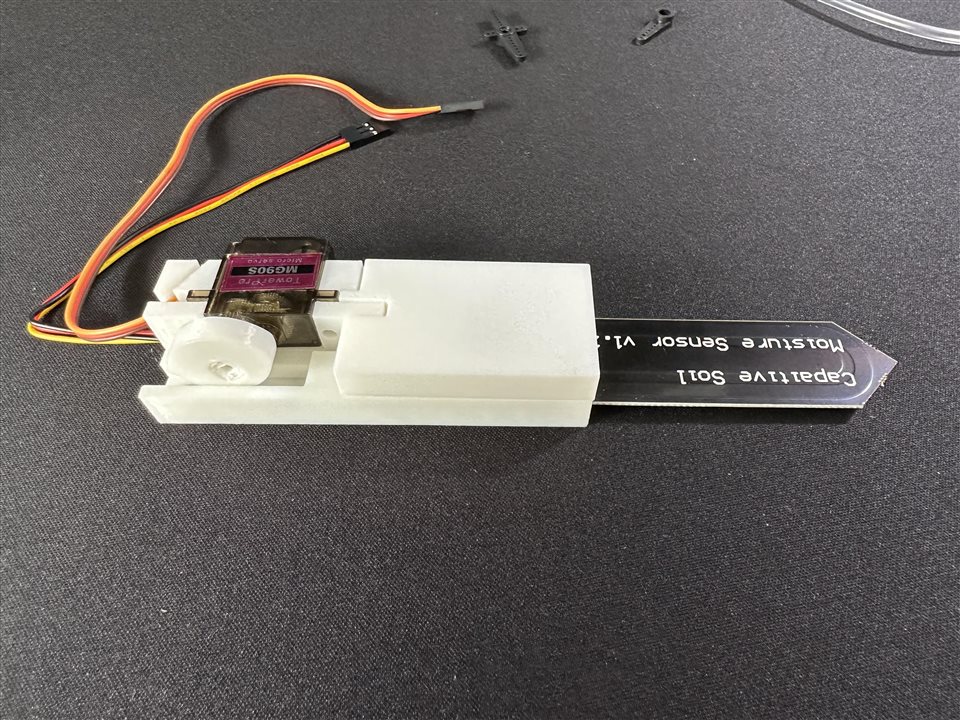
Finally you need to insert the water pipe under the servo pully for testing purpose. Inserting the water pipe is very easy. You just need to push the pipe through the top hole towards the the bottom hole. It will automatically follow the path.

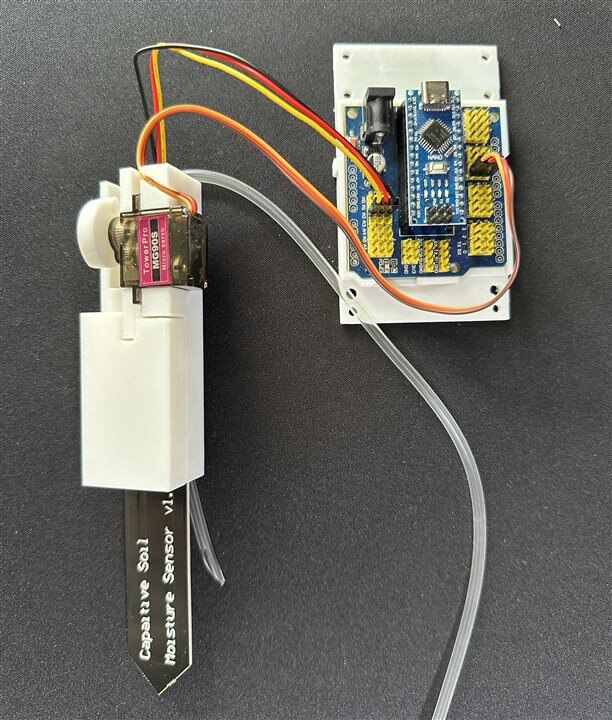
Connecting & Testing
Senor unit assembling is completed and now we can test it by attaching with the Arduino Nano. For avoid any soldering I used Arduino Nano I/O shield for connecting servo and the sensor. We can use up to 8 sensor units for 8 plants using a single nano i/o shield. We need 8 analog pins for eight sensors and eight digital pins for attaching 8 servo motors. For each sensor unit we can use any analog port (A0 to A7) and any digital port. You just need to modify the Arduino code accordingly.
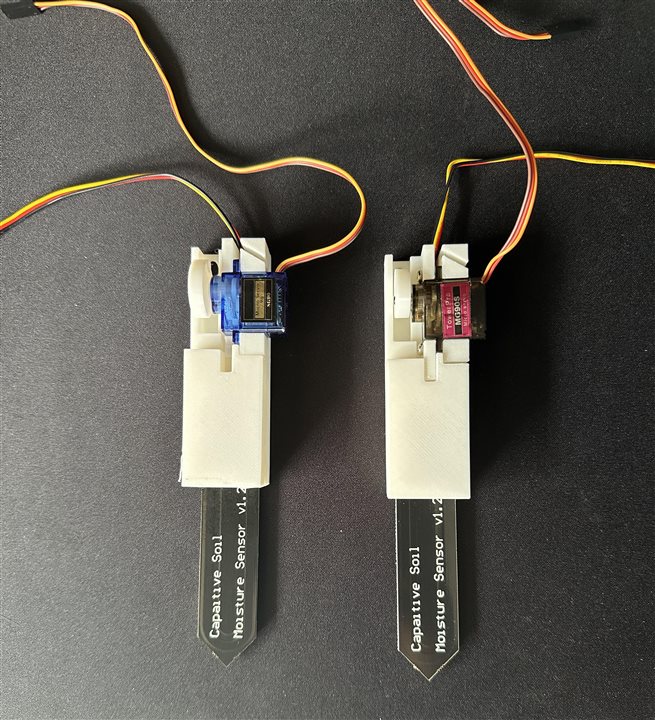
I make the system for my two plants and I used A0 and D8 for first sensor using and A1 and D9 for second sensor unit. Each plant pot needs a separate sensor unit for independently watering the plant.

The Arduino Code is given below:
#include <Servo.h>

Servo sensor_1_servo, sensor_2_servo;


void setup() {
  // put your setup code here, to run once:
  sensor_1_servo.attach(8);
  sensor_2_servo.attach(8);
}

void loop() {
  // put your main code here, to run repeatedly:
  int sensor_1_value = analogRead(A0); //sensor 1 is connected to A0 pin
  int sensor_2_value = analogRead(A1);

  if(sensor_1_value >350) //soil is dry
  {
    sensor_1_servo.write(0); //water flow is on
    delay(1000);
  }
  else if(sensor_1_value <200) //soil has enough water
  {
    sensor_1_servo.write(95); //water flow is off
    delay(1000);
  }

  if(sensor_2_value >350) //soil is dry
  {
    sensor_2_servo.write(0); //water flow is on
    delay(1000);
  }
  else if(sensor_2_value <200) //soil has enough water
  {
    sensor_2_servo.write(95); //water flow is off
    delay(1000);
  }

}
For the whole assembly process and testing please watch the video below:
This video will help you to assemble the soil sensor, servo motor and the water pipe with the 3D printed parts very easily. Watch the video carefully and assemble accordingly.
My two sensor units after assembly:
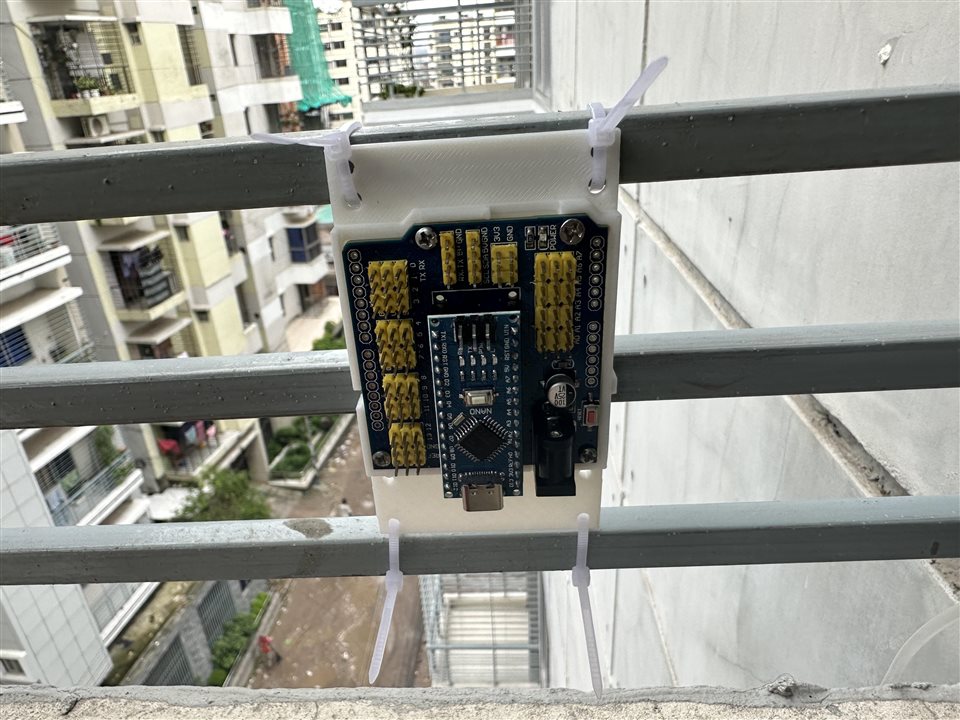
I also made a 3D base for the Nano IO shield so that I can place it at any convenient place.

Installation of the Sensor Unit
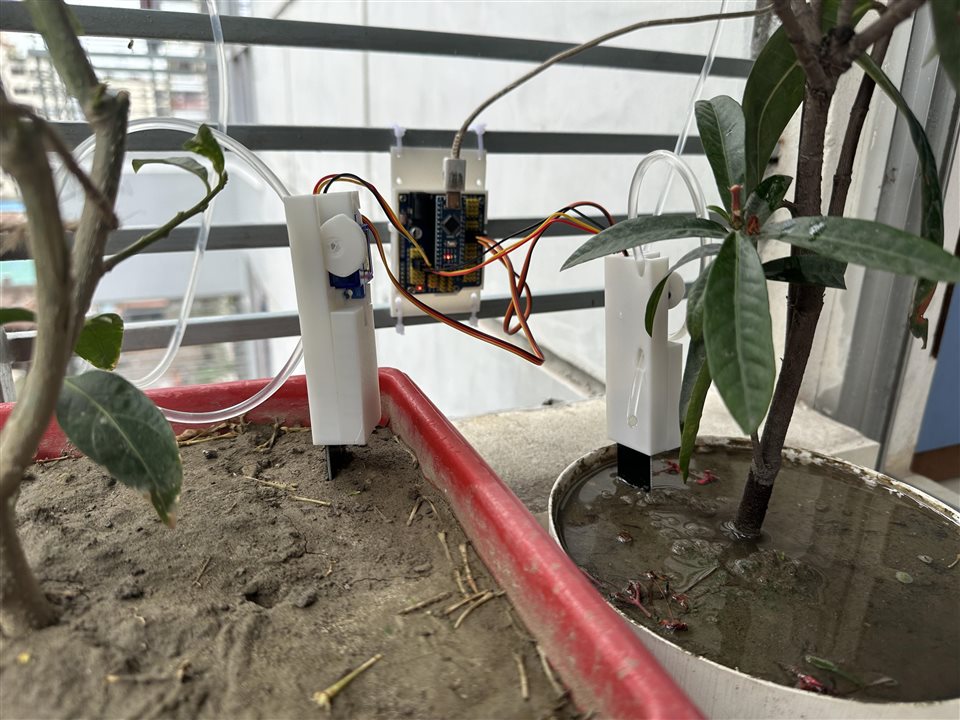
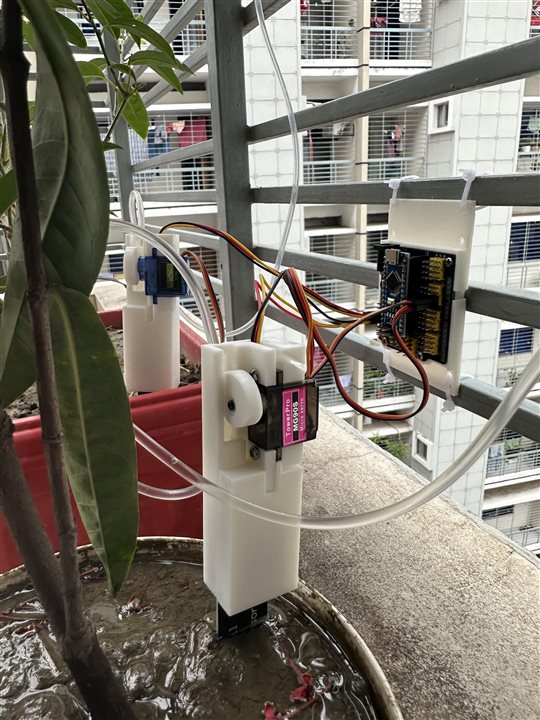
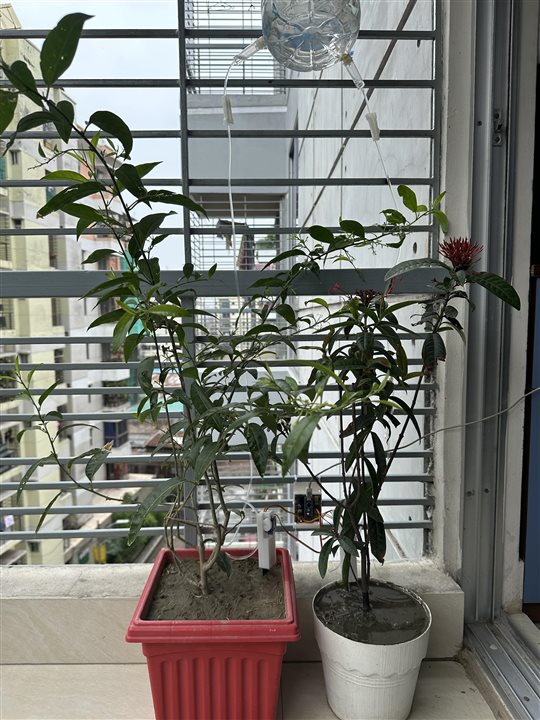
After preparing all the sensor units I installed the system to my plant. I used two sensor units for my two plant. I placed the plant in my balcony. So, I fixed the arduino unit to my balcony grill with zip tie. Then, I inserted one sensor unit to each plant pot.
Finally, I connected the sensor cable and servo cable to the corresponding port of the nano io shield as mention in the previous step.
I inserted the sensors to my plant pots as illustrated below:
Ready to Serve
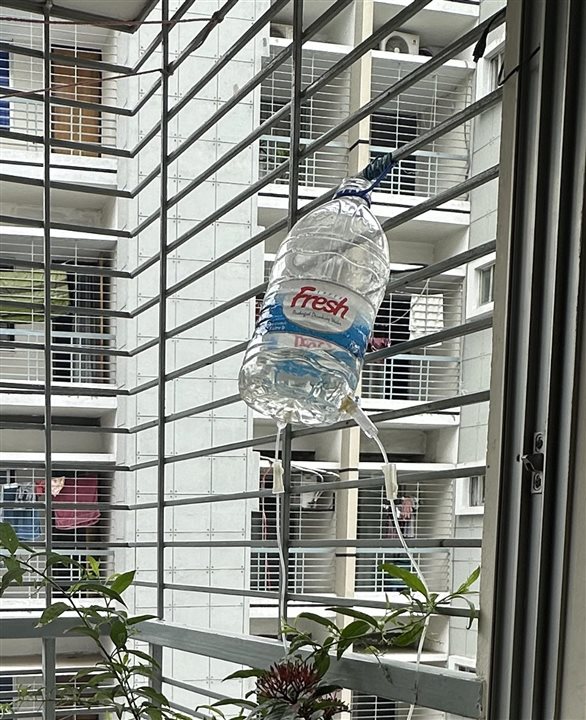
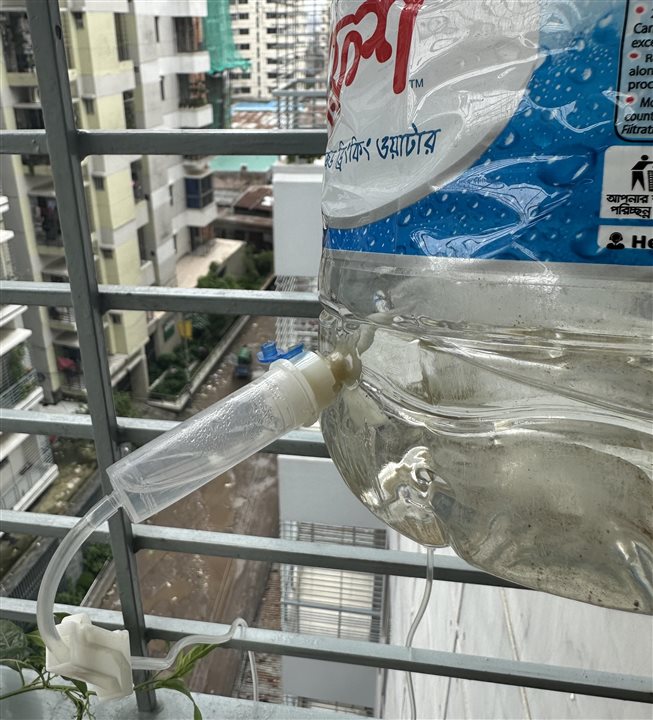
For providing the water to plant pot we need to store the water in a pot first. I placed the water pot is placed at a height so that water fall to the plant pot due to gravity. As, I used a plastic water bottle, I made two small holes for inserting two pipes. Every saline set has a spike with the pipe and I inserted that spike through the hole. To avoid any water leakage, I used some hot glue to tightly fixed the spike to the hole and fill any small gap.
I filled the water bottle and connect the power source to the nano io shield. Power can be provided through the USB programming port or the DC barrel jack. I used the first option.
The system is finally ready to serve me.


