


The project Inspiration:
I usually purchase pre grown seedlings for my deck garden, having tried growing plants from seed with minimal success.
This year I swung for the fence, built a project I've put off for a few years, a monitored growing system to germinate seeds and develop robust seedlings.
Hot peppers are often the focus of my garden because they are expensive at the store, if you can even find the varieties I look for. One favorite is Thai pepper.
This year's compulsion is to grow Aji Charapita and Aji lemon drop peppers. These are Peruvian varieties that can cost $17 a pound, if you can find them.
Once harvested, these peppers will be used in making unique recipes like venison chili, lamb chili, etc... frozen and pickled for fall and winter tailgating.
Great thanks to prior E14 shopping carts & webinar prizes for providing me a generous stash of controllers and sensors to have on hand. Some sensors that have been in my stash for years.
Research into growing the Perfect Pepper Seedings: https://peppergeek.com/germinate-peppers-seeds-fast/
Temperature is potentially the most important factor in successful seed germination,
Pepper seeds will germinate best when the soil is between 80-90°F (27-32°C).
Seed heating mat underneath propagation tray. Make sure to choose a mat that has a thermostat! otherwise, the mat will be on constantly, potentially over-heating the soil.
After your pepper seedlings are about 2-3 weeks old (after sprouting), they should be ready to move up to a larger pot.
https://www.outdoorapothecary.com/how-to-grow-pepper-plants-from-seeds/
Grow Lights – Peppers need 14-16 hours of bright light daily to grow strong and prevent legginess, use full-spectrum LED grow lights, positioning them 2-3 inches above the seedlings and adjusting the height as they grow. Keep the soil evenly damp but avoid overwatering.
Maintain Proper Temperature After germination, peppers grow best in daytime temperatures around 70-75°F and slightly cooler nights around 60-65°F.
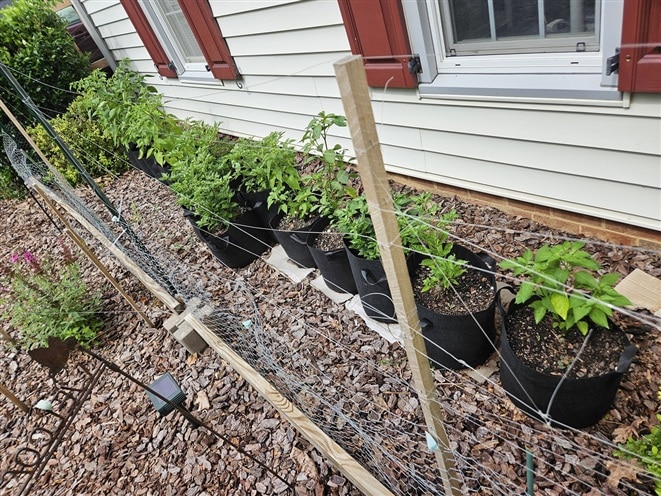
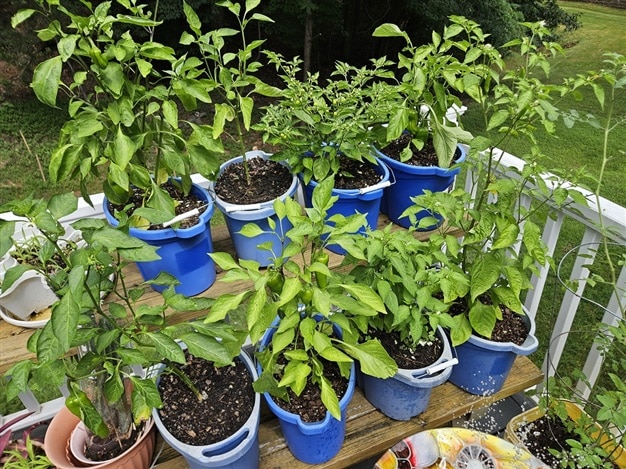
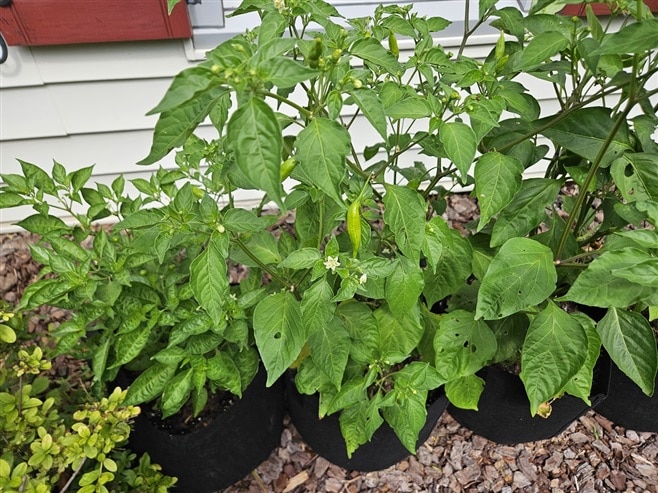
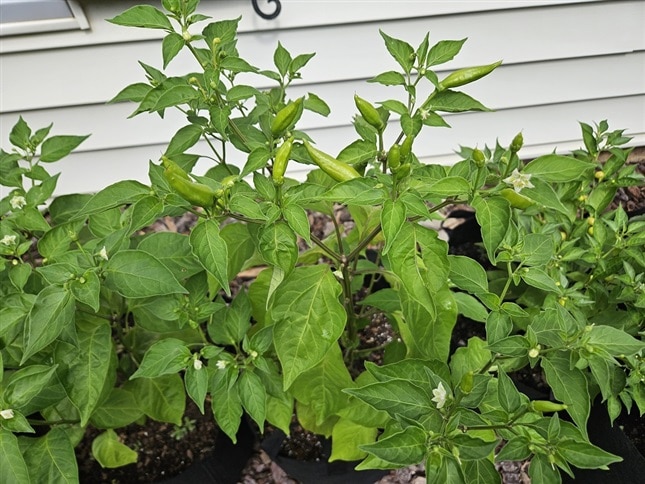
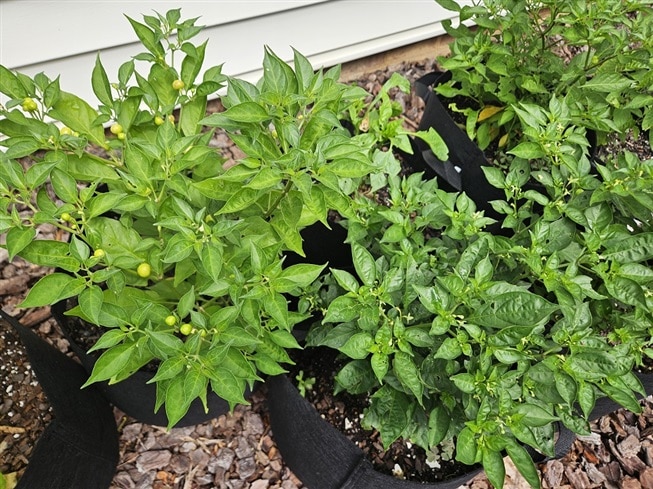
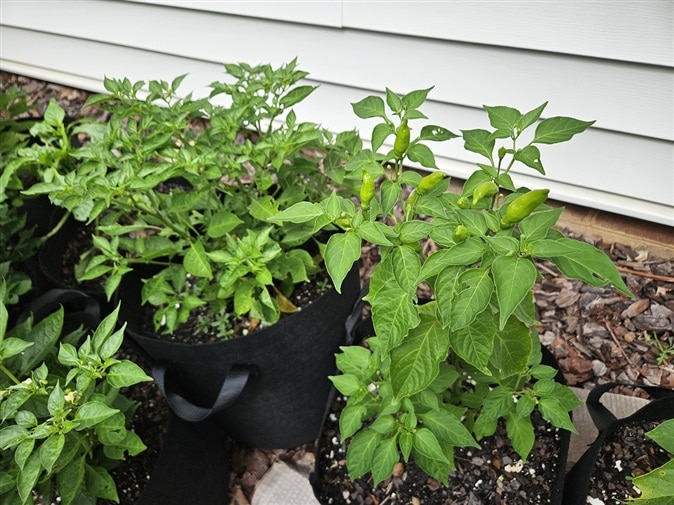
A bit of a brag: June 28 2025 photos of the pepper plants here. They got off to a great start this and the best crop of peppers Ive ever had are close at hand.
Putting Plans to Action:
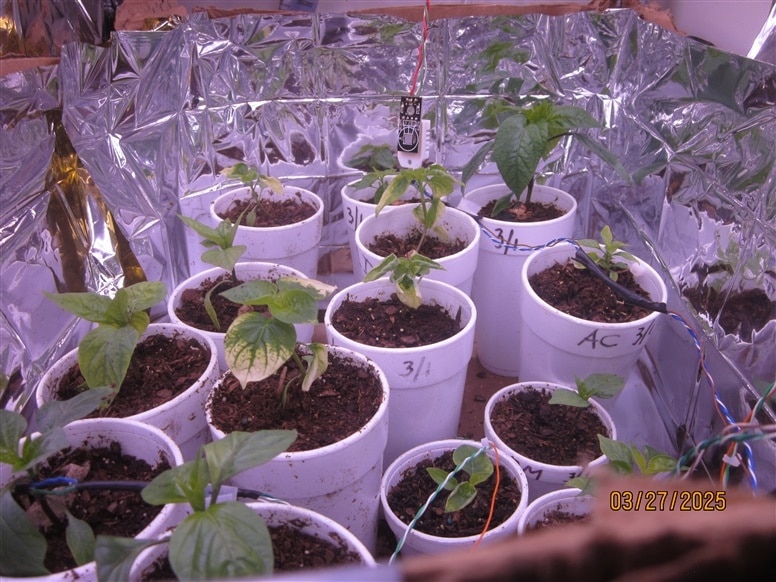
Keeping in line with the online advice to grow the Perfect Pepper from seed, my Grow System has 2 boxes:
one for seeds to germinate , and a second seedling box for development and hardening.
A heating mat isnt needed if the temperature at the plant pot base is kept to 70 degrees or so.
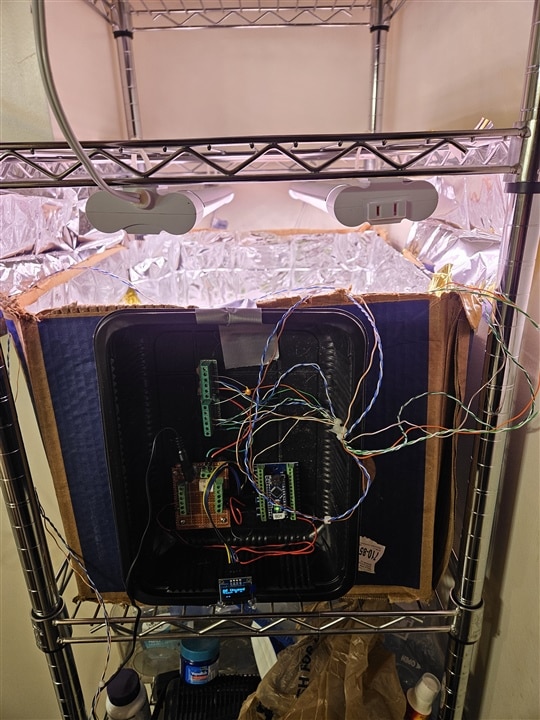
Material List (BOM) for both Germination Box and Development Box Arduino based monitoring systems
- Qty 2 Arduino Nano , Also experimented using an Arduino Minima
- Qty 2 49” OLED Display Module 64 X 32 Pixel SSD1315 I2C Mono Display as the HMI, one for each box
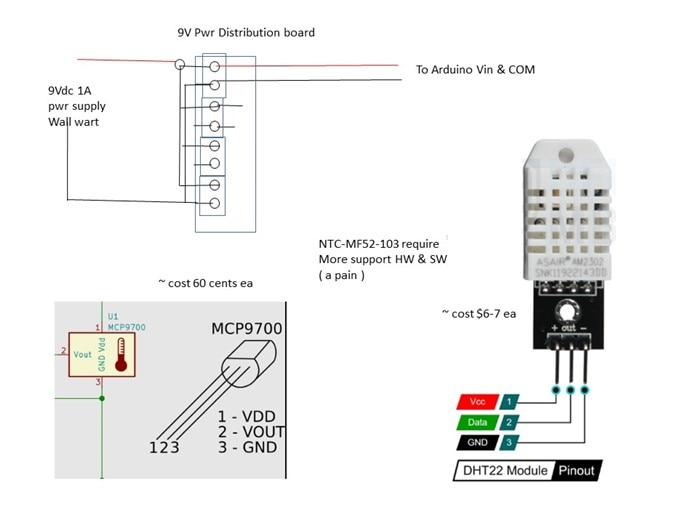
- DHT11 & DHT22 humdity & temp sensors
- Qty 15 MCP9700A-TO temperature sensors
- Qty 2, 12V 1A wall wart power supplies
- Parted out from an old server - 40x40x20mm Fan DF124020BH -Air Flow: 10.28 CFM. Speed: 9,000 RPM.Noise Level: <32 dBA.
- 5V Piezo buzzer
- Flashing white LED + 1 K resistor
Getting right to the build,
This is the germination box in action video
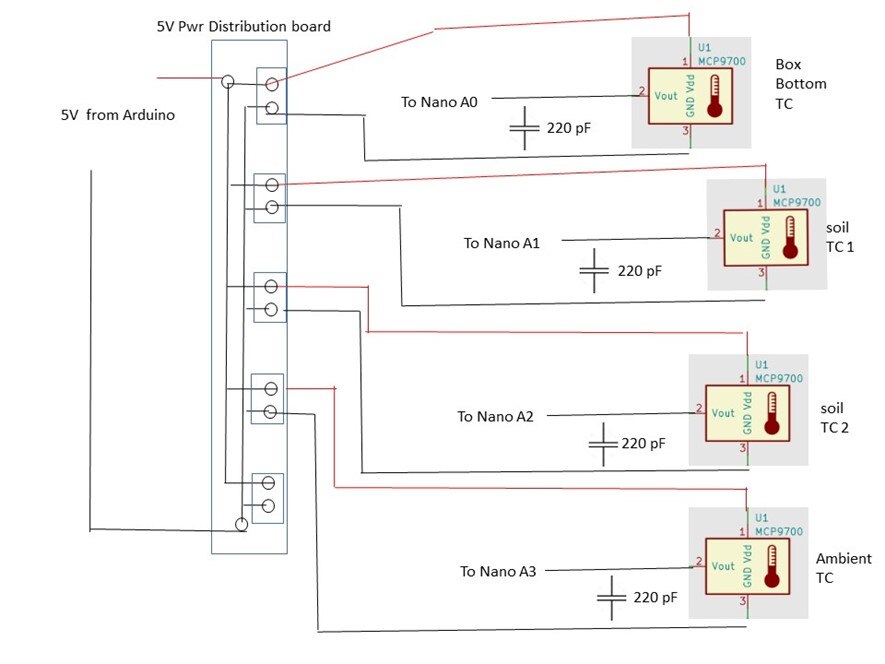
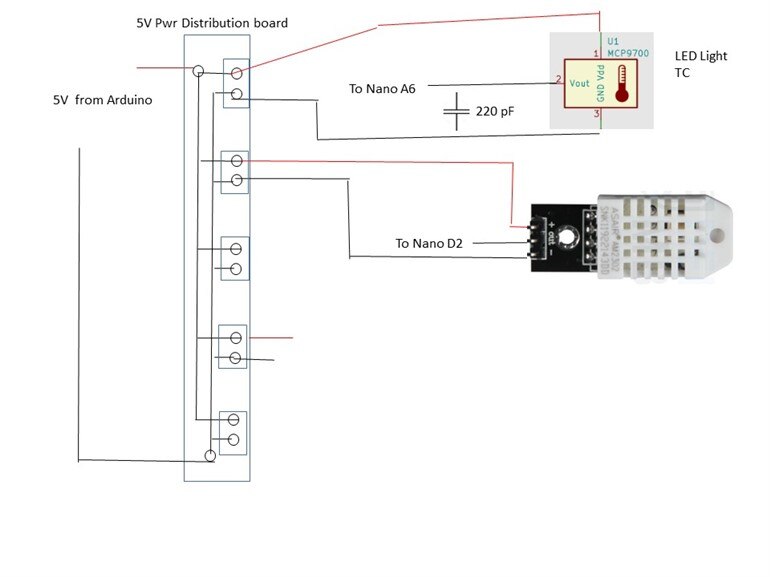
The Germination Box Monitoring System Schematics:

The is the Development Box Monioring System in action video.
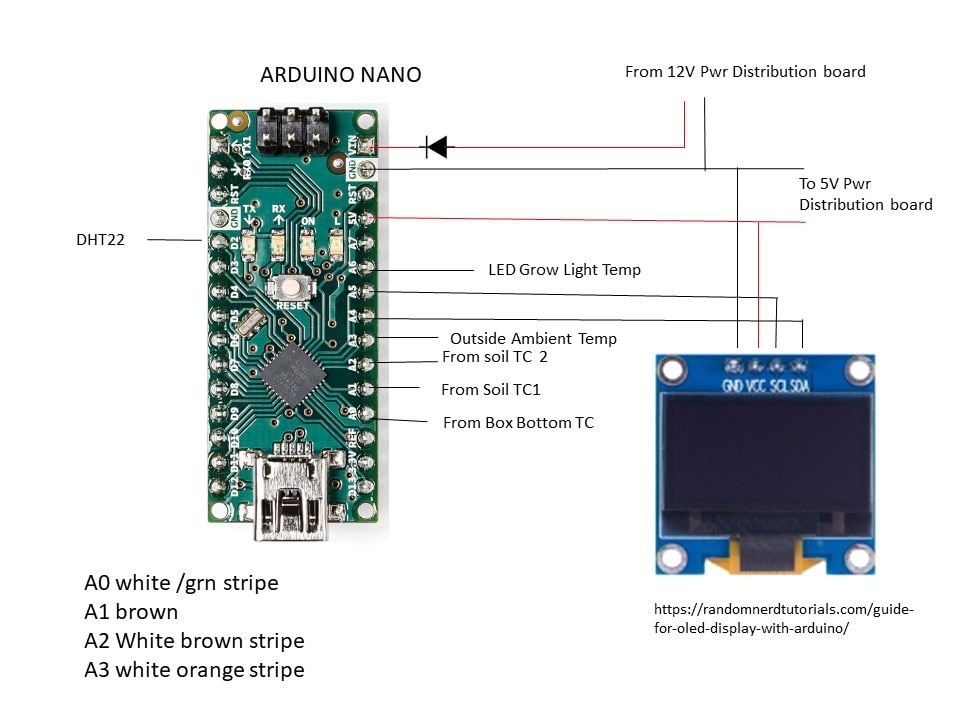
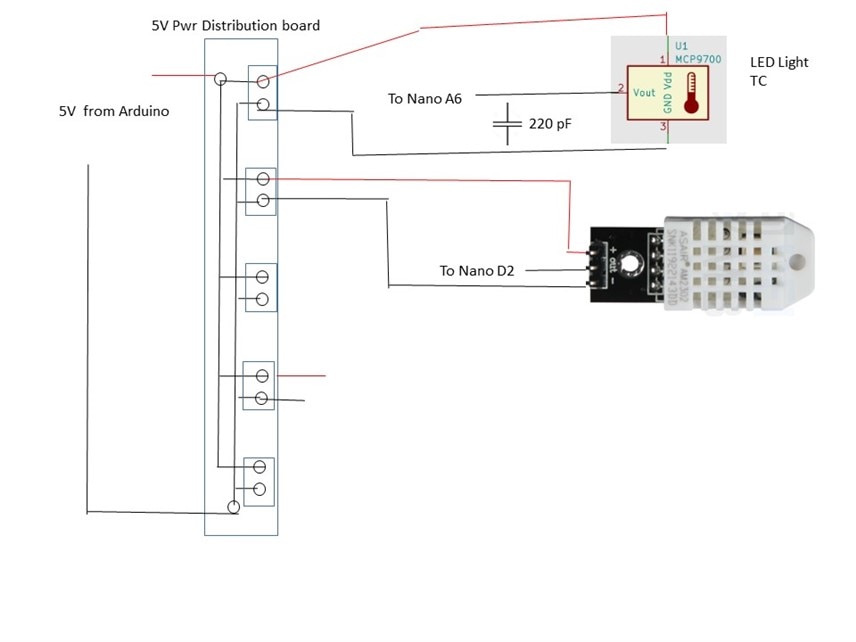
The is the Development Box Monioring System schematics:
Build history and lessons learned
Start with the Arduino Nano & MCP9700As -
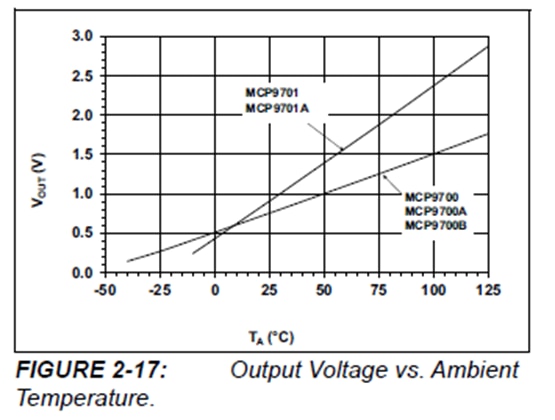
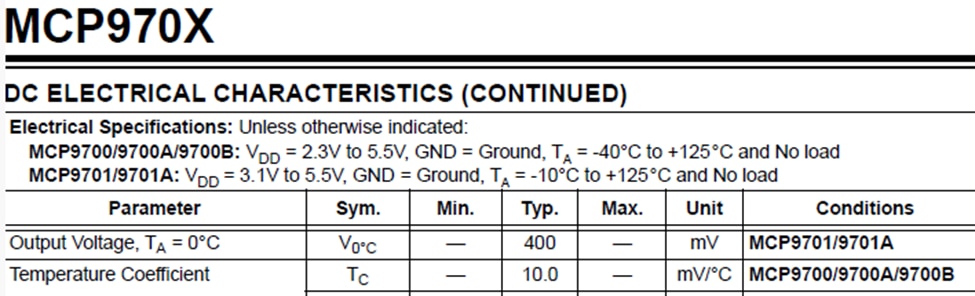
1st surprise – MCP9700A thermal sensor is the -40C to 125C model. So…….-40 is 0V and 125C=5V ?
NO !!! 0C is ~ 500mV and 125C =~ 1.7V
My desired measurement range is 5C to 45C or so……500mV to 1Vdc on the Arduino Analog input.
It is important to read the components datasheet first !
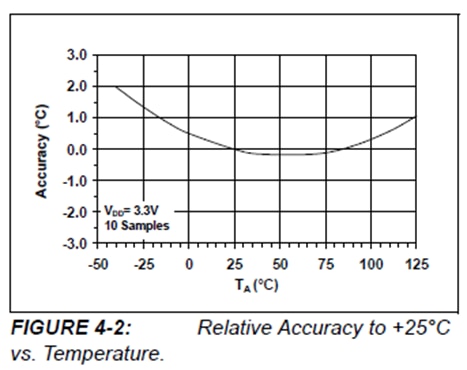
Accuracy:
Optimized for Analog-to-Digital Converters (ADCs):
- 10.0 mV/°C (typical) (MCP9700/9700A/
9700B)TA = -40°C to +125°C TACY -2.0 ±1 +2.0 °C MCP9700A

2nd shocking surprise - with 5V = 1023 counts on the analog inputs , resolution is ~ 50 mV per count, 0C =~counts 50C ~ 200 counts a too touchy on the resolution , my spiderman senses tingle, this will not do. Lets make the resolution counts better.
3rd surprise – increase analog input count resolution - setup the Arduino Nano to use the analog internal reference for 1 PU 1023 counts = ~ 1.5V. After a lot of measurements, offset measurements, and scale factor fudging discovered the real 1 PU volts is ~ 1.4V. Its a much better match for the range of MCP9700As useage.
4th surprise – Tried using the Arduino Minima which can be configured for a 14 bit analog, 1 PU = 16383 counts. Much better accuracy, but doesn’t perform any better for this application. Using the analog reference , the count range for 500mV – 1V is much better, but doesn’t add any true value this project having +- 1 degree F is more than plenty accuracy.
5th surprise – Added DHT22 humidity sensor to hardening box, expected it to mostly read ambient room humidity, which it did, unless the plants had just been watered. Adding DHT11 to the germination box, discovered the small stirring fan made a huge difference in humidity, it tended to dry out the internal air as this box was more sealed to hold in the lamp heat.
6th surprise – Some MCP9700A leads weren’t completely covered with heat shrink tube or hot glue. Those sensors started to give bad readings and one failed. The combination of moisture and fertilized soil helped those leads corrode pretty quickly. Removing the corrosion brought the readings back on some, but one sensor had a lead totally eaten thru and broke off.
7th Gotcha - Temperature readings skyrocket when a thermistor lead opens. Some of the wiring had extra slack, wire loops dangled from the Germination Box and the table where the box sat. The temptation was too much for my furry friends. They had to snack on the yummy light gauge wire of the thermistors. I had to get more serious with the tyraps and not leave room on the table top lest they be tempted to play and chew on more thermistor wires.


8th Challenge - the temperatures displayed seemed noisy. The sensors have a relatively long time constant but were still subject to air breezes and drafts. To help stabilze the readings, 5 temperature reading samples, 600 msecs apart, were saved to an array then averaged to act as an averaging filter. That technique helped. The temperature variations in the Development box are OK for started seedlings, so the averaging was only done in the Germination Box Monitor System.
9th unexpected Event – the stirring fan mounting failed, the fan sat on the box floor, the lamps temperature reached 44C – enough concern to add a high temperature alarm for the system.
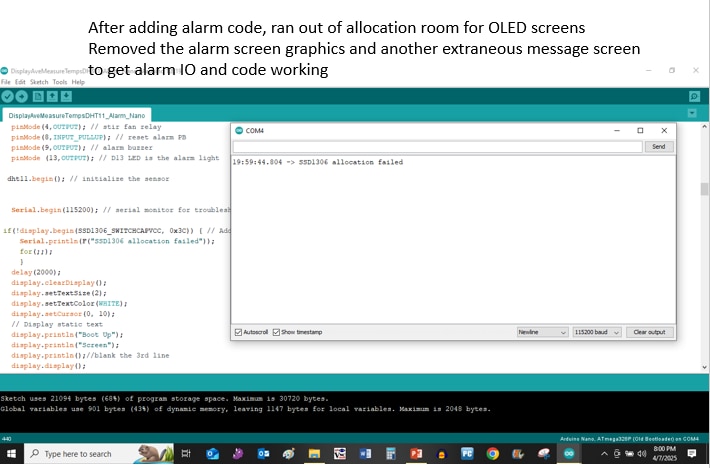
Added a flashing alarm LED and audible buzzer , and a silence pushbutton, to ensure a temperature alarm would be noticed. Adding alarm annunciation messages on the OLED screen caused the 10th surprise.
10th surprise – OLED SSD1315 screen limit. Had to remove a couple redundant print to OLED screens to alleviate this fault. It also crashed the Arduino.
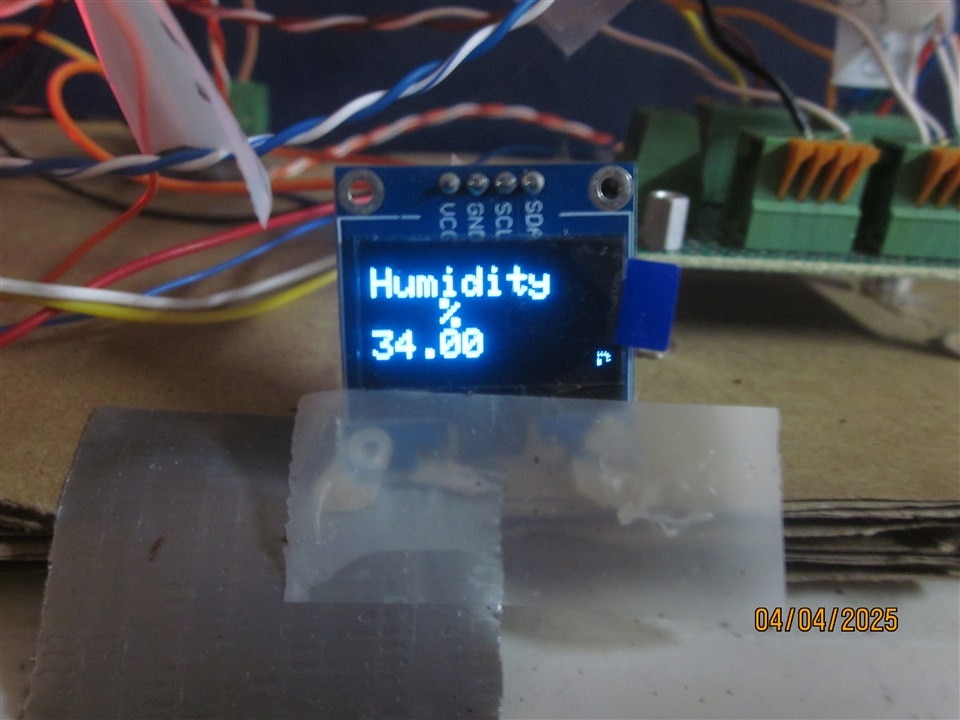
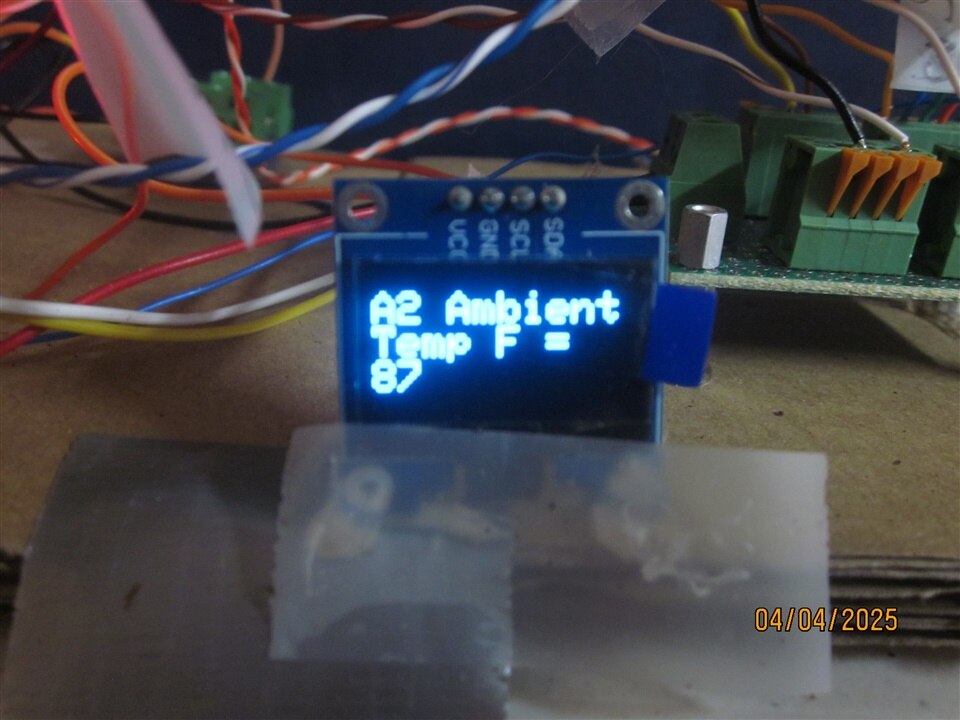
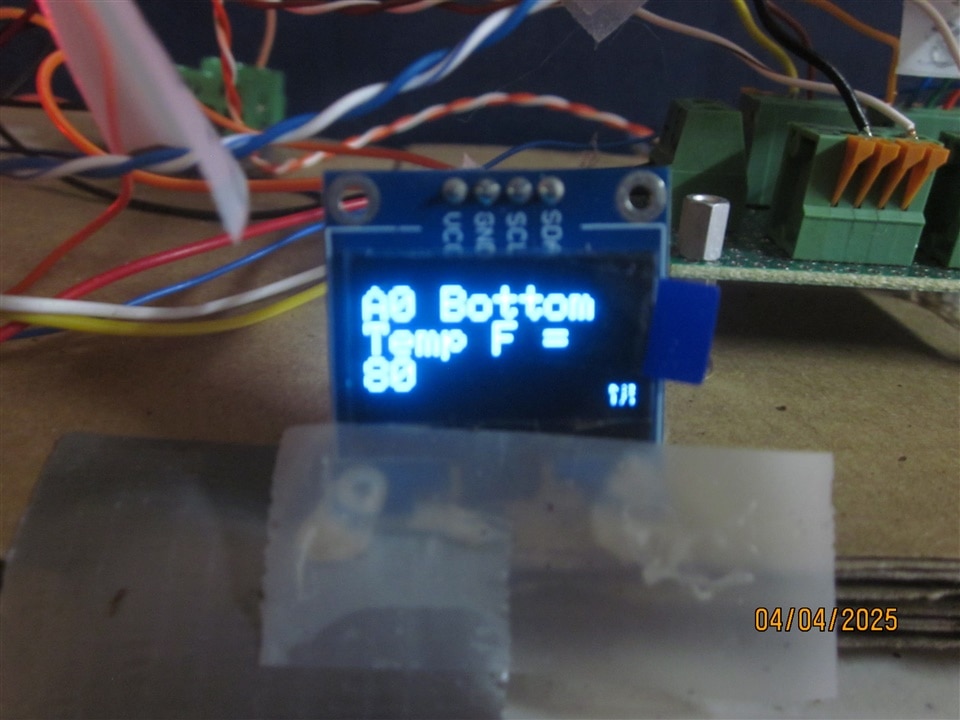
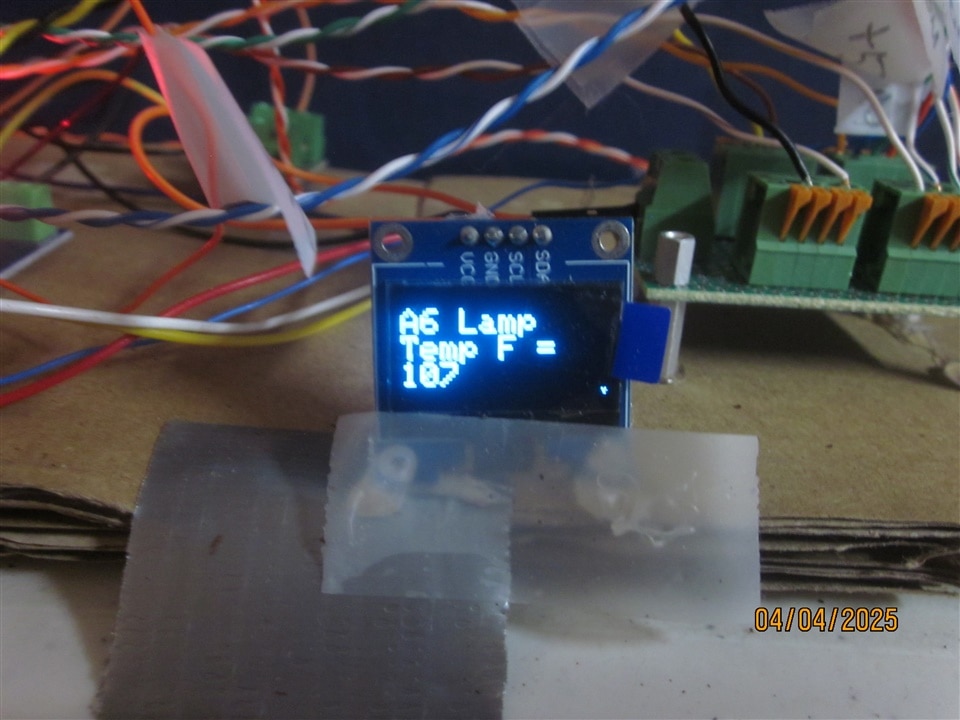
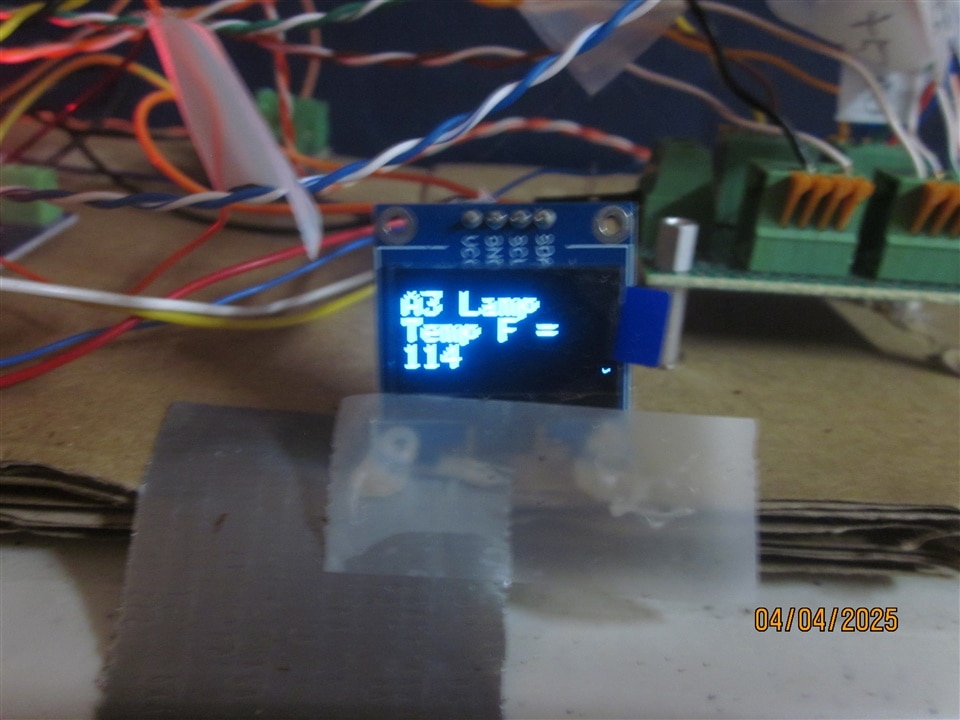
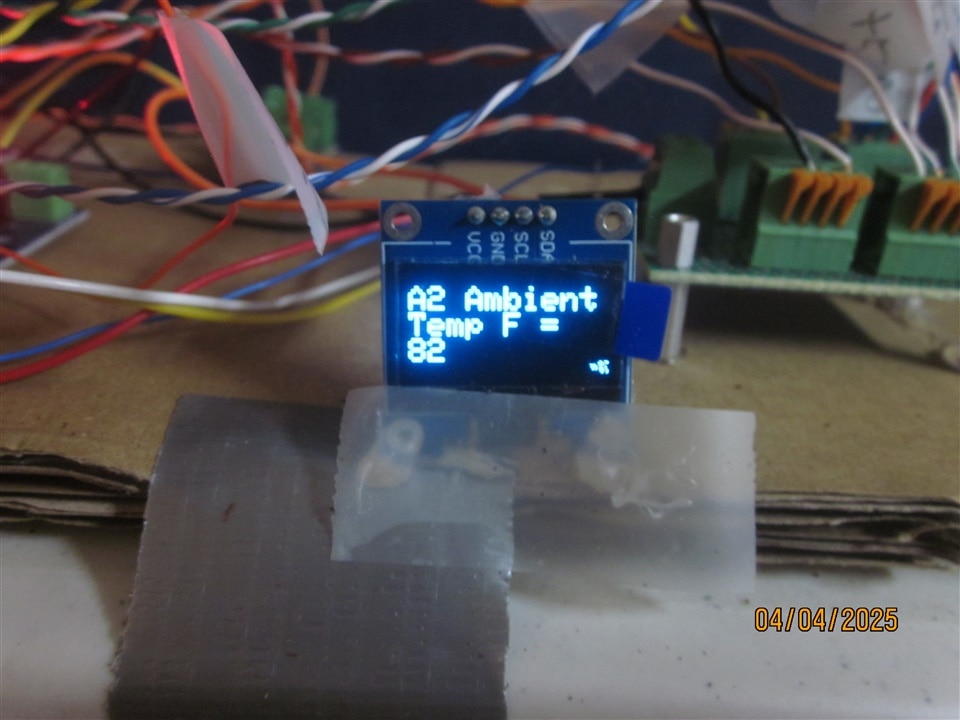
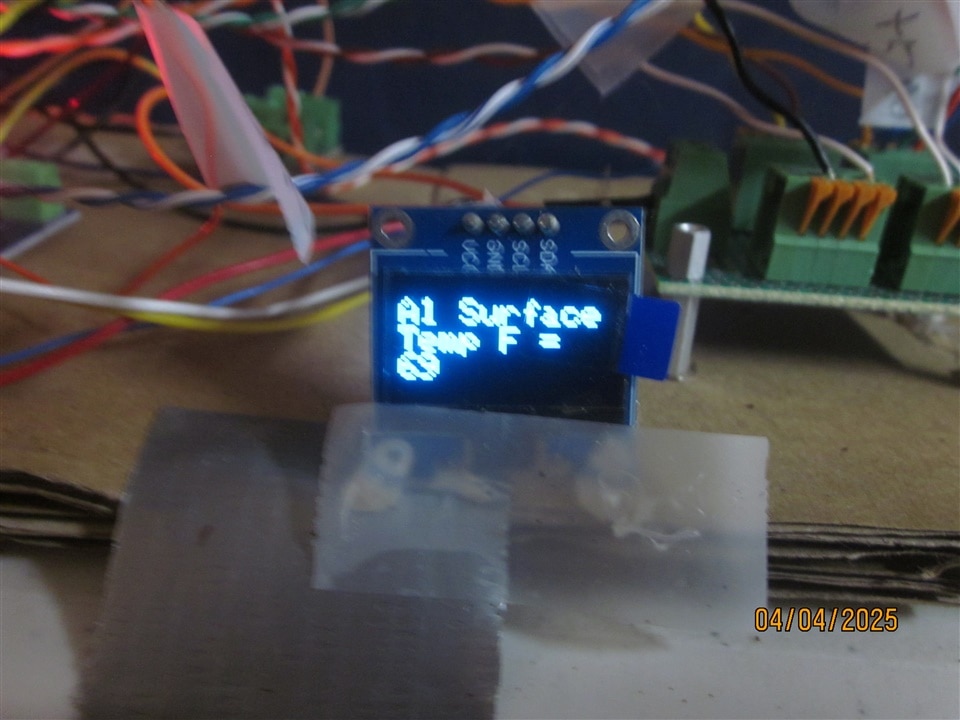
Photos of the Germination Box Monitor Screens:

Photos of the Development Box Monitor Screens:


The Germination Box Monitor Code:
// this code is for the nano !!
// MCP9700AETO is an analog device whose output varies linear with temp -40C to 125C
// -40C = ~ .2V 0 C ~ .5V 20C ~ .8V 50C ~ 1.4V 62.8 C per V .628C per mV
// analogRead input natively has 5V = 1023 counts, 53.8 mV per count
// using analogReference = internal, can change the 1PU on the analog to 1.1V !!!!so we shall
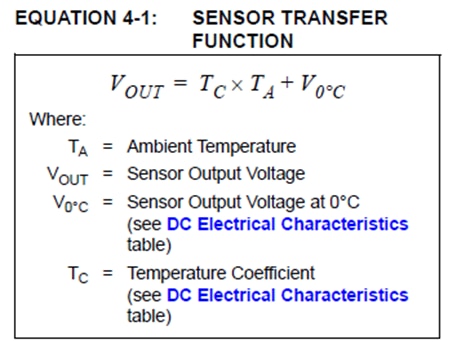
// MCP temperature transfer function Vout = Tcoefficient*Temperature + Vout@0C
// Vout@0C == 500mV Tcoefficient = 10mV per degree C
// transfer function (Vout-500mV)/10mV = Temperature C
// https://randomnerdtutorials.com/guide-for-oled-display-with-arduino/
// A4 & A5 are reserved for the SSD1306 screen A4(SDA), A5(SCL)
// this version takes 5 readings 1 sec apart, then averages
// Axcounts VAR becomes an array remember the first element location is 0
// DHT11 was added in this version to allow the germination box to be used later a development-hardening box
// https://arduinogetstarted.com/tutorials/arduino-dht11
//
int A0counts[]={0,0,0,0,0};
int A1counts[]={0,0,0,0,0};
int A2counts[]={0,0,0,0,0};
int A3counts[]={0,0,0,0,0};
int A6counts[]={0,0,0,0,0};
float A0countsAve=0; // calc the average of 5 readings
float A1countsAve=0;
float A2countsAve=0;
float A3countsAve=0;
float A6countsAve=0;
float A0millivolts =0;
float A1millivolts =0;
float A2millivolts =0;
float A3millivolts =0;
float A6millivolts =0;
int A0_TC;
int A0_TF;
int A1_TC;
int A1_TF;
int A2_TF;
int A2_TC;
int A3_TF;
int A3_TC;
int A6_TC;
int A6_TF;
int AnalogSampleInterval=600;
int ScreenOnTime=3000;
int ScreenClearDelay=250;
int TempAlarmThreshold=115;
int HiTemperatureAlarm=LOW;
int ResetTempAlarmPB=HIGH;
int AlarmBuzzer=LOW;
int StirFanRelayOn = LOW; // preset Fan relay state
float StirFanOnTempThr = 96.0; // when stir fan turns on from A3 TC
float StirFanOffTempThr = 75.0; // when stir fan turns off from A2 TC
int A0_0C_offset = -5;// mV offset measured at 0C
int A1_0C_offset = -10;// mV offset measured at 0C
int A2_0C_offset = -5;// mV offset measured at 0C
int A3_0C_offset = 0;// mV offset measured at 0C
int A6_0C_offset = 0;// mV offset measured at 0C
float DHT11_humidity=0;
#include <SPI.h>
#include <Wire.h>
#include <Adafruit_GFX.h>
#include <Adafruit_SSD1306.h>
#define SCREEN_WIDTH 128 // OLED display width, in pixels
#define SCREEN_HEIGHT 64 // OLED display height, in pixels
// Declaration for an SSD1306 display connected to I2C (SDA, SCL pins)
#define OLED_RESET -1 // Reset pin # (or -1 if sharing Arduino reset pin)
Adafruit_SSD1306 display(SCREEN_WIDTH, SCREEN_HEIGHT, &Wire, OLED_RESET);
#include "DHT.h"
#define DHT11_PIN 2
DHT dht11(DHT11_PIN, DHT11);
void setup()
{
analogReference(INTERNAL);
pinMode(A0, INPUT); //thermocouple 1
pinMode(A1, INPUT); //thermocouple 2
pinMode(A2, INPUT); //thermocouple 3
pinMode(A3, INPUT); //thermocouple 4
pinMode(A6, INPUT); //thermocouple 6
pinMode(4,OUTPUT); // stir fan relay
pinMode(8,INPUT_PULLUP); // reset alarm PB
pinMode(9,OUTPUT); // alarm buzzer
pinMode (13,OUTPUT); // D13 LED is the alarm light
dht11.begin(); // initialize the sensor
Serial.begin(115200); // serial monitor for troubleshooting
if(!display.begin(SSD1306_SWITCHCAPVCC, 0x3C)) { // Address 0x3D for 128x64
Serial.println(F("SSD1306 allocation failed"));
for(;;);
}
delay(2000);
display.clearDisplay();
display.setTextSize(2);
display.setTextColor(WHITE);
display.setCursor(0, 10);
// Display static text
display.println("Boot Up");
display.println("Screen");
display.println();//blank the 3rd line
display.display();
delay(3000);
// remove screen for troubleshooting allocation
// display.clearDisplay();
// display.setTextSize(2);
// display.setTextColor(WHITE);
// display.setCursor(0, 10);
// Display static text
// display.println(" wait to");
// display.println("stabilize");
// display.println(" TCs");
// display.println();//blank the 3rd line
// display.display();
// delay(3000);
}
void loop() {
/////////// DHT11 stuff ////////////////////
float DHT11_humidity= dht11.readHumidity();
// read temperature as Celsius
float DHT11tempC = dht11.readTemperature();
// read temperature as Fahrenheit
float DHT11tempF = dht11.readTemperature(true);
// check if any reads failed
if (isnan(DHT11_humidity) || isnan(DHT11tempC) || isnan(DHT11tempF)) {
Serial.println("Failed to read from DHT11 sensor!");
}
display.clearDisplay();
delay(ScreenClearDelay);
display.setCursor(0, 10);
// Display static text
display.println("Humidity");
display.println(" %");
display.println(DHT11_humidity);
display.display();
delay(ScreenOnTime);// for reading display
display.clearDisplay();
delay(ScreenClearDelay);
display.setCursor(0, 10);
// Display static text
display.println(" DHT11");
display.println("temp F=");
display.println(DHT11tempF);
display.display();
delay(ScreenOnTime);// for reading display
/// read input thermistors
delay (100); // thermisters have a 500ms time constant, no rush
/// read A0 5 times
for (int i = 0; i <= 4; i++)
{
delay (10);
A0counts[i]= (analogRead(A0)+ A0_0C_offset); // read the input pin
// Serial.println("A0 cnts value =");
// Serial.println(i);
// Serial.println(A0counts[i]);
delay(AnalogSampleInterval);
}
// calculate the average A0readings
A0countsAve = ((A0counts[0]+A0counts[1]+A0counts[2]+A0counts[3]+A0counts[4])/5.0);
//A0counts= (analogRead(A0)+ A0_0C_offset); // read the input pin
//delay(500);
// Serial.println("A0 cnts value =");
// Serial.println(A0countsAve);
// calculate inputs volts
A0millivolts=((A0countsAve*1060.0)/1023.0);//
// Serial.println("A0 millivolts =");
// Serial.println(A0millivolts);
//delay(1000); //for reading
// transfer function (Vout-500mV)/10mV = Temperature C
A0_TC=((A0millivolts-500)/(10));
//Serial.println("A0 temperature C =");
//Serial.println(A0_TC);
//delay(1000); //for reading
A0_TF=(((A0_TC*9)/(5))+32 );
// Serial.println("A0 temperature F =");
// Serial.println(A0_TF);
// delay(100); //for reading monitor
display.clearDisplay();
delay(ScreenClearDelay);
display.setCursor(0, 10);
// Display static text
display.println("A0 Bottom");
display.println("Temp F =");
display.println(A0_TF);
display.display();
delay(ScreenOnTime);// for reading display
///////// read A1 5 times ****************************
for (int i = 0; i <= 4; i++)
{
delay (10);
A1counts[i]= (analogRead(A1)+ A1_0C_offset); // read the input pin
// Serial.println("A1 cnts value =");
// Serial.println(i);
// Serial.println(A1counts[i]);
delay(AnalogSampleInterval);
}
// calculate the average A0readings
A1countsAve = ((A1counts[0]+A1counts[1]+A1counts[2]+A1counts[3]+A1counts[4])/5.0);
//A1counts= (analogRead(A1)+A1_0C_offset); // read the input pin
delay(200);
//Serial.println("A1 value =");
//Serial.println(A1countsAve);
A1millivolts=((A1countsAve*1060.0)/1023.0);//
A1_TC=((A1millivolts-500)/(10));
A1_TF=(((A1_TC*9)/(5))+32 );
// Serial.println("A1 temperature F =");
// Serial.println(A1_TF);
display.clearDisplay();
delay(ScreenClearDelay);
display.setCursor(0, 10);
// Display static text
display.println("A1 Surface");
display.println("Temp F =");
display.println(A1_TF);
display.display();
delay(ScreenOnTime); //for reading display
/// read A2 5 times
for (int i = 0; i <= 4; i++)
{
delay (10);
A2counts[i]= (analogRead(A2)+ A2_0C_offset); // read the input pin
//Serial.println("A2 cnts value =");
// Serial.println(i);
// Serial.println(A2counts[i]);
delay(AnalogSampleInterval);
}
// calculate the average A0readings
A2countsAve = ((A2counts[0]+A2counts[1]+A2counts[2]+A2counts[3]+A2counts[4])/5.0);
//A2counts= (analogRead(A2)+ A2_0C_offset); // read the input pin
delay(ScreenClearDelay);
//Serial.println("A2 value =");
//Serial.println(A2counts);
A2millivolts=((A2countsAve*1050.0)/1023.0);// 1050 is measured from PS
A2_TC=((A2millivolts-500)/(10));
A2_TF=(((A2_TC*9)/(5))+32 );
//Serial.println("A2 temperature F =");
//Serial.println(A2_TF);
// delay(100); //for
display.clearDisplay();
delay(500);
display.setCursor(0, 10);
// Display static text
display.println("A2 Ambient");
display.println("Temp F =");
display.println(A2_TF);
display.display();
delay(ScreenOnTime); //for reading display
if ((A2_TF < StirFanOffTempThr )&&(StirFanRelayOn==HIGH))
{ digitalWrite(4,LOW);
StirFanRelayOn=LOW;
display.clearDisplay();
delay(ScreenClearDelay);
display.setCursor(0, 10);
// Display static text
display.println("STIR FAN");
display.println("OFF");
// display.println(A3_TF);
display.display();
delay(ScreenOnTime); //for reading display
}
////////////// A3 section /////////////////////
/// read A3 5 times
for (int i = 0; i <= 4; i++)
{
delay (10);
A3counts[i]= (analogRead(A3)+ A3_0C_offset); // read the input pin
//Serial.println("A3 cnts value =");
// Serial.println(i);
//Serial.println(A3counts[i]);
delay(AnalogSampleInterval);
}
// calculate the average A0readings
A3countsAve = ((A3counts[0]+A3counts[1]+A3counts[2]+A3counts[3]+A3counts[4])/5.0);
///A3counts= (analogRead(A3)+ A0_0C_offset); // read the input pin
delay(200);
//Serial.println("A3 value =");
//Serial.println(A3counts);
A3millivolts=((A3countsAve*1050.0)/1023.0);// 1.05V==1023 counts
A3_TC=((A3millivolts-500)/(10));
A3_TF=(((A3_TC*9)/(5))+32 );
//Serial.println("A3 temperature F =");
//serial.println(A3_TF);
// delay(100); //for
display.clearDisplay();
delay(ScreenClearDelay);
display.setCursor(0, 10);
// Display static text
display.println("A3 Lamp");
display.println("Temp F =");
display.println(A3_TF);
display.display();
delay(ScreenOnTime); //for reading display
if ((A3_TF > StirFanOnTempThr )&& (StirFanRelayOn==LOW))
{ digitalWrite(4,HIGH);
StirFanRelayOn=HIGH;
display.clearDisplay();
delay(ScreenClearDelay);
display.setCursor(0, 10); // Display static text
display.println("Stir Fan");
display.println("RUNNING");
// display.println(A3_TF);
display.display();
delay(ScreenOnTime); //for reading display
}
//////////////// A6 counts //////////////
/// read A6 5 times
for (int i = 0; i <= 4; i++)
{
delay (10);
A6counts[i]= (analogRead(A6)+ A1_0C_offset); // read the input pin
//Serial.println("A6 cnts value =");
//Serial.println(i);
//Serial.println(A6counts[i]);
delay(AnalogSampleInterval);
}
// calculate the average A6readings
A6countsAve = ((A6counts[0]+A6counts[1]+A6counts[2]+A6counts[3]+A6counts[4])/5.0);
///A6counts= (analogRead(A6)+A6_0C_offset); // read the input pin
delay(50);
//Serial.print("A6 value =");
//Serial.println(A6counts);
A6millivolts=((A6countsAve*1050)/1023);//
A6_TC=((A6millivolts-500)/(10));
A6_TF=(((A6_TC*9)/(5))+32 );
//Serial.println("A6 temperature F =");
//Serial.println(A6_TF);
delay(50); //for
display.clearDisplay();
delay(ScreenClearDelay);
display.setCursor(0, 10);
// Display static text
display.println("A6 Lamp");
display.println("Temp F =");
display.println(A6_TF);
display.display();
delay(ScreenOnTime); //for reading display
if (StirFanRelayOn==HIGH)
{
display.clearDisplay();
delay(ScreenClearDelay);
display.setCursor(0, 10);
// Display static text
display.println("Stir");
display.println("Fan is");
display.println("Running");
display.display();
delay(ScreenOnTime); //for reading display
}
else
{
display.clearDisplay();
delay(ScreenClearDelay);
display.setCursor(0, 10);
// Display static text
display.println("Stir Fan");
display.println(" is ");
display.println(" OFF ");
display.display();
delay(ScreenOnTime); //for reading display
}
///////////// temp alarm /////////////////////
if ((A3_TF>TempAlarmThreshold)||(A6_TF>TempAlarmThreshold))
{
HiTemperatureAlarm=HIGH;
///// annunciate on screen
// tone(9,1000);
display.clearDisplay();
delay(ScreenClearDelay);
display.setCursor(0, 10);
// Display static text
// display.println("WARNING");
// display.println("hi temp");
// display.println(" alarm ");
// display.display();
// delay(ScreenOnTime); //for reading display
}
else
{
HiTemperatureAlarm=LOW;
AlarmBuzzer=LOW;
}
digitalWrite(13,HiTemperatureAlarm);
ResetTempAlarmPB=digitalRead(8);
if ((HiTemperatureAlarm==HIGH)&&(ResetTempAlarmPB==HIGH)&&(AlarmBuzzer==LOW))
{
tone(9,950);
AlarmBuzzer=HIGH;
}
else
{ noTone(9);
}
// Serial.println("HiTemperatureAlarm =");
// Serial.println(HiTemperatureAlarm);
}
The Seedling Development Box Arduino Code:
//
//
// this code is for the nano !! The Seedling Development/Hardening Box
// MCP9700AETO is an analog device whose output varies linear with temp -40C to 125C
// -40C = ~ .2V    0 C ~ .5V   20C ~ .8V   50C ~ 1.4V
// analogRead input natively has 5V = 1023 counts, 53.8 mV per count
// using analogReference = internal, can change the 1PU on the analog to ~1.1V  we shall

// MCP temperature transfer function Vout = Tcoefficient*Temperature + Vout@0C
// Vout@0C == 500mV   Tcoefficient = 10mV per degree C
// transfer function  (Vout-500mV)/10mV = Temperature C

// https://randomnerdtutorials.com/guide-for-oled-display-with-arduino/
// A4 & A5 are reserved for the SSD1306 screen  A4(SDA), A5(SCL)
//
// https://www.electroschematics.com/arduino-dht22-am2302-tutorial-library/

#include "DHT.h"

#define DHTPIN 2     // what pin we're connected to
#define DHTTYPE DHT22   // DHT 22  (AM2302)
DHT dht(DHTPIN, DHTTYPE);

int A0counts=0;
int A1counts=0;
int A2counts=0;
int A3counts=0;
int A6counts=0;

float A0millivolts =0;
float A1millivolts =0;
float A2millivolts =0;
float A3millivolts =0;
float A6millivolts =0;

int A0_TC;
int A0_TF;
int A1_TC;
int A1_TF;
int A2_TF;
int A2_TC;
int A3_TF;
int A3_TC;
int A6_TC;
int A6_TF;
int DHTtempF;

int ScreenOnTime=3000;
int ScreenClearDelay=250;

//int StirFanRelayOn = LOW; // preset Fan relay state
//int StirFanRelayOff = HIGH;//preset Fan Relay State
//int StirFanOnTempThr = 90; // when stir fan turns on from A3
//int StirFanOffTempThr = 75; // when stir fan turns off from A2

int A0_0C_offset = -10;// mV offset measured at 0C
int A1_0C_offset = -1;// mV offset measured at 0C
int A2_0C_offset = -3;// mV offset measured at 0C
int A3_0C_offset = -1;// mV offset measured at 0C
int A6_0C_offset = 0;// mV offset measured at 0C


#include <SPI.h>
#include <Wire.h>
#include <Adafruit_GFX.h>
#include <Adafruit_SSD1306.h>

#define SCREEN_WIDTH 128 // OLED display width, in pixels
#define SCREEN_HEIGHT 64 // OLED display height, in pixels

// Declaration for an SSD1306 display connected to I2C (SDA, SCL pins)
#define OLED_RESET     -1 // Reset pin # (or -1 if sharing Arduino reset pin)
Adafruit_SSD1306 display(SCREEN_WIDTH, SCREEN_HEIGHT, &Wire, OLED_RESET);


void setup()
{
 analogReference(INTERNAL);
  pinMode(A0, INPUT); //thermocouple 1
  pinMode(A1, INPUT); //thermocouple 2
  pinMode(A2, INPUT); //thermocouple 3
  pinMode(A3, INPUT); //thermocouple 4
  pinMode(A6, INPUT); //thermocouple 6

 dht.begin();

  Serial.begin(115200); // serial monitor for troubleshooting

if(!display.begin(SSD1306_SWITCHCAPVCC, 0x3C)) { // Address 0x3D for 128x64
    Serial.println(F("SSD1306 allocation failed"));
    for(;;);
    }
  delay(2000);
  display.clearDisplay();
  display.setTextSize(2);
  display.setTextColor(WHITE);
  display.setCursor(0, 10);
  // Display static text
  display.println("Hardening");
  display.println("  Box ");
    display.println("Monitor");
  display.display();

}


void loop() {

/// read input thermistors

delay (500); // thermisters have a 500ms time constant
      ///// yea, I should make it a loop, easier this way to rework IO if needed

      ///  read
      A0counts= (analogRead(A0)+ A0_0C_offset);  // read the input pin
      //delay(500);
         // Serial.println("A0 cnts value =");
         // Serial.println(A0counts);
          // calculate inputs volts
      A0millivolts=((A0counts*1060.0)/1023.0);//
           // Serial.println("A0 millivolts =");
           // Serial.println(A0millivolts);
            //delay(1000); //for reading
            // transfer function  (Vout-500mV)/10mV = Temperature C
      A0_TC=((A0millivolts-500)/(10));
            //Serial.println("A0 temperature C =");
             //Serial.println(A0_TC);
            //delay(1000); //for reading
      A0_TF=(((A0_TC*9)/(5))+32 );
       //      Serial.println("A0 temperature F =");
       //    Serial.println(A0_TF);
      // delay(100); //for reading monitor
    display.clearDisplay();
    delay(ScreenClearDelay);
    display.setCursor(0, 10);
  // Display static text
  display.println("A0 Bottom");
  display.println("Temp F =");
  display.println(A0_TF);
  display.display();
 delay(ScreenOnTime);// for reading display


      A1counts= (analogRead(A1)+A1_0C_offset);  // read the input pin
      delay(500);
      //Serial.println("A1 value =");
      //Serial.println(A1counts);
      A1millivolts=((A1counts*1060.0)/1023.0);// yes, introducing a 3.3% error by using 5000 mV/1000 cnts rather than 1023 cnts, so so much cleaner
      A1_TC=((A1millivolts-500)/(10));
      A1_TF=(((A1_TC*9)/(5))+32 );
 //     Serial.println("A1 temperature F =");
  //    Serial.println(A1_TF);
      display.clearDisplay();
      delay(ScreenClearDelay);
    display.setCursor(0, 10);
  // Display static text
  display.println("A1 Soil");
  display.println("Temp F =");
  display.println(A1_TF);
  display.display();
      delay(ScreenOnTime); //for reading display


      A2counts= (analogRead(A2)+ A2_0C_offset);  // read the input pin
      delay(ScreenClearDelay);
      //Serial.println("A2 value =");
      //Serial.println(A2counts);
      A2millivolts=((A2counts*1050.0)/1023.0);// yes, introducing a 3.3% error by using 5000 mV/1000 cnts rather than 1023 cnts, so so much cleaner
      A2_TC=((A2millivolts-500)/(10));
      A2_TF=(((A2_TC*9)/(5))+32 );
      //Serial.println("A2 temperature F =");
      //Serial.println(A2_TF);
      // delay(100); //for
    display.clearDisplay();
    delay(500);
    display.setCursor(0, 10);
  // Display static text
  display.println("A2 Soil");
  display.println("Temp F =");
  display.println(A2_TF);
  display.display();
        delay(ScreenOnTime); //for reading display

 // if ((A2_TF < StirFanOffTempThr )&(StirFanRelayOn==HIGH))
 //     { digitalWrite(4,LOW);
 //     StirFanRelayOn=LOW;
 //         display.clearDisplay();
//    delay(ScreenClearDelay);
//    display.setCursor(0, 10);
  // Display static text
//  display.println("STIR FAN");
//  display.println("OFF");
 // display.println(A3_TF);
 // display.display();
//  delay(ScreenOnTime); //for reading display
//      }


      A3counts= (analogRead(A3)+ A3_0C_offset);  // read the input pin
      delay(500);
      //Serial.println("A3 value =");
      //Serial.println(A3counts);
      A3millivolts=((A3counts*1050.0)/1023.0);// yes, introducing a 3.3% error by using 5000 mV/1000 cnts rather than 1023 cnts, so so much cleaner
      A3_TC=((A3millivolts-500)/(10));
      A3_TF=(((A3_TC*9)/(5))+32 );
      //Serial.println("A3 temperature F =");
      //serial.println(A3_TF);
      // delay(100); //for
    display.clearDisplay();
    delay(ScreenClearDelay);
    display.setCursor(0, 10);
  // Display static text
  display.println("A3 Amb");
  display.println("Temp F =");
  display.println(A3_TF);
  display.display();
  delay(ScreenOnTime); //for reading display

//  if ((A3_TF > StirFanOnTempThr )& (StirFanRelayOn==LOW))
//      { digitalWrite(4,HIGH);
//       StirFanRelayOn=HIGH;
//       display.clearDisplay();
//    delay(ScreenClearDelay);
//    display.setCursor(0, 10);
  // Display static text
//  display.println("Stir Fan");
 // display.println("RUNNING");
 // display.println(A3_TF);
 // display.display();
//  delay(ScreenOnTime); //for reading display
//      }


      A6counts= (analogRead(A6)+A6_0C_offset);  // read the input pin
      delay(500);
      //Serial.print("A6 cnts =");
      //Serial.println(A6counts);
      A6millivolts=((A6counts*1050.0)/1023.0);//
      A6_TC=((A6millivolts-500)/(10));
      A6_TF=(((A6_TC*9)/(5))+32 );
      //Serial.println("A6 temperature F =");
      //Serial.println(A6_TF);
      delay(100); //for
      display.clearDisplay();
    delay(ScreenClearDelay);
    display.setCursor(0, 10);
  // Display static text
  display.println("A6 Lamp");
  display.println("Temp F =");
  display.println(A6_TF);
  display.display();
        delay(ScreenOnTime); //for reading display

///////////////////////////// DHT22 humidity sensor ////////

// Reading temperature or humidity takes about 250 milliseconds!
  // Sensor readings may also be up to 2 seconds 'old' (its a very slow sensor)
  float DHThumidity = dht.readHumidity();
  // Read temperature as Celsius
  float DHTtemperatureC = dht.readTemperature();//temp is in C
             Serial.print("Humidity: ");
            Serial.print(DHThumidity);
            Serial.print(" %\t");
            Serial.print("Temperature: ");
            Serial.print(DHTtemperatureC);
            Serial.println(" *C ");
  DHTtempF=(((DHTtemperatureC*9)/(5))+32 );

  // Check if any reads failed and exit early (to try again).
  if (isnan(DHThumidity) || isnan(DHTtemperatureC)) {
    Serial.println("Failed to read from DHT sensor!");
    return;
  }

      display.clearDisplay();
    delay(ScreenClearDelay);
    display.setCursor(0, 10);
  // Display static text
  display.println("Humidity");
  display.println("   % ");
  display.println(DHThumidity);
  display.display();
        delay(ScreenOnTime); //for reading display

      display.clearDisplay();
    delay(ScreenClearDelay);
    display.setCursor(0, 10);
  // Display static text
  display.println("DHT22");
  display.println("Temp F= ");
  display.println(DHTtempF);
  display.display();
        delay(ScreenOnTime); //for reading display


}
At the end I had learned new lessons, had a tremendous germination yield of 80% , and have a beautiful pepper garden to look forward to.
-

DAB
-
Cancel
-
Vote Up
0
Vote Down
-
-
Sign in to reply
-
More
-
Cancel
Comment-

DAB
-
Cancel
-
Vote Up
0
Vote Down
-
-
Sign in to reply
-
More
-
Cancel
Children