


INTRODUCTION:
I absolutely love animals, but I have quite bad allergies, so I’ve always wanted to make a robotic pet that I can play with whenever I’m bored. This is what got me into electronics last year, with an Arduino starter kit.
I made Murphy 1.0, a simple 4 wheeled robot that can only move forward in December, 2025. It had so many problems and didn’t look visually appealing.
I wanted to make a 2.0 version of it after exam season, but I eventually forgot about it. I remembered about Murphy when I saw an ad for this Spring Clean competition on my Instagram feed. This is my new attempt at an improved version of Murphy! I wanted it to be able to move and rotate via a joystick + a little extra fun features!
PROGRESS:
I originally intended to use servo motors to mimic the motions of legs, like how they can move to specific angle positions. HOWEVER, I accidentally bought the wrong servo motors (360 degrees continuous instead of 180) so instead of moving like a 4 legged mammal, Murphy moves like a car. It’s not what I wanted but I don't have enough money to buy the correct servos. Lesson learned: Always make sure you’re buying the correct model for your components :,)
PROBLEM: Originally, I had 2 legs. For each leg, there was a servo that rotated the direction of a spinning forward motor. This meant a total of 4 servo motors.
However, a bad surprise happened. I don’t have any power sources that provided a high enough current for 4 servo motors. I was powering it mainly through my laptop. Then the power supply regulator on my ESP32 started smoking when I tried to power 4 motors at once :( . I honestly didn’t know that current would be such a problem, I assumed if there was not enough current then everything would just power off (incorrect). Surprisingly the ESP32 still works fine but I had to wait for a new ESP32 to arrive before playing around with this.

Lesson learned: Always use correct power sources!!! This was my first time burning something and it terrified me. I'll definitely be more careful from now on. I reused a broken wire charging wire to connect my portable powerbank to the breadboard, so now there’s a consistent 2.4A, enough to power 3 motors.
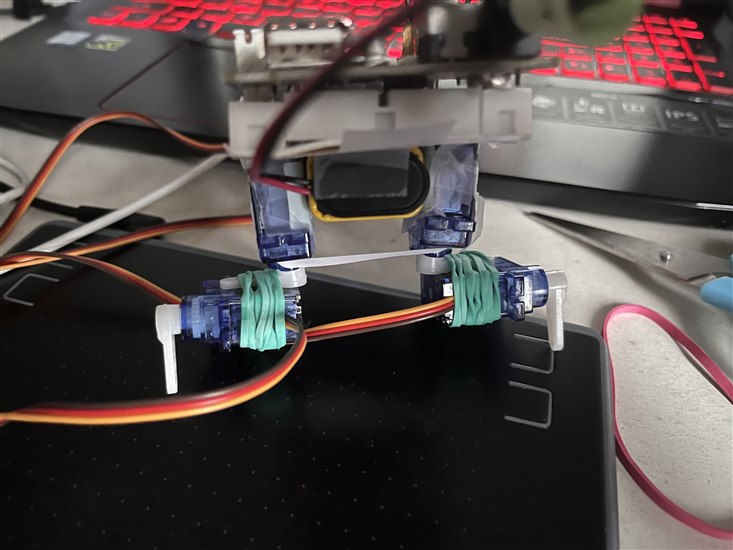
I had to redesign the legs so that there were only 3 servo motors. One servo acts as an axis of rotation to control the direction of the spinning wheels, and the other two spins (moving Murphy forward). This is an improvement from Murphy 1.0 since now it can turn away from obstacles.
I didn’t have any hot glue gun and scotch tape didn’t work to keep the 2 servo motors attached to the axis, so I used elastic bands instead.

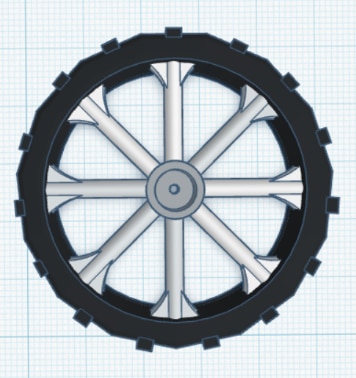
Next, I needed wheels. For Murphy 1.0, I reused water bottle caps for wheels since I didn’t have access to a 3D printer, but recently I’ve learned that my local library has a 3D printer that the public can use. I designed this simple wheel on TinkerCAD for the first time ever
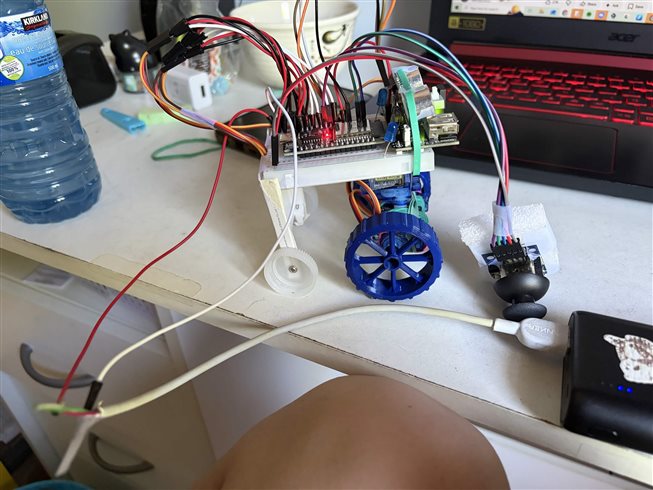
Then, while playing around with my prototype, I realized that it was having trouble turning and was quite unstable because of how there was no back leg support. It could only stand up since I was pulling the joystick module up.
Since I didn’t have a strong enough current to make 2 more wheels for the back, I decided to just make it out of bottle caps again. I designed 3d back legs that had holes for the wheels to screw into.

However, when I added the hind legs on, they just fell off every time. It’s hard to use scotch tape to tape on plastic onto plastic & elastic bands wouldn’t work. So, I had to make a plan 2. I made something like a cape for the back that had 2 water bottle caps on it. This gave better back support, but this is only temporary. In the future, I’d probably add a section connecting the 2 back legs, so the breadboard can sit comfortably on top, something like this. I don’t have enough money to print it out again though.

CONCLUSION:
I was also hoping to use another ESP32 to make my joystick Bluetooth but sadly my package got delayed before this competition’s deadline. So this is my final Murphy 2.0, her full name is Ellie Scott Murphy. Ellie for elastic band, Scott for scotch tape, and Murphy since me and my friend both adore the actor Cillian Murphy
I know this is a bit simple but this has been my favourite electronics project by far & I learned so much. When I have a bigger budget I’ll make a Murphy 3.0 with the correct servo motors + a real face
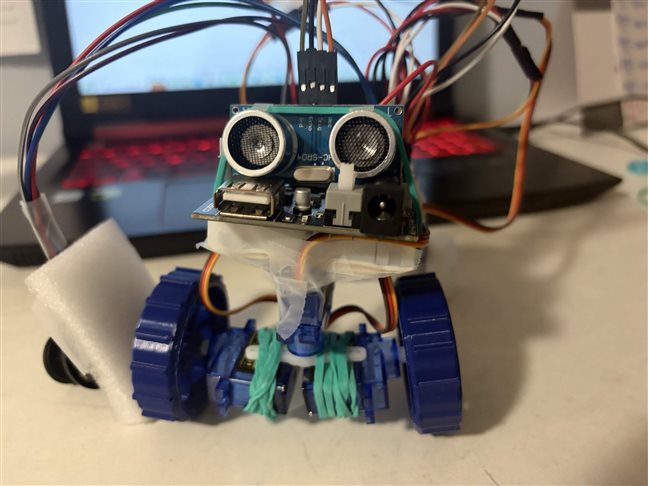
This is now my final Murphy 2.0 ! It can move forward, backwards, rotate, + As something extra, I decided to add an ultrasonic sensor to notice when Murphy 2.0 got too close to an obstacle, so I could stop it. The ultrasonic sensor is connected to 2 blue LED’s so it’s easy for me to notice. The LED's can also be turned on by pressing the button on the joystick 


Thank you Electronics14 for hosting this!
It was fun, I was scared to start this because I didn't know if it would even work, but this competition really motivated me to finish this
CODE:
Materials:
ESP32 CH340C
power supply module
3 Servo motors
1 Joystick module
Lots of Jumper Wires
Elastic bands + Tape
Ultrasonic sensor
5K ohm resistor & 220 ohm resistor (5k is connected to the LED on the 5v rail, 220 is connected to the LED on the 3.3v rail)
2 Blue LEDS (1 will work just fine)
2 Bottle cap wheels
2 3D printed wheels
Small piece of cardboard
Screws