


For the Project14 Spy Nerd theme, my plan is to build a Spy Audio Recorder using a Raspberry Pi, which will start recording audio when folks are in the room and email the transcript to the Spy  ! Basically, I plan to break this project into multiple parts, to achieve the final goal , that is start recording as soon as someone enters the room, and see if something is said, If yes, then transcribe the audio into text, after recording a .wav file and using some neural network. And, then finally send the transcription to an email.
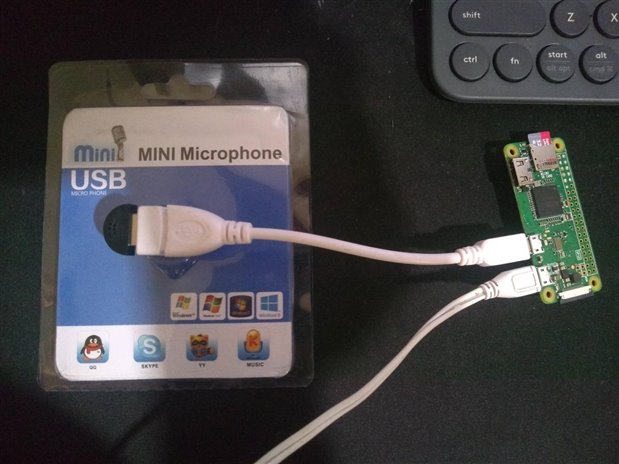
Here is part #1 of the build. I am setting up a Pi Zero W with a USB mic.
Ahh ! it would have been really nice, if I had my hands on the new Raspberry Pi Zero 2W..
If you plan to follow along, here are the steps to follow
#1 Burn the latest Raspberry Pi OS lite image onto a sd card, in my case I am using 2021-05-07-raspios-buster-armhf-lite image
#2 Once you boot into your Pi, change your password using raspi-config and also enable SSH.
#3 Shutdown the Pi and connect the Mic to the Pi using a micro usb OTG cable, in my case I bought my Mic from Amazon.
#4 Now boot up the Pi and run the following command
lsusb -t
if the Pi has detected your USB mic, the output should similar to the below
pi@raspberrypi:~ $ lsusb -t
/:  Bus 01.Port 1: Dev 1,, Driver=dwc_otg/1p, 480M
    |__ Port 1: Dev 2, If 0,, Driver=snd-usb-audio, 12M
    |__ Port 1: Dev 2, If 1,, Driver=snd-usb-audio, 12M
    |__ Port 1: Dev 2, If 2, Interface Device, Driver=usbhid, 12M
#2 You can also run the following command to show the list of audio input devices
arecord -l
pi@raspberrypi:~ $ arecord -l
**** List of CAPTURE Hardware Devices ****
card 1: Device [USB PnP Sound Device], device 0: USB Audio [USB Audio]
  Subdevices: 1/1
  Subdevice #0: subdevice #0
Basically here Mic matches card 1/ device 0
#3 To check if your Mic is functioning, lets record something for 5 seconds, using the command
arecord -D plughw:1,0 -d 5 test1.wav
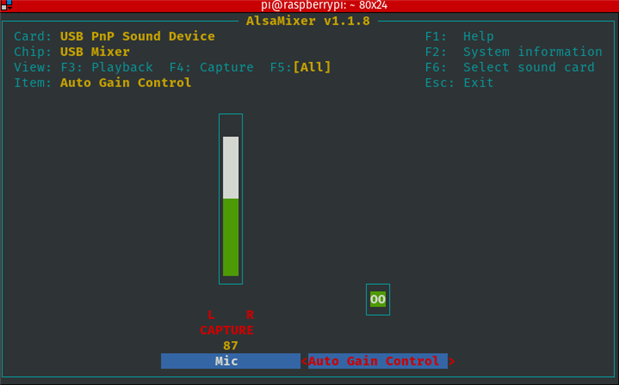
#4 Now you would have realized that the volume of recording is very low, now to adjust the volume use alsamixer
alsamixer -c 1
here 1 is the card number, and the use F6 to select the device , it should be something on the lines of "USB PnP Sound Device"
and then use F4 followed by the up arrow key on you keyboard to increase the volume
once done, record another audio wav file using the command below, and you should hear a good enough volume on the audio.
arecord -D plughw:1,0 -d 5 test2.wav
#5 As part of the next few steps we are going to install a few packages, so that we can use pyaudio in a python program, which will be handy in the second part of this project.
First we are going to install pip, followed by some dependencies and then pyaudio
sudo apt-get update
sudo apt-get install python3-pip
sudo apt-get install libportaudio0 libportaudio2 libportaudiocpp0 portaudio19-dev
sudo pip3 install pyaudio
#6 then run the following in the python shell, by running
python3
>>> import pyaudio
>>> p = pyaudio.PyAudio()
>>> for i in range(p.get_device_count()):
... print(p.get_device_info_by_index(i).get('name'))
don't forget to hit tab before the print command, you should now see something like
USB PnP Sound Device: Audio (hw:1,0)
>>> exit()
if you run this on pi zero you will get just one line, which mean the index is 0 (that is dev_index = 0 is the python file attached), but if you run this on a full sized Pi like a Pi4 you will see multiple results, because the HDMI and audio jack will be counted as devices, which means you will have to change the index in the python file attached to 2 or 3 based on the sequence of the listing.
#7 Finally, download the python file attached and run it using the following command
sudo python3 pyAudioRecord.py
The program records audio for 60 seconds using the USB microphone, and stores it as a wav file with today date time, once you run the python program multiple times, run ls to list the files..

