Table of contents
Abstract
Using an Arduino R4 Minima with some random other hardware and a heaping serving of artistic talent by our guest star SuperArtGirl, we send a cat into space!
Project
Intro
I mentioned this Time and Space contest to my SuperArtGirl wife earlier this year and she almost immediately came downstairs with her prototype in hand - a box painted inside, with props taped to the edges... Wow! I was not expecting that enthusiastic a response!
I wasn't sure I would have anything fun to create for this contest, but now I guess I had no choice but to build it!
Starting At the End!
Let's start with the completed project, because I think me explaining it all would take away some of the fun and surprise of the final result.
The Parts
For this project I used what I hope are fairly common parts:
* Arduino R4 Minima. An older Uno or almost any Arduino with enough pins should work just as well, as this is not a power hungry project.
* a dual 7-segment display. This has been in my parts bin for over a decade already, so it deserved a moment in the sun!
* a servo motor. Just a cheap plastic one, but it does the trick
* a wheel motor. This I got from a robot-worm kit I bought several years ago on AliExpress. These geared motors seem to be quite common, and also quite affordable.
* a relay module. This is easier to use than a separate relay, but it's not too difficult to use a relay and a diode and transistor if that's what you have available.
* a whole bunch of little wires to connect it all together.
* a handful of 220-ohm resistors for the 7-segment display. I think I needed 9 for this project. Using the resistors keeps the display evenly lit. Without them the numbers would be brighter or dimmer depending on how many segments are lit.
* a cardboard box
* Tape
* Hot glue
* black thread - or really any thread or string or line to lift the rocket without being too obvious. I started with fishing line, but the line I had was too thick so I went with this thread from the sewing machine kit.
* batteries and a battery pack for the motor - this was part of the robot-worm kit, but many options also exist.. or try some other form of power for it, maybe a USB charger with some extra bits to adjust the power down if needed.
* I used a 9-volt power supply designed for the Arduino Uno to run it, but it can also just be run using a USB charger.
* a ton of other random parts that turn out to be entirely wrong for the project. This is also a good time to pull out those parts and tools your spouse says you've been hoarding, to give the illusion that you do actually use them once in a while
Here is some of it in progress: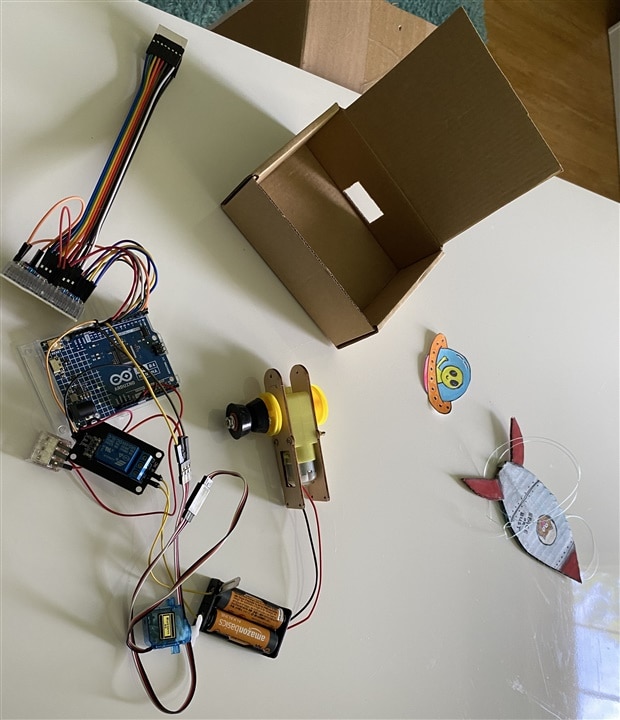
Finding The Right Motor.
This was a fun project to work on, but it was not without its challenges. Mainly, I had a LOT of trouble finding a motor solution that would work to raise up the rocket.
I'm not as mechanically inclined as many here, so I think others might soar past that point. In my case, I had a few failed attempts that threatened to derail the project right from the start.
First I tried a geared hobby motor I already had. I have two, but this one looked promising. Until I hooked it up and nothing happened. I tried with different voltages, starting low at around 5v then up to 12v... still nothing. At that point I finally noticed the print on the motor that says it's a 120v AC motor. sigh. I don't know why I have that. maybe I salvaged it out of something in the past.
The next motor was a geared motor I had bought years ago thinking I'd use it for an automatic cat treat dispenser at some point in the future. That point has not happened yet, so it became a candidate for this project. However, it is geared v..e..r..y....sloooooowww. It would take ages to drag that rocket into space at that rate. I looked into finding some gears to speed it up, including putting a big wheel on it, but it was still too slow.
Then I realized I still had that robot worm toy thing I built a while back and then used in my Rube Goldberg Machine. I blame thank dubbie for getting me started on this
That little kit was not at all expensive, and it includes a wheel drive which is geared at a pretty good pace that with a bit of tweaking should work at about the right speed for the rocket to lift off.
The mechanism as it was in the kit didn't have a way to wind up the string, so I ended up making my own little spool out of what I think used to be rubber feet off some appliance or power tool at some point in the past. In any case, they were small and rubbery and had a nice cone shape - two together made the right kind of spool. I hot-glued it onto the motor and hooray! it finally works!
Hooking the motor up to the relay: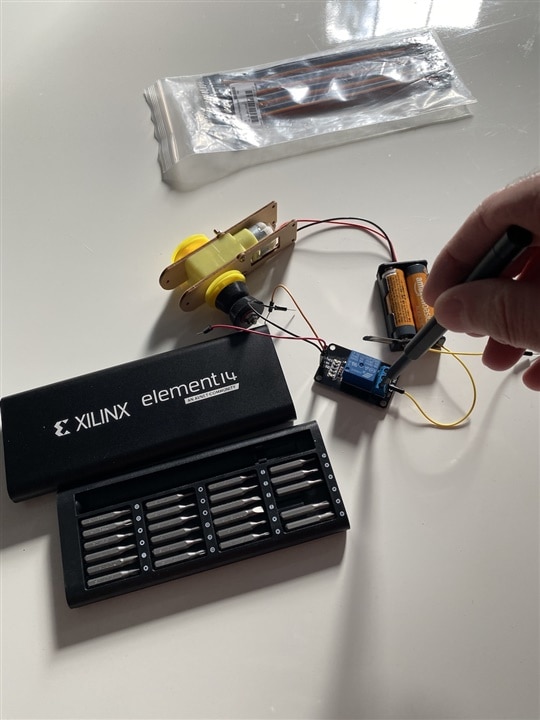
The battery box had the switch built-in, so I soldered wires onto the two sides of that switch, allowing me to manually use the existing switch (great for testing), while also allowing automated control with the relay.
The Art
To make the box for the whole scene, I taped closed a delivery box and then cut it into two lengthwise, cut open one end of each piece and then stuck them together to make one very long box. I think there's better ways of doing that, but this worked well enough
My wife then did all of the magic of creating the scene and making everything look pretty. I actually did lend a tiny bit of my limited art skills into this part - I cut that little rocket shape out of cardboard for my testing. I didn't know she would use it for the final set LOL. She used tempura paints, and lined the box with art paper that was all one big sheet to begin with - this covers the ugly box-joining bits well. She mounted the clouds on some wooden skewers.
How cute is all this eh?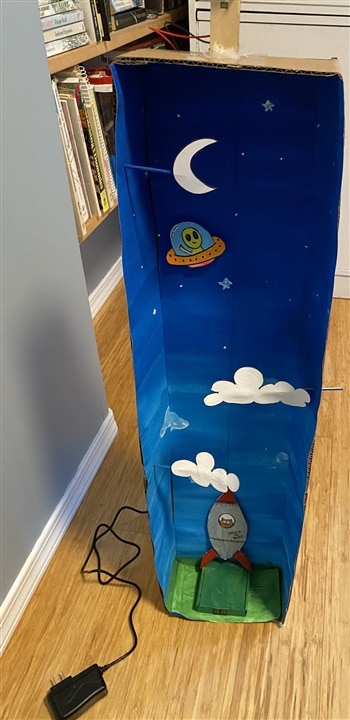
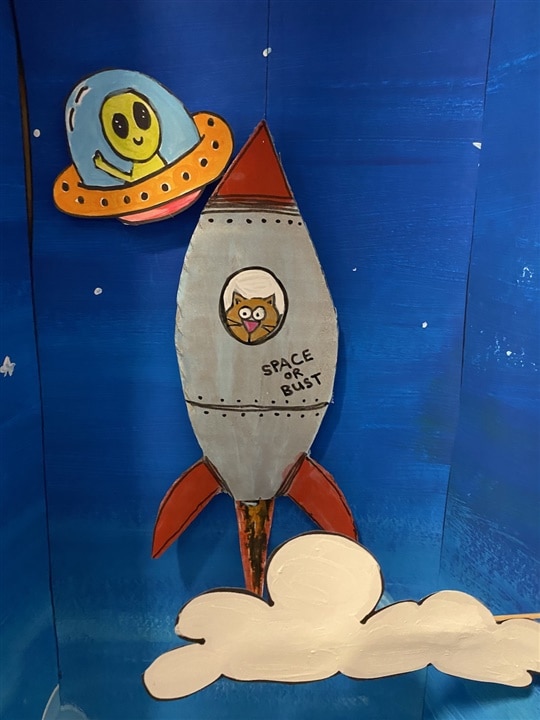
To make the rocket hang better, I pushed a common nail into the bottom as a weight. Before that it was too light and just didn't behave well.
The alien is taped onto a little servo that I mounted through the cardboard box, but only poked the circle bit through the art paper, so it has just the right amount of clearance, and the servo is not visible from the front.
To hide the messy parts of the dual 7 segment display, I used a little box that at one point held some small electronic gadget, and hot-glued it in there. That box then became the launch platform for the rocket.
The Software
I tend to use the Arduino IDE for most of my projects because it's easy to use and there are lots of supporting libraries and tutorials easily available for it.
I do more complicated setups at work, but I don't want my hobby to feel like work.
As I always do in projects like this, I break down the tasks into separate test sketches and then combine them into the final project after I've tested to see that it works.
For this project, the first step was to figure out how the 7-segment display was wired up - ie, which pins control which LEDs? Browsing around the web a little bit showed a few different possibilities. I did a simple test using a 3v button cell battery to figure out which pinout applied to my display. I'm pretty sure my old-old-old display is not like the one you might have, so I won't bore you with my specific pinout diagram.
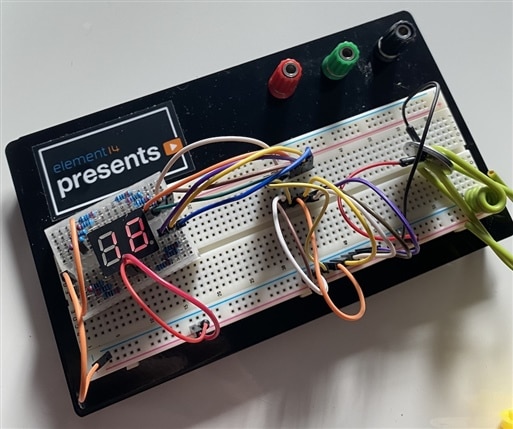
Once that was figured out, I added the resistors and wires to control it with the Arduino. Since my count-down starts at 10, I only needed the first digit to show a 1, or nothing, so I wired those two segments up to one Arduino pin, saving having to use up IO pins for the rest of that digit. The other digit has all 7 segments connected to separate IO pins. I also added a power pin for the digit, so I could flash the whole thing on and off easily. I now realize I could also have done that by having an extra all-off setting in the code, but oh well. I considered using a 74LS47 chip to convert binary to 7-seg, but that would add more hardware, plus the Arduino R4 Minima has plenty of pins available for this project.
I borrowed some code from a previous project to control the display, which saved me a lot of time. And then I tested the count-down.
The relay software is easy - all that needs to be done is send a high or low to the pin on the module and it switches on or off. It's just one IO pin and one wire (plus power and ground).
In this picture I'm testing the countdown timer together with the motor relay.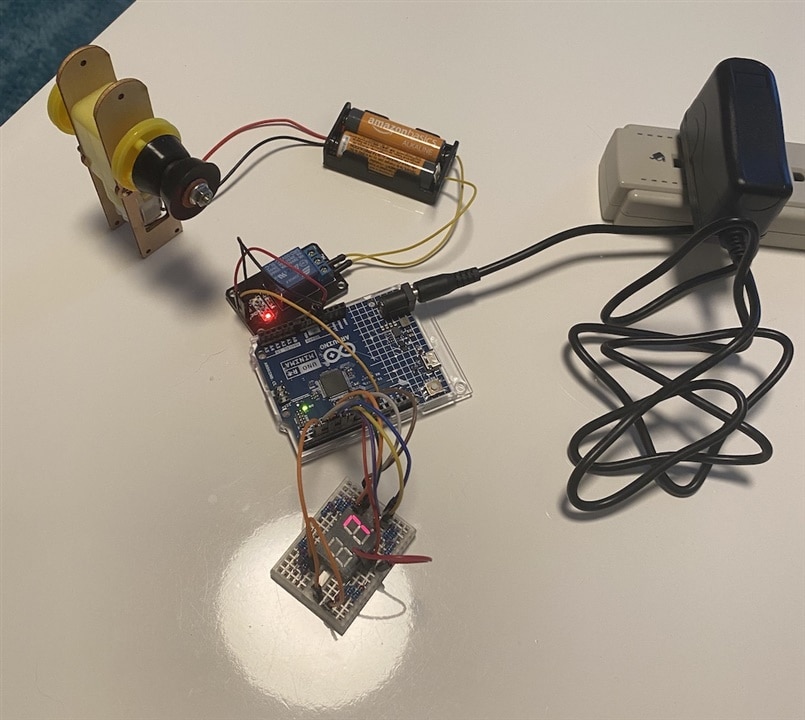
The servo was a bit more finicky. I had already used the one 5v pin on the Arduino, so I thought I'd be clever and use a digital IO pin for power. However, as I found after spending too much time on it, the servo needs more power than that pin can provide. Once I wired it up to the 5v pin, all worked well. I tested using the provided Sweep example. Make sure you are using the correct Servo library, because the one I had installed complained about not supporting the Arduino R4. All I had to do to fix it was go to the library manager and pick the proper Arduino supplied library.
Then putting it all together with a bit of added magic in the timing of the scene, I had a nice little sketch to run the puppet show
-> The attached zip file contains the sketch I used, and it includes notes on the connections. I'll duplicate it here for convenience:
Connections:

  For the Dual-7-Segment display, Digit 1 only every displays 1 or nothing, so just one pin is used to power segments B and C together.
  Each of the display pins needs their own resistor.
  Arduino - Dual 7-seg Display
    d2    -   13 and 1    // digit 1, seg-B and seg-C
    d3    -   10          // digit 2, seg-A
    d4    -   12          // digit 2, seg-B
    d5    -   8           // digit 2, seg-C
    d6    -   6           // digit 2, seg-D
    d7    -   7           // digit 2, seg-E
    d8    -   11          // digit 2, seg-F
    d9    -   9           // digit 2, seg-G
    d10    -   4 and 5     // digit 1 and digit 2 power -> D10 provides power, but you might need a transistor if your display draws too much power.

  Arduino - Relay board
    d11   -   in1
    vcc   -   5v
    gnd   -   gnd

  Relay to motor and battery pack
    COM   -  battery pack switch wire 1
    NO    -  battery pack switch wire 2
    (the wires are interchangeable - it's just a switch)
Putting It All Together
Now that the software sketch was working with the hardware on the testing breadboards, it was time to mount everything into the physical part of the project.
I decided to add a little box to the back of the project to keep the mess of hardware a bit more organized - as a bonus, this also added a lot of stability to help keep the main box standing upright!
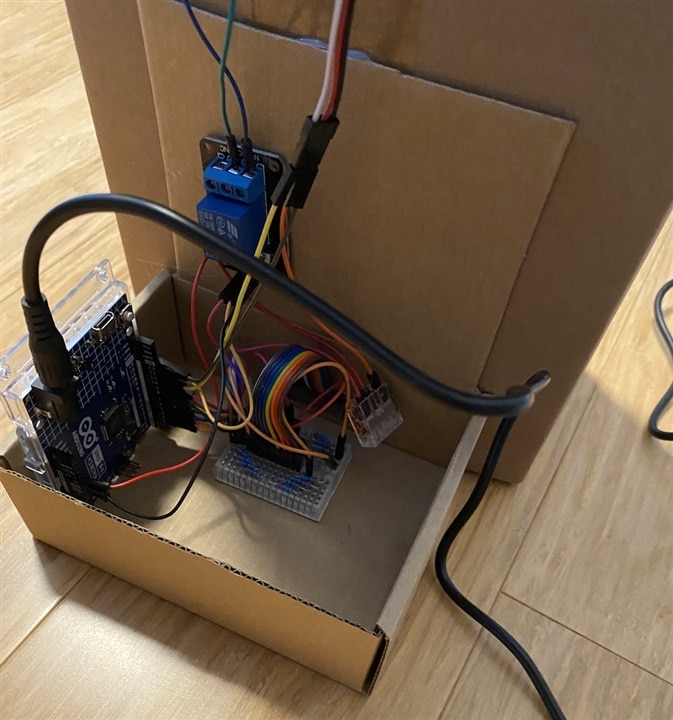
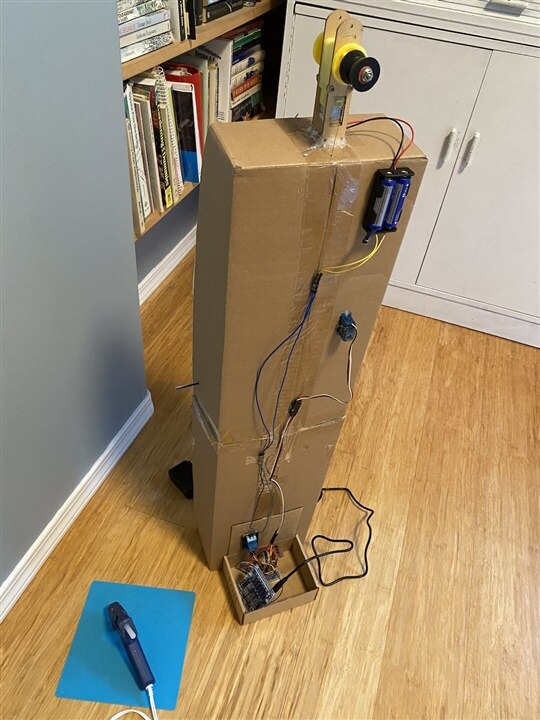
I had to extend some wires, as expected. I used hot glue to stick things where they needed to be stick-ed. That stuff works really well for these types of projects, because the glue is also something that peels off fairly easily if you have to take it apart or move things around.
Does It Meet The Requirements?
"Time and Space"... I think we nailed it!
The countdown timer for the spaceship launch covers the "time" part, and the artsy parts of the project really brings home the "space" part
Then the spaceship goes up for 10 seconds. The alien starts waving around 4 seconds and stops around 6 seconds.
As an interesting nerdy extra for the "time" component, the software contains a few fancy dance steps to deal with handling multiple time-sensitive things all at the same time, all while still keeping relatively close to actual time.
* The countdown clock counts once per second, and only needs to be updated once a second for that.
* The servo needs to be updated every 5 milliseconds or so, to make it move more smoothly. Otherwise we'd have harsh movements side to side once per second in time with the count-down clock's 1 second updates.
* The countdown clock also flashes on zero on the second, after the countdown is complete.
* Everything has to happen at the correct time for each step
I usually prefer to use the lazy method of just telling the chip to "delay" for a half second or so, but when you get into managing multiple time sensitive items, or items that need regular check-ins (like communications), it's best to loop quickly and keep an eye on the millis() as they pass. A little bit of math on how much time has past since the last millis() checkpoint and we can now easily track the seconds while also managing the more demanding task of servo control.
Blooper Reel
There isn't enough space for ALL of the oops moments in this build, but here's a few fun ones...
The magic of using a string to slowly increase the rocket flame as it takes off didn't quite work as well as I had hoped...
The next run was pretty close, but the rocket slowed down a lot when the flame-string reached the point where it was supposed to let go.
Conclusion
I have to admit that the projects where I can combine my wife's art with my techy bits are the most fun to work on!
Attachments
SpaceCountdown.ino.zipReferences
Arduino R4 Minima details: https://store.arduino.cc/products/uno-r4-minima
Arduino Servo Library: https://www.arduino.cc/reference/en/libraries/servo/
I used the Sweep example as a starting point.


Top Comments