element14 Community
element14 Community
    Register Log In
  • Site
  • Search
  • Log In Register
  • About Us
  • Community Hub
    Community Hub
    • What's New on element14
    • Feedback and Support
    • Benefits of Membership
    • Personal Blogs
    • Members Area
    • Achievement Levels
  • Learn
    Learn
    • Ask an Expert
    • eBooks
    • element14 presents
    • Learning Center
    • Tech Spotlight
    • STEM Academy
    • Webinars, Training and Events
    • Learning Groups
  • Technologies
    Technologies
    • 3D Printing
    • FPGA
    • Industrial Automation
    • Internet of Things
    • Power & Energy
    • Sensors
    • Technology Groups
  • Challenges & Projects
    Challenges & Projects
    • Design Challenges
    • element14 presents Projects
    • Project14
    • Arduino Projects
    • Raspberry Pi Projects
    • Project Groups
  • Products
    Products
    • Arduino
    • Avnet Boards Community
    • Dev Tools
    • Manufacturers
    • Multicomp Pro
    • Product Groups
    • Raspberry Pi
    • RoadTests & Reviews
  • Store
    Store
    • Visit Your Store
    • Choose another store...
      • Europe
      •  Austria (German)
      •  Belgium (Dutch, French)
      •  Bulgaria (Bulgarian)
      •  Czech Republic (Czech)
      •  Denmark (Danish)
      •  Estonia (Estonian)
      •  Finland (Finnish)
      •  France (French)
      •  Germany (German)
      •  Hungary (Hungarian)
      •  Ireland
      •  Israel
      •  Italy (Italian)
      •  Latvia (Latvian)
      •  
      •  Lithuania (Lithuanian)
      •  Netherlands (Dutch)
      •  Norway (Norwegian)
      •  Poland (Polish)
      •  Portugal (Portuguese)
      •  Romania (Romanian)
      •  Russia (Russian)
      •  Slovakia (Slovak)
      •  Slovenia (Slovenian)
      •  Spain (Spanish)
      •  Sweden (Swedish)
      •  Switzerland(German, French)
      •  Turkey (Turkish)
      •  United Kingdom
      • Asia Pacific
      •  Australia
      •  China
      •  Hong Kong
      •  India
      •  Korea (Korean)
      •  Malaysia
      •  New Zealand
      •  Philippines
      •  Singapore
      •  Taiwan
      •  Thailand (Thai)
      • Americas
      •  Brazil (Portuguese)
      •  Canada
      •  Mexico (Spanish)
      •  United States
      Can't find the country/region you're looking for? Visit our export site or find a local distributor.
  • Translate
  • Profile
  • Settings
Enchanted Objects
  • Challenges & Projects
  • Design Challenges
  • Enchanted Objects
  • More
  • Cancel
Enchanted Objects
Blog Multimeter Inbox 2: First Experiments
  • Blog
  • Forum
  • Documents
  • Polls
  • Files
  • Events
  • Mentions
  • Sub-Groups
  • Tags
  • More
  • Cancel
  • New
  • Share
  • More
  • Cancel
Group Actions
  • Group RSS
  • More
  • Cancel
Engagement
  • Author Author: kidiccurus
  • Date Created: 5 Apr 2015 2:37 AM Date Created
  • Views 1083 views
  • Likes 5 likes
  • Comments 7 comments
  • enchanted_objects
  • multimeter_inbox
  • dial
  • sellotape
  • uno
  • leonardo
  • arduino
Related
Recommended

Multimeter Inbox 2: First Experiments

kidiccurus
kidiccurus
5 Apr 2015

The arrival of parcels is always exciting for me. Even if it is just an Amazon box containing an audio cable, I still get a little excited, so naturally, when this arrived at my door, I was VERY excited.


image

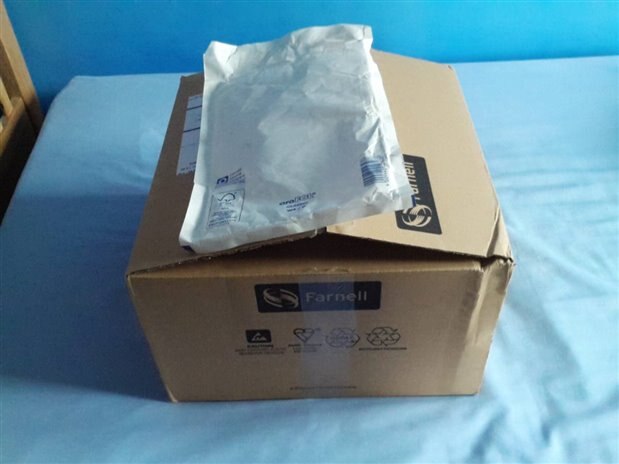
The box arrived within a few days of the e-mail telling me that I had been accepted into the challenge. Considering that I am in the UK, this is especially impressive. Naturally, my first reaction was to open everything and lay it out onto my bed (I had just had guests and my desk was still not cleared). Strangely enough, the Arduino proto sheild came in a separate envelope from a UK warehouse in order to ship faster to the UK. It is nice to see that fast shipping is given such a priority. Unfortunately the Gun has not arrived yet, but everything else was included in the box. Also, kudos to Atmel for including a USB cable with the explained board. One of my micro B cables recently suffered some sort of internal failing, leaving it unable to charge my tablet at a reasonable speed. The new one is now a significant part of my cab.


image

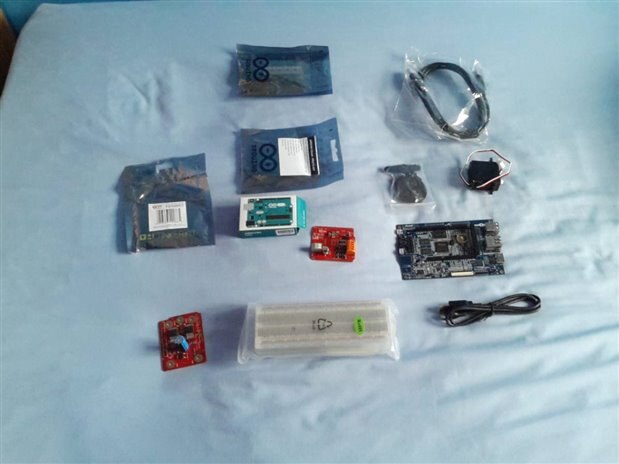
Strangely enough, I have never owned an Uno. My only Arduino up to this point has always been a Leonardo, thanks to the extra IO, reduced cost and keyboard emulation. I was really excited about the ease of use with extra library's and ability to swap chips. What I did not realise was how much faster it would be to upload sketches. Uploading sketches to the Leonardo is not too difficult after the first time, and did not expect the Uno to blow me away in this area. In reality, after the sketch compiled, it would upload several times faster on the Uno. I still like my Leonardo, but the Uno is going to be a valuable addition to my toolkit.


My first stage of testing was to remove the display from the meter's circuitry and hook it up to a 5v power supply to see if the dial would reach full deflection. Thankfully the dial had convenient positive and negative labels for the terminals. I briefly tapped the terminal and the dial immediately went off the scale. This may change my approach to the design for project. It may be possible to commit the motor driver and circuitry from the multimeter and instead drive the dial via a pwm pin from the Arduino via some resistors to limit the current. Of course this depends on the power required to drive the dial and whether the Arduino is capable of supplying the required current. If this is possible, then I may instead use the LED driver I was sent to implement a more interesting backlight.

image

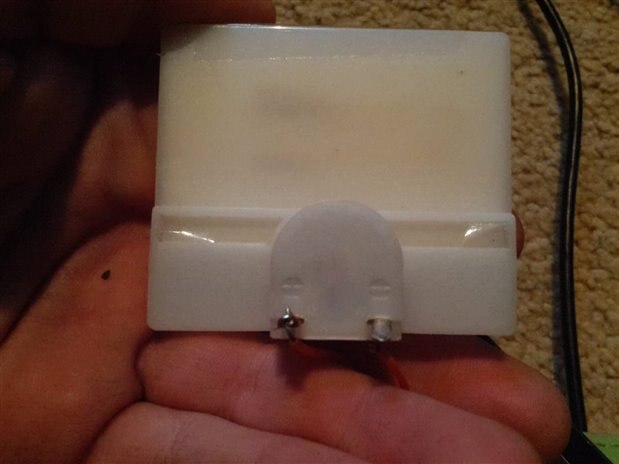
I also noticed that the cover for the display was held on only with sellotape. This potentially means I could remove the cover and polish out some of the scratches that it has picked up over the years. However, my experiences with polishing plastic have been universally disappointing. If you have any advice on how to polish it, or on any other aspects of the protect, please feel free to leave it in the comments section.


NOTE: My new computer setup is still causing me some issues in producing these blog posts. I will attempt to continue posting from my backup device but expect some delays in posts. Strangely enough, comments are not being impacted.

  • Sign in to reply

Top Comments

  • 4ringfan
    4ringfan over 10 years ago +1
    Again, here I go with my car background, but there are kits available for restoring automotive headlight plastic to their original clear surface. Most involve some very fine sandpaper, and some buffing…
  • kidiccurus
    kidiccurus over 10 years ago in reply to mcb1 +1
    Thank you for your replys. Mark, I should clarify that when testing, I made sure to only touch the terminals of the display to the PSU for a a very brief moment to avoid damage. For further testing I will…
  • kidiccurus
    kidiccurus over 10 years ago in reply to mcb1

    Thank you for your replys.

    Mark, I should clarify that when testing, I made sure to only touch the terminals of the display to the PSU for a a very brief moment to avoid damage. For further testing I will be using a resistor.


    As for the display, I think will accept the scratches rather than risk causing damage. They are reasonably small and I don't want to risk more damage.

    • Cancel
    • Vote Up +1 Vote Down
    • Sign in to reply
    • More
    • Cancel
  • 4ringfan
    4ringfan over 10 years ago

    If the plastic window is small, you could use a cotton tip applicator with some rubbing compound.

    • Cancel
    • Vote Up 0 Vote Down
    • Sign in to reply
    • More
    • Cancel
  • mcb1
    mcb1 over 10 years ago in reply to kidiccurus

    Low grit sandpaper in particular seems liable to cause more damage.

    Yes Low Grit ie 80 will cause damage.

    You need something like 4000 or higher.


    Personally I'd simply stick with either a metal polish, or even a car polish that has a 'cutting compound' in it.

    Try laying a cloth with the polish on it down on a flat surface and rubbing the meter against it.

    Short out the meter with a wire, this will help damp it so it doesn't bounce around.


    I seem to recall advising you earlier to use a resistor in series with the meter when testing it ... lucky you didn't bend it around the end stop.

    Mark

    • Cancel
    • Vote Up 0 Vote Down
    • Sign in to reply
    • More
    • Cancel
  • kidiccurus
    kidiccurus over 10 years ago in reply to Workshopshed

    Thank you all for your replys. The main thing that I am worried about is that I could potentially cause more damage to the plastic in my attempts to clean it. This has been a problem for me in the past. Low grit sandpaper in particular seems liable to cause more damage.

    • Cancel
    • Vote Up 0 Vote Down
    • Sign in to reply
    • More
    • Cancel
  • Workshopshed
    Workshopshed over 10 years ago

    The Yun arrived by UPS from the US about 10days after everything else.


    I have also noticed that meters seem to be held together with tape.


    Thinking about Mike's comment, perhaps some T-Cut might work, you can get it from Halfords or even some supermarkets.

    • Cancel
    • Vote Up 0 Vote Down
    • Sign in to reply
    • More
    • Cancel
>
element14 Community

element14 is the first online community specifically for engineers. Connect with your peers and get expert answers to your questions.

  • Members
  • Learn
  • Technologies
  • Challenges & Projects
  • Products
  • Store
  • About Us
  • Feedback & Support
  • FAQs
  • Terms of Use
  • Privacy Policy
  • Legal and Copyright Notices
  • Sitemap
  • Cookies

An Avnet Company © 2025 Premier Farnell Limited. All Rights Reserved.

Premier Farnell Ltd, registered in England and Wales (no 00876412), registered office: Farnell House, Forge Lane, Leeds LS12 2NE.

ICP 备案号 10220084.

Follow element14

  • X
  • Facebook
  • linkedin
  • YouTube