element14 Community
element14 Community
    Register Log In
  • Site
  • Search
  • Log In Register
  • About Us
  • Community Hub
    Community Hub
    • What's New on element14
    • Feedback and Support
    • Benefits of Membership
    • Personal Blogs
    • Members Area
    • Achievement Levels
  • Learn
    Learn
    • Ask an Expert
    • eBooks
    • element14 presents
    • Learning Center
    • Tech Spotlight
    • STEM Academy
    • Webinars, Training and Events
    • Learning Groups
  • Technologies
    Technologies
    • 3D Printing
    • FPGA
    • Industrial Automation
    • Internet of Things
    • Power & Energy
    • Sensors
    • Technology Groups
  • Challenges & Projects
    Challenges & Projects
    • Design Challenges
    • element14 presents Projects
    • Project14
    • Arduino Projects
    • Raspberry Pi Projects
    • Project Groups
  • Products
    Products
    • Arduino
    • Avnet Boards Community
    • Dev Tools
    • Manufacturers
    • Multicomp Pro
    • Product Groups
    • Raspberry Pi
    • RoadTests & Reviews
  • Store
    Store
    • Visit Your Store
    • Choose another store...
      • Europe
      •  Austria (German)
      •  Belgium (Dutch, French)
      •  Bulgaria (Bulgarian)
      •  Czech Republic (Czech)
      •  Denmark (Danish)
      •  Estonia (Estonian)
      •  Finland (Finnish)
      •  France (French)
      •  Germany (German)
      •  Hungary (Hungarian)
      •  Ireland
      •  Israel
      •  Italy (Italian)
      •  Latvia (Latvian)
      •  
      •  Lithuania (Lithuanian)
      •  Netherlands (Dutch)
      •  Norway (Norwegian)
      •  Poland (Polish)
      •  Portugal (Portuguese)
      •  Romania (Romanian)
      •  Russia (Russian)
      •  Slovakia (Slovak)
      •  Slovenia (Slovenian)
      •  Spain (Spanish)
      •  Sweden (Swedish)
      •  Switzerland(German, French)
      •  Turkey (Turkish)
      •  United Kingdom
      • Asia Pacific
      •  Australia
      •  China
      •  Hong Kong
      •  India
      •  Korea (Korean)
      •  Malaysia
      •  New Zealand
      •  Philippines
      •  Singapore
      •  Taiwan
      •  Thailand (Thai)
      • Americas
      •  Brazil (Portuguese)
      •  Canada
      •  Mexico (Spanish)
      •  United States
      Can't find the country/region you're looking for? Visit our export site or find a local distributor.
  • Translate
  • Profile
  • Settings
Enchanted Objects
  • Challenges & Projects
  • Design Challenges
  • Enchanted Objects
  • More
  • Cancel
Enchanted Objects
Blog Multimeter Inbox 3 - Prototyping Hardware
  • Blog
  • Forum
  • Documents
  • Polls
  • Files
  • Events
  • Mentions
  • Sub-Groups
  • Tags
  • More
  • Cancel
  • New
  • Share
  • More
  • Cancel
Group Actions
  • Group RSS
  • More
  • Cancel
Engagement
  • Author Author: kidiccurus
  • Date Created: 6 May 2015 8:47 PM Date Created
  • Views 1072 views
  • Likes 3 likes
  • Comments 10 comments
  • enchanted_objects
  • inbox_multimeter
  • multimeter_inbox
Related
Recommended

Multimeter Inbox 3 - Prototyping Hardware

kidiccurus
kidiccurus
6 May 2015

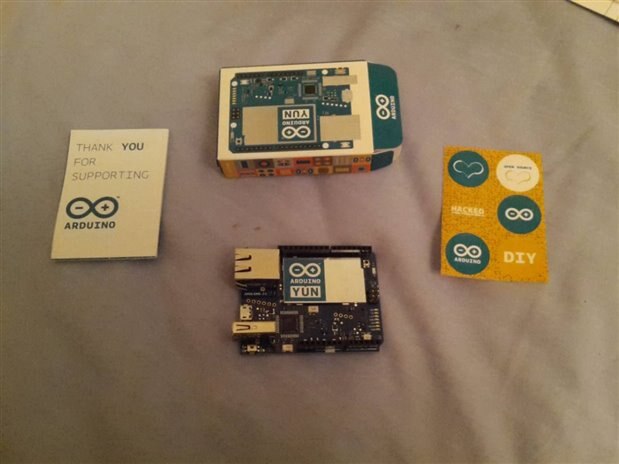
Good news, my Yun has arrived. I am not quite ready to move on to the internet side of my project, but it nice to be able to see what I am working with. On the minus side, the Ups shipping notification arrived two days after the Yun, but thankfully I was at home on the day that it arrived so there were no problems with the delivery.

image

And now onto my progress. Having determined that the screen could be driven from 5v, my first step was to try and power it from the Uno. The minimum safe resistance on the io pins of most Arduinos is around 200 ohms, so to test the display I wired a 220 ohm resistor in series with it, and hooked it up to the Uno. My original plan to test the display was to use a serial terminal to communicate with the Arduino so I could change PWM values on the fly to work out the correct values for this display, but the code I uploaded for a test uploaded so quickly compared to the sketches on my Leonardo that I decided just to use a simple analogue write and change the value and re upload each time. This could damage the chips memory over time, but I wanted to take advantage of this new boards features the first time I used it. Using trial and error, I was able to work out display values to get the screen to work correctly. However, I had to use very low PWM values to the point that I could not get the resolution that I needed. To fix this I added a second 220 ohm resistor in series with the first and changed my PWM values accordingly to get a reasonably accurate display working. In the final design, I will use a single 470 ohm resistor, but at the time I did not feel like rummaging through my part bins for a second time. Using the new PWM values I then created a quick demo programming that moves the dial up through all the values. Some tweaking is still needed but it works reasonably well.


Now that I have the display working, it is time to think about my backlight. My original plan was a monochromatic backlight driven by a single PWM pin from the Arduino. However, now that I have moved away from the motor shield, I am able to very easily install the Infineon LED sheild instead. I am going to use the shield to implement a traffic light style indication of the number of posts from the backlight, starting green and moving through to yellow and red. Rather than an RGB led, I am going to use a separate red, green and yellow led. The In fine on shield does not come with headers installed, so I first had to solder these into place. It is worth bearing in mind that no headers are included with the sheild, I had to use the ones from the Arduino starter kit. Nonetheless, breaking apart and soldering on the headers was very quick and easy. I also used some spare headers to attach to create an adaptor to plug the outputs from the sheild into a breadboard, to a low the display to plug into the breadboard, and to add some wires coming off the sheild to more headers so I could still use the display as well as add some buttons. To power the sheild I just cut the end off a twelve volt power brick I had lying around.

  The first issue I had was with downloading the example code. Strangely enough, the download from the official website required running a programming to create the correct folders. As a Linux user, this could have been an issue. Thankfully though, it was able to run under WINE with no issues. My next issue was setting the current limit. I had some issues lowering the current limit from the driver through software. Instead of fighting with code I decided just to use some resistors to ensure the current passing through the LEDs was not to high. This is a bit of a dirty fix, but for a prototype it is not to much of an issue.

  Eventually I was able to modify the example code to the point where I could control the backlight. I then combined this with my previous demo programming and was able to cycle through the values on the dial and backlight. A few more modifications, and I was able to control the values with a pair of buttons. The buttons work through a variable in the code which in the final version will be updated by the number of message in my inbox. I also added the option to deactivate the backlight with a third button, which will be replaced with a switch in the final version. This is so I can have the unit in a bedroom and turn off the backlight to sleep. I have set up the light to go red quite a while before the dial reaches the end of the scale. This mostly because my inbox rarely has more than 6 messages, and I want to try and enjoy the full color spectrum available to the light system.


  My next step is going to be working on the code for the internet side of this project. If anyone knows a good way to create the cookies on the Yun to log in to the site so I can parse for the message count, or has another way of getting the message count please leave it in the comments.

  • Sign in to reply
  • kidiccurus
    kidiccurus over 10 years ago in reply to Workshopshed

    Done some probing with my multimeter and I think I am able to get a connection with the shield at an angle and the pins not quite in place. If this is reliable enough I may just forgoe the expansion hadders and leave it at an angle. If not then I will follow your advice.

    • Cancel
    • Vote Up 0 Vote Down
    • Sign in to reply
    • More
    • Cancel
  • Workshopshed
    Workshopshed over 10 years ago in reply to kidiccurus

    You can always use some stacking headers to gain a bit more height. The downside to that is you might need to buy more headers and they might come out when you unplug the boards.

    I went for a compromise solution using the protoboard with pins on one side and headers on the other.

    • Cancel
    • Vote Up 0 Vote Down
    • Sign in to reply
    • More
    • Cancel
  • kidiccurus
    kidiccurus over 10 years ago in reply to Workshopshed

    Thank ylu for pointing that out. I did not notice the problem with short headers, so no I did not use the correct ones at the time. Looks like some more soldering is in order. As for the video, it works fine for me. I will be using YouTube for future videos, but for now I recommend trying a different browser. Sorry.

    • Cancel
    • Vote Up 0 Vote Down
    • Sign in to reply
    • More
    • Cancel
  • Workshopshed
    Workshopshed over 10 years ago

    Hopefully you installed the long header pins onto the shield, the Yún has some clearance issues because of the 90°USB connector and the Ethernet socket

    • Cancel
    • Vote Up 0 Vote Down
    • Sign in to reply
    • More
    • Cancel
  • fvan
    fvan over 10 years ago in reply to Workshopshed

    Same here ...

    • Cancel
    • Vote Up 0 Vote Down
    • Sign in to reply
    • More
    • Cancel
>
element14 Community

element14 is the first online community specifically for engineers. Connect with your peers and get expert answers to your questions.

  • Members
  • Learn
  • Technologies
  • Challenges & Projects
  • Products
  • Store
  • About Us
  • Feedback & Support
  • FAQs
  • Terms of Use
  • Privacy Policy
  • Legal and Copyright Notices
  • Sitemap
  • Cookies

An Avnet Company © 2025 Premier Farnell Limited. All Rights Reserved.

Premier Farnell Ltd, registered in England and Wales (no 00876412), registered office: Farnell House, Forge Lane, Leeds LS12 2NE.

ICP 备案号 10220084.

Follow element14

  • X
  • Facebook
  • linkedin
  • YouTube