element14 Community
element14 Community
    Register Log In
  • Site
  • Search
  • Log In Register
  • Community Hub
    Community Hub
    • What's New on element14
    • Feedback and Support
    • Benefits of Membership
    • Personal Blogs
    • Members Area
    • Achievement Levels
  • Learn
    Learn
    • Ask an Expert
    • eBooks
    • element14 presents
    • Learning Center
    • Tech Spotlight
    • STEM Academy
    • Webinars, Training and Events
    • Learning Groups
  • Technologies
    Technologies
    • 3D Printing
    • FPGA
    • Industrial Automation
    • Internet of Things
    • Power & Energy
    • Sensors
    • Technology Groups
  • Challenges & Projects
    Challenges & Projects
    • Design Challenges
    • element14 presents Projects
    • Project14
    • Arduino Projects
    • Raspberry Pi Projects
    • Project Groups
  • Products
    Products
    • Arduino
    • Avnet & Tria Boards Community
    • Dev Tools
    • Manufacturers
    • Multicomp Pro
    • Product Groups
    • Raspberry Pi
    • RoadTests & Reviews
  • About Us
  • Store
    Store
    • Visit Your Store
    • Choose another store...
      • Europe
      •  Austria (German)
      •  Belgium (Dutch, French)
      •  Bulgaria (Bulgarian)
      •  Czech Republic (Czech)
      •  Denmark (Danish)
      •  Estonia (Estonian)
      •  Finland (Finnish)
      •  France (French)
      •  Germany (German)
      •  Hungary (Hungarian)
      •  Ireland
      •  Israel
      •  Italy (Italian)
      •  Latvia (Latvian)
      •  
      •  Lithuania (Lithuanian)
      •  Netherlands (Dutch)
      •  Norway (Norwegian)
      •  Poland (Polish)
      •  Portugal (Portuguese)
      •  Romania (Romanian)
      •  Russia (Russian)
      •  Slovakia (Slovak)
      •  Slovenia (Slovenian)
      •  Spain (Spanish)
      •  Sweden (Swedish)
      •  Switzerland(German, French)
      •  Turkey (Turkish)
      •  United Kingdom
      • Asia Pacific
      •  Australia
      •  China
      •  Hong Kong
      •  India
      • Japan
      •  Korea (Korean)
      •  Malaysia
      •  New Zealand
      •  Philippines
      •  Singapore
      •  Taiwan
      •  Thailand (Thai)
      • Vietnam
      • Americas
      •  Brazil (Portuguese)
      •  Canada
      •  Mexico (Spanish)
      •  United States
      Can't find the country/region you're looking for? Visit our export site or find a local distributor.
  • Translate
  • Profile
  • Settings
Sudden Impact Wearables Design Challenge
  • Challenges & Projects
  • Design Challenges
  • Sudden Impact Wearables Design Challenge
  • More
  • Cancel
Sudden Impact Wearables Design Challenge
Blog SFH: Week 3 - Preparing the Raspberry Pi B+
  • Blog
  • Forum
  • Documents
  • Polls
  • Files
  • Events
  • Mentions
  • Sub-Groups
  • Tags
  • More
  • Cancel
  • New
  • Share
  • More
  • Cancel
Group Actions
  • Group RSS
  • More
  • Cancel
Engagement
  • Author Author: hawkeyethehacker
  • Date Created: 29 Dec 2014 11:59 AM Date Created
  • Views 288 views
  • Likes 2 likes
  • Comments 0 comments
  • safe_field_hockey
  • sudden_impact
Related
Recommended

SFH: Week 3 - Preparing the Raspberry Pi B+

hawkeyethehacker
hawkeyethehacker
29 Dec 2014

image

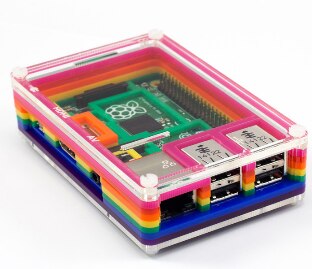
Meet the Raspberry Pi B+ - in a nutshell, it is basically pure awesome.

It has more GPIO, double the USB ports of a standard model B, a better layout of connectors on the board, what more could you possibly want?


Today we'll be setting up the B+ in general, and installing Node.JS on it. We will also be adding a Websocket library via npm, node's package manager.


b1f65a704a91c9c3b6d450726f138621.png

We will be using Win32 Disk Imager to flash our MicroSD card.

2bdc9bf3523139f5973eae3001e0309b.png

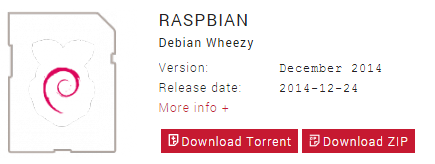
We'll also be using the latest Raspbian, which was released on the 24th December 2014.


For those who have never used a Raspberry Pi (or for those who received one over Christmas image), this is a brief overview of the Win32 Disk Imager interface:

3da492c3a6a0628bbdc8b42eac65181a.png

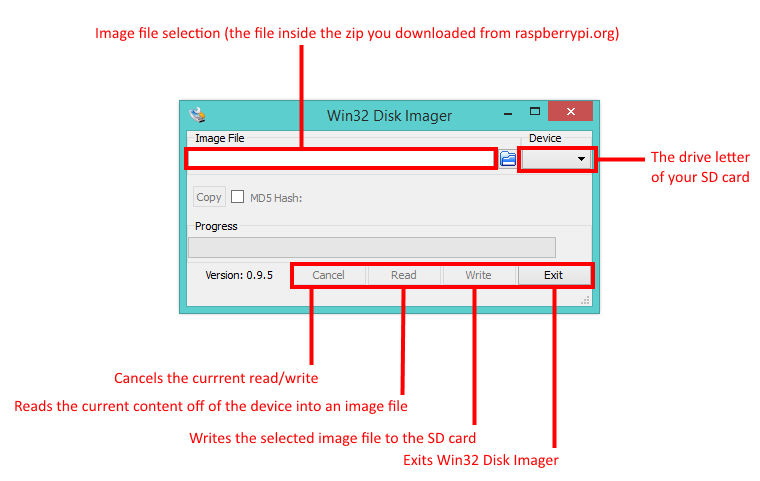
All you have to do, is ensure your SD card is correctly selected in the Device dropdown menu, the image from raspberrypi.org is selected in the Image file box, and you just click Write!

Once that is complete, the SD card is pushed into the Raspberry Pi and it will hold itself there providing you pushed it in properly.

For the next steps, I hooked the Pi up to an ethernet cable and powered it up. I then used a tool called Advanced IP Scanner to find the IP address for the Pi.


Once that was done, I SSH'd into the Pi using a tool called putty


Now, when you first boot up the Pi with a monitor, it would automatically start raspi-config for you. However, if you do your first login over SSH, you will need to do it manually.


sudo raspi-config

You can then use the arrow keys to select options. I expanded the root filesystem, changed the default password (pi, raspberry) and did a modest overclock, just to speed things up a bit.


Now we will install Node.JS and my websocket library of choice.

sudo apt-get update

sudo apt-get install nodejs npm

sudo npm config set registry http://registry.npmjs.org/

sudo npm install --save ws

Node.JS and a websockets library (ws, by einaros) are now installed, and will be used as a server for the player's uniforms and the mobile app.

  • Sign in to reply
element14 Community

element14 is the first online community specifically for engineers. Connect with your peers and get expert answers to your questions.

  • Members
  • Learn
  • Technologies
  • Challenges & Projects
  • Products
  • Store
  • About Us
  • Feedback & Support
  • FAQs
  • Terms of Use
  • Privacy Policy
  • Legal and Copyright Notices
  • Sitemap
  • Cookies

An Avnet Company © 2025 Premier Farnell Limited. All Rights Reserved.

Premier Farnell Ltd, registered in England and Wales (no 00876412), registered office: Farnell House, Forge Lane, Leeds LS12 2NE.

ICP 备案号 10220084.

Follow element14

  • X
  • Facebook
  • linkedin
  • YouTube