


I have a DFRobot UNIHIKER M10 Linux SBC that I got for participating in a Hackster contest. DFRobot recently released a MCU based variant of that board, the K10, which uses the ESP32-S3. This new board is targeted at AI educational (STEM/STEAM) applications. I use the ESP32-S3 in a lot of my projects, so I thought I'd give this board a try.
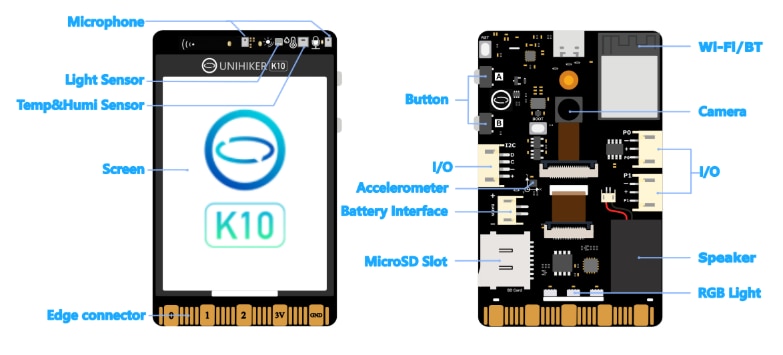
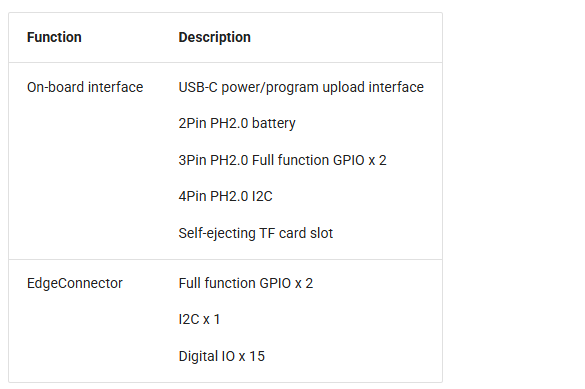
The K10 costs $28 which is about 35% the price of an M10. With its educational focus it uses Mind+ which is a block based programming language with some AI customization to support limited image, sound, and motion detection/recognition. It has a rich feature set including a display, camera, WiFi/Bluetooth, and multiple sensors. It even has a Microbit compatible edge connector that will allow you to use Microbit expansion boards.
https://www.dfrobot.com/product-2904.html
https://www.unihiker.com/wiki/K10
I received the K10 about a week ago. I already had Mind+ installed on my PC because I had been using it with the M10. The K10 requires an update to Mind+ to include the K10 board configuration. Mind+ indicated that it was already running the latest version (which it wasn't) so I needed to update it manually by downloading the latest installer.
Here's the K10 mounted on a 3D printed baseplate in a Seeed Studio stand.
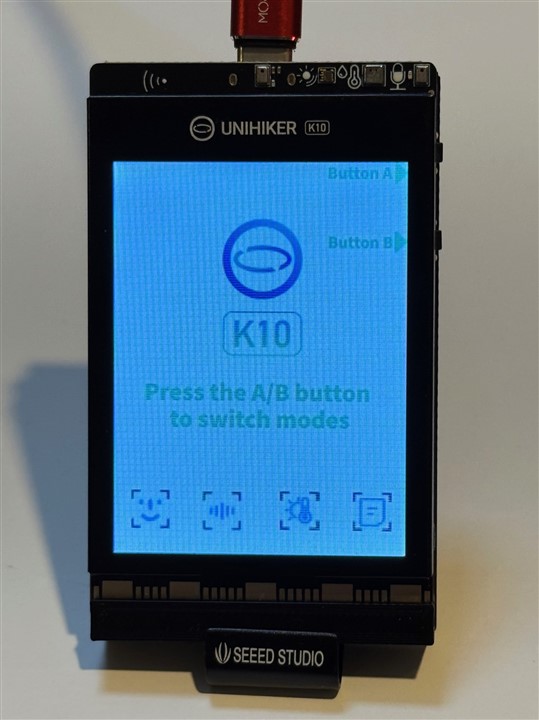
The K10 comes pre-installed with 4 types of Vision AI Models
- Face Detection
- Cat/Dog Detection
- Motion Detection
- QR Code Recognition
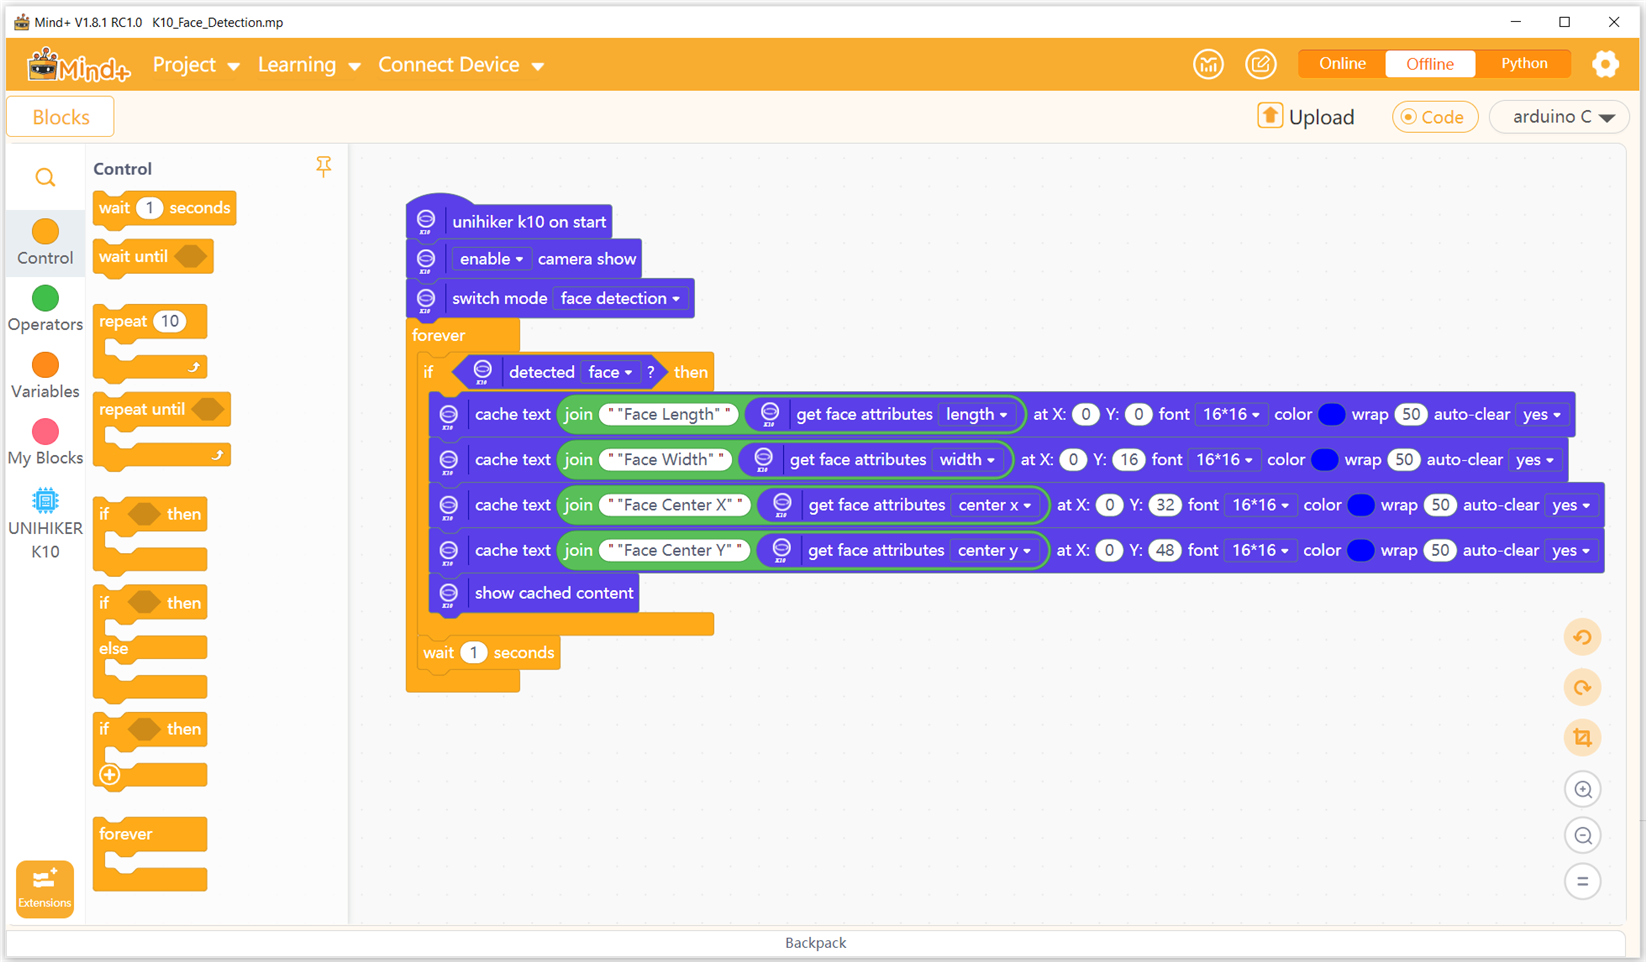
I played with it a bit and everything appeared to be working fine albeit somewhat slowly. I decided that a good test would be to try using Mind+ to reprogram Face Detection as that would verify everything installed correctly.
Here is the graphical block code:
And the autogenerated C++ code:
/*!
 * MindPlus
 * esp32s3bit
 *
 */
#include "unihiker_k10.h"
#include "AIRecognition.h"
// Create an object
UNIHIKER_K10  k10;
uint8_t       screen_dir=2;
AIRecognition ai;


// Main program start
void setup() {
	k10.begin();
	k10.initScreen(screen_dir);
	ai.initAi();
	k10.initBgCamerImage();
	k10.setBgCamerImage(false);
	k10.creatCanvas();
	ai.switchAiMode(ai.NoMode);
	k10.setBgCamerImage(true);
	ai.switchAiMode(ai.Face);
}
void loop() {
	if (ai.isDetectContent(AIRecognition::Face)) {
		k10.canvas->canvasText((String("\"Face Length\"") + String(ai.getFaceData(AIRecognition::Length))), 0, 0, 0x0000FF, k10.canvas->eCNAndENFont16, 50, true);
		k10.canvas->canvasText((String("\"Face Width\"") + String(ai.getFaceData(AIRecognition::Width))), 0, 16, 0x0000FF, k10.canvas->eCNAndENFont16, 50, true);
		k10.canvas->canvasText((String("\"Face Center X\"") + String(ai.getFaceData(AIRecognition::CenterX))), 0, 32, 0x0000FF, k10.canvas->eCNAndENFont16, 50, true);
		k10.canvas->canvasText((String("\"Face Center Y\"") + String(ai.getFaceData(AIRecognition::CenterY))), 0, 48, 0x0000FF, k10.canvas->eCNAndENFont16, 50, true);
		k10.canvas->updateCanvas();
	}
	delay(1000);
}
The code would be compatible with the Arduino IDE and the Espessif ESP32-S3 board library but to use it with AI and sensors you would need to figure out how to load the associated software libraries. There is no instruction of how to do that (or use it with the Arduino IDE) and no one responded on the DFRobot forum. So for now I'll just do all programming in Mind+.
You can also program the K10 with Micropython, but I don't think that extends to any of the AI programming.
Next I had to 3D print a tripod adapter for the board.
Here's a real quick demo with a familiar face. Apologies for the unsteadiness of the video.
A pretty nice board with lots of features. I'm sure I'll find a good project for it. It should be great for STEAM courses. The price isn't that much more than a Microbit V2. I can't wait to try it out with my grandson, but he's only 2 1/2.


