In the 1990s a craze swept the world, Tamagotchis sometimes known as virtual pets became a big business. They used cheap LCD screens, buttons and microcontrollers to create a pet that would fit into your pocket.
With new technologies taking over, the virtual pet soon fell out of favour as children demanded more from their devices. In the ensuing years we saw a slew of handheld gaming devices leading on to the rise in mobile and tablet gaming. But does this mean that the humble tamagotchi is dead and buried?
Codebug is a project created by Dr Andrew Robinson who has a PhD in low power embedded processors. Along with Andrew there is Thomas Preston who works on the software that powers Codebug and Thomas Macpherson-Pope who is the hardware engineer that designed Codebug.
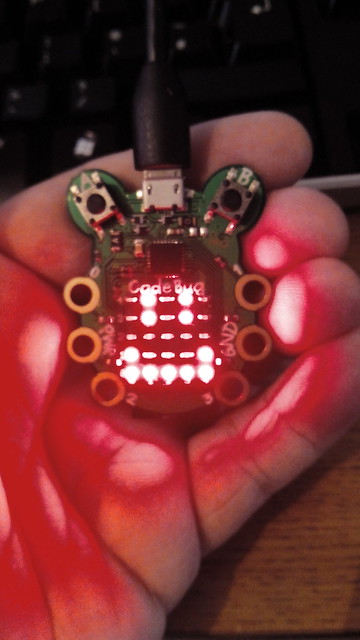
The Codebug board measures 39mm wide and 47mm tall and is shaped to resemble a friendly bug. At the top of Codebug we can see a micro USB port that can be used for power and uploading code. On either side of the micro USB port we can see a simple momentary switch which are basic forms of input. Just under the micro USB port we can see a PIC18F microcontroller which is the brains of the board. Under the PIC18F we see a matrix of 5x5 red LEDs for use as an output device. Finally around the perimeter we can see six brass connectors which can be used with crocodile clips. These are inputs/outputs that can be controlled using the Codebug software.
Codebug is programmed using a block based language that is similar to Scratch and Blockly. Rather than typing code into a console or file, code is dragged as blocks from a menu and joined together to form a sequence.
In this tutorial we shall use Codebug to create our own virtual pet coded ourselves using the Codebug website.
Getting started
We start the project by visiting the Codebug website http://www.codebug.co.uk/ and creating an account. It only takes a few minutes. Once your account is created and you are logged in click on Create to start a new project. Remember to save your work frequently!
The Codebug interface is dominated by an area to the right of the screen which is the main programming interface. It has a series of menus that are used to store the blocks necessary to code. By dragging the blocks from the menus we can connect them together in the coding area. In the top right of this area is a trash can used to remove blocks that are no longer needed.
Let's start coding our virtual pet and we start...at the start which is a pre-populated block in the coding area. The start block can be used to configure Codebug when it starts, in this project we shall leave it as is.
For our first block of code we shall grab Scroll Sprite block from the Sprite menu and connect it to the start block. This block will scroll content to the left of the 5x5 matrix and updates every 100ms. But we have nothing to scroll so let's go ahead and use the Get String Sprite, also from the Sprite menu and connect it to the Scroll Sprite block. We changed the text from Hello World to Bugagotchi!
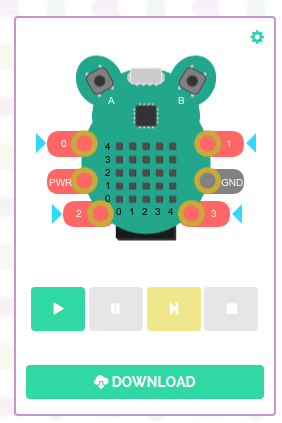
Let's give this code a test, look to the top left of the screen and you will see a Codebug simulator. Click on the green play button to see your code simulated on screen. Scrolling text intro completed
Let's move on to creating a repeating sequence. In programming this is called a loop. We are going to use a loop that will constantly run and check our sequence.
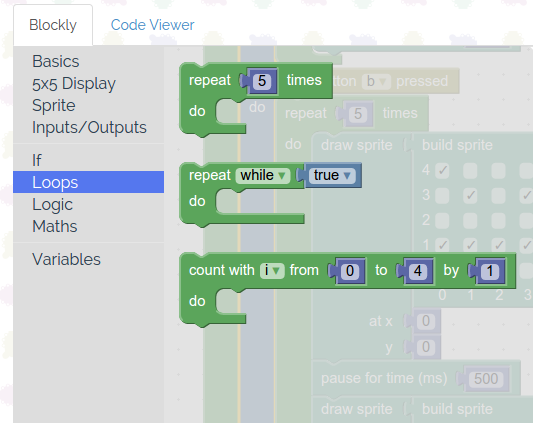
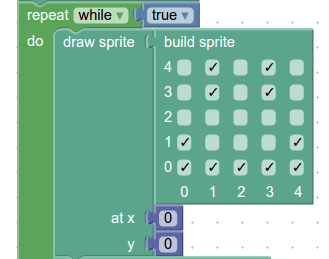
The loop that we want is called Repeat While True and it can be found in the Loops menu. Attach the loop to the bottom of our previous code. Inside the loop we shall drag blocks that will be repeated and the first of those is Draw Sprite from the Sprite menu and to this we shall attach Build Sprite as so.
Build sprite enables a sprite to be drawn on to the 5x5 LED matrix using a series of ticks on the block. A tick equals the LED being illuminated. We drew a simple smiley face. Go ahead and test your code using the simulator. You should see the matrix light up with your smiley.
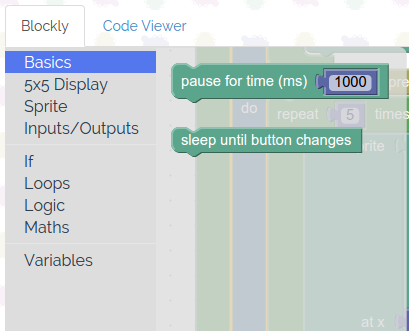
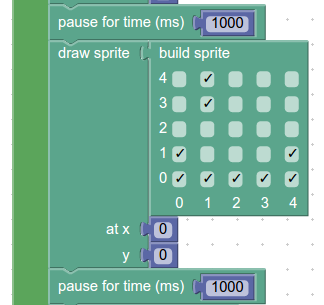
We are now going to create an animation using the LED matrix, so we need to add a delay between the previous smiley face and the next one, so in the Basics menu you can find the Pause for time(ms) block.
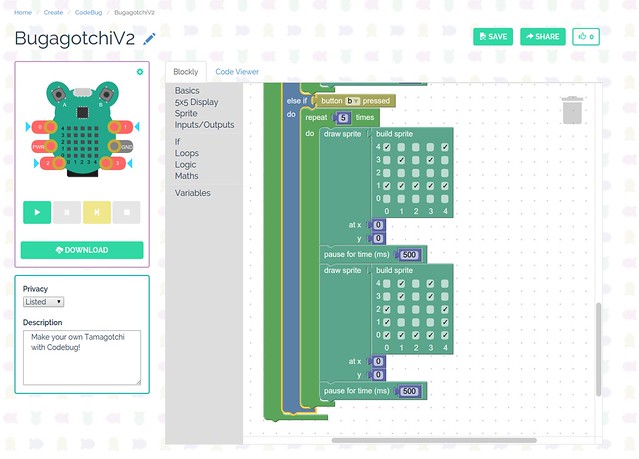
Drag this block and attach it underneath our previous blocks but still inside the loop. We’ll next use the Draw Sprite and Build Sprite blocks as before to draw a new smiley face, lastly we add another Pause for time(ms) block. Try your code in the simulator.
The next block in our sequence is found in the Basics menu and is called sleep until button changes, and this pauses the sequence waiting for user input.
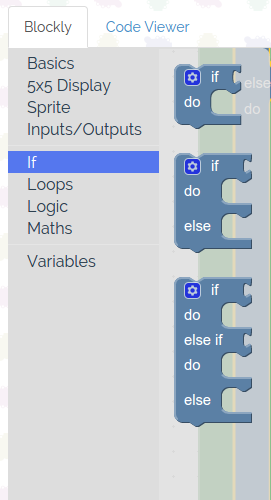
We are now going to construct a conditional statement, this is going to look for what button has been pressed and act accordingly. Conditional statements are really powerful and comprise of a series of tests that are applied. The first test is called “if” and if the first test is not true, false, the sequence moves on to the next test, which in this case is “else if”. If this second test is false we carry on until all of the "else if" statements are proven to be false, or one of them is proven true. If everything is proven to be false then the final test “else” will be true and the code contained therein is run.
For our conditional test we shall go to the If menu and drag the if..do..elseif..do..else block over and attach it to the sleep until button changes block. We need to change the block so that we can remove the else condition. To do this look for the cog icon next to if and left click on it. Remove the else block by dragging it to the other blocks in the dark grey area.
With our conditional statement structure complete let's build our first test, for if. We shall say that “if button a is pressed...” You can find the button a press block in the Inputs/Outputs menu, drag it on to the coding area and attach it to the right of if.
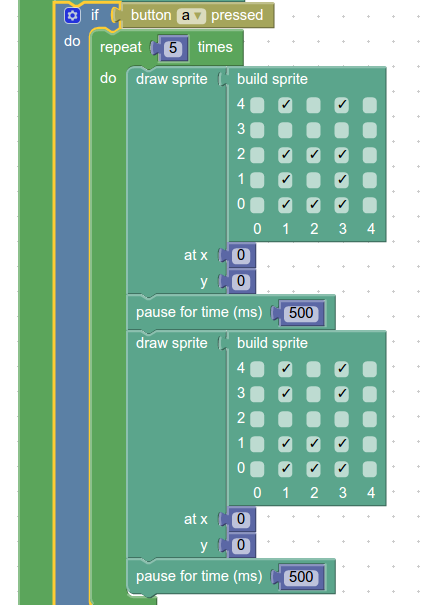
Lets now write some code that will be run when button A is pressed. When button A is pressed we shall feed the bugagotchi, so we shall use a similar technique to previous to create an animation on the LED matrix. We shall use a repeat 5 times loop to animate 5 times, so go ahead and grab it from the Loops menu and put it inside the If condition. Then go ahead and add the blocks to create the animation.
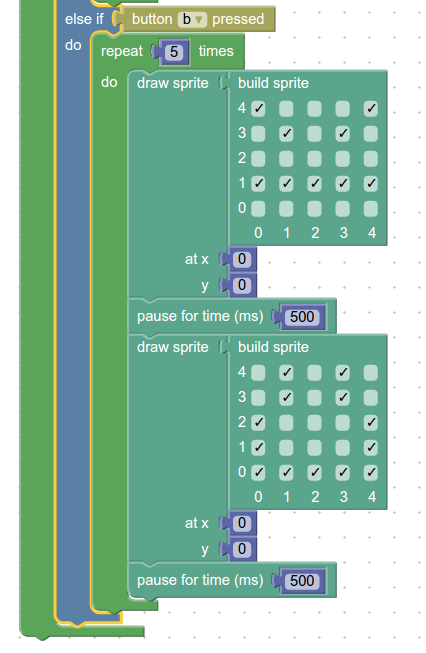
For the Else if conditional test we will check to see if button B has been pressed and then create another animation similar to that of button A
And that is all of the code written, so let's test it in the simulator!
With the code working, click on Download, it's just under the simulator controls, to download a compiled version of the code ready for our real Codebug. When the code is downloaded, plug in a USB to micro USB lead to your computer. Now hold button A of your Codebug and insert the micro USB into it. On your Codebug the top left LED in the matrix will come to life and flash. The Codebug will also appear as a USB drive on your computer. The code that has been downloaded from the Codebug website can be copied to the USB drive and once there press button B to run the program. If you would like to make the project portable use a CR2032 battery and insert it into the holder on the back of Codebug.
Congratulations you have built your very own Bugagotchi virtual pet!



-

DAB
-
Cancel
-
Vote Up
0
Vote Down
-
-
Sign in to reply
-
More
-
Cancel
-

gregoryfenton
in reply to DAB
-
Cancel
-
Vote Up
0
Vote Down
-
-
Sign in to reply
-
More
-
Cancel
Comment-

gregoryfenton
in reply to DAB
-
Cancel
-
Vote Up
0
Vote Down
-
-
Sign in to reply
-
More
-
Cancel
Children