element14 Community
element14 Community
    Register Log In
  • Site
  • Search
  • Log In Register
  • About Us
  • Community Hub
    Community Hub
    • What's New on element14
    • Feedback and Support
    • Benefits of Membership
    • Personal Blogs
    • Members Area
    • Achievement Levels
  • Learn
    Learn
    • Ask an Expert
    • eBooks
    • element14 presents
    • Learning Center
    • Tech Spotlight
    • STEM Academy
    • Webinars, Training and Events
    • Learning Groups
  • Technologies
    Technologies
    • 3D Printing
    • FPGA
    • Industrial Automation
    • Internet of Things
    • Power & Energy
    • Sensors
    • Technology Groups
  • Challenges & Projects
    Challenges & Projects
    • Design Challenges
    • element14 presents Projects
    • Project14
    • Arduino Projects
    • Raspberry Pi Projects
    • Project Groups
  • Products
    Products
    • Arduino
    • Avnet Boards Community
    • Dev Tools
    • Manufacturers
    • Multicomp Pro
    • Product Groups
    • Raspberry Pi
    • RoadTests & Reviews
  • Store
    Store
    • Visit Your Store
    • Choose another store...
      • Europe
      •  Austria (German)
      •  Belgium (Dutch, French)
      •  Bulgaria (Bulgarian)
      •  Czech Republic (Czech)
      •  Denmark (Danish)
      •  Estonia (Estonian)
      •  Finland (Finnish)
      •  France (French)
      •  Germany (German)
      •  Hungary (Hungarian)
      •  Ireland
      •  Israel
      •  Italy (Italian)
      •  Latvia (Latvian)
      •  
      •  Lithuania (Lithuanian)
      •  Netherlands (Dutch)
      •  Norway (Norwegian)
      •  Poland (Polish)
      •  Portugal (Portuguese)
      •  Romania (Romanian)
      •  Russia (Russian)
      •  Slovakia (Slovak)
      •  Slovenia (Slovenian)
      •  Spain (Spanish)
      •  Sweden (Swedish)
      •  Switzerland(German, French)
      •  Turkey (Turkish)
      •  United Kingdom
      • Asia Pacific
      •  Australia
      •  China
      •  Hong Kong
      •  India
      •  Korea (Korean)
      •  Malaysia
      •  New Zealand
      •  Philippines
      •  Singapore
      •  Taiwan
      •  Thailand (Thai)
      • Americas
      •  Brazil (Portuguese)
      •  Canada
      •  Mexico (Spanish)
      •  United States
      Can't find the country/region you're looking for? Visit our export site or find a local distributor.
  • Translate
  • Profile
  • Settings
CodeBug
  • Learn
  • Learning Center
  • STEM Academy
  • CodeBug
  • More
  • Cancel
CodeBug
Forum RGB Wand for Codebug - mix and make
  • Blog
  • Forum
  • Documents
  • Events
  • Polls
  • Files
  • Members
  • Mentions
  • Sub-Groups
  • Tags
  • More
  • Cancel
  • New
Join CodeBug to participate - click to join for free!
Actions
  • Share
  • More
  • Cancel
Forum Thread Details
  • Replies 0 replies
  • Subscribers 8 subscribers
  • Views 1137 views
  • Users 0 members are here
  • codebug
  • stem
  • colourstar
  • colour
  • variable_resistor
  • breadboard
  • codebug creative
Related

RGB Wand for Codebug - mix and make

jlangbridge
jlangbridge over 8 years ago

I'm getting ready to go to a school in France to show off the Codebug, a cute little design that makes development easy. There are some great examples on the element14 site, and I found an example for an RGB wand, something my 5 year old daughter loved (she put on her fairy disguise and ran around with the Codebug until the batteries drained). However, if I want to show development to kids, I need something with a little more impact. So, with the RGB wand in mind, I went and made something else.


Take a breadboard, and 3 variable resistors. For this example, I'm using 4.7K versions. Hook one end to "Power", and the other to "Ground". Do the same for all three. Now, connect the middle pin to pins 0, 1 and 2. These will be R, G and B respectively. Add a ColourStar, wire everything up with the crocodile clips, and it's time to code.


image


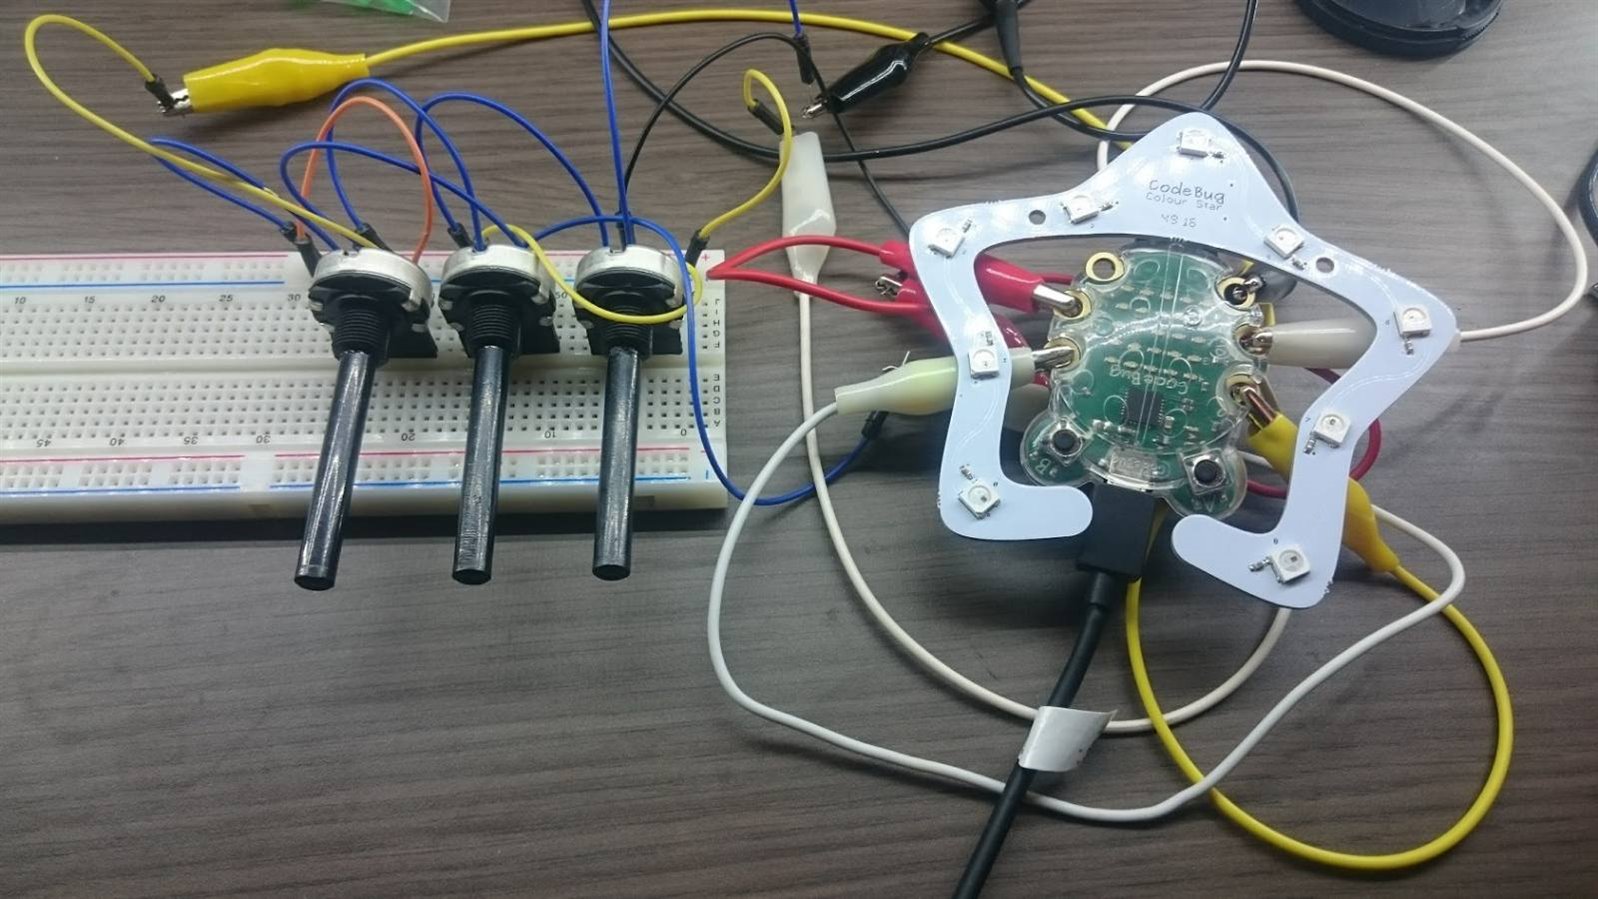
The code is simple; we will set legs 0, 1 and 2 as analogue inputs. We'll also use the CoulorStar. We create a loop, one that will run forever. On each iteration, we will read in the values of pins 0, 1 and 2, and store them into variables; R, G and B respectively. Then, in another loop, we will turn each of the ColourStar LEDs to the value found on the analogue pins. Then repeat, forever. Here's what my setup looks like:


image


Flash the program, and play about. With each of the variables resistors at a zero value, the LEDs are turned off. With each of the variable resistors connected to Vcc, all three colours are fully lit, and the LEDs appear white (watch it, these things are bright!). What happens when you turn on blue with a hint of red?


image


With this, I hope my students are going to have fun, while learning about colours, and also about programming. I'll teach them programming, they will teach me about colours, since I'm totally colour-blind (almost black and white colour vision).


The entire project took about ten minutes, hunting down the final variable resistor included. The code itself was less than five minutes, it really is that easy to program these devices. I'll keep you updated on what my students think!


A huge thanks to element14 for the "Bit by the bug" campaign!

  • Sign in to reply
  • Cancel
element14 Community

element14 is the first online community specifically for engineers. Connect with your peers and get expert answers to your questions.

  • Members
  • Learn
  • Technologies
  • Challenges & Projects
  • Products
  • Store
  • About Us
  • Feedback & Support
  • FAQs
  • Terms of Use
  • Privacy Policy
  • Legal and Copyright Notices
  • Sitemap
  • Cookies

An Avnet Company © 2025 Premier Farnell Limited. All Rights Reserved.

Premier Farnell Ltd, registered in England and Wales (no 00876412), registered office: Farnell House, Forge Lane, Leeds LS12 2NE.

ICP 备案号 10220084.

Follow element14

  • X
  • Facebook
  • linkedin
  • YouTube