


January feels like it has flown by but every time I sit down to write one of these blog posts I'm reminded of how each class is spaced one week apart.
That's a long time when you think about having to retain what you've learnt over a week ago and pick up again right where you started. Because of this I often find myself having to review what I covered previously; this is expected but then again, it bites into my ambitious lesson plans where I outline all the things I hope to cover during a 40 minute class block.
This January has also been peculiar in the sense that snow days, and scheduling conflicts have shorted up lesson periods on a few occasions to less to around 30 minutes. This past Tuesday was one of those instances of a shorter than usual lesson as a result of me having to travel with the squash team for a match 2 hours away. This past Tuesday though, I was pleasantly surprised by the progress my student, William, made as he exceeded expectations by covering all that I hoped to achieve in a complete 40 minute block. In most part, due to his strong recall of the programming commands in Python's Tkinter library which we covered last week.
For this lesson I did not create a complete lesson plan. Normally I create a lesson plan for each class I teach as I feel it is a courtesy to the students I teach to use their time effectively. It also allows me to pace my instruction and visualize how class needs to play out beforehand. The reason I didn't have one this time though, was because I knew that I'd have to leave early for squash and during my past lessons there were so many goals we did not achieve I felt that I could just list them, at this point.
The checklist was as follows/each point is then followed by a goal completed summary:
1. Create a control interface for the Raspberry Pi "Turtle Bot". During the last class William and I had issues working with the Tkinter library as a result of missteps following the worksheet I created for the class. Essential commands were left out of our Python code using the Tkinter library that instead of seeing a glimmering arrangement of buttons to push to control the directional movement of our robot all that was seen was a giant black square:
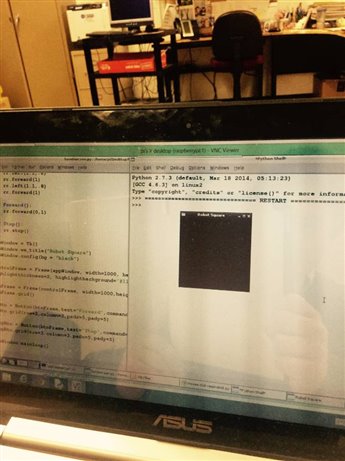
Goal 1 Completed: I was so happy with how William got right down to business. I explained what the issue was with our Python code last week and he quickly hammered out the following script:
import serial
import time
from Tkinter import*
import RPi.GPIO as GPIO
import picamera


from rrb2 import*
rr=RRB2()


def Square():
    rr.forward(1)
    rr.left(1.1,.8)
    rr.forward(1)
    rr.left(1.1,.8)
    rr.forward(1)
    rr.left(1.1,.8)
    rr.forward(1)


def Forward():
    rr.forward(0,1)


def Stop():
    rr.stop()


def Left():
    rr.left(0,0.6)


def Right():
    rr.right(0,0.6)


def Reverse():
    rr.reverse(0,1)


def Camera():
    with picamera.PiCamera() as camera:
        camera.start_preview()
        time.sleep(5)
        camera.capture('/home/pi/Desktop/image1.jpg')

appWindow = Tk()
appWindow.wm_title("Robot Square")
appWindow.config(bg = "lawngreen")


controlFrame = Frame(appWindow, width=1000, height = 1000, bg="red2",highlightthickness=2, highlightbackground="#111")
controlFrame.grid() #did not have this last lesson


btnFrame = Frame(controlFrame, width=1000, height = 1000, bg="blue")
btnFrame.grid()


upBtn = Button(btnFrame, text="FORWARD", command=Forward, bg="green")
upBtn.grid(row=2, column=2, padx=5, pady=5)


stopBtn = Button(btnFrame,text="STOP",command=Stop, bg="purple")
stopBtn.grid(row=2,column=4,padx=5,pady=5)


LeftBtn = Button(btnFrame, text="LEFT", command=Left, bg="orange")
LeftBtn.grid(row=3, column=2, padx=5, pady=5)


RightBtn = Button(btnFrame, text="RIGHT", command=Right, bg="yellow")
RightBtn.grid(row=3, column=4, padx=5, pady=5)


ReverseBtn = Button(btnFrame, text="REVERSE", command=Reverse,bg="black")
ReverseBtn.grid(row=4, column=2, padx=5, pady=5)


SquareBtn = Button(btnFrame, text="SQUARE", command=Square, bg="magenta")
SquareBtn.grid(row=4, column=4, padx=5, pady=5)


CameraBtn = Button(btnFrame, text="CAMERA", command=Camera, bg="brown")
CameraBtn.grid(row=5, column=2, padx=5, pady=5)


appWindow.mainloop()
What may have helped is that I was not looking over his shoulder the whole time while he wrote this stuff. Instead, I gave him time to read the worksheets and then trouble shoot the code himself. He would then show me the finished/functional product (which was in about 20 minutes):
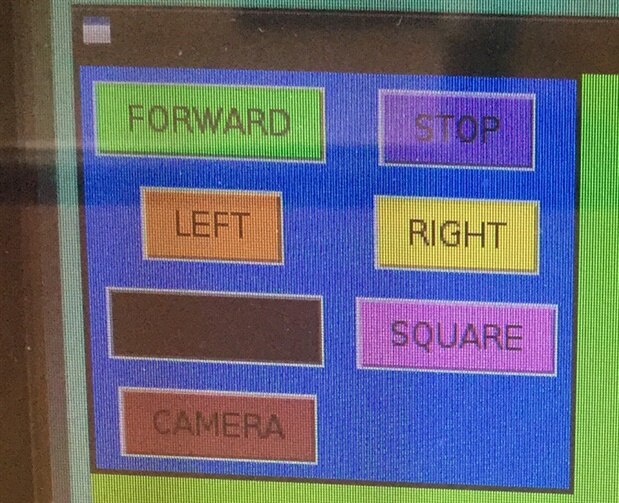
2. Create a button for a shape. In my previous blogs I've described how I am attempting to recreate the movement of the Python "turtle" in robot form. To do this I had William first draw a square in Python using the turtle library and then eventually translate this same effect into drawing a square in movement using our "Turtle Bot" with a pen attached to the front of it to trace the shape it moves within. Notice in the picture above there is a button specifically for the execution of a square drawing, and if you reference the code above it relates to the "def square" function. For my programming class this was a nice example of a function moving away from commands listed simply as variables.
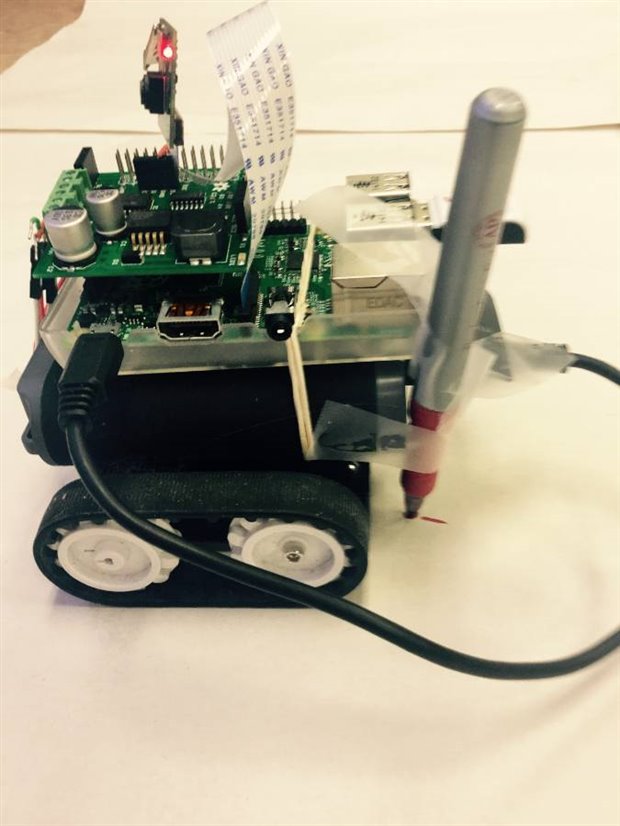
As a reminder the turtle bot looks as follows with a red pen attached to the front which then drags around as it moves:

And when you press the "SQUARE" button this is what it draws, the picture was taken using the "CAMERA" button which I will go into later.
Goal 2 completed:

Okay,,,it wasn't a perfect square but more like a ninja star shape. Notice though, how the shape is repeated twice this is because once the button is pressed the Turtle Bot continues to execute the function until the stop button is then pressed.
3. Create a button for the camera. I've been wanting to incorporate the Raspbery Pi Camera Module into these lessons for a while. The picture below was taken a while ago with the device. It is of the lights above my office:

When the camera is not moving this is the sharp quality image it can capture. However, when the camera is jiggling around the top of a wire on the Turtle Bot these are the kinds of images you get....not the best photos of the screen with buttons but the point was to use the button "CAMERA" in William's code to take the photo:
Goal 3 completed:


Like I said...not the nicest photos but when the camera is still it takes very nice photos. Wllliam took a selfie which turned out very well which I then sent to him via email as a memento of the lesson.
4 This goal was to drive the robot around using the control interface which we did for a bit. But the lesson was quickly drawing to a close. I had to rush out to catch the bus to a squash match and William had to go to a basketball game.
In conclusion: this was a very successful lesson where I felt everything starting to come together. Next week I will show William how to "slave" and Arduino device to the Raspberry Pi and have the two communicate back and forth using the serial communication. The goal in this will be to use Tkinter buttons to cause a servo motor attached to an Arduino to move up and down- thus, when a pen is attached to the servo, replicates the pen up pen down function of the Python turtle library.