element14 Community
element14 Community
    Register Log In
  • Site
  • Search
  • Log In Register
  • Community Hub
    Community Hub
    • What's New on element14
    • Feedback and Support
    • Benefits of Membership
    • Personal Blogs
    • Members Area
    • Achievement Levels
  • Learn
    Learn
    • Ask an Expert
    • eBooks
    • element14 presents
    • Learning Center
    • Tech Spotlight
    • STEM Academy
    • Webinars, Training and Events
    • Learning Groups
  • Technologies
    Technologies
    • 3D Printing
    • FPGA
    • Industrial Automation
    • Internet of Things
    • Power & Energy
    • Sensors
    • Technology Groups
  • Challenges & Projects
    Challenges & Projects
    • Design Challenges
    • element14 presents Projects
    • Project14
    • Arduino Projects
    • Raspberry Pi Projects
    • Project Groups
  • Products
    Products
    • Arduino
    • Avnet & Tria Boards Community
    • Dev Tools
    • Manufacturers
    • Multicomp Pro
    • Product Groups
    • Raspberry Pi
    • RoadTests & Reviews
  • About Us
  • Store
    Store
    • Visit Your Store
    • Choose another store...
      • Europe
      •  Austria (German)
      •  Belgium (Dutch, French)
      •  Bulgaria (Bulgarian)
      •  Czech Republic (Czech)
      •  Denmark (Danish)
      •  Estonia (Estonian)
      •  Finland (Finnish)
      •  France (French)
      •  Germany (German)
      •  Hungary (Hungarian)
      •  Ireland
      •  Israel
      •  Italy (Italian)
      •  Latvia (Latvian)
      •  
      •  Lithuania (Lithuanian)
      •  Netherlands (Dutch)
      •  Norway (Norwegian)
      •  Poland (Polish)
      •  Portugal (Portuguese)
      •  Romania (Romanian)
      •  Russia (Russian)
      •  Slovakia (Slovak)
      •  Slovenia (Slovenian)
      •  Spain (Spanish)
      •  Sweden (Swedish)
      •  Switzerland(German, French)
      •  Turkey (Turkish)
      •  United Kingdom
      • Asia Pacific
      •  Australia
      •  China
      •  Hong Kong
      •  India
      •  Korea (Korean)
      •  Malaysia
      •  New Zealand
      •  Philippines
      •  Singapore
      •  Taiwan
      •  Thailand (Thai)
      • Americas
      •  Brazil (Portuguese)
      •  Canada
      •  Mexico (Spanish)
      •  United States
      Can't find the country/region you're looking for? Visit our export site or find a local distributor.
  • Translate
  • Profile
  • Settings
STEM Projects
  • Learn
  • Learning Center
  • STEM Academy
  • STEM Projects
  • More
  • Cancel
STEM Projects
Blog Virtual Eye System -- Post#4 -- Programming the Pi to get the distance
  • Blog
  • Forum
  • Documents
  • Events
  • Polls
  • Files
  • Members
  • Mentions
  • Sub-Groups
  • Tags
  • More
  • Cancel
  • New
Join STEM Projects to participate - click to join for free!
  • Share
  • More
  • Cancel
Group Actions
  • Group RSS
  • More
  • Cancel
Engagement
  • Author Author: nikhil22
  • Date Created: 14 Aug 2015 8:32 PM Date Created
  • Views 222 views
  • Likes 1 like
  • Comments 0 comments
  • teachers_pet
  • virtual_eye_system
  • matlab_raspberry_pi
  • 3d_mapping
  • teachers pet robotics design challenge
  • sharp_ir_distance_formula
  • arduino
Related
Recommended

Virtual Eye System -- Post#4 -- Programming the Pi to get the distance

nikhil22
nikhil22
14 Aug 2015

Hi folks!!!

In the last blog post we have learnt about SPI communication, how to take analog readings with Raspberry Pi with MCP3008 ADC and we have derived a formula to convert the voltage readings to distance values from the Sharp IR distance sensor. Please refer to the previous blog post in order to get a clear understanding on what is explained in this post.

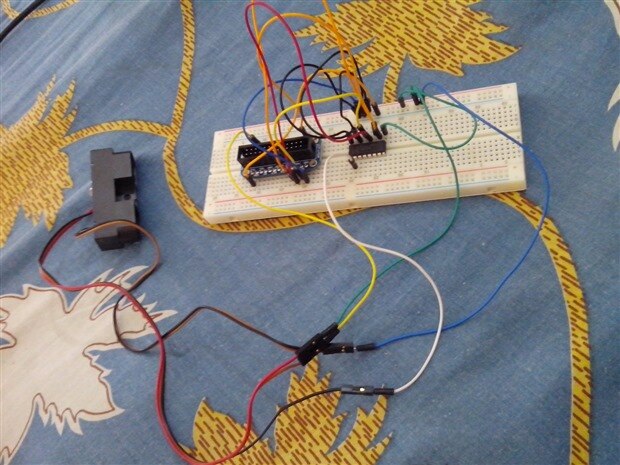
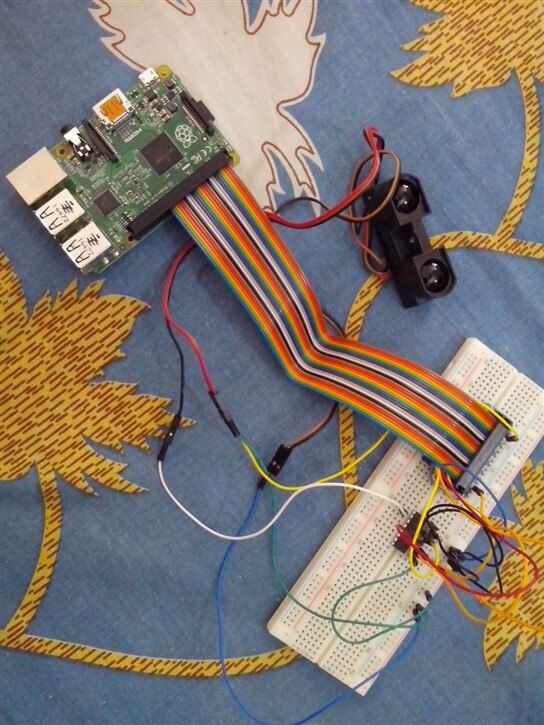
Just connect the distance sensor and ADC as directed in the previous blog apart from connecting Ethernet cable between raspi and computer, and powering it, before trying to burn the code to raspi through matlab.

image

Matlab Program for reading ADC and getting the distance:


Let us first see how to access the analog to digital converted values sent by MCP3008.......

clear rpi;

rpi = raspi();

clear mcp3008;

mcp3008 = raspi.internal.mcp3008(rpi, 'CE0');


The variable rpi creates a raspi object which can communicate with the given raspberry pi hardware connected to the computer.  As we have connected the Channel 0 pin of ADC to the SPI channel CE0, we have to command raspi to listen to CE0.

voltage = readVoltage(mcp3008, 0);

fprintf('Voltage = %0.2f;\t', voltage);

dig = voltage*(1023/5);

fprintf('Digital value = %0.2f\n', dig);

distance=28250/(dig-229.5);

fprintf('distance in cm is %0.2f\n',distance);

The readVoltage function lets us store the voltage read by raspi, here we are reading voltage in pin 0 of the two SPI pins 0 and 1.  We print the voltage values and convert it to digital values i.e. converting 0-5 V to 0- 1023 scale. Then, we apply the formula, we derived to get the distance and print it.

image

This program only taken 1 value of distance from sensor and it could be erroneous as the first reading is not always a stable one. So, we have modified the program to make it more accurate and usable.

for i = 1:50

    voltage = readVoltage(mcp3008, 0);

    fprintf('Voltage = %0.2f;\t', voltage);

    dig = voltage*(1023/5);

    distance=28250/(dig-229.5);

    fprintf('Digital value = %0.2f\n', dig);

    tot=tot+distance;

    pause(0.01);

end

avg=tot/50;

fprintf('distance in cm is %0.2f\n', avg);


This program takes 50 values of distance consecutively and averages all of them at the end to give a value agreeable with the actual readings. Although one or two trash readings come up, it does not affect much on the outcome as the outcome may maximum be out of the tune by 0.01-0.1 cm which is negligible.


Arduino code for the same:

void setup() {

Serial.begin(9600);

}

int sensorValue;

float distance;

void loop() {

sensorValue = analogRead(0);

if(sensorValue>=280&&sensorValue<=512)  //Corresponding distance range from 1m to 5.5m

{

   Serial.print("The distance is : ");

   distance=28250/(sensorValue-229.5);

  Serial.print(distance);

   Serial.println("cm");

   }

  delay(100);               

}

The above code just reads the analog output pin of the distance sensor connected to Analog 0 pin of Arduino. It reads A0 pin and prints the distance value on the Serial monitor continuously if the condition of the range of 1m -5.5m  is satisfied.

The arduino code of averaging a certain number of distance readings is self-explanatory and simple, so I leave it for you intelligent people out there.

image

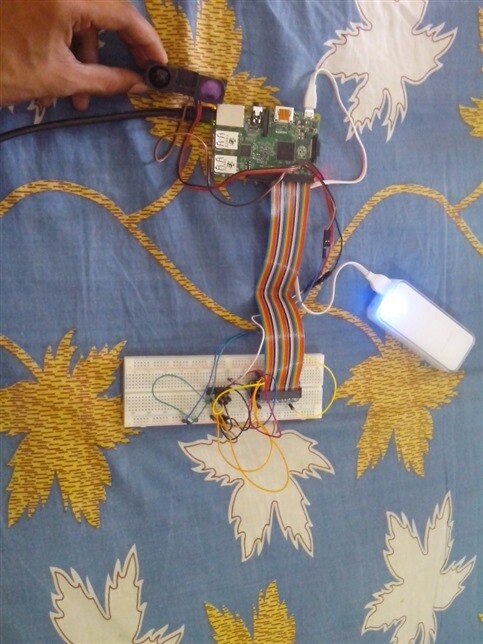
The above pic shows the working model of the distance sensor being monitored by raspi and we can see that the IR transmitter being lit up which distinguishes it from the receiver module beside it.

  • Sign in to reply
element14 Community

element14 is the first online community specifically for engineers. Connect with your peers and get expert answers to your questions.

  • Members
  • Learn
  • Technologies
  • Challenges & Projects
  • Products
  • Store
  • About Us
  • Feedback & Support
  • FAQs
  • Terms of Use
  • Privacy Policy
  • Legal and Copyright Notices
  • Sitemap
  • Cookies

An Avnet Company © 2025 Premier Farnell Limited. All Rights Reserved.

Premier Farnell Ltd, registered in England and Wales (no 00876412), registered office: Farnell House, Forge Lane, Leeds LS12 2NE.

ICP 备案号 10220084.

Follow element14

  • X
  • Facebook
  • linkedin
  • YouTube