


The Amazon Fire TV Stick 4K Select is quite a new device equipped with MT8698 SoC, that runs four ARM Cortex-A55 core, 1 GB LPDDR RAM and 8 GB eMMC. This device is the one of first that runs a new operating system called Vega OS, that is based on Linux, not Android. I have decided to check how this device looks inside. The device has the form of a small stick. With the usage of the triangular openers, it was really easy and quick to disassemble the housing. Below is a photo of the opened case: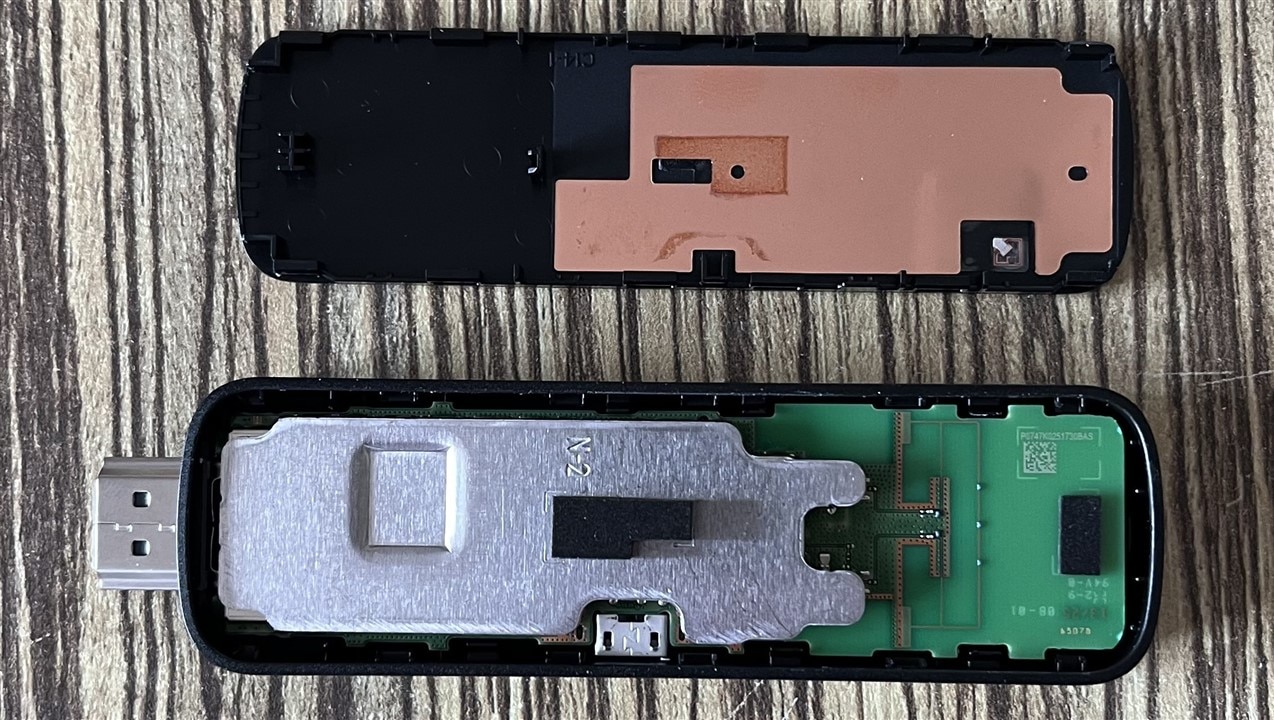
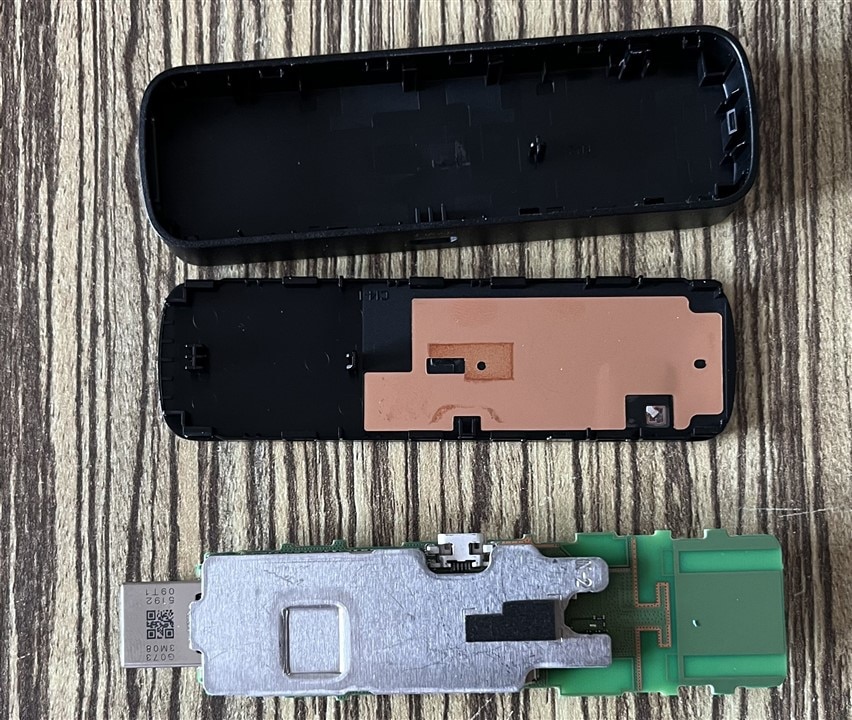
On both sides there are soldered shield cans, with glued by double tape aluminum plates, which act as additional heat sinks. Here is a photo with the top of the top aluminum plate removed:
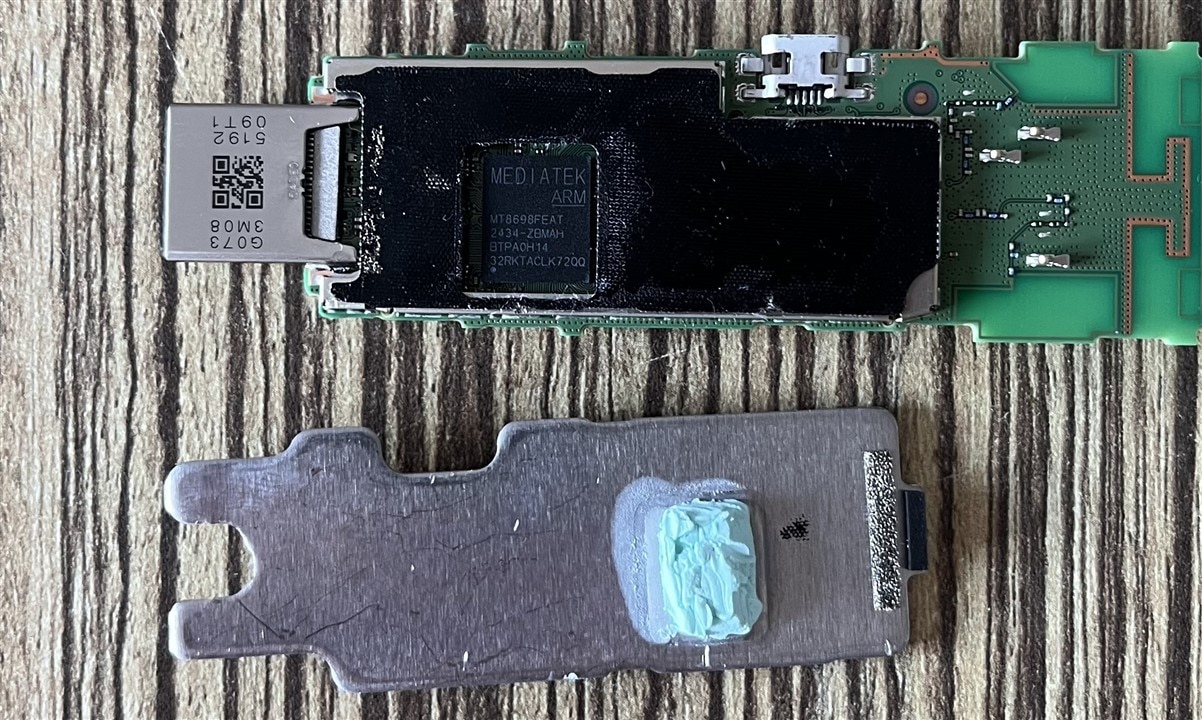
As we see, there is SoC: MT8698FEAT which is connected via thermal paste with an aluminum plate for better heat dissipation. Probably close to the SoC there is also an eMMC located. Here is a photo of the bottom side with the removed aluminum plate.
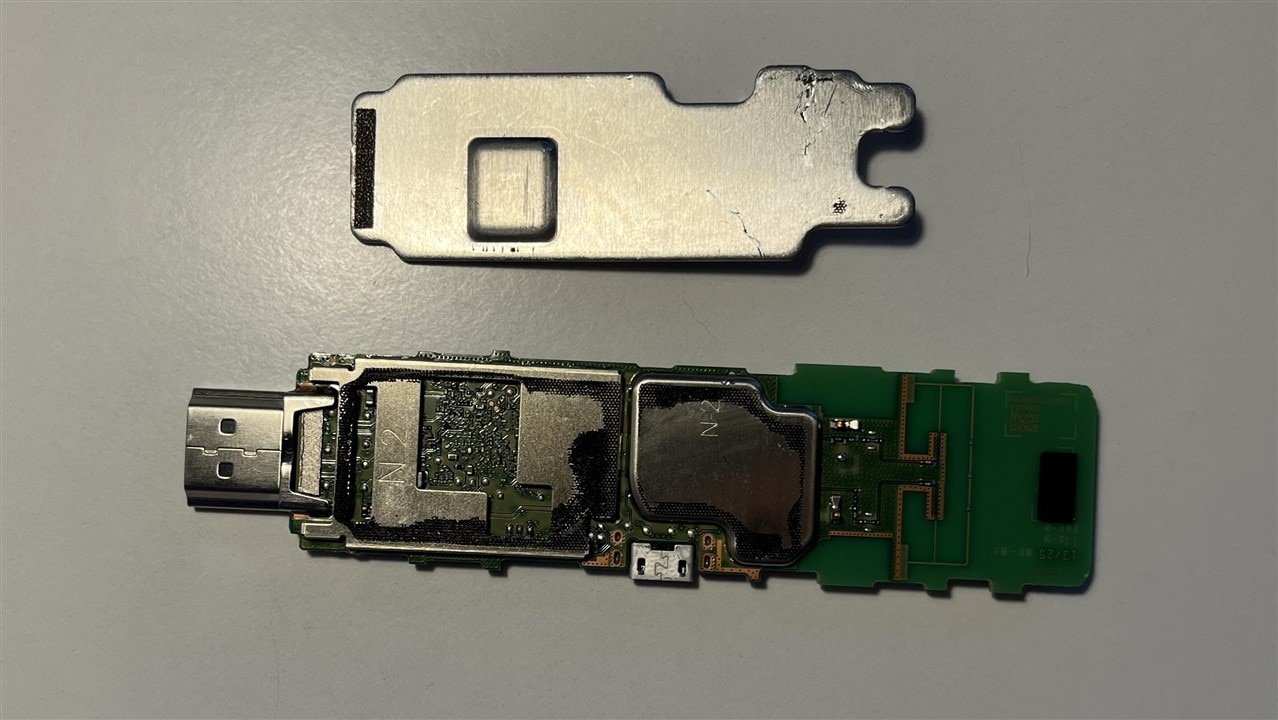
On the bottom side, there was also a thermal paste that transferred the heat from the PCB layer of the bottom of the SoC, to the aluminum plate. In the separate can, there is probably a Wi-Fi/BT chipset. I have also found three pins here that look interesting, so I decided to check with the logic analyzer if there is any data on them. After a while, I found that it was a UART with the following pinout.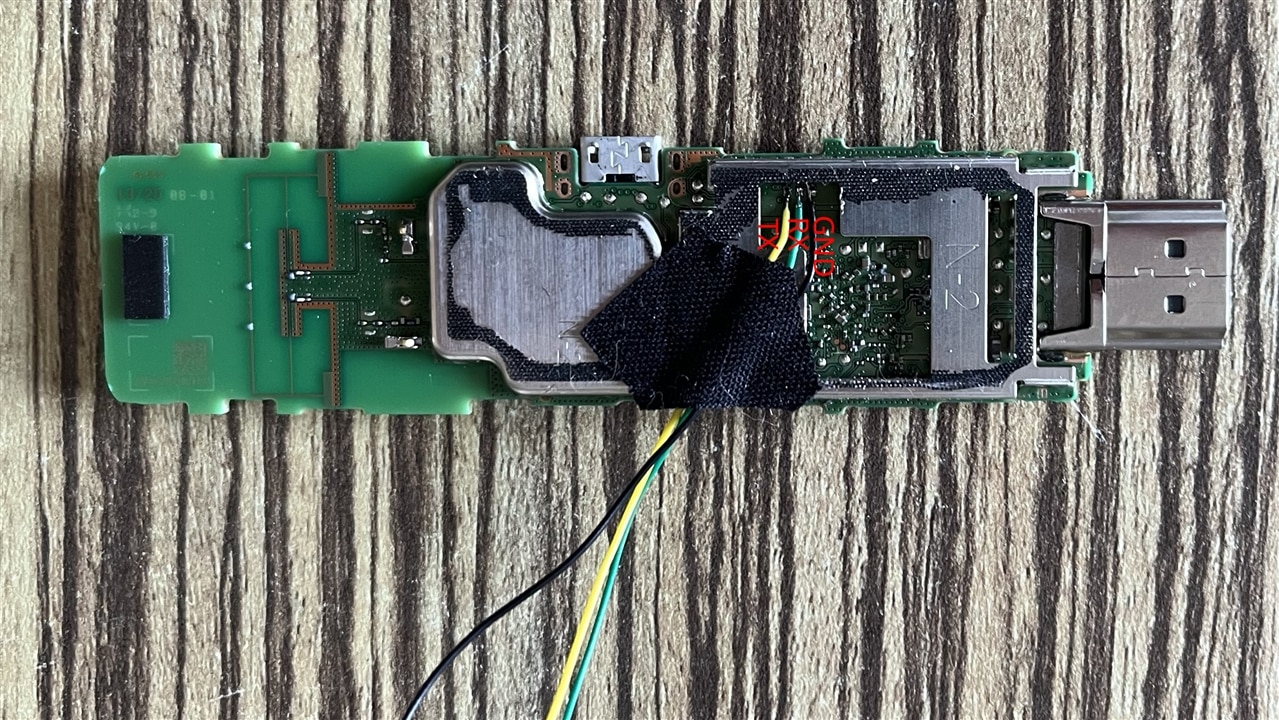
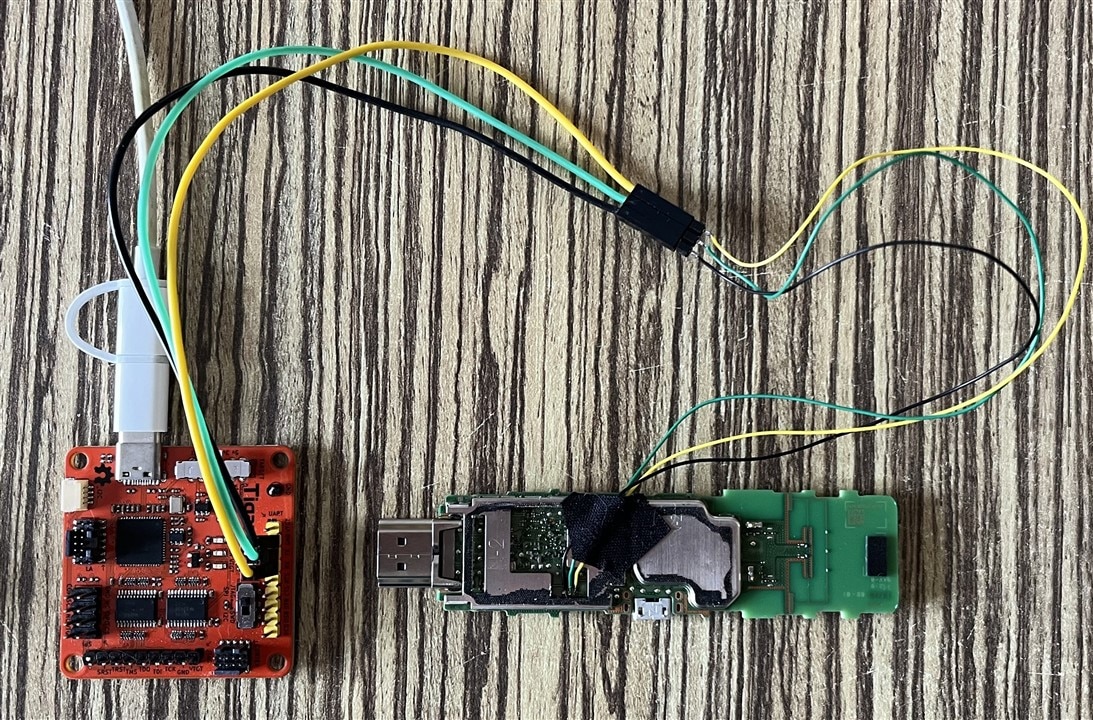
The UART works with 921600 bps speed and collection logs of the boot procedure. There is also a login prompt (asks for login/password), but by default, probably disabled for security reasons. Here are attached boot logs:
0574.bootlog.txt
What information do we get based on the logs. First, there is information about the eMMC GPT partition layout:
[eMMC/SD] Size: 7456 MB, Max.Speed: 200000 kHz, blklen(512), nblks(15269888), ro(0)
emmc_boot_prepare, enpart: 8
[1]name=misc, start_sect=0x400, nr_sects=0x1000, uuid=4bea35e4-2333-4507-90f4-cdb04287739f
[2]name=boot_a, start_sect=0x1400, nr_sects=0xf000, uuid=d69802a5-5a3f-49ea-a9d5-db87fd438fac
[3]name=boot_b, start_sect=0x10400, nr_sects=0xf000, uuid=6d2ea1f7-32d4-4e43-b0e2-81691d6f6936
[4]name=uboot_a, start_sect=0x1f400, nr_sects=0x1000, uuid=815d5c39-8ac4-4457-b05a-afdf2947090f
[5]name=uboot_b, start_sect=0x20400, nr_sects=0x1000, uuid=51afd507-b678-4265-a6f2-54d219ca60d3
[6]name=tee_a, start_sect=0x21400, nr_sects=0x2800, uuid=a6745685-2519-474c-8887-6169679c74a5
[7]name=tee_b, start_sect=0x23c00, nr_sects=0x2800, uuid=bc5292ca-51ef-44b4-858e-afa5bcb313cb
[8]name=mcupm_a, start_sect=0x26400, nr_sects=0x800, uuid=8f867354-5bf8-4c89-a00e-8375da0007cd
[9]name=mcupm_b, start_sect=0x26c00, nr_sects=0x800, uuid=1909ec81-2034-48cf-b9ab-4ad8355bf478
[10]name=dpm_a, start_sect=0x27400, nr_sects=0x2000, uuid=4b64fa1e-fdd1-4345-83af-cb9a49d0b0b9
[11]name=dpm_b, start_sect=0x29400, nr_sects=0x2000, uuid=3b1e6528-9241-4364-a0ae-134372f40eb2
[12]name=boot_para, start_sect=0x2b400, nr_sects=0x3000, uuid=8dd430bf-66bf-4f10-9455-a4abd6d930cb
[13]name=persist, start_sect=0x2e400, nr_sects=0xc000, uuid=35335386-1169-4180-9ce3-dcc071d419ae
[14]name=logo, start_sect=0x3a400, nr_sects=0x4000, uuid=3f0feb57-d868-4aa1-9c14-fd8ebd93f344
[15]name=system_a, start_sect=0x3e400, nr_sects=0x271000, uuid=0f78ab78-d5a2-4243-a0fc-f371cd567542
[16]name=system_b, start_sect=0x2af400, nr_sects=0x271000, uuid=ddc46b3a-29ac-4495-be29-43b6f447757a
[17]name=vendor_a, start_sect=0x520400, nr_sects=0x3e800, uuid=0aeba188-c8b2-446e-bc70-51d5f9a9c127
[18]name=vendor_b, start_sect=0x55ec00, nr_sects=0x3e800, uuid=62b7f957-e6fb-4cb8-904e-9e56a31c3dda
[19]name=cache, start_sect=0x59d400, nr_sects=0x10000, uuid=40be35ef-3d73-427b-a6b3-f3a4514896f7
[20]name=userdata, start_sect=0x5ad400, nr_sects=0x8e2401, uuid=d90775c1-f4cf-4d3b-9cb3-57a7f2dc2816
We see the partition types and sizes. We know that the device uses A/B upgrade scheme. When the device boots from A slot and performs an upgrade, the new software is installed on the B slot, so after a reboot or switch, in case of issues before the new firmware is confirmed, it is still to get working device, switching back to the A slot. The device has enabled security features like secure boot, which means that it allows user to install only a properly signed firmware package. During the upgrade, each part of the firmware hash signature is verified. Additionally, the device has enabled an anti-rollback feature with information stored in eFuse. This permits a potential attacker to install a valid older signed firmware with a security vulnerability. This allows the software distributor to control the security of released firmware and remove exploitable vulnerabilities.
The boot chain looks quite standard and starts with BootROM, which is hard-coded, immutable code inside the SOC that executes upon power-on. After that is the preoloader, the first software-defined stage after BROM hands off control (BL2). It mainly initializes clocks/DRAM etc. After that, there is a similar solution for ARM SoCs, the TEE (BL31/BL32). After that, the TEE loads U-boot, which executes the Linux kernel from the FIT image.
Based on logs, it looks like the update uses SWUpdate solution for which more information can be found here:
https://sbabic.github.io/swupdate/swupdate.html
The firmware looks like the minimal Yocto build with enabled systemd, busybox, PAM (Pluggable Authentication Modules) , SMACK (Simplified Mandatory Access Control Kernel) and some Amazon's custom services. It uses Linux kernel in version 6.1.25 and the U-Boot in version U-Boot 2020.10. Additionally, it looks like some partitions, e.g. system or vendor, are squashfs images protected by dm-verity.


