

So, what do we have here? The goal is simple, using a COB LED (230VAC!!!) for occasional lighting where needed, good for home use. Natural white in color, and with a power consumption of 20W, this COB LED could not be used safely, and by that I mean the fact that it gets very hot, even if the seller says that there is overheat protection I don't want to try that  . So without a cooling element I can't use it for a long time, so I applied a DIY method.
In the first version, a 100% passive cooling system, I used a simple radiator, but it was quite small, it was only a few mm larger than the LED. The LED is assembled on an aluminum plate so the heat transfer is quite good. Although the radiator was small, I liked that it had mounting brackets for 3mm screws in the corners.
In the second version, I completely changed the idea, I gave up on size and opted for functionality, so I reused a much larger radiator (75mm*75mm*40mm) and which came with an active cooling system, fan. You will probably recognize the source of this radiator in the pictures, I'll let you write in the comments. I added another piece, thermal pads, they are not new, I recovered them from somewhere else, but they are quite clean.
Larger radiator, flat, I drilled 4x 2.5mm holes then I made a thread with a 3mm tap. It is better not to drill the hole with a drill of the same diameter as the screw, I use a smaller one because the tap will "cut" the material.
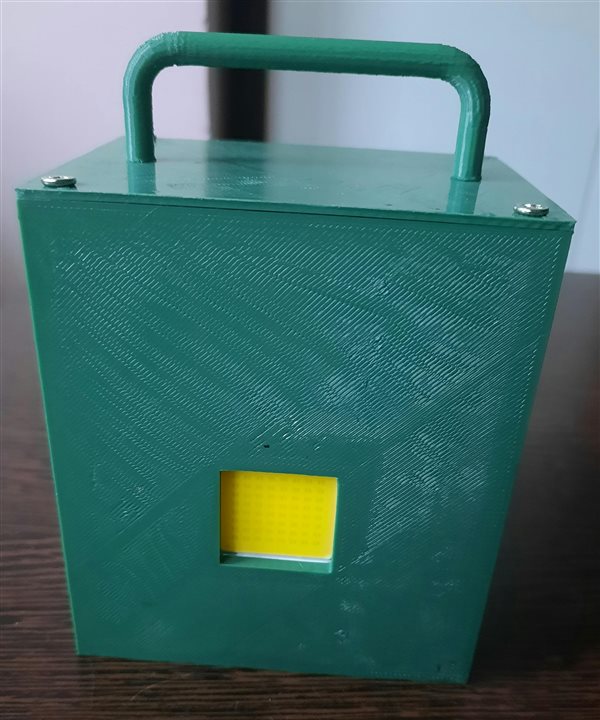
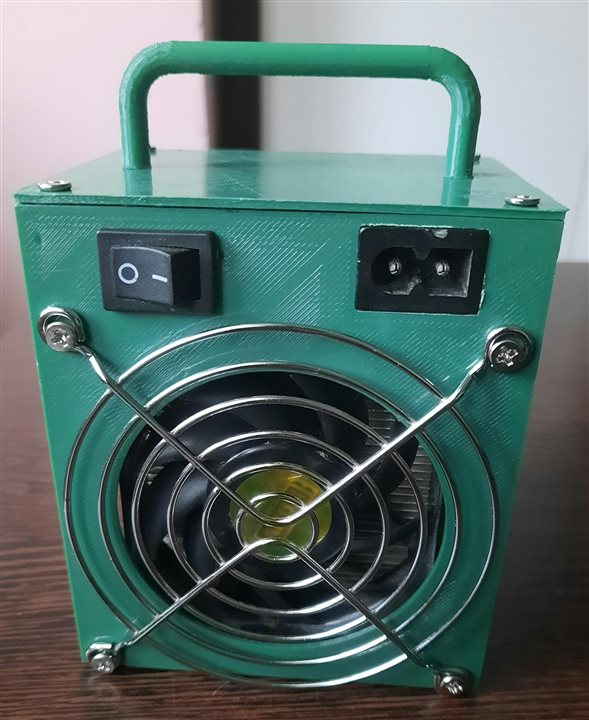
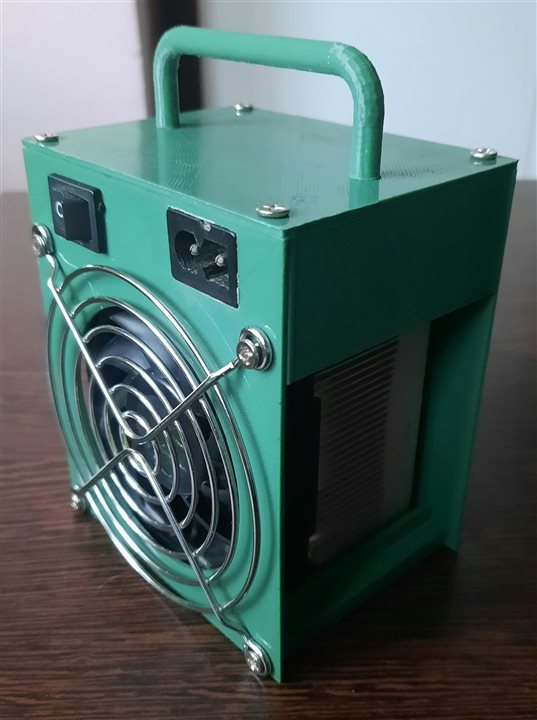
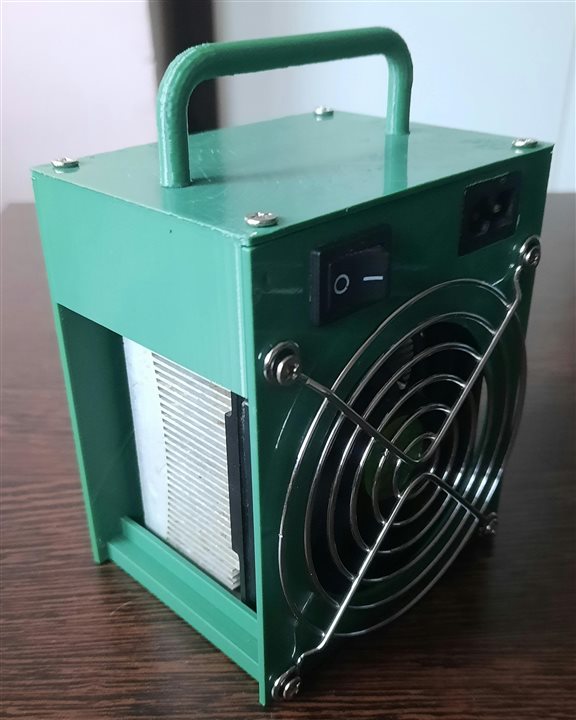
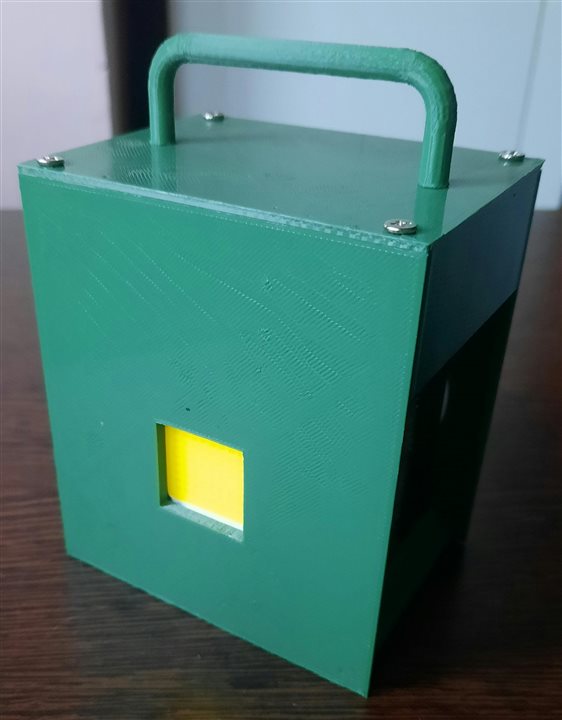
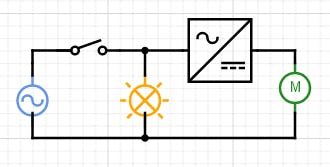
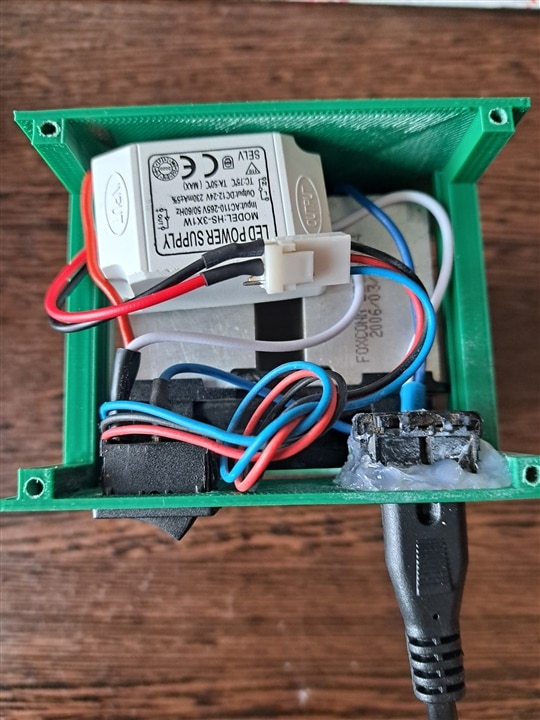
But I still had work to do, I couldn't use that 12V fan at 230VAC, so I wanted a very simple DC power supply (picture below, also a simple circuit). I asked a friend and he offered me this power supply, probably from a spot light (very funny thing, I use a power supply from a spot to power a fan that cools another spot  ). Now, with a fan, the radiator isn't even warm. From here you can understand what followed, a few wires to solder, I also mounted a power socket and a switch. What did I mount them on? The newest tool loved by makers/hobbyist/ and many more, 3D printing. In Tinkercad I created an enclosure (4 parts in total), I printed in town, and as usual some touch-ups were needed (I didn't even expect it to be a perfect piece ). With the file I made space for the switch and socket, but the most regret is that I was not inspired to reinforce the piece; also it would have been nice to have a honeycomb design on the sides, for example, but maybe I will do that for the next project. I also used hot glue because I couldn't think of any other way to fix the power socket, but I think it will hold up. It's a bit cramped on the inside but I insulated the solder joints and the radiator as I said doesn't get hot, so the wires won't get damaged.
PLA material, the enclosure dimensions are 95mm*110mm(without handle)/135mm(with handle)*70mm, I say it's ok, if the piece doesn't fall on the floor. 
| {gallery}My Gallery Title |
|---|
|
IMAGE TITLE: THEN IMAGE DESCRIPTION |
|
IMAGE TITLE: THEN IMAGE DESCRIPTION |
|
IMAGE TITLE: THEN IMAGE DESCRIPTION |
|
IMAGE TITLE: THEN IMAGE DESCRIPTION |
|
IMAGE TITLE: THEN IMAGE DESCRIPTION |
|
IMAGE TITLE: THEN IMAGE DESCRIPTION |
|
IMAGE TITLE: THEN IMAGE DESCRIPTION |
|
|
A short video: https://www.youtube.com/watch?v=6-gvErV2WhY
So, I had a 20W 230V COB LED that was sitting in a drawer, and I used a radiator, fan, power socket and switch, all of which were recovered from other sources.
Have a great day!