


Here is a blog on how to test / configure SD-Card on K64 board using KDS + KDSK 1.1.0 (Newer version)
Pre-requisite for this project execution:
1) KDS (Kinetis Design Studio)
2) KSDK 1.1.0
3) FRDM-K64F
4) SD Card
We will be following below steps to perform the activity:
Step-1: Install KSDK1.1.0 update.
Step-2: Build Platform library.
Step-3: Build demo application.
Step-4: Import existing demo project to workspace then compile & execute the project.
KSDK platform
The platform folder is the most important folder in the KSDK. It contains the “foundation” of the KSDK, and stores the source code for the primary components including CMSIS header files, peripheral drivers, HAL, OS abstraction, startup, system services and linker files. Building a demo application successfully requires a majority of these components.
When building a demo application that utilizes the KSDK platform components, two methods are possible: including individual source files for each required piece (startup file, driver, etc.), or link in a library that contains all or relevant components of the platform folder. All demo applications in the KSDK utilize the latter approach, choosing to provide a library that contains all source code in the platform folder. This simplifies application development because it only requires the include paths to be set correctly in the project files, as opposed to the user manually adding each file needed by the application.
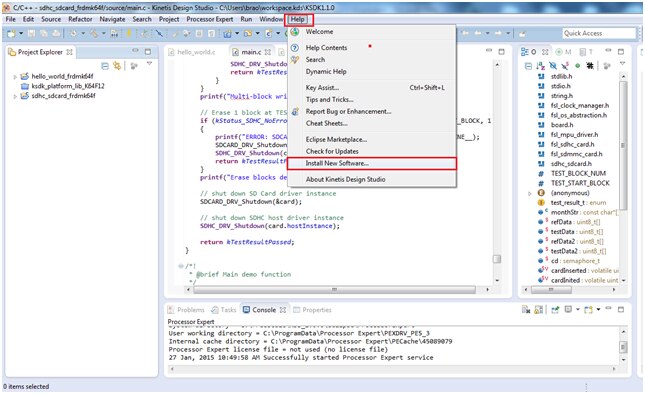
- Install Eclipse update
Before using KDS IDE with KSDK, the KSDK Eclipse Update must be applied. Without this update, Eclipse cannot generate KSDK-compatible projects.
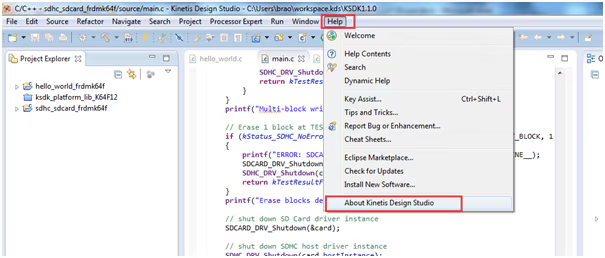
To install the update, follow these instructions:
Then proceed as below:

In the Repository archive dialog box, browse the KSDK install directory
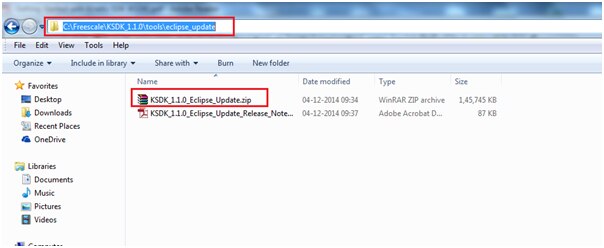
Browse for the installation directory,
in my case it is located at “C:\Freescale\KSDK_1.1.0\tools\eclipse_update”
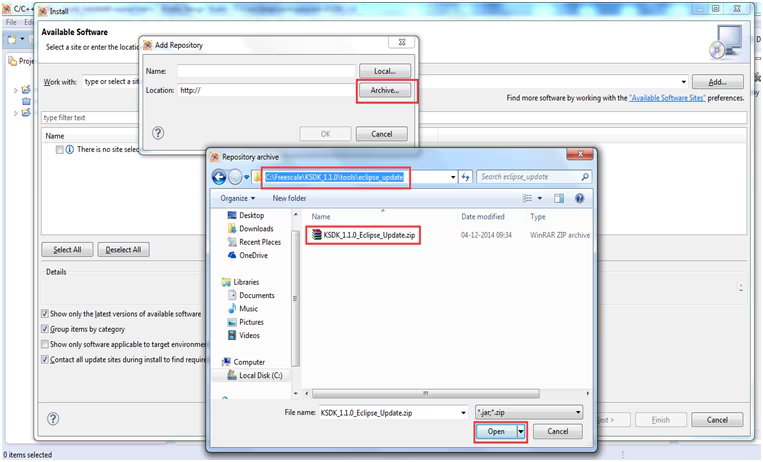
Click “Open”, and the “OK” button in the Add Repository dialog box.
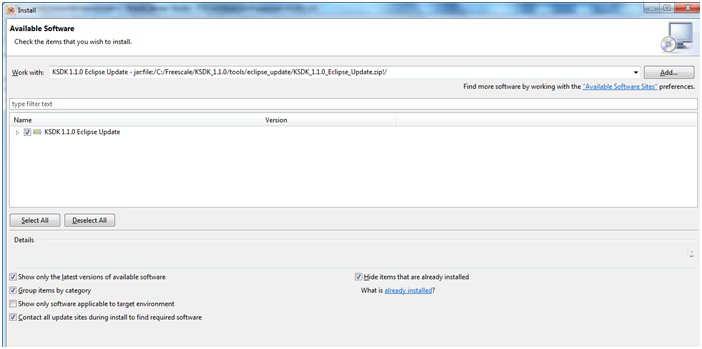
Check the box to the left of the KSDK Eclipse update and click the “Next” button in the lower right corner and Follow the remaining instructions to finish the installation of the update.
After the update is applied, restart the KDS IDE for the changes to take effect.
You can check after the installation in installation details:
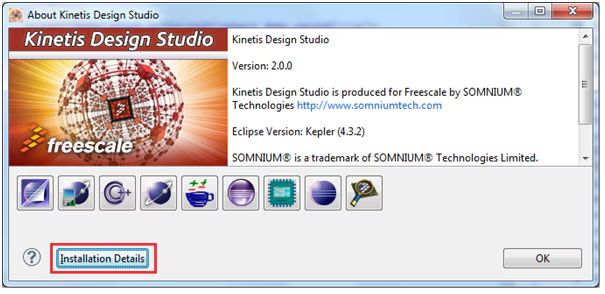
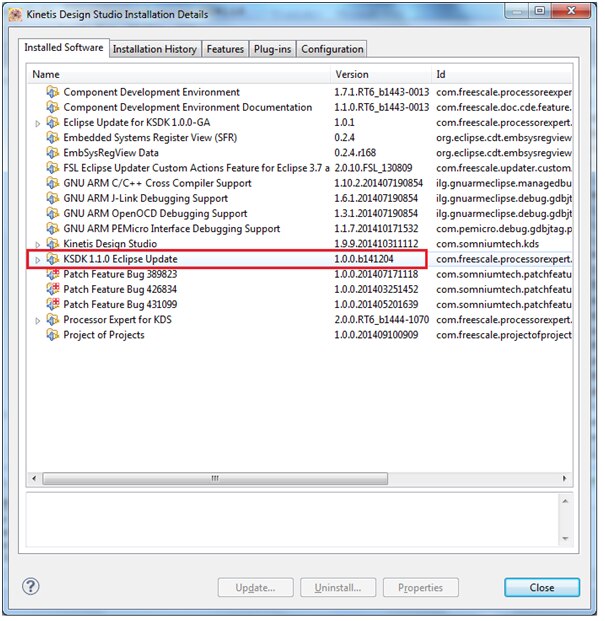
You can see the updates installed as “KSDK 1.1.0 Eclipse Update”
- Build the platform library
KSDK Lib build:
As with the demo applications, each library configuration in the lib folder contains a folder for each supported toolchain. Each toolchain contains a folder for a specific SoC. The ksdk_platform_lib must be built for the specific SoC being used in the demo. This is discussed in detail in the subsequent toolchain-specific sections.
These steps show how to open and build the platform library project in KDS IDE. The platform library is required by the demo and does not build without it.
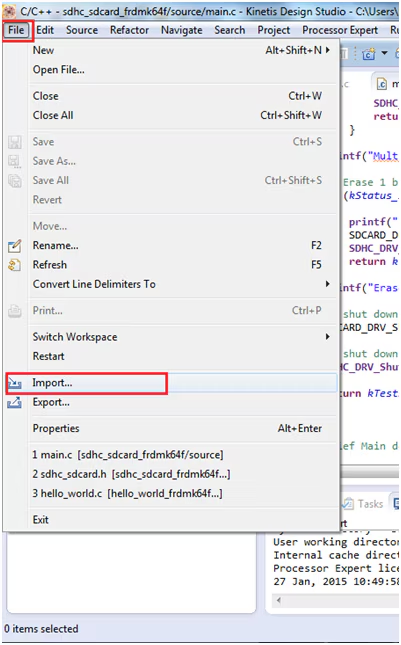
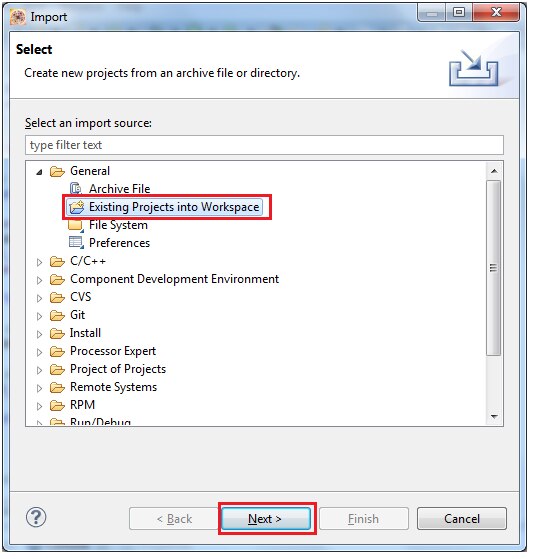
Select “File->Import” from the KDS IDE menu
Then follow as below:
Click the “Browse” button next to the “Select root directory:” option
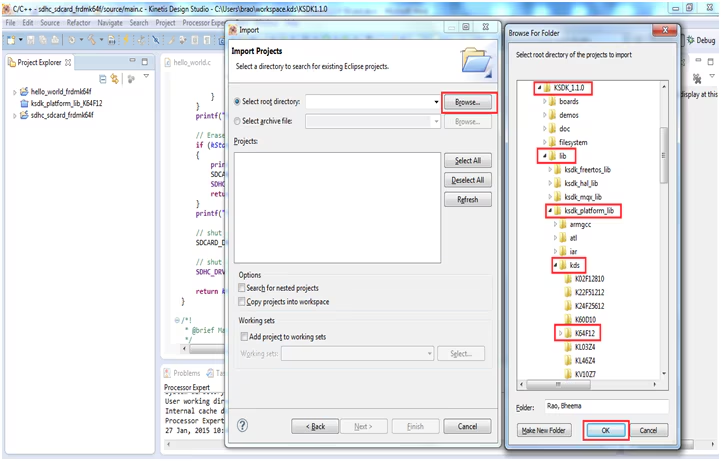
Point to the platform library project for the appropriate device, which can be found as shown above.
“C:\Freescale\KSDK_1.1.0\lib\ksdk_platform_lib\kds\K64F12”
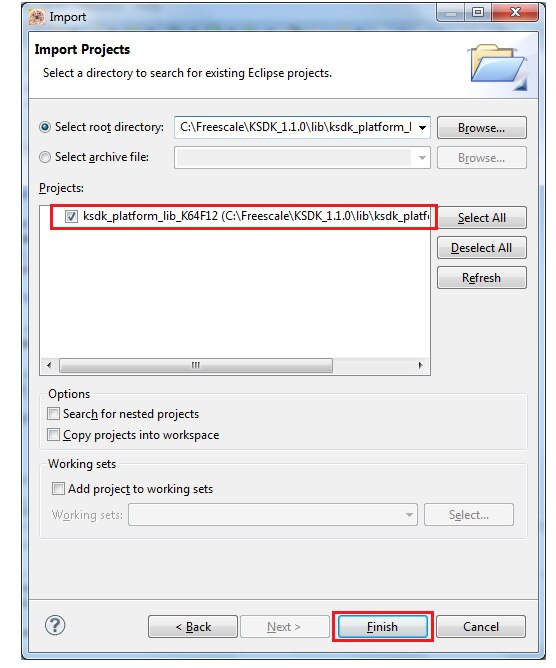
Now select the platform libraries from project folder then right click select the option as shown below:

You can see the progress bar as shown below: The library starts building after the build target is selected
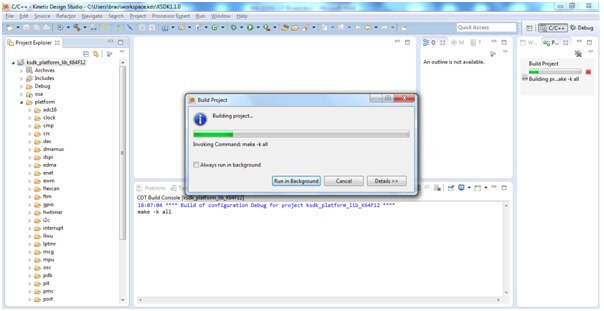
After build is successful you can see the ‘Debug’ and ‘platform’ folder created in platform lib folder of K64 directory as shown below: these folders are necessary to compile the new created projects.

Now its time to build a Demo application project, in our case it is SDCard demo which we are going to execute.
- Build a demo application
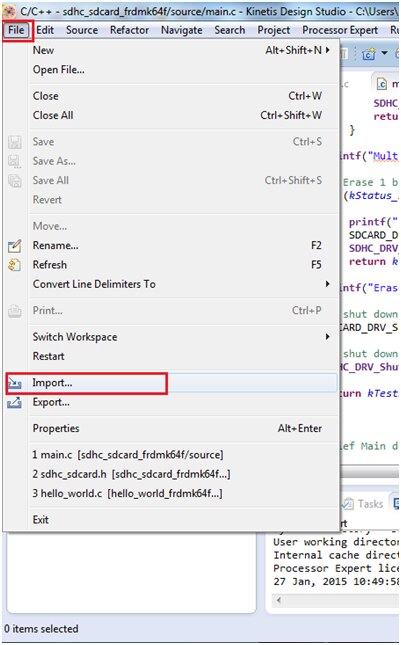
Select “File->Import” from the KDS IDE menu
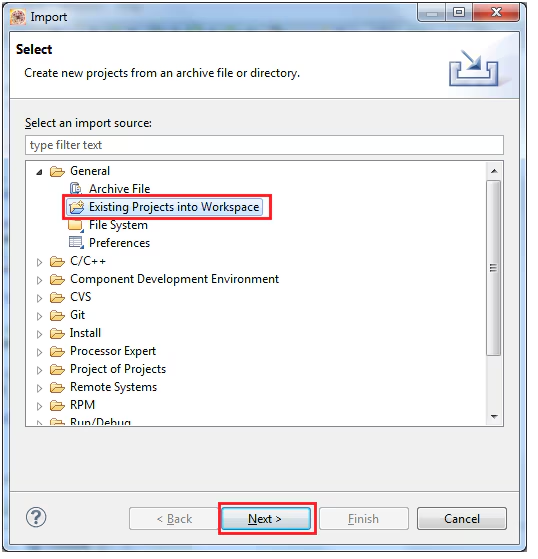
Then next follow as below
Click the “Browse” button next to the “Select root directory:” option
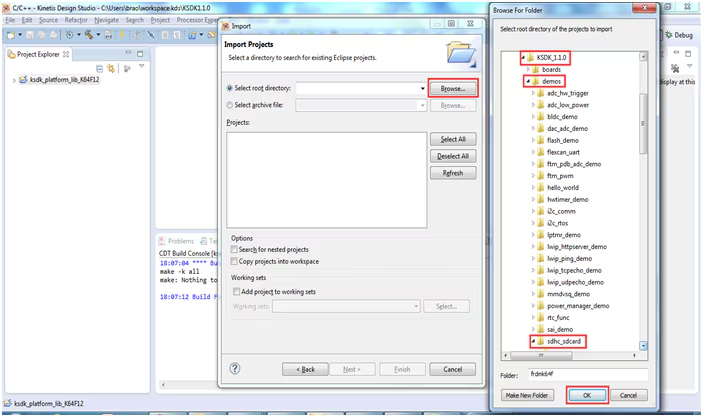
Next select the option as shown below:
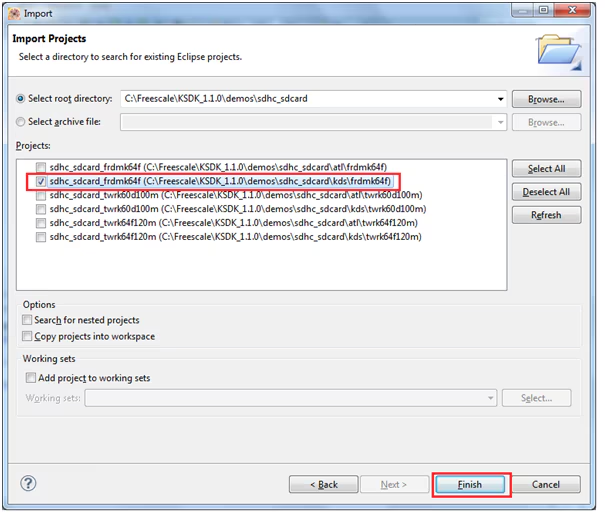
You can see the project is added to the project folder as shown below:

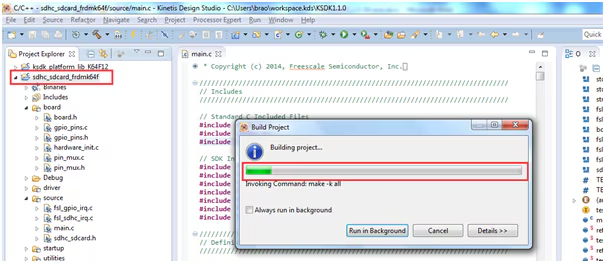
Now it’s time to compile/Build the project
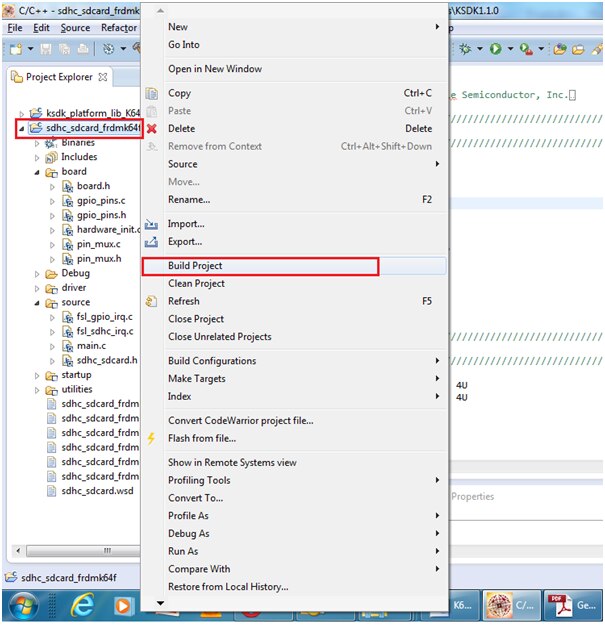
You can see a progress bar of building the project, it is as shown below:
Now connect the SDCard to K64 board as shown below

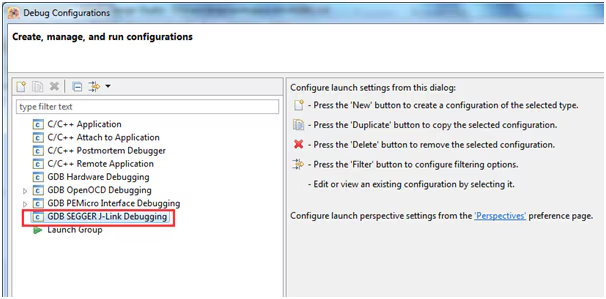
Configure the project for debugging by following below steps
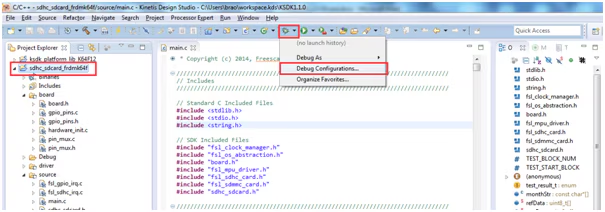
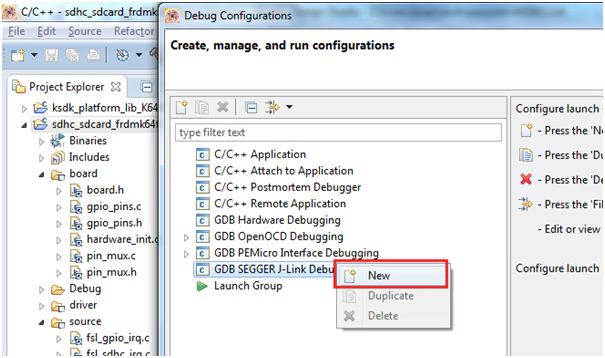
Select GDB Segger J-link option as shown
Right click and select the option “NEW” as shown
Then automatically our project “sdhc_sdcard_frdmk64f Debug” with Debug will be selected as shown
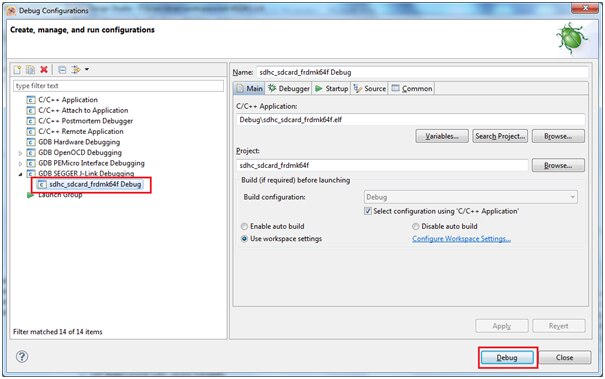
Then proceed by clicking ‘Debug’
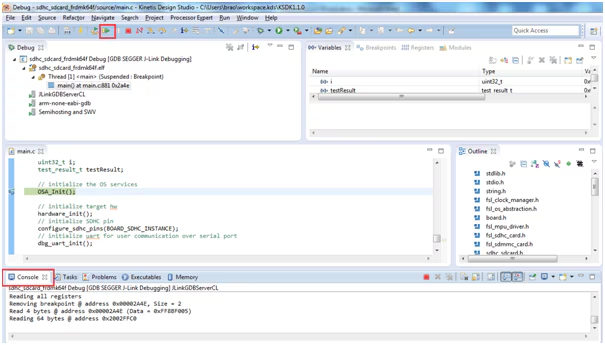
You can see the debug progress and now its ready to debug as shown below:
Now you can execute the project by clicking the b
 utton
utton
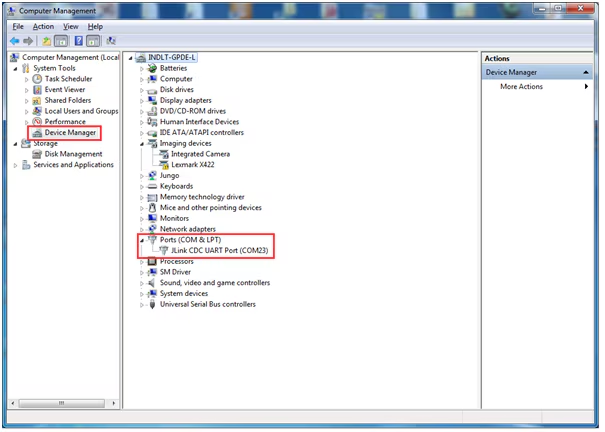
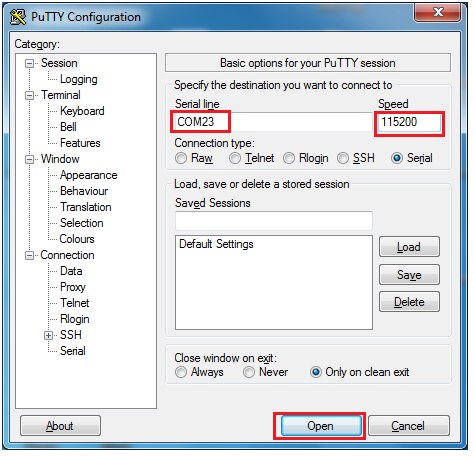
Parallelly you need to open the corresponding hyper terminal serial port from device manager as shown below in my case it is COM23 port
Open the hyper terminal from Putty (in my case) and provide the below info i.e baud rate to be 115200 and com port is COM23
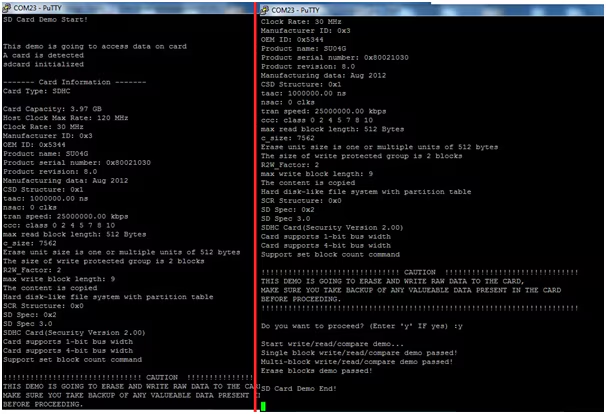
Then you can see below output is seen in serial terminal window.
It displays the details about SD card like Card Capacity, Clock rate, Manufacturer, Product name, sd card version, read write speed ..Etc.

Happy SD Carding 