element14 Community
element14 Community
    Register Log In
  • Site
  • Search
  • Log In Register
  • Community Hub
    Community Hub
    • What's New on element14
    • Feedback and Support
    • Benefits of Membership
    • Personal Blogs
    • Members Area
    • Achievement Levels
  • Learn
    Learn
    • Ask an Expert
    • eBooks
    • element14 presents
    • Learning Center
    • Tech Spotlight
    • STEM Academy
    • Webinars, Training and Events
    • Learning Groups
  • Technologies
    Technologies
    • 3D Printing
    • FPGA
    • Industrial Automation
    • Internet of Things
    • Power & Energy
    • Sensors
    • Technology Groups
  • Challenges & Projects
    Challenges & Projects
    • Design Challenges
    • element14 presents Projects
    • Project14
    • Arduino Projects
    • Raspberry Pi Projects
    • Project Groups
  • Products
    Products
    • Arduino
    • Avnet & Tria Boards Community
    • Dev Tools
    • Manufacturers
    • Multicomp Pro
    • Product Groups
    • Raspberry Pi
    • RoadTests & Reviews
  • About Us
  • Store
    Store
    • Visit Your Store
    • Choose another store...
      • Europe
      •  Austria (German)
      •  Belgium (Dutch, French)
      •  Bulgaria (Bulgarian)
      •  Czech Republic (Czech)
      •  Denmark (Danish)
      •  Estonia (Estonian)
      •  Finland (Finnish)
      •  France (French)
      •  Germany (German)
      •  Hungary (Hungarian)
      •  Ireland
      •  Israel
      •  Italy (Italian)
      •  Latvia (Latvian)
      •  
      •  Lithuania (Lithuanian)
      •  Netherlands (Dutch)
      •  Norway (Norwegian)
      •  Poland (Polish)
      •  Portugal (Portuguese)
      •  Romania (Romanian)
      •  Russia (Russian)
      •  Slovakia (Slovak)
      •  Slovenia (Slovenian)
      •  Spain (Spanish)
      •  Sweden (Swedish)
      •  Switzerland(German, French)
      •  Turkey (Turkish)
      •  United Kingdom
      • Asia Pacific
      •  Australia
      •  China
      •  Hong Kong
      •  India
      • Japan
      •  Korea (Korean)
      •  Malaysia
      •  New Zealand
      •  Philippines
      •  Singapore
      •  Taiwan
      •  Thailand (Thai)
      • Vietnam
      • Americas
      •  Brazil (Portuguese)
      •  Canada
      •  Mexico (Spanish)
      •  United States
      Can't find the country/region you're looking for? Visit our export site or find a local distributor.
  • Translate
  • Profile
  • Settings
Personal Blogs
  • Community Hub
  • More
Personal Blogs
Legacy Personal Blogs Getting started with Gertduino -  Are you serial?
  • Blog
  • Documents
  • Mentions
  • Sub-Groups
  • Tags
  • More
  • Cancel
  • New
  • Share
  • More
  • Cancel
Group Actions
  • Group RSS
  • More
  • Cancel
Engagement
  • Author Author: doorknob
  • Date Created: 17 Apr 2014 12:49 AM Date Created
  • Views 1397 views
  • Likes 0 likes
  • Comments 12 comments
  • gertduino
  • all-sky
  • camera
Related
Recommended

Getting started with Gertduino -  Are you serial?

doorknob
doorknob
17 Apr 2014

Yes indeed, I'm super serial right now. Or is that supposed to be 'super cereal'?


I carefully followed the instructions for disabling login via the Pi's serial port. Then I disabled the Pi's boot messages (out to the serial port), shut down the system, set the jumpers to connect the Pi's serial transmit line to the Gertduino's serial receive line (and vice-versa), powered up the system (it booted up just fine, yay!), installed the minicom terminal emulator, installed the scrot screen capture utility, brought up the LXDE graphical environment, started minicom at 9600 bps over port /dev/ttyAMA0, started the arduino IDE, loaded, compiled, then uploaded the simple sample serial program Serial_startup.ino to the Gertduino, and this was the result: 


image


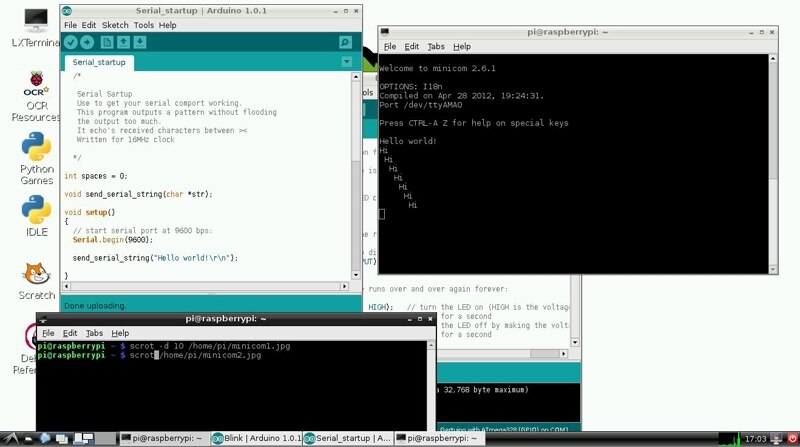
(I also tested keying into minicom and watching it echoed back, so both directions seem to be working.)


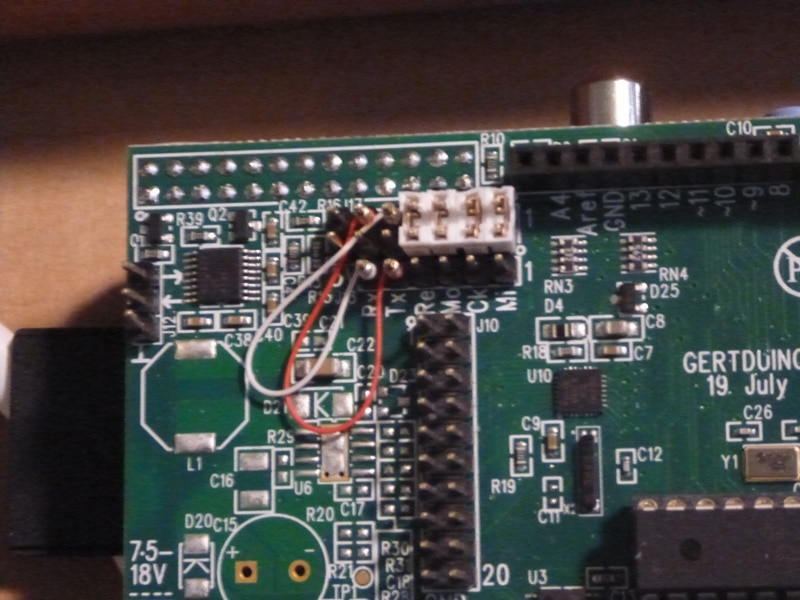
To set up the jumpers to let the Pi talk to the Gertduino, you need to hook them up in a criss-cross pattern. I used a hand wire-wrap tool and two short, pre-stripped lengths of #30 Kynar wire to make the connections. Here's a blurry photo (sorry) showing the jumpers:


image


I hereby declare phase 1 of my phased approach to getting the two boards talking a success. Phase 2 will involve a Python program talking to an Arduino program.


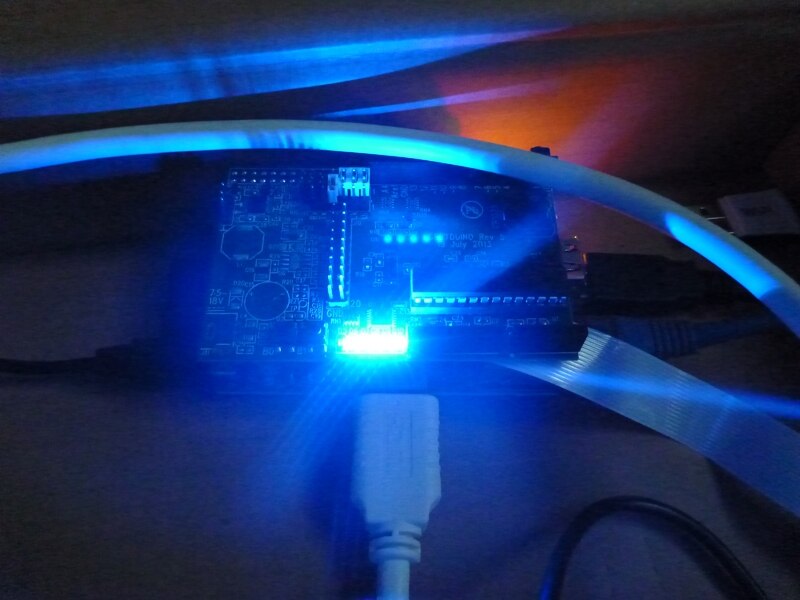
But before I go there, here's a really artistic photo showing the Gertduino's blue LEDs brightly lit up to celebrate the achievement:


image

  • Sign in to reply

Top Comments

  • doorknob
    doorknob over 11 years ago in reply to wegunterjr +1
    Are you using the Serial_startup.ino sample program on the Gertduino or are you using some other program? If you're not using Serial_startup.ino , then can you put together a barebones Arduino sketch using…
Parents
  • wegunterjr
    wegunterjr over 11 years ago

    I also have followed these steps:

    arefully followed the instructions for disabling login via the Pi's serial port. Then I disabled the Pi's boot messages (out to the serial port), shut down the system, set the jumpers to connect the Pi's serial transmit line to the Gertduino's serial receive line (and vice-versa), powered up the system (it booted up just fine, yay!), installed the minicom terminal emulator,


    I just can't remember if i did it manually, or if i used Gordon's script. Either way, it is complete.  I use minico to connect to the arduino (pi - 328 using the crossed wires) but all i get is gibberish in the window. Anything I Might be missing?

    • Cancel
    • Vote Up 0 Vote Down
    • Sign in to reply
    • More
    • Cancel
  • doorknob
    doorknob over 11 years ago in reply to wegunterjr

    Receiving gibberish through serial communications often is a symptom of a bit rate mismatch between the sender and the receiver.


    I am away from my system at the moment, but IIRC both ends of the link were set for 9600 bps. Is that what you have set up?

    • Cancel
    • Vote Up 0 Vote Down
    • Sign in to reply
    • More
    • Cancel
  • doorknob
    doorknob over 11 years ago in reply to doorknob

    Further thoughts on that last thought - do you have access to an oscilloscope?


    If so, it might be easiest to confirm that the Gertduino is transmitting at 9600 bps by probing the Gertduino's TX line while it is transmitting, and measuring the shortest bit duration that you see, then compare that to what should be expected for 9600 bps - I haven't done the math, and I'm about to run out for a meeting, but I've done that before to figure out or verify a serial bit rate.

    • Cancel
    • Vote Up 0 Vote Down
    • Sign in to reply
    • More
    • Cancel
  • wegunterjr
    wegunterjr over 11 years ago in reply to doorknob

    How do i change that?  I will look into that. I haven't made any of those changes intentionally.

    • Cancel
    • Vote Up 0 Vote Down
    • Sign in to reply
    • More
    • Cancel
  • wegunterjr
    wegunterjr over 11 years ago in reply to wegunterjr

    Thanks for all the help so far.  So, I understood most of what you said, but I was able to use an additional arduino to check if the gertduino was sending out good values using the software serial sketch.  here is what I did:


    1.  Gertduino TX - Pin 10 (RX) on the 2nd arduino

    2. Gertduino RX - Pin 11 (TX) on the 2nd arduino

    3. changed all baud rates to 9600

    a. gertduino Serial.begin(9600)

    b. 2nd arduino Serial.begin(9600);    in the setup loop at the top

    c. 2nd arduino mySerial.begin(9600)    //this is the software serial, and in the setup loop also


    when i use serial monitor for the 2nd arduino, i see Goodnight MOon (text at the top of the setup loop), but I don't see the  mySerial.println("Hello, world?");


    then it is all gibberish again.


    Walter

    • Cancel
    • Vote Up 0 Vote Down
    • Sign in to reply
    • More
    • Cancel
  • wegunterjr
    wegunterjr over 11 years ago in reply to wegunterjr

    I found this


    avrdude -qq -c gpio -p atmega328p -U lock:w:0x3F:m -U efuse:w:0x07:m -U lfuse:w:0xE7:m -U hfuse:w:0xD9:m

    from GertDuino Getting Started Tutorial – Hello World | Raspberry Pi Spy....    I did a reset on the gertduino, even recycled the PI to cut power, and made sure all the baud rates were 9600 on both sides.  Still getting gibberish.  ( I am happy there is a connect, but would like something clean to come through)

    • Cancel
    • Vote Up 0 Vote Down
    • Sign in to reply
    • More
    • Cancel
  • wegunterjr
    wegunterjr over 11 years ago in reply to wegunterjr

    Also, the timing that is in the boards.txt file l have is 12Mhz and not 16, so I had to change this:


    /usr/share/arduino/hardware/arduino/boards.txt


    gert328.build.f_cpu=12000000L


    to

    gert328.build.f_cpu=16000000L


    • Cancel
    • Vote Up 0 Vote Down
    • Sign in to reply
    • More
    • Cancel
Comment
  • wegunterjr
    wegunterjr over 11 years ago in reply to wegunterjr

    Also, the timing that is in the boards.txt file l have is 12Mhz and not 16, so I had to change this:


    /usr/share/arduino/hardware/arduino/boards.txt


    gert328.build.f_cpu=12000000L


    to

    gert328.build.f_cpu=16000000L


    • Cancel
    • Vote Up 0 Vote Down
    • Sign in to reply
    • More
    • Cancel
Children
No Data
element14 Community

element14 is the first online community specifically for engineers. Connect with your peers and get expert answers to your questions.

  • Members
  • Learn
  • Technologies
  • Challenges & Projects
  • Products
  • Store
  • About Us
  • Feedback & Support
  • FAQs
  • Terms of Use
  • Privacy Policy
  • Legal and Copyright Notices
  • Sitemap
  • Cookies

An Avnet Company © 2025 Premier Farnell Limited. All Rights Reserved.

Premier Farnell Ltd, registered in England and Wales (no 00876412), registered office: Farnell House, Forge Lane, Leeds LS12 2NE.

ICP 备案号 10220084.

Follow element14

  • X
  • Facebook
  • linkedin
  • YouTube