


Overview
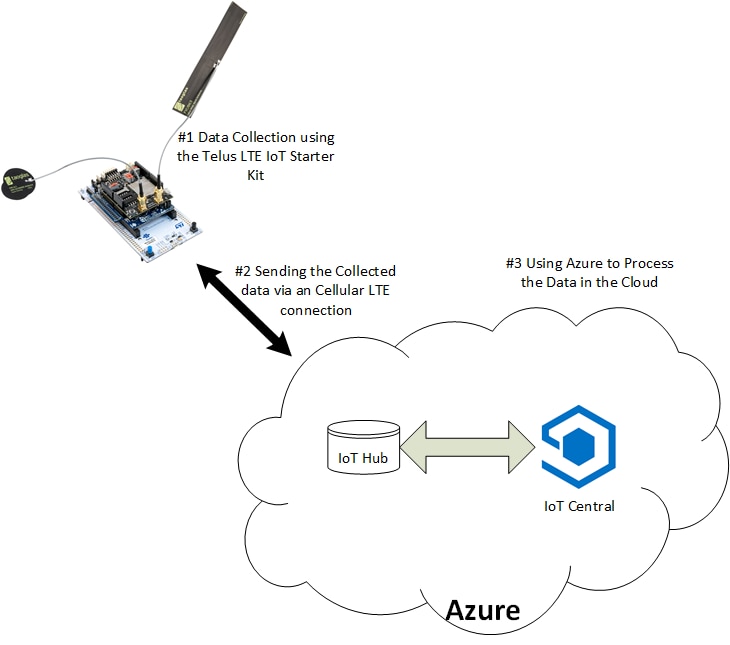
When you talk about the "Internet of Things" (IoT), there are several different areas involved, but in its essence, It comprises three basics (1) data collection, (2) sending collected data to the Internet, and (3) doing something with the data once it is there.
The 'data collection' step is covered thoroughly in other Blogs such as this one, and for this one, I am using the Azure Example that I have previously written about. Step #2, sending collected data to the internet, in most examples uses WiFI solutions but I wanted to use a Cellular example to cover IoT solution's that aren't within the range of a WiFi network (think long-haul trucking for example). Regardless of how you are communicating with the Internet, step #3, doing something with the data once it is in the cloud, isn't discussed much. Recently, I was asked to help create a dashboard for showing the data in a more graphical manner and since I was sending the data to Azure, I figured I would try and use IoT Central to do that. Azure (and AWS for that matter) allow you to do a lot of back-end processing of data that it contains, but I only wanted to create a simplistic dashboard to display the data. Because of that, the bulk of this Blog focuses on how to setup an IoT Central Application that shows the data being sent. Exciting? Probably not so much so, but the basics seldom are; but if you work through the steps I discuss, you will have a basic understanding that should allow you to create something more exciting and useful...
Data Collection
The Azure Example cover steps #1 and #2 I mentioned above. The sensor data collected and sent consists of Temperature, Humidity, Barometric Pressure, Board Tilt Detection, and User Button detection. The difference between what is implemented in the Azure Example and this blog is that instead of sending the data directly to Azure IoT Hub, the data is sent to a Azure IoT Central application. The modification needed for the Azure Example consists of modifying the connectionString. This is all that is necessary because IoT Central appears to be built upon IoT Hub even though you are sending data to IoT Central. Before you can create the needed connectionString though, you must create the IoT Central Application where the data will be sent.
Internet Storage aka, the cloud
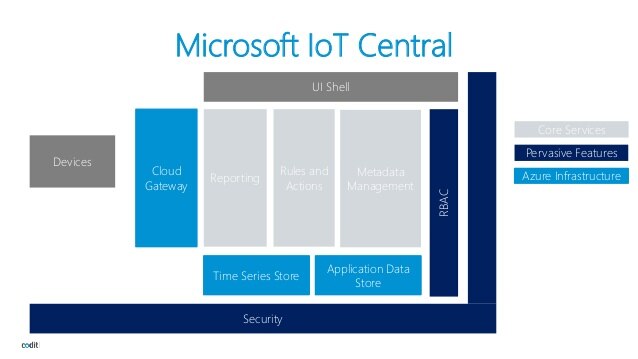
IoT Central is Microsoft’s Software As A Service (SaaS) offering that allows users to quickly setup a console and manage IoT devices. To be fair, there is a lot more to Azure IoT Central than what I will discuss here so I encourage you to visit https://azure.microsoft.com/en-us/services/iot-central/ to understand all the capabilities available. For this Blog, the data that is sent from the Telus LTE IoT Starter Kit will be displayed graphically for a user--a basic dashboard for viewing data. You could do more with it--like implement a remote weather collection station--but I wanted to keep the Blog as simple as possible since it is just explaining the setup for IoT Central.
Managing/Manipulating the Data
Setting up an IoT Central Application is a multi-step process. But first, you must have an active Azure subscription. If you don't and you are in Canada using the TELUS kit, create your Azure account here (it includes a $250 Credit to explore any Azure service for 30 days), if you are in the US, then create your Azure account here. The steps needed to create the IoT Central Application are:
- Create the Application
- Create a Device Template
- Using the Device Template, create a 'real' device (as opposed to a simulated device)
Once the device is created, the information needed to generate the connectionString can be obtained by using a command line tool that Microsoft provides. Using the connectionString, the program source is updated, compiled, then programmed into the device--then then you can monitor the data being sent.
Creating the IoT Central Application
Much of what is involved in creating an IoT Central application is described in Microsoft's Quick-start documentation (see https://docs.microsoft.com/en-us/azure/iot-central/quick-deploy-iot-centralP). What follows is adapted for the Azure Example without a lot of the 'extra' information. I also note some nuances when implementing this simple dashboard.
Create the Application
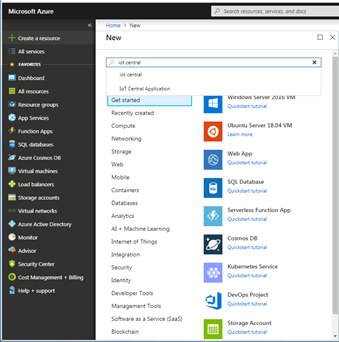
To get started, log into your Azure account and select 'Create a resource' on the top-left of the selection frame. This will then bring up a window that shows all the elements that Azure is capable of and since we want an IoT Central Application, simply enter that in the search bare. This will bring up the two possible entries of which you want to select 'IoT Central Application'
After you have selected 'IoT Central Application', you will be asked to confirm the Application Creation
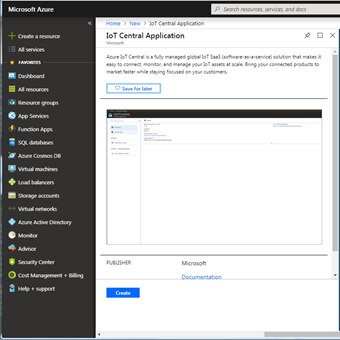
Followed by the details for the Application:
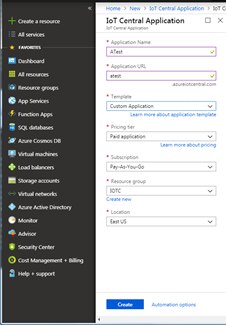
Much of this is self explanatory but it is interesting to note that:
- The application name will be used to generate a unique URL prefix so make it something that is easily remembered.
- For the application template, use 'Custom application'
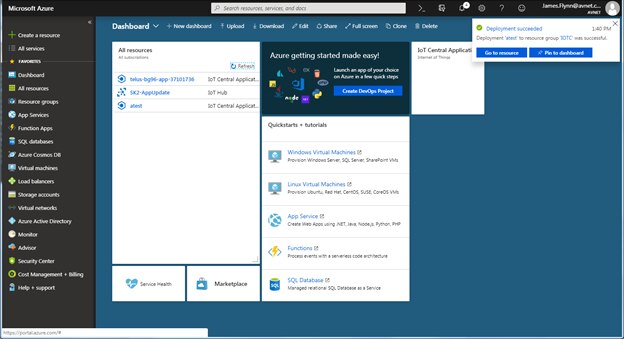
Then click Create. Azure will then create and deploy your application and once it deploys, it will show up in the 'All Resources' screen
After the newly created application shows up in the Resource screen, select it and you will be shown the details for the application:
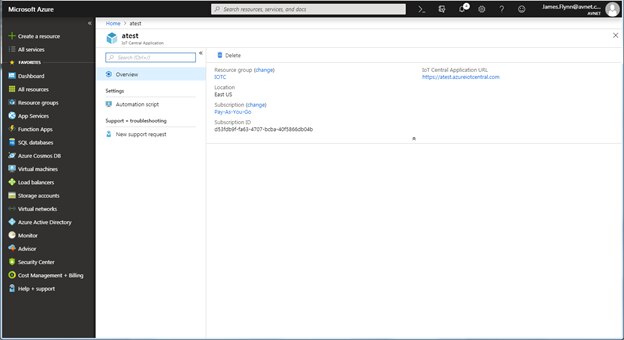
Selecting the URL listed, will take you to the IoT Central Application where you can create a Device Template.
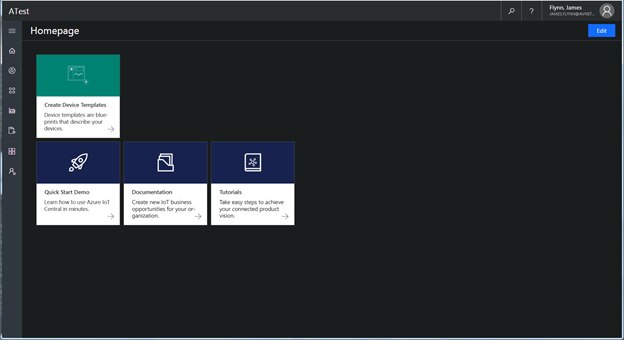
Create a Device Template
From the Applications Home page, one of the tiles is for 'Create Device Template'. After you select this tile
.
You will be prompted to name the template. This is the template that will be used when you create the 'real' device.

The new device template will now be created and presented to you for customization. Along the left side of the screen are the Telemetry, State, and Event elements

that you will want to predefined for you device.
Create a REAL device
With the Template now created, you can proceed to creating a real device. When you create the template, a simulator is automatically created with the Telemetry, State, and Events you defined in the template. But since we are working with a real device, the simulator is of less interest. Begin by navigating to Device Explorer (you can expand the icons on the left side of the screen by selecting the icon), then selecting the '+' followed by Real.
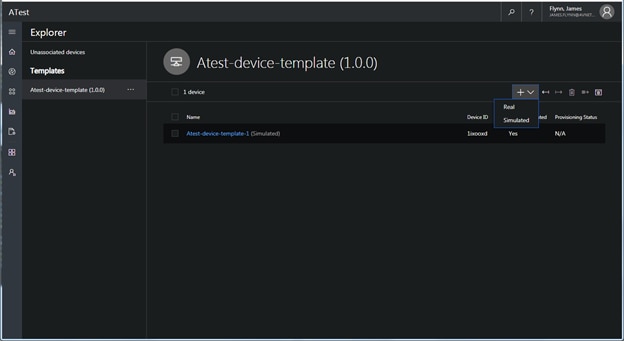
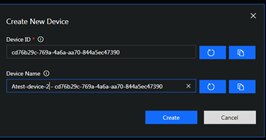
This will result in a dialog showing you the Device ID and Device name that is being created.
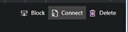
Once the device is created, you will want to select the connect button that is in the upper right of the screen.
This provides a dialog with information that is needed when creating your connectionString.
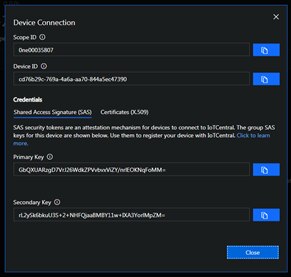
Configuring your Telus Kit/Data-Collection device source code
Details for adding devices are provided in the Microsoft Documentation, but in summary, you need csonnectionString that looks like:
"HostName=XXXX;DeviceId=xxxx;SharedAccessKey=xxxx"
To get this string, you first install a 'DSP Key Generator Utility' that Microsoft provides (see https://github.com/Azure/dps-keygen/tree/master/bin). Once you clone this repository, find the executable appropriate for your platform and run the application using the data you obtain from the Device Connection dialog. An example of creating this string using the Device Connection information :
./dps_cstr 0ne00035807 cd76b29c-769a-4a6a-aa70-844a5ec47390 GbQXUARzgD7VrJ26WdkZPVvbvxViZY/nrlEOKNqFoMM=
...
Registration Information received from service: saas-iothub-b12dd383-6f8d-4256-909f-2b51ab1aceec.azure-devices.net!
Connection String:
HostName=saas-iothub-b12dd383-6f8d-4256-909f-2b51ab1aceec.azure-devices.net;DeviceId=cd76b29c-769a-4a6a-aa70-844a5ec47390;SharedAccessKey=GbQXUARzgD7VrJ26WdkZPVvbvxViZY/nrlEOKNqFoMM=
The resulting Connect String will added to 'AvnetBG96_azure_client.cpp' (~line 66) after which you can recompile the program, load the executable, and begin running. You are now sending data to your IoT Central Application. .
Monitoring IoT Central data with the iotc-explorer CLI tool
With sensor data being sent to IoT Central, you probably want to verify it. The 'iotc-explorer' tool is a command line tool which allows you to interact with Azure IoT Central and see messages being sent. Install the tool from https://github.com/Azure/iotc-explore and utilize it to:
- Log into IoT Central
- Monitor messages being sent to the device
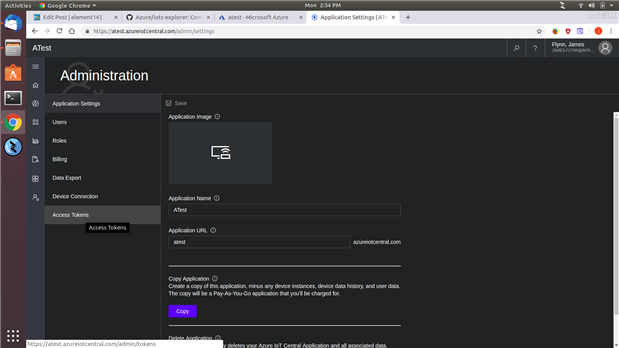
Before you can use the tool, you need to get an access token from your IoT Central Application, so go back to the device URL and choose 'Administration'.

After selecting 'Administration', you will be presented a number of options, the one we are interested in is 'Access Tokens' at the bottom of the list.
Selecting access token opens a dialog listing the tokens you have already created (in this screen shot, I have no other tokens but even if tokens existed, there is no way of querying them for their values. So previously defined tokesn aren't very useful except to see that they have already been created). Next, select 'Generate Token' and respond to the prompt for a name. After a name is supplied, select the 'Generate' button and your token is displayed:
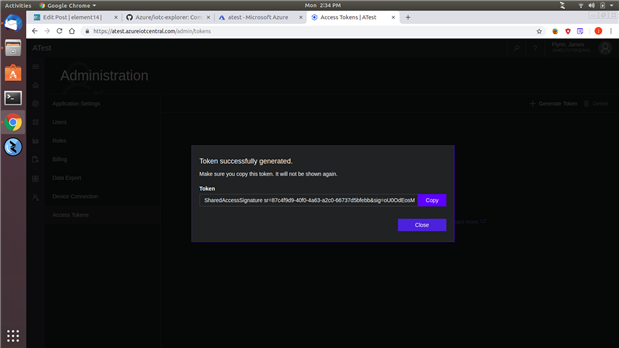
IMPORTANT: This is the only time you will have access to the token so be sure to copy it somewhere safe! If you misplace the token, you will have to generate another in order to login/use iotc-explorer.
After you have the token, issue the command to login then monitor the data being sent to your IoT Central application.
$ iotc-explorer login "SharedAccessSignature sr=87c4f9d9-40f0-4a63-a2c0-66737d5bfebb&sig=kE1A2OACcrZI3av0yvanm%2F2c7ko4WASmo75EO8WtSKg%3D&skn=test&se=1574797718606"
Login successful. Session expires Tue Nov 26 2019 14:48:38 GMT-0500 (EST)
$ iotc-explorer monitor-messages
Monitoring messages from all devices...


============ Device f97e18d7-e41e-4dbf-b947-cff781ea3d53 at Mon, 26 Nov 2018 20:55:59 GMT ============
{
  ObjectName: "Avnet NUCLEO-L496ZG+BG96 Azure IoT Client",
  ObjectType: "SensorData",
  Version: "1.0",
  ReportingDevice: "STL496ZG-BG96",
  Temperature: "24.80",
  Humidity: "49",
  Pressure: "989",
  Tilt: "2",
  ButtonPress: "0",
  TOD: "Mon 2018-11-26 20:55:58 UTC"
}


============ Device f97e18d7-e41e-4dbf-b947-cff781ea3d53 at Mon, 26 Nov 2018 20:56:04 GMT ============
{
  ObjectName: "Avnet NUCLEO-L496ZG+BG96 Azure IoT Client",
  ObjectType: "SensorData",
  Version: "1.0",
  ReportingDevice: "STL496ZG-BG96",
  Temperature: "24.70",
  Humidity: "49",
  Pressure: "989",
  Tilt: "2",
  ButtonPress: "0",
  TOD: "Mon 2018-11-26 20:56:03 UTC"
}
You now know that your device is collecting sensor data, sending it to Azure, and that Azure is receiving it.
Monitoring IoT Central using the web-based GUI
Observing the sensor data using iotc-explorer provides a level of confidence, but the goal is to use IoT Central to create a Graphical User Interface within which to present the sensor data. To do this, navigate back to the homepage, and select the device we want to monitor.
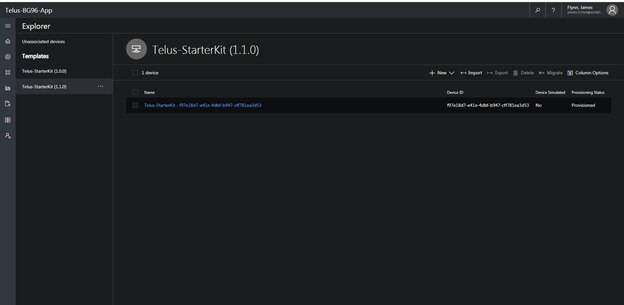
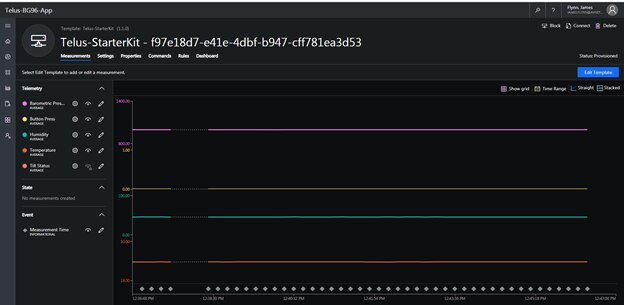
After being selected, the data associated with it will be presented:
Hopefully, this brief tutorial provided enough of the details to get you up and running with IoT Central. If you implement this IoT Central Application yourself, you will be able to explore the variety of options available in IoT Central.

