


Probably the most tedious and mundane task in the entire project is the construction of the solder-less breadboard itself. This is only important in that it will be the job most likely to devolve to the instructor. You can get enthusiastic help constructing the 10x components. But that enthusiasm wanes quickly when talking about hundreds of tie points. So when constructing the board I am trying to keep in mind not only the wide availability of materials, but also the ease of construction.
There is no single right way to build the board. What I am going to do is give a series of indicators and things I've tried that work.
The following will assume we are scaling up from 1/10 inch to 1 inch.
Lets break the board down into the face, the connective rails and the separators.
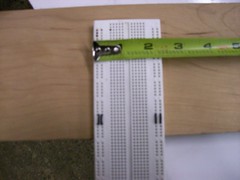
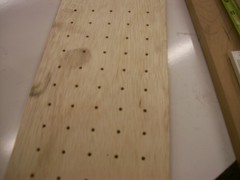
Looking at a board the key features are apparent. Holes. Lots of Holes. But the holes tend to be in groups of five. The other common distinguishing feature is the trough or troughs. Depending on the board the other areas lacking holes, call them the borders also show up.
Board face
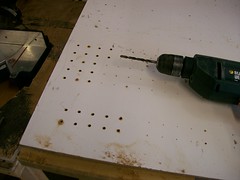
The obvious first choice of material for the face is 1 inch pegboard. Filling in unneeded holes is a lot less work then drilling the needed ones. But if you choose to use another material the very first thing you should do is make a drilling jig.
The Idea here is to get a good solid grid before you start drilling. I started with some graph paper and got a solid 1 inch square by driving an 8d nail through the 4 corners. This gave me a good start on maintaining parallel. Using the nail marks as if a center punched I then drilled them out. Using this small jig I then built a 5 x 5 jig. From there maintain parallel and spacing is simply a matter of remembering where you are. Of course in the next iteration of the jig I just ran it on the CNC.
If you are going to construct the face out of poster-board or other cardboard like material you could just drive the nails through and skip drilling altogether. As we are incorporating one version of the board as a section of white board I felt it important to show a way to get the correct spacings.
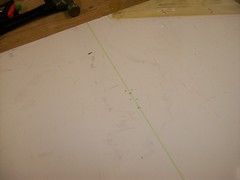 Finding the center
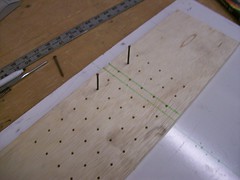 Marking The Board
 Drill it out
The trough is important but only in that it is a handy indication. The board does not actually need a physical indentation. For most field construction I expect that no indentation will actually be made and the trough will simply be a blank (hole-less) area.
The borders are also simply aesthetic.
Rails
The rails that provide the connectivity are the true heart of the board.
Looking at the guts of a breadboard you will see that it uses a simple bent metal spring. The bends clamp down on the wire and provide the connectivity and the support. Normally the rail is bent into a flat bottom U shape with addition V shaped bends near the top to clamp onto the wire. A notch is cut between every inch so one wire doesn't effect the wire in to hole next to it for the spring action.
Many different materials can and probably will be used to construct the Rails. The spring action can be accomplished with the material use to electrically separate the rails.
During the setup for our Maker Faire the box of my premade rails got misplaced. I had a bunch of cut foam ready for rail construction. What I didn't have was time to bend the rails. Solution, stuff the foam with steel wool. While anyone who camps a lot would never recommend that for a long term solution (steel wool and a battery makes a pretty good fire starter), it did the job quite well.
I've used Roof flashing, partially untwisted wire rope, steel pallet strapping, crumpled aluminum foil and soda cans so far.

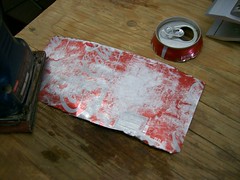
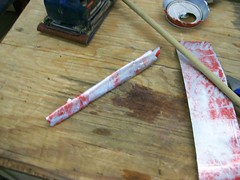
Soda cans work really well. You first have to lightly sand the coating off and then what I do is roll it around a thick pencil pinch flattening it as I slid the roll off. Pinching lets it hold its shape. Because the material is so thin and flexible there really is no reason to notch it. Oxidation may become an issue but so far it hasn't and since aluminum oxidizes so quickly I doubt it will. The ubiquitousness of material far outweighs any downside.
 Lightly Sand
 Split
Split
 Roll and Pinch
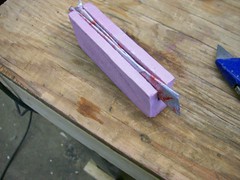 Fill The Rail then trim
There is no reason that I can see that the rails need to be connected side to side. My normal configuration right now is two rolled and pinched soda can rails side by side. This allows for some slop in the construction.
Separators
What material you use for the rails may determine what material you choose to electrically separate the rails. Foam insulation works well for most, but harder materials tend to chew it up. Foam has the advantage of allowing the wire to be embedded in it making vertical displays more practical. Wood works for non-loose packed materials. With loose packed material it doesn't provide the spring that foam does. But it works well with pallet strapping tape.
Overall
There are a tremendous variety of materials that can be used to construct the board. The limitations are simply time and tenacity.
I do however highly recommend that you build the Rail and Separator combination in Five hole groups. Trying to router out the underside of the board and then insert the rails. There really is a reason that house builders work with 1/16th of play. The amount of wasted material you generate is not worth the effort.

