


The students at DSIS have been very busy over the last few weeks building their projects, and unfortunately so have I. Now that I have some time off from college, I am going to document their progress over the last month.
Piezo Buzzers:
Till now most of the projects that the students have done have focused on visual response (i.e: The LED matrix). This is natural as it is easy to program the LEDs to display characters and shapes on the Micro:Bit, and more importantly it doesn't require any peripherals such as wires and breadboards as the LEDs are built-in to the back of the board. However, advancing further inevitably requires add ons to the board, so we had to get the students through some rather tedious sessions about what GPIO pins meant and how breadboards work. They were a patient crowd, and picked up on it soon enough.
The Piezo Buzzer is a fascinating piece of hardware, it can produce different kids of beep sounds, and the students enjoyed it so much that there were a lot of budding musicians trying out different combinations.
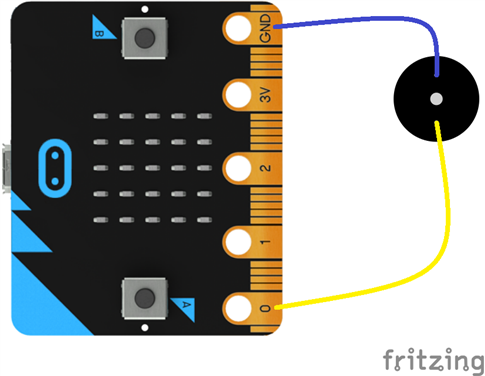
The above is the wiring for the Piezo buzzer. Unfortunately we did not have crocodile clips, so we had to make do with the extension board and use jumper wires while putting the buzzer on the breadboard. Many of the students have explained the working of their buzzers in the videos below.
Footnotes:
http://www.makerspace-uk.co.uk/a-selection-of-microbit-projects/