element14 Community
element14 Community
    Register Log In
  • Site
  • Search
  • Log In Register
  • Members
    Members
    • Achievement Levels
    • Benefits of Membership
    • Feedback and Support
    • Members Area
    • Personal Blogs
    • What's New on element14
  • Learn
    Learn
    • eBooks
    • Learning Center
    • Learning Groups
    • STEM Academy
    • Webinars, Training and Events
  • Technologies
    Technologies
    • 3D Printing
    • Experts & Guidance
    • FPGA
    • Industrial Automation
    • Internet of Things
    • Power & Energy
    • Sensors
    • Technology Groups
  • Challenges & Projects
    Challenges & Projects
    • Arduino Projects
    • Design Challenges
    • element14 presents
    • Project14
    • Project Groups
    • Raspberry Pi Projects
  • Products
    Products
    • Arduino
    • Avnet Boards Community
    • Dev Tools
    • Manufacturers
    • Product Groups
    • Raspberry Pi
    • RoadTests & Reviews
  • Store
    Store
    • Visit Your Store
    • Or choose another store...
      • Europe
      •  Austria (German)
      •  Belgium (Dutch, French)
      •  Bulgaria (Bulgarian)
      •  Czech Republic (Czech)
      •  Denmark (Danish)
      •  Estonia (Estonian)
      •  Finland (Finnish)
      •  France (French)
      •  Germany (German)
      •  Hungary (Hungarian)
      •  Ireland
      •  Israel
      •  Italy (Italian)
      •  Latvia (Latvian)
      •  
      •  Lithuania (Lithuanian)
      •  Netherlands (Dutch)
      •  Norway (Norwegian)
      •  Poland (Polish)
      •  Portugal (Portuguese)
      •  Romania (Romanian)
      •  Russia (Russian)
      •  Slovakia (Slovak)
      •  Slovenia (Slovenian)
      •  Spain (Spanish)
      •  Sweden (Swedish)
      •  Switzerland(German, French)
      •  Turkey (Turkish)
      •  United Kingdom
      • Asia Pacific
      •  Australia
      •  China
      •  Hong Kong
      •  India
      •  Korea (Korean)
      •  Malaysia
      •  New Zealand
      •  Philippines
      •  Singapore
      •  Taiwan
      •  Thailand (Thai)
      • Americas
      •  Brazil (Portuguese)
      •  Canada
      •  Mexico (Spanish)
      •  United States
      Can't find the country/region you're looking for? Visit our export site or find a local distributor.
  • Translate
  • Profile
Personal Blogs
  • Members
  • More
Personal Blogs
Legacy Personal Blogs My Reflow Soldering Setup
  • Blog
  • Documents
  • Mentions
  • Sub-Groups
  • Tags
  • More
  • Cancel
  • New
Blog Post Actions
  • Subscribe by email
  • More
  • Cancel
  • Share
  • Subscribe by email
  • More
  • Cancel
Group Actions
  • Group RSS
  • More
  • Cancel
Engagement
  • Author Author: modalpdx
  • Date Created: 25 Sep 2015 9:46 PM Date Created
  • Views 592 views
  • Likes 6 likes
  • Comments 9 comments
  • reflow
  • diy
  • soldering
  • scrappy
Related
Recommended

My Reflow Soldering Setup

modalpdx
modalpdx
25 Sep 2015

For no other reason than I'm a sucker for punishment, I have decided to share my uber-lame but nonetheless effective reflow soldering setup. I have used this hardware to reflow solder a few boards (in particular a Bus Pirate 4 "DorkBot edition," and a GoodFET) as well as some small components on breakout boards and all attempts have been successful, barring a few solder bridges and components that somehow misaligned before the solder paste reflowed.


Looking around element14 and other sites, I see that many of you take your reflow stations very seriously. That's awesome! Some day I'll have a serious set of hardware that can handle heat profiles and such. For now, though, I'm staying scrappy.


Without further ado, here's what I use:


image


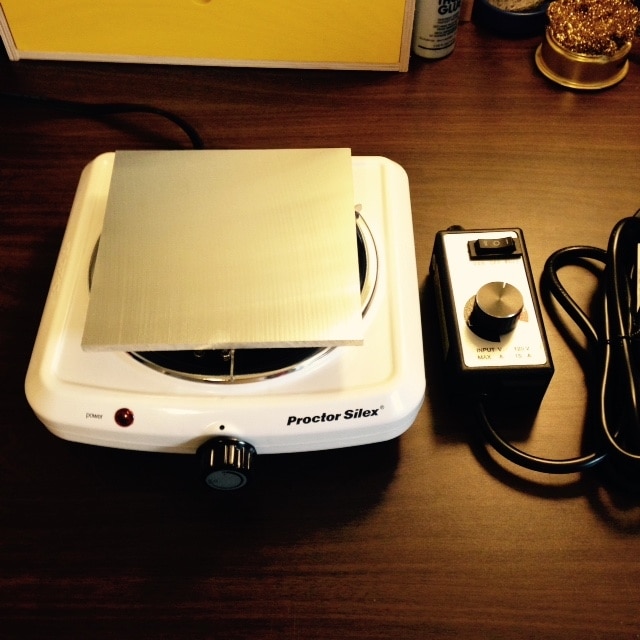
  • a 1,000 watt Proctor Silex "Durable Fifth Burner" that I bought at Amazon.com for around $16 (free Prime shipping FTW)
  • a 6" x 6" x 1/4" MIC6 aluminum plate that I got from McMaster Carr for around $25 including shipping
  • a Harbor Freight Router Speed Control that I bought locally for around $20


I always use this setup in my laundry room on top of my dryer, right under an exhaust fan. Those solder paste fumes...yuck. Don't want 'em. Nasty, nasty stuff.


The burner has a coil which doesn't work very well with PCBs. The MIC6 aluminum plate somewhat remedies this by not only offering a smooth, flat surface for maximum PCB contact, but it also distributes the inconsistent heat that emanates from the burner coil. It's not perfect, but it works well enough for dirty reflow work.


The problem with this rig is temperature control. Folks that use cheap burners know that there is no actual temperature control; it's either 100% on or 100% off. The higher the "temperature" is set, the more time the burner stays 100% on; the lower the "temperature," the more time the burner is 100% off. You want consistent heat when doing reflow soldering, not long periods of "on" alternating with long periods of "off."


To remedy this, some people hack relays into their burners to turn them on/off quickly according to heat profiles. Others have external wall jack boxes that turn whatever's plugged into them on/off based on heat profiles. These are all severely cool setups. However, I am not that sophisticated (yet) and that's a lot of work.


So here's where the router speed control kicks in. The router speed control delivers consistent, adjustable power to whatever is plugged into it. Even though it's made for routers (which I assume are either 100% on or 100% off, hence the need for a speed control), there's nothing saying you have to plug a router into it.


What I do is I turn up the burner "temperature" to 100% so it's all the way on, then I plug that into the turned-off router speed control. Through experimentation and a laser thermometer, I have determined that a good setting for the router speed control is about 2/3 of the way into the "M" (medium) speed range. At that setting, it takes roughly 3 or so minutes to heat everything up when starting with a completely cool burner and aluminum plate. No matter where I dial in the "speed," the power that is delivered to the burner is consistent. The higher the "speed," the hotter the burner. The burner buzzes a bit (I suspect the burner doesn't like having its wattage limited by a router speed control) but so far no catastrophes have occurred.


image


With this all set up and dialed in, I place my PCB on the aluminum plate and switch the router speed control to "var," then the burner starts to slowly heat up. It's important that this process begin with a cool aluminum plate because everything needs to heat up gradually. Never throw a freshly solder-pasted PCB on an already hot burner!


Long story longer, after about 3 minutes the solder paste reflows and I remove the PCB from the aluminum plate. I was told long ago to cool PCBs on wood, not metal, so I have a cutting board that serves as a cooling surface.


And...that's it. Put a fork in it, because it's done.


Overall, I'm pretty happy with this setup. It cost just over $60 and I haven't had any issues yet. My house hasn't burned down, nothing has exploded, etc. And best of all, I have not had to hack any hardware to do this. Everything is off-the-shelf and in its original condition, save for a few scuffs. I don't know why I like that but I do.


Also, so far I have had no obvious damage to components. Everything I have soldered has worked just fine after solder bridges were fixed (if any), so I assume I'm doing at least most of this semi-correctly. Of course, if anyone out there wants to duplicate this setup, your "speed" setting may be very different from mine so experiment and measure frequently with a laser thermometer or other heat measurement apparatus, otherwise you'll risk frying your components.


Thanks for reading! If you have ideas for doing this easier/better/cheaper, please let me know. I'm always on the lookout for scrappier ways to get sophisticated things done.


image

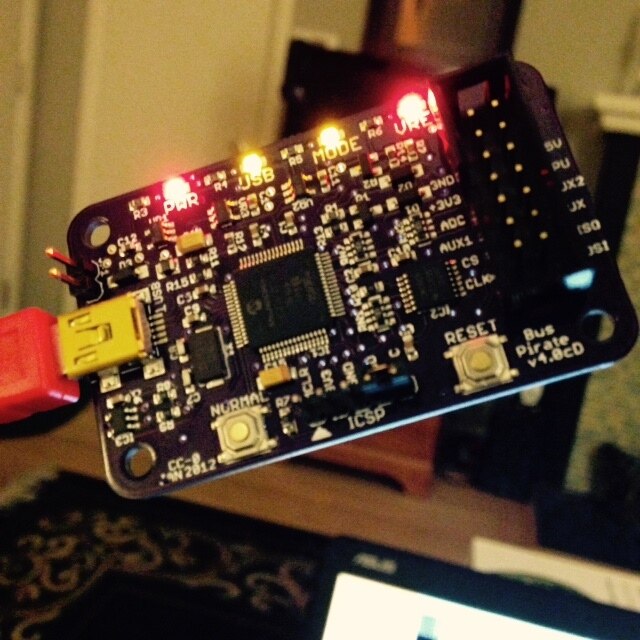
(My Bus Pirate 4 "DorkBot Edition," reflow soldered on the setup above. Works like a charm. I apologize for the blurry photo. Maybe I'll swap it with a better one some day. Purple PCB is from OSHPark, obviously.)

  • Sign in to reply

Top Comments

  • shabaz
    shabaz over 8 years ago +1
    Hi Erik, The result looks great! Also cool blog post tag, 'scrappy' ; )
  • DAB
    DAB over 8 years ago +1
    Cool idea. I would suggest using a pot lid to keep the heat in around the aluminum plate, but other than that, it looks functional. DAB
  • modalpdx
    modalpdx over 8 years ago in reply to Jan Cumps +1
    Hi Jan, So far, I've only used Mechanic solder paste which I can get in tiny not-quite-50g crucibles from Shenzen, CN (via eBay) for around $5/US, shipping included. It's cheap and I'm sure it's not great…
  • DAB
    DAB over 8 years ago in reply to modalpdx

    Either look for a WOK lid, or just use a frying pan upside down.


    All you want to do is trap heat around the board, you are actually cooking anything or worrying about splatter.


    Think simple.


    DAB

    • Cancel
    • Vote Up 0 Vote Down
    • Sign in to reply
    • More
    • Cancel
  • modalpdx
    modalpdx over 8 years ago in reply to DAB

    Hey DAB,


    Now that's a great idea! Even with the plate, the heat isn't 100% consistent from one side to the other, so maybe this can help? I'm planning on cooking a couple of Dangerous Prototypes boards simultaneously soon (IR Toy and Logic Analyzer, or at least one side of the LA, that is) so more even heat may be helpful.


    I'll see if I can locate a proper lid at a local thrift store. All of the pots in my kitchen have lids that lower into the pot and stay up using their outer edge, but this would require a lid that's more like an upside-down bowl. I'm sure one is available around here somewhere.


    Thanks for the suggestion!

    • Cancel
    • Vote Up 0 Vote Down
    • Sign in to reply
    • More
    • Cancel
  • modalpdx
    modalpdx over 8 years ago in reply to Jan Cumps

    Hi Jan,


    So far, I've only used Mechanic solder paste which I can get in tiny not-quite-50g crucibles from Shenzen, CN (via eBay) for around $5/US, shipping included. It's cheap and I'm sure it's not great, but after letting it sit at room temperature for a while (it lives in a glass jar a remote corner of my refrigerator) it seems to do what solder paste is supposed to do. I don't solder SMD parts often enough to justify a large syringe or tub of paste, so these tiny amounts work great for me.

    • Cancel
    • Vote Up +1 Vote Down
    • Sign in to reply
    • More
    • Cancel
  • modalpdx
    modalpdx over 8 years ago in reply to jw0752

    Thanks for the kudos!


    It's amazing how long it took me to find information about setting up my hardware. I guess people with inexpensive reflow soldering stations are hesitant to reveal their secrets? image I don't know. Regardless, hopefully my post will help some starving student get going with SMD soldering w/o an iron.

    • Cancel
    • Vote Up 0 Vote Down
    • Sign in to reply
    • More
    • Cancel
  • modalpdx
    modalpdx over 8 years ago in reply to shabaz

    Ha, thanks! I figure tags like "scrappy" may help me find my audience easier (read: starving college/university students and electronics dabblers). image Some day I hope to post about non-scrappy subjects, but for now it seems to be how I operate.

    • Cancel
    • Vote Up 0 Vote Down
    • Sign in to reply
    • More
    • Cancel
>
element14 Community

element14 is the first online community specifically for engineers. Connect with your peers and get expert answers to your questions.

  • Members
  • Learn
  • Technologies
  • Challenges & Projects
  • Products
  • Store
  • About Us
  • Feedback & Support
  • FAQs
  • Terms of Use
  • Privacy Policy
  • Legal and Copyright Notices
  • Sitemap
  • Cookies

An Avnet Company © 2023 Premier Farnell Limited. All Rights Reserved.

Premier Farnell Ltd, registered in England and Wales (no 00876412), registered office: Farnell House, Forge Lane, Leeds LS12 2NE.

ICP 备案号 10220084.

Follow element14

  • X
  • Facebook
  • linkedin
  • YouTube