


Personally I have not had much experience with working with backend web development (server side), but for an industry placement I will be doing for my degree, I am going to need to be able to work with Node.js. Something I have had no experience with previously, so I decided to write a program which is a bit more complex the the standard "hello world". Most of the difficulty experienced when learning this has been being able to search for the right terms, not having experience with backend development I would search for something and it would result in a completely different result than I was expecting. I'm not looking to write this as a full tutorial, or complete introduction to Node.js, just a fun little project to work on.
I have been using Visual Studio Code for editing the files, but any text editor of your choice will do.
Apologies for any incorrect terminology used.
The project will serve a web page for uploading a CSV (Comma Separated Value) file, parse the file into an array, and display the file as an HTML table. For displaying the page, a web template using Handlebar will be used to allow for passing the information onto the page (something else which I have no prior experience with). The CSV file will have three headers, Name, Age and Birthday, although this can be changed in the html later, I have not found a way of dynamically creating the headers in the template file yet, and for testing will be as follows (Yes i know its using semicolons for seperation, this is just for the parser I have used as i forgot to tell it to look for commas)
Name; Age; Bday
person 1; 55; 1/1/2000
person 2; 66; 1/1/1980
To start with the required files are imported into the script called index.js, this is done using require;
const fs = require('fs');This line creates an in instance of the module fs called fs, which is used for file manipulation. It is a package with comes included with the Node.js install.
Other packages used are installed using the package manager npm, and installed as such;
npm install express
The packages used for this project are
- FS
- HTTP
- HBS
- Express
- Multer
- Convert-CSV-to-JSON
To run the Node.js files open the terminal in the folder you have the script saved and type (replacing <filename> with the name of your file)
node <filename>.js
For scripts which do not have an end (such as our web server) you will see just a cursor until the script outputs anything the the console.
To view the web server running, use the browser of your choice and go to http://localhost:<port>. Replacing <port> with the port number specified in the code.
Lets get Started
This now includes all the packages needed for the project and sets up the web server using the Express framework. Multer handles the file upload and line 10 (above) set the temporary folder for saving the file to for parsing.
const http = require('http');
const fs = require('fs');

const express = require('express');
const multer =  require('multer');
const hbs = require('hbs');

const csv = require('convert-csv-to-json');

const upload = multer({dest: 'tmp/csv'});
const app = express();
const server = http.createServer(app);
const port = 9090;
Handling Requests
The world of the internet is all about requests and responses. when you type in a website address, it requests that page from the server and the server responses with that page.
so for our project we need to consider what to respond to and when. For this project, there will only be two pages, one as a 'landing page' and one for handling data sent to it form the 'landing page. Serving these pages is quick enough;
app.get('/', function(req, res){
     res.render('index.hbs');
});
What this is doing, when ever a browser requests the page / (eg: localhost/) is response by rendering the template we have written (I'll explain that a bit later)
The get in app.get is a reference to the two main ways websites communicate, using GET and POST methods (https://www.w3schools.com/tags/ref_httpmethods.asp )
The function is an anonymous function which handles both the request and the response, req and res respectively.
The next page we need to handle is /upload, we will leave this blank for now and will add in the functionality later, this page will be where the form on the main page will direct its data to.
app.post('/upload', upload.single('myFile'), function(req, res) {

});
This time we are looking for a POST request.
The other part of this is the upload.single() which is what handles that actual fiel we are sending, there are ways of handling multiply files but we are only interested in the one file just now. The parameter passed to the function is the name of the file input on the form in the template.
The last bit that we need to do to tell the script to server the pages is;
function startServer(){
     server.listen(port, function() {
     console.log('Server Listening on : ' + port);
}

startImmediate(startServer);
This tells the server to listen for requests on the port specified earlier (9090). The startImmedite() function just tell the script to start this first (I believe). We also have an anonymous function to write out to the console the port we are listening on.
With that the basic functionality of the script is done, although if you run it, nothing will happen, and you will probably get some errors as there is no file index.hbs to server to the browser. So lets fix that.
Web Templates
Node.js Setup
This will go just under the require first block of require and const statements, and it tells express that we are wanting to use handlebars (hbs) as our view engine, basically that we are using a template design for serving web pages and it uses handlebars (sure there is a much more in depth explanation of view engine). The second line tells the view engine where to look for static files, such as css.
app.set('view engine', 'hbs');
app.use(express.static(_dirname + '/public);
Using HBS has been a bit weird for arranging the files structure for the templates, where as normally I would arrange a file structure such;
- index.html
- css/
- main.css
where the index is within the main directory and css is located in a subdirectory, when using hbs it looks for this structure;
- views/
- index.hbs
- public/
- css/
- main.css
- css/
which is fine, although you would then link the stylesheet, as css/main.css in the hbs file.
HBS file
handlebar takes an input object and displays it at desired locations using custom tags (https://handlebars-draft.knappi.org/guide/ ), apart from that it is written like a normal html file. The basic index.hbs looks like;
<!DOCTYPE html>
<html lang=en>
     <head>
          <title>
               File Uploader
          </title>
     </head>

     <body>
          <h1>File Uploader</h1>

          <p> {{staus}} </p>
          <p> {{filename}} </p>

          <form action='/upload' method='POST' enctype='multipart/form-data'>
               <input type='file' name='myFile'>
               <input type='submit'>
          </form>
     </body>
</html>
which results in;
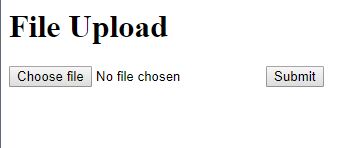
You will notice that {{status}} and {{filename}} do not show up. This is due to them being the data that handlebar is looking to have passed to it by the server.
The other important part of this file is the enctype of the form, this needs to be set as multipart/form-data for the file uploader to function, we have also set the name of the file input to 'myFile', just as we told the uploader it would be. The destination is also set to be '/upload' and being sent by POST request. Now that we have a web page to serve, we can handle the incoming file.
File Upload
For this we will be returning to
app.post('/upload', upload.single('myFile'), function(req, res) {

});
and giving the function dome functionality.
In here we will determine if a file has been uploaded and then respond with the template displaying the file name,
if(req.file) {
     console.log('Uploading file ... ' + req.file.originalname + '\n');

     var filename = req.file.originalname;
     var uploadStatus = 'File Uploaded Successfully: ');
} else {
     console.log('Upload Failed');

     var filename = 'Upload Failed : ';
     var uploadStatus = 'Upload Failed';
}

fs.unlinkSync(req.file.path);

res.render('index.hbs, {
          filename: filename,
          status: uploadStatus
});
It starts out by checking if a file has been sent in the request, if it has it will log to the console the name of the file, and set the value for two variables which will be used later. One is the name of the file and the other is a status string. If there is no file, it again sets the two variables with a string indicating the failure of the upload.
fs.unlinkSync(req.file.path)
this removes the temporary file form the file system
the last part is the exciting bit, this uses the same template as before, but passes some information onto it. This information is then displayed in the field we specified earlier in the template. first we specify the field name from the template and then the data we wish to pass on, in this case the two variables we wrote when checking the upload. This results in the page being displayed as
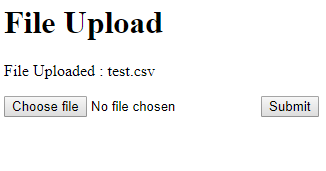
Success!! we have a web page which uploads a csv file. Now to parse the file and display it as a table.
Parsing
Node.js
Parsing the data is handled by a node module convert-csv-to-json, which does exactly as it says on the tin, converts a csv file to json such as this (https://www.npmjs.com/package/convert-csv-to-json )
[
 {
  "first_name": "Constantin",
  "last_name": "Langsdon",
  "email": "clangsdon0@hc360.com",
  "gender": "Male",
  "age": "96"
 },
 {
  "first_name": "Norah",
  "last_name": "Raison",
  "email": "nraison1@wired.com",
  "gender": "Female",
  "age": "32"
 }
]
Which can then be passed on to the template for display, which is as simple as writing
let json = csv.getJsonFromCsv(req.file.path);
Then we pass it into the template by adding it to the data list in the res.render statement
res.render('index.hbs, {
          filename: filename,
          status: uploadStatus,
          data : json
});
HBS file
For accepting the data it is a bit more complex than the simple strings we where passing before. but it is still easy enough to grasp. By using handlebars equivalent of and if statement and a forEach command
{{#if data}}
<table style='width: 100%; text-align: centre;'>
     <tr>
          <th>Name</th>
          <th>Age</th>
          <th>Birthday</th>
     </tr>
     {{#each data}}
     <tr>
          <td> {{Name}} </td>
          <td> {{Age}} </td>
          <td> {{Bday}} </td>
     </tr>
     {{/each}}
</table>
{{/if}}
Here we can see the if statement {{#if condition}} ... {{/if}}. This will only show the html contained if there is data passed into the condition, therefore it will hid the table when we are on the landing page and are not passing data into the template.
The other new tag is the {{#each array}} ... {{/each}}, this acts like a forEach function. Doing the containing html for every element of the array passed to it.
with all of this combined, the result when uploading a file;

Success!!!! Now we can upload and View a CSV File
This has ended up being a rather long blog post, but Node.js is a powerful tool.
Attached is the completed basic project. I have also taken this and upgraded it to include some error catching and styles for the web pages.
Top Comments