


One of the topics I wanted to investigate while roadtesting the PAN1780 eval kit was how it can differentiate itself from other, similar modules that also contain Nordic's nRF52840 mcu. I noticed that the PAN1780 had better signal strength compared to my other dev board while scanning via Web Bluetooth, so I thought maybe I can do some sort of testing around this?
Looking around the Nordic InfoCenter got me this interesting section: https://infocenter.nordicsemi.com/topic/sdk_nrf5_v17.0.2/ble_sdk_app_att_mtu.html?cp=7_1_4_2_1_0
The ATT_MTU Throughput Example shows how different connection parameters influence the throughput performance of BLE connections.
This was quite close to what I wanted, so I tried it out. I'm posting this so anyone who might want to try out some throughput tests would know what to expect and how to get things setup.
First, we need to get the boards programmed. You'll need to get nRF connect for desktop from Nordic: https://www.nordicsemi.com/Software-and-tools/Development-Tools/nRF-Connect-for-desktop and install the Programmer tool.

You'll also need to download the nRF52 sdk https://www.nordicsemi.com/Software-and-tools/Software/nRF5-SDK and extract the contents.
Open the programmer and click on Add Hex and choose the \examples\ble_central_and_peripheral\experimental\ble_app_att_mtu_throughput\hex\ble_app_att_mtu_throughput_pca10056_s140.hex file and Erase and Write

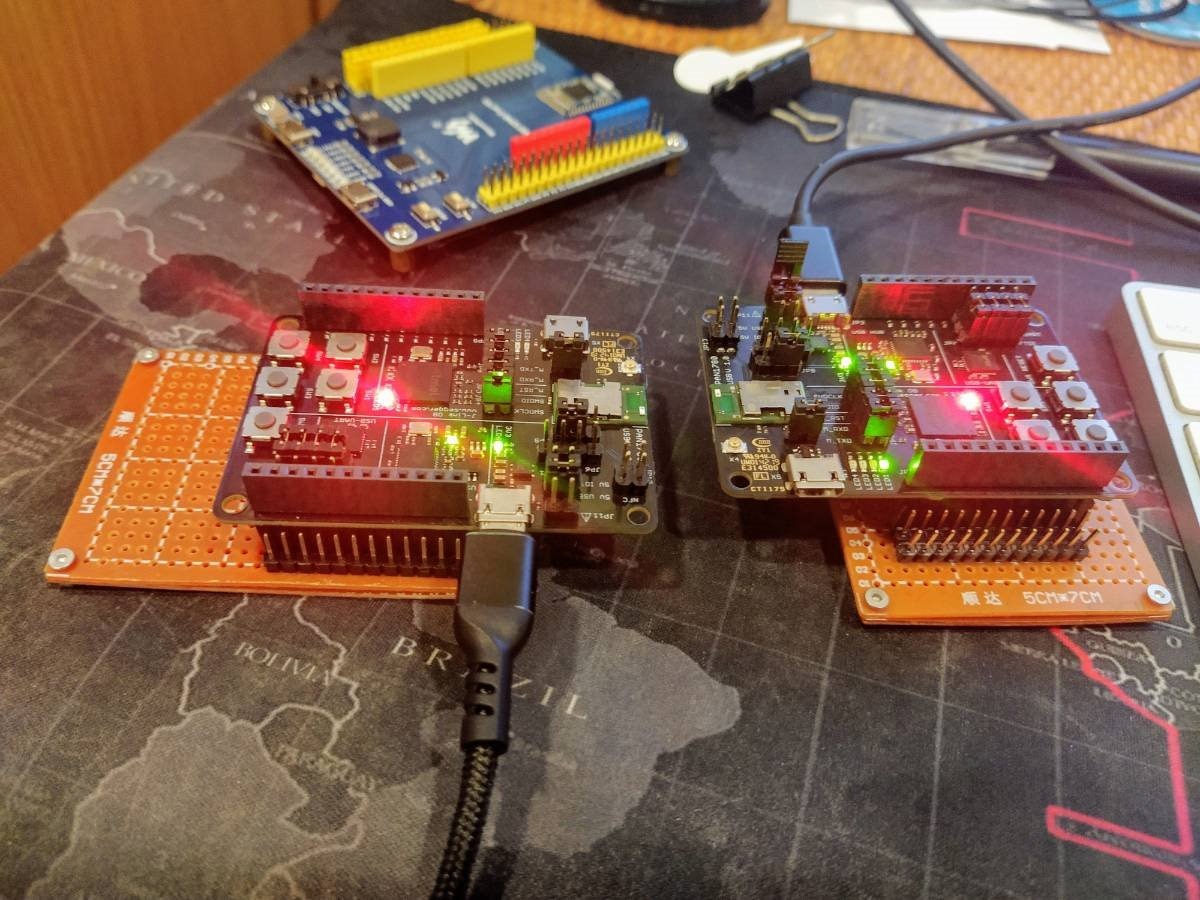
I did this on both of the PAN1780 eval kits.
One of the kits would be the responder, and the other would be the tester.
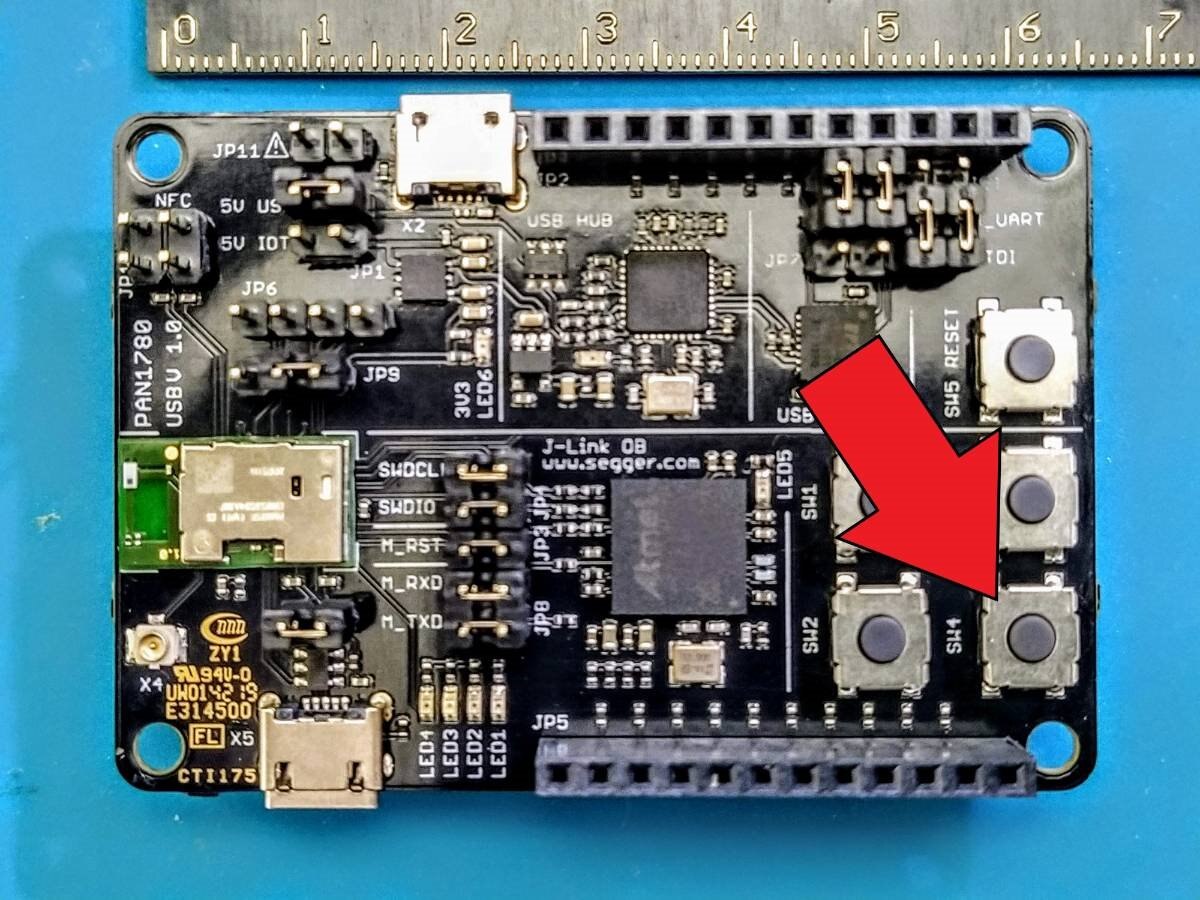
When you press Button 4 on the board, it turns that board into a responder. There is no need to interact with the board after the button press, so I just plug it into a power bank.
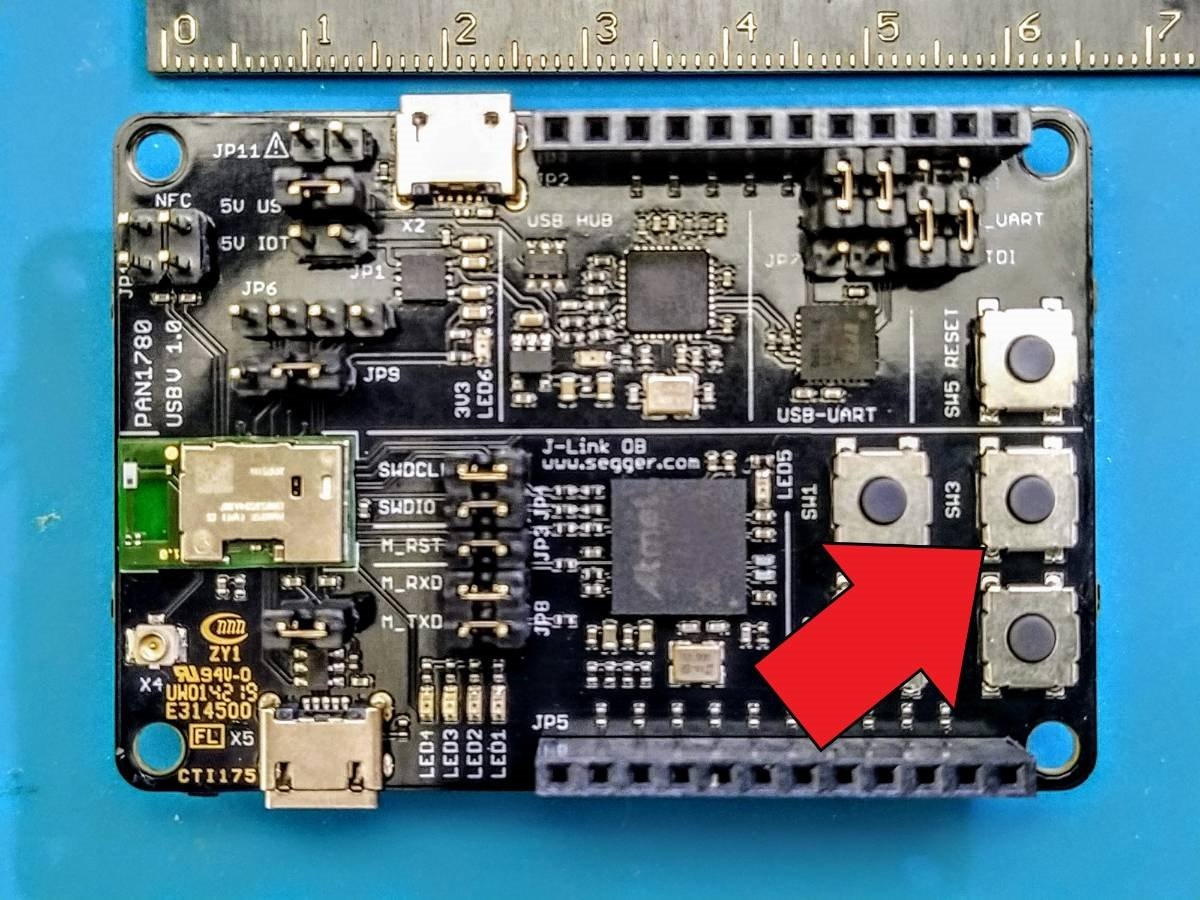
When you press Button 3 on the board, that board becomes the tester. You'll need serial to configure the test parameters, so this board needs to be connected to the computer.
You'll then need a serial terminal to communicate with the board firmware. Nordic recommends PuTTY or TeraTerm; I prefer TeraTerm and you can get it from https://ttssh2.osdn.jp/index.html.en
You'll then need to setup the connection parameters. I connect to COM10 which is the USB Serial Port (not the JLink CDC UART Port) after configuring the jumpers JP7 to connect to the FTDI adapter.

There will now be some instructions (we've already done this, but it's a good reminder). If you don't see the info messages, you can try resetting the board.
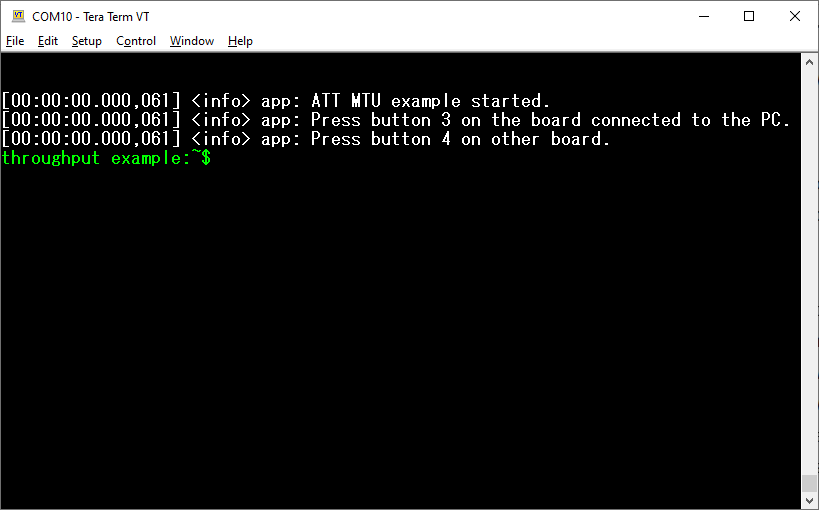
In this case, pressing Button 3 while connected to serial will confirm the action.
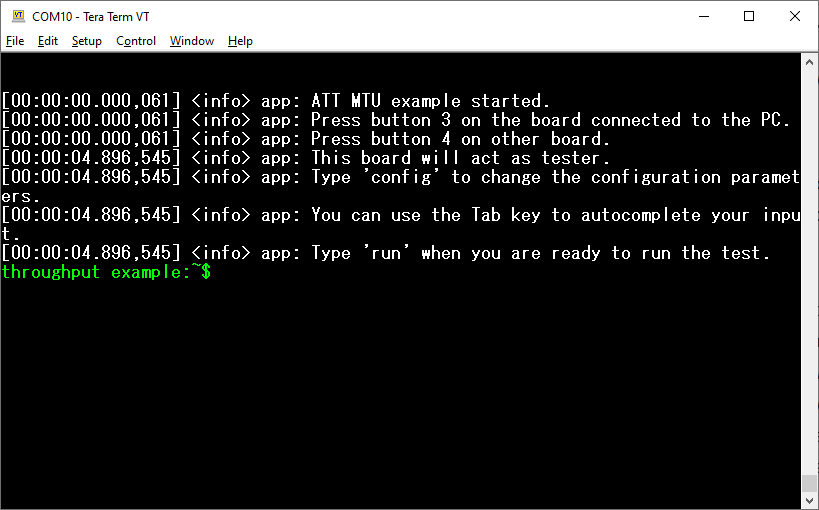
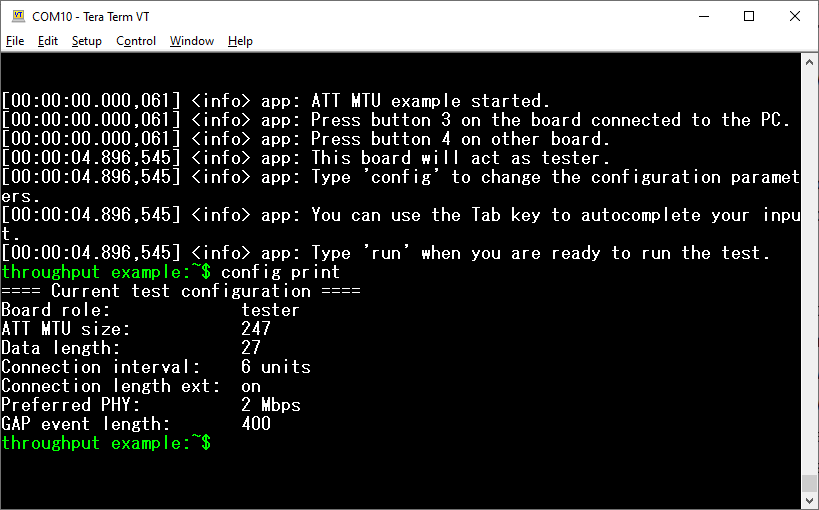
You can check the current configuration by typing config print into the terminal.
Typing run will start the test. In this case, the tester and the responder are just a few centimeters apart.
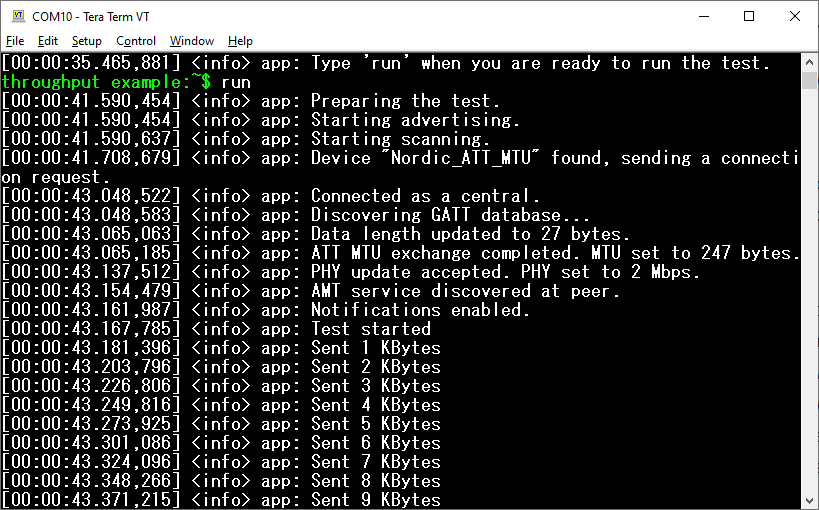
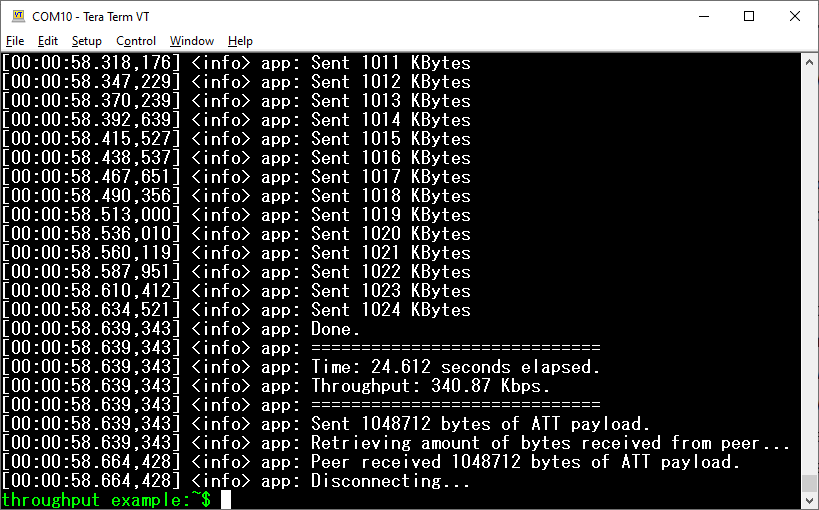
Wait about half a minute for the whole test to finish (it will send 1024KBytes of data) and then it will print a summary of the results.
The Nordic Info Center recommends repeating the test after having changed parameters and then observing how the throughput changes for different sets of parameters.
Novelbits has a really in-depth investigation on the how to theoretically get the best throughput here: https://www.novelbits.io/bluetooth-5-speed-maximum-throughput/ so I tried it out.
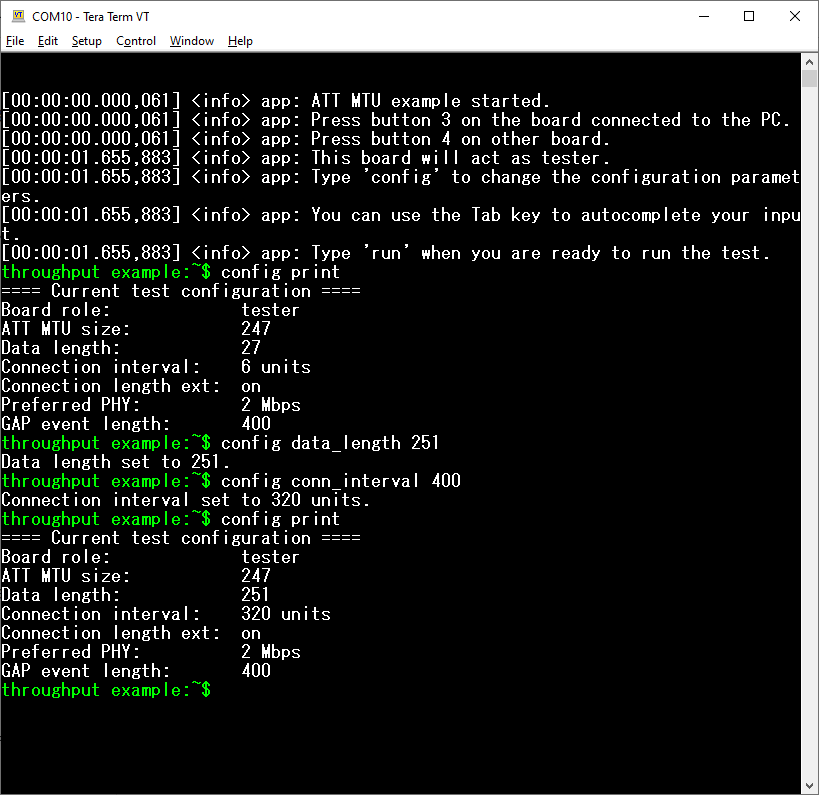
I set the data length to 251 and the connection interval to 400 and then ran the test with the boards close to each other.
Here are the results:
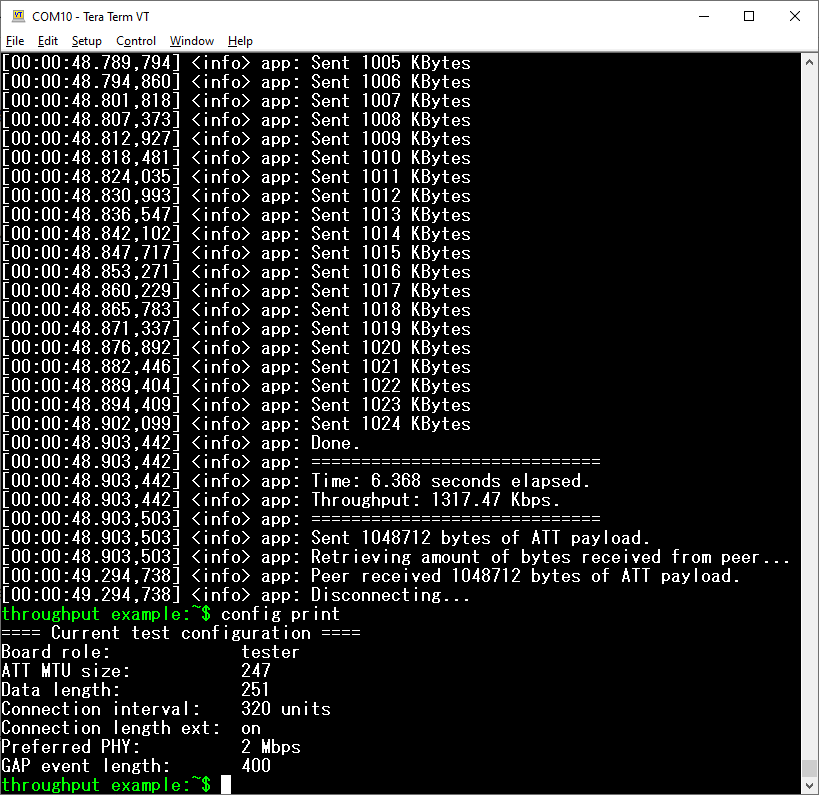
Quite close to the theoretical calculated 1400Kbps max! 
I have an nRF52840DK arriving soon (whoever said you get free stuff when roadtesting wasn't telling all the truth; you spend not on the product but on supporting materials because you become too curious about the product you're roadtesting  ) and I'll be doing some throughput benchmarks with that as well for my road test blog.