element14 Community
element14 Community
    Register Log In
  • Site
  • Search
  • Log In Register
  • Community Hub
    Community Hub
    • What's New on element14
    • Feedback and Support
    • Benefits of Membership
    • Personal Blogs
    • Members Area
    • Achievement Levels
  • Learn
    Learn
    • Ask an Expert
    • eBooks
    • element14 presents
    • Learning Center
    • Tech Spotlight
    • STEM Academy
    • Webinars, Training and Events
    • Learning Groups
  • Technologies
    Technologies
    • 3D Printing
    • FPGA
    • Industrial Automation
    • Internet of Things
    • Power & Energy
    • Sensors
    • Technology Groups
  • Challenges & Projects
    Challenges & Projects
    • Design Challenges
    • element14 presents Projects
    • Project14
    • Arduino Projects
    • Raspberry Pi Projects
    • Project Groups
  • Products
    Products
    • Arduino
    • Avnet & Tria Boards Community
    • Dev Tools
    • Manufacturers
    • Multicomp Pro
    • Product Groups
    • Raspberry Pi
    • RoadTests & Reviews
  • About Us
    About the element14 Community
  • Store
    Store
    • Visit Your Store
    • Choose another store...
      • Europe
      •  Austria (German)
      •  Belgium (Dutch, French)
      •  Bulgaria (Bulgarian)
      •  Czech Republic (Czech)
      •  Denmark (Danish)
      •  Estonia (Estonian)
      •  Finland (Finnish)
      •  France (French)
      •  Germany (German)
      •  Hungary (Hungarian)
      •  Ireland
      •  Israel
      •  Italy (Italian)
      •  Latvia (Latvian)
      •  
      •  Lithuania (Lithuanian)
      •  Netherlands (Dutch)
      •  Norway (Norwegian)
      •  Poland (Polish)
      •  Portugal (Portuguese)
      •  Romania (Romanian)
      •  Russia (Russian)
      •  Slovakia (Slovak)
      •  Slovenia (Slovenian)
      •  Spain (Spanish)
      •  Sweden (Swedish)
      •  Switzerland(German, French)
      •  Turkey (Turkish)
      •  United Kingdom
      • Asia Pacific
      •  Australia
      •  China
      •  Hong Kong
      •  India
      •  Japan
      •  Korea (Korean)
      •  Malaysia
      •  New Zealand
      •  Philippines
      •  Singapore
      •  Taiwan
      •  Thailand (Thai)
      •  Vietnam
      • Americas
      •  Brazil (Portuguese)
      •  Canada
      •  Mexico (Spanish)
      •  United States
      Can't find the country/region you're looking for? Visit our export site or find a local distributor.
  • Translate
  • Profile
  • Settings
Personal Blogs
  • Community Hub
  • More
Personal Blogs
Legacy Personal Blogs PYNQ-Z2 - Pre-workshop setup
  • Blog
  • Documents
  • Mentions
  • Sub-Groups
  • Tags
  • More
  • Cancel
  • New
  • Share
  • More
  • Cancel
Group Actions
  • Group RSS
  • More
  • Cancel
Engagement
  • Author Author: Fred27
  • Date Created: 5 Apr 2020 6:48 PM Date Created
  • Views 6238 views
  • Likes 14 likes
  • Comments 18 comments
  • pynqworkshpch
  • xilinx
  • pynq
  • pynqstarter
  • pynz z2
Related
Recommended

PYNQ-Z2 - Pre-workshop setup

Fred27
Fred27
5 Apr 2020
image

PYNQ-Z2: Embedded Vision Workshop Series with Adam Taylor


Getting Started | Getting Up and Running  | Unlocking Your Inner PYNQ Hero  | Project14 | PYNQ Workshop image


I don't know about you, but I've always meant to delve properly into Pynq and I'm looking forward to the three workshops, starting with this one on 5th May. PYNQ-Z2 Workshop: Getting Started with PYNQ


I bought a PYNZ-Z2 and thought it would be wise just to get to a point where I could hit the ground running with the workshop. I know it starts from zero, but you don't want to find you miss the first half an hour because you weren't organized enough. I'm going to jot down just a few things I found useful. It's not going to be a Pynq lessons, more of a checklist. If you can already fire up a browser, go to http://pynq:9090 and you see a Jupyter notebook, then you don't need this guide. That's where I'll stop.


Buy the bits you need

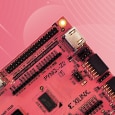
PYNQ and accessories

Obviously as mention on the event listing there's a PYNQ-Z2PYNQ-Z2 and (if you don't have any lying around) some male-to-male jumper cables. There are some starter kits - a BasicBasic and AdvancedAdvanced - and if you don't got for these, make sure you have and suitable micro USB cable, network cable and micro SD card of at least 8GB. Once again most E14 members will have this lying around, but if you don't then either get them or go for a starter kit. In case you were wondering what the difference is, the Advanced includes a case and bag to zip it all up into. I don't think we'll need the power supply.


Camera

I wasn't going to bother getting a camera with a HDMI output. I was going to use a Raspberry Pi with a Pi camera and use the HDMI output from the Pi. The ApeMan camera mentioned isn't expensive, but I didn't want yet more stuff that I use once cluttering up the place. As my boys have started making their own YouTube videos I relented and got one on eBay. I suspect the really cheap A70 version (with HD output) would do, but decided to go for the A77 (4K version). There's a newer A80 too, but it didn't seem significantly different. You should be able to get one for £25-30 on eBay. Amazon have them but in the UK at least shipping on non-essential items is about a month. Fair enough at the moment, but it means it wouldn't arrive in time for the workshop. I suspect anything with a HDMI output would do for the workshop at a push - TV, PC, whatever. I don't know this, but I would guess we'll do something like edge detection for a demo.


My ApeMan A77 camera arrived. It's well worth the money - even if it's just for all the GoPro compatible accessories it comes with. One thing it doesn't come with though is a micro HDMI cable. If you already have a Pi 4 then you're probably all set, because the Pi 4 also uses micro HDMI. Otherwise, make sure you order a micro HDMI to standard HDMI cable or the appropriate adapters. The camera also expects micro SD card to store images / video. You won't need a card for live throughput, but if you don't have one there's an annoying warning triangle superimposed on the middle of the display!


It seems the workshop article has been updated to a Crosstour brand camera. From the photos it looks to be identical hardware under a different brand.


Hold off on getting this exact camera. I can't get it to work with the PYNQ-Z2 even though another HDMI source (Pi 4) works fine.

Problem with PYNZ-Z2 and HDMI output from camera


Using a Raspberry Pi as a camera

So, I think my Apeman A77 just isn't going to work. I'm going back to "Plan A" of using a Raspberry Pi and a Pi camera V2 as my video source. This is pretty easy. I decided on a Pi 3 over a Pi 4 just because it had full-size HDMI. Both worked when I tried them.


Change your settings

Use Raspberry Pi Configuration to enable the camera. You can also enable SSH if you want an easy way to control it remotely. Change your resulotion to what you need. 1920 x 1080 seems to work fine with the PYNQ-Z2 but apparently we'll be using lower (640 x 480?) in the workshops.

imageimage


Start your video feed

All you need is a terminal. Type raspivid -t 0 to preview the camera output fullscreen. You need Ctrl-C to stop if required. That's it. You Pi and Pi camera are now working as a HDMI camera and can be used as the input to your PYNQ-Z2.


Get to "zero"

If you're trying to get from zero to hero, we might as well get to zero. The official setup guide is here but I want to add a little bit to it.


Vivado / Vitis

Whenever I've done anything with Zynq, I've found that installing the dev tools takes quite a while and if you're following any sort of guide then the version is extremely important. There is no mention of needing Vivado or Vitis for this course. I guess that's sort of the point of PYNQ and if so it's a good thing. However, I thought I'd mention it. If you're interested in the whole Zynq ecosystem you might want to take a look. Expect a 30GB download and to need lots of memory and disk space. PYNQ's sounding pretty good right now, isn't it?

Vitis 2019.1 is now listed for the Workshop, so get installing! Don't be tempted by 2019.2. It's very different when it comes to the PS side of things - the IDE for coding against the processor defined in the Pynq. If we go anywhere near that part you will really struggle if you're on the wrong version.


PYNQ image

That micro SD card will need a PYNQ image.  The Z2 one is available from here but you will need a Xilinx account to download it. Or you can get it from TUL here without having to register with Xilinx. (Thanks to beacon_dave for pointing this out in the comments.)


All these little things take time and you don't want to be doing it whilst trying to listen to the workshop! Another bit of the guide recommends using Win32DiskImager to copy the img file to the SD card for Windows, ImageWriter for Mac or dd for Linux. I happen to have the latest Raspberry Pi Imager installed as I'd recently done the same for a Pi4. I can confirm that this also works. I'm sure plenty of other image to SD card software like Etcher does too.


Setting a useful IP address

Strangely, the PYNQ-Z2 is set up to use a static IP of 192.168.2.99. I don't think anyone uses 192.168.2.x at home. I've usually seem 192.168.0.x or 192.168.1.x. Once the board boots up this makes it unreachable without lots of messing around with IP addresses. I initially changes my router to use a 255.255.252.0 subnet mask, but then found an easier way!


If you fire up the PYNQ-Z2 board with a USB cable and ethernet cable attached, a serial port will appear. Connect to this using your preferred serial terminal (115200 8-N-1) and you get a bash console. This should let us reconfigure the network. The official FAQ says you need to change /etc/dhcp/dhclient.conf but unfortunately this is incorrect. The file you actually need to modify (in Pynq 2.5 at least) is /etc/network/interfaces.d/eth0. In my case, all I wanted was for the PYNQ board to grab an appropriate IP address via DHCP. This is the original contents of /etc/network/interfaces.d/eth0:

auto eth0

iface eth0 inet dhcp


auto eth0:1

iface eth0:1 inet static

address 192.168.2.99

netmask 255.255.255.0


DHCP

What I needed it to be for the PYNQ board to use DHCP was just those first to lines, i.e.:

auto eth0

iface eth0 inet dhcp

The easiest way to do this was to just overwrite the file - after taking a copy of it first of course. The first time I tried it using sudo was enough but when I retried for this guide, I seemed to need su first. No idea why. Anyway, this is what I did to change the PYNQ to use DHCP. To be honest I'd have thought DHCP would have been the simplest default option for most people.

image

Linux gurus may know an even easier way. Feel free to let me know out in the comments. You should now find that on startup your PYNQ-Z2 board grabs an IP address and all you need to to from here on is go to http://pynq:9090 as in the guide.


A different fixed IP

DHCP worked for me, but if you'd rather assign a different fixed IP then you just need to swap out the IP address in eth0 for th eone you want. The easiest way is to use sed to do a search and replace. Try this, using whatever IP address you want. I chose 192.168.1.99 in this example:

sed 's/192.168.2.99/192.168.1.99/g' eth0


Ready to go

OK. I might do a little more reading up on Pynq, but at least I feel I'm ready to start the workshop...

  • Sign in to reply

Top Comments

  • beacon_dave
    beacon_dave over 5 years ago +3
    You can get the PYNQ v2.3/2.4/2.5 Boot image for the PYNQ-Z2 via the TUL site without the need for a Xilinx account TUL Another approach to the networking issue is to give your host PC a secondary IP address…
  • maxim.yudayev
    maxim.yudayev over 5 years ago in reply to edrisamin +3
    Hi, /tools/Xilinx/Vivado/"your_vivado_version"/bin/vivado I use 2019.2 for my university course, hence this is the directory I have and use in place for "your_vivado_version". Just enter the one you use…
  • genebren
    genebren over 5 years ago +2
    Sounds like you are ready to go. This should be an interesting set of courses, so I hope you learn a lot and share with the rest of of us. I too have been wanting to take a deeper look into this stuff…
  • weiwei2
    weiwei2 over 5 years ago

    I like your idea of using raspberry pi HDMI out instead of a HDMI camera. i have had some bad experience with HDMI camera.


    i have a mid range dashcam as well as those low cost non branded action camera. Both of them has HDMI, but i have learnt a dear mistake that often such lower end camera's HDMI is not the HDMI capable of providing standard resolution HDMI output and hence cannot be detected by some HDMI input module that i had. Not too sure if they can be used for PYNQ-Z2, though.

    In fact i am planning to use Roku as i am sure it has full HD capability. In addition Roku has mirroring capability with Android phone, i have a wireless camera gong around image via my android phone with mirroring to Roku

    • Cancel
    • Vote Up +1 Vote Down
    • Sign in to reply
    • More
    • Cancel
  • beacon_dave
    beacon_dave over 5 years ago in reply to Fred27

    Ah yes - that old problem. A number of camcorders suffer from the on-screen display overlaid on the video out. Some you can only disable with an IR remote, which is a pain.


    Yes, the R-Pi sounds like a good plan. I have a basic solid state media player that I got from CPC as a back-up plan as well.


    You could perhaps loop the HDMI 'output' from the PYNQ-Z2 back to the HDMI 'input' and output a test signal with it all in the PL fabric. However you would loose that as a display output, so would have to monitor the processed video via the PS side of things.

    • Cancel
    • Vote Up +1 Vote Down
    • Sign in to reply
    • More
    • Cancel
  • Fred27
    Fred27 over 5 years ago in reply to beacon_dave

    I've not tried USB webcam mode. I assume it'll work, but that we need to use the HDMI output as we'll be processing data from the PYNQ-Z2's HDMI in.


    The HDMI output from this camera is OK, but I can't find a way to turn off the on screen display of settings, time remaining, etc. Also, with no SD card you get a big warning triangle in the middle of the screen. It still works, but is annoying. Another SD card need just to shut that up! Maybe my original idea of using the Pi for its HDMI out wasn't so bad after all...

    • Cancel
    • Vote Up +2 Vote Down
    • Sign in to reply
    • More
    • Cancel
  • beacon_dave
    beacon_dave over 5 years ago in reply to Fred27

    "...Getting it to output live over HDMI felt like mostly random button pressing! It seems to behave differently depending on whether the HDMI is plugged in when powered on, etc..."

    Yes, not the best situation when working with a new device. "Is it my FPGA configuration, or is it just the test device acting up..."


    Have you tried out the USB webcam mode out yet ?


    I was pondering if the PYNQ-Z2 could be used for prototyping a USB web cam video switcher, as this could be useful for web conferencing type set-ups which typically expect a single USB webcam, but you may want to be able to switch between a couple of them for different angles, a HDMI source (document camera) and a holding slide or looping video. I've not seen a hardware device on the market that can actually do this as yet.

    • Cancel
    • Vote Up +2 Vote Down
    • Sign in to reply
    • More
    • Cancel
  • Fred27
    Fred27 over 5 years ago in reply to beacon_dave

    I'd already spotted the micro HDMI and updated the post. Luckily I had an adapter for a Pi 4. The camera seems good, but as you might expect the UI is a mess. Getting it to output live over HDMI felt like mostly random button pressing! It seems to behave differently depending on whether the HDMI is plugged in when powered on, etc.

    • Cancel
    • Vote Up +2 Vote Down
    • Sign in to reply
    • More
    • Cancel
<>
element14 Community

element14 is the first online community specifically for engineers. Connect with your peers and get expert answers to your questions.

  • Members
  • Learn
  • Technologies
  • Challenges & Projects
  • Products
  • Store
  • About Us
  • Feedback & Support
  • FAQs
  • Terms of Use
  • Privacy Policy
  • Legal and Copyright Notices
  • Sitemap
  • Cookies

An Avnet Company © 2026 Premier Farnell Limited. All Rights Reserved.

Premier Farnell Ltd, registered in England and Wales (no 00876412), registered office: Farnell House, Forge Lane, Leeds LS12 2NE.

ICP 备案号 10220084.

Follow element14

  • X
  • Facebook
  • linkedin
  • YouTube