element14 Community
element14 Community
    Register Log In
  • Site
  • Search
  • Log In Register
  • Members
    Members
    • Benefits of Membership
    • Achievement Levels
    • Members Area
    • Personal Blogs
    • Feedback and Support
    • What's New on element14
  • Learn
    Learn
    • Learning Center
    • eBooks
    • STEM Academy
    • Webinars, Training and Events
    • Learning Groups
  • Technologies
    Technologies
    • 3D Printing
    • Experts & Guidance
    • FPGA
    • Industrial Automation
    • Internet of Things
    • Power & Energy
    • Sensors
    • Technology Groups
  • Challenges & Projects
    Challenges & Projects
    • Design Challenges
    • element14 presents
    • Project14
    • Arduino Projects
    • Raspberry Pi Projects
    • Project Groups
  • Products
    Products
    • Arduino
    • Dev Tools
    • Manufacturers
    • Raspberry Pi
    • RoadTests & Reviews
    • Avnet Boards Community
    • Product Groups
  • Store
    Store
    • Visit Your Store
    • 'Choose another store...'
      • Europe
      •  Austria (German)
      •  Belgium (Dutch, French)
      •  Bulgaria (Bulgarian)
      •  Czech Republic (Czech)
      •  Denmark (Danish)
      •  Estonia (Estonian)
      •  Finland (Finnish)
      •  France (French)
      •  Germany (German)
      •  Hungary (Hungarian)
      •  Ireland
      •  Israel
      •  Italy (Italian)
      •  Latvia (Latvian)
      •  
      •  Lithuania (Lithuanian)
      •  Netherlands (Dutch)
      •  Norway (Norwegian)
      •  Poland (Polish)
      •  Portugal (Portuguese)
      •  Romania (Romanian)
      •  Russia (Russian)
      •  Slovakia (Slovak)
      •  Slovenia (Slovenian)
      •  Spain (Spanish)
      •  Sweden (Swedish)
      •  Switzerland(German, French)
      •  Turkey (Turkish)
      •  United Kingdom
      • Asia Pacific
      •  Australia
      •  China
      •  Hong Kong
      •  India
      •  Korea (Korean)
      •  Malaysia
      •  New Zealand
      •  Philippines
      •  Singapore
      •  Taiwan
      •  Thailand (Thai)
      • Americas
      •  Brazil (Portuguese)
      •  Canada
      •  Mexico (Spanish)
      •  United States
      Can't find the country/region you're looking for? Visit our export site or find a local distributor.
  • Translate
  • Profile
Personal Blogs
  • Members
  • More
Personal Blogs
Legacy Personal Blogs Raspberry pi Photo frame
  • Blog
  • Documents
  • Mentions
  • Sub-Groups
  • Tags
  • More
  • Cancel
  • New
Blog Post Actions
  • Subscribe by email
  • More
  • Cancel
  • Share
  • Subscribe by email
  • More
  • Cancel
Group Actions
  • Group RSS
  • More
  • Cancel
Engagement
  • Author Author: Former Member
  • Date Created: 7 Jan 2014 5:08 PM Date Created
  • Views 324 views
  • Likes 0 likes
  • Comments 0 comments
  • kf7ccy
Related
Recommended

Raspberry pi Photo frame

Former Member
Former Member
7 Jan 2014

      This project is an attempt to rid myself of the traditional paper calender. I used some scrap wood to build a frame for the LCD screen I took out of an older LCD computer monitor. I wanted this to be somewhat portable so I found a monitor that will work on 12v D.C. . The Monitor only has a VGA input making it some what of a problem since the Computer output is HDMI or A/V. I was able to work around the issue with a HDMI to VGA converter cable, I also had to edit the /boot/config.txt file to force the signal into safe mode. The bottom line and lesson learned is if at all possible use a monitor with an HDMI input.                                                                 


The frame is simple to build. I started by removing the LDC out of the monitor casing I used and Measured it. Using a miter box I cut the 45's needed to create a frame. I used a nail gun to secure the corners with 1 1/4 inch brads.image


image

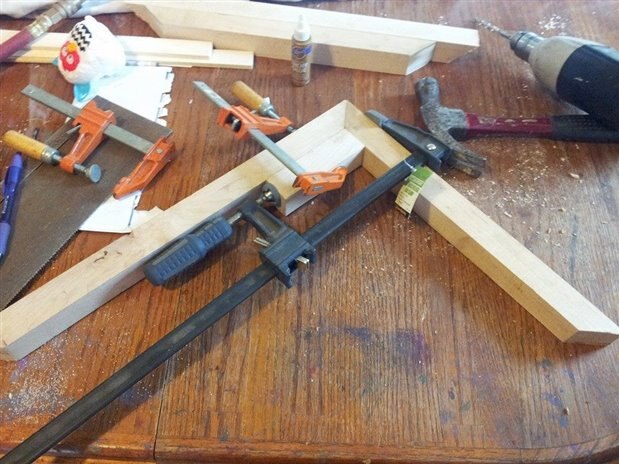
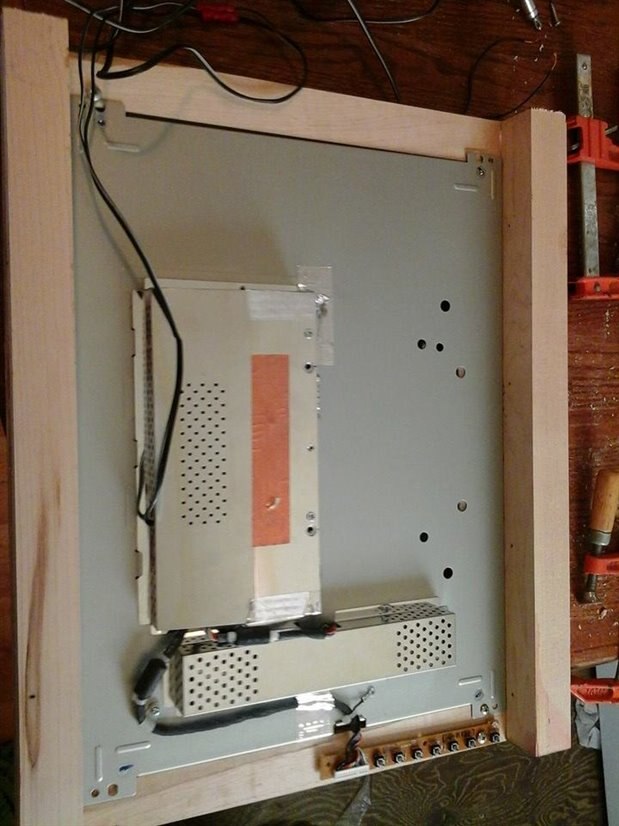
This is just the Back of the Monitor Notice the 4 metal tabs I used to secure the LCD screen to the frame.


image

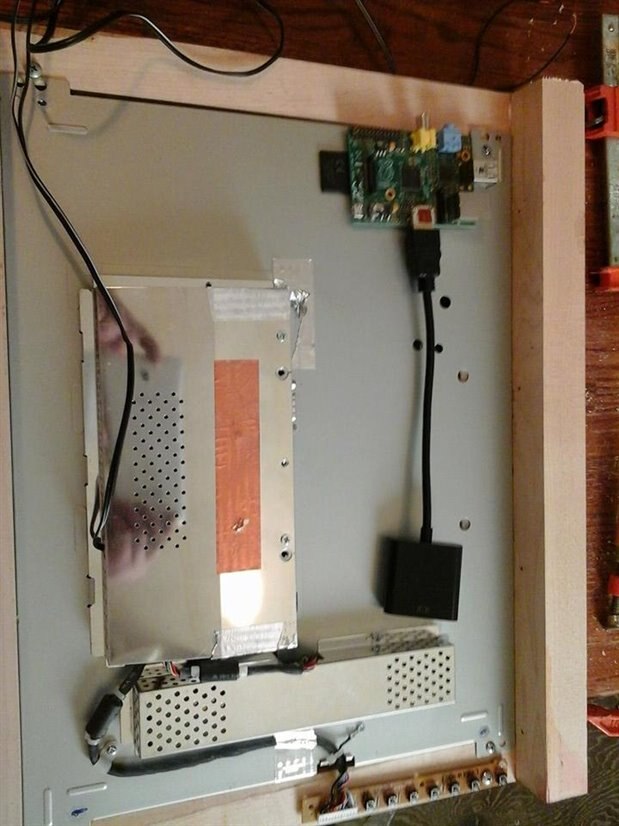
This photo shows the back of the monitor the Raspberry Pi and the HDMI to VGA adapter. I used a wood screw to attach the monitor control panel to the back side of the frame out of site. I have not mounted the Raspberry Pi yet because it will require an insulator between the back of the monitor and the PC board to avoid it shorting out.


image

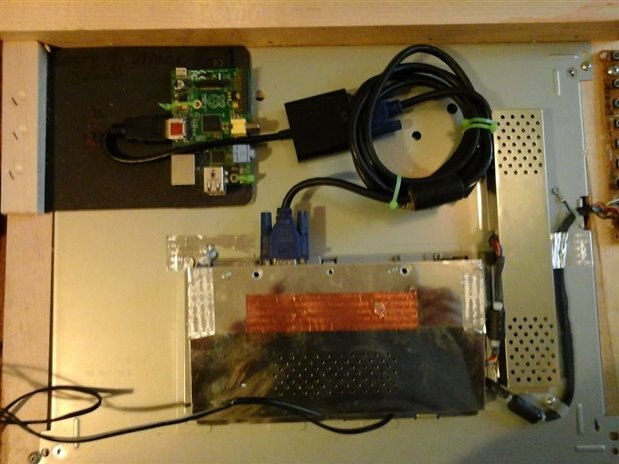
Here you see the Raspberry pi attached to the monitor. I used a thick piece of cardboard and 2 small zip ties to secure the pi to the card board. I used 2 small pieces of wood to hold the card board down. This was a great way to keep all the ports away from the sides giving me complete access to the PC board. I needed a VGA cable to connect the HDMI adapter to the monitor I secured it with zip ties also.


image

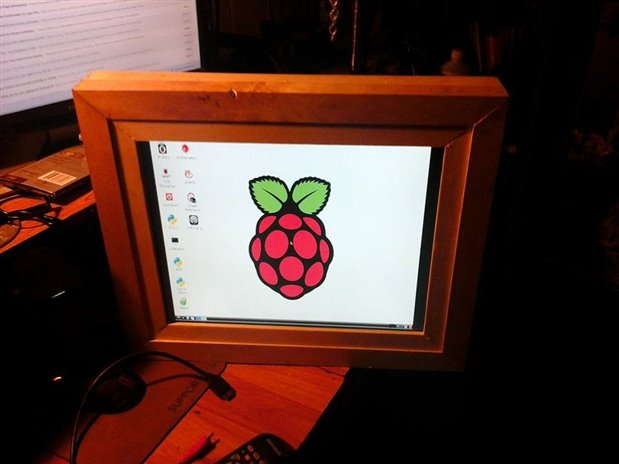
Here is the completed frame. I built the outer frame around the outside edge of the LCD this left a exposed metal edge around the front of the new frame. I used balsa wood to cut 4 small inner frame pieces and glued them in place with wood glue. Completing the frame.


image

Program your pi to display Photo's Use it as a live calender the uses are limitless. Have Fun Donovan "KF7CCY"

  • Sign in to reply
element14 Community

element14 is the first online community specifically for engineers. Connect with your peers and get expert answers to your questions.

  • Members
  • Learn
  • Technologies
  • Challenges & Projects
  • Products
  • Store
  • About Us
  • Feedback & Support
  • FAQs
  • Terms of Use
  • Privacy Policy
  • Legal and Copyright Notices
  • Sitemap
  • Cookies

An Avnet Company © 2023 Premier Farnell Limited. All Rights Reserved.

Premier Farnell Ltd, registered in England and Wales (no 00876412), registered office: Farnell House, Forge Lane, Leeds LS12 2NE.

ICP 备案号 10220084.

Follow element14

  • X
  • Facebook
  • linkedin
  • YouTube