


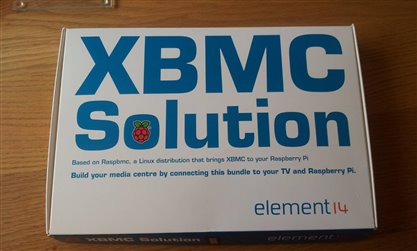
I recently acquired the XBMC bundle that Farnell have put together for the Raspbery Pi and this is my review of the kit.
The package is well presented in a small box (As you can see left) and includes an SD card, HDMI lead, network cable and what I consider the star of the show, a small keyboard that attaches wirelessly to the Pi using a small dongle, which is stored in the base of the controller, alongside a small lithium-ion battery which re-charges through connecting a USB cable to the remote.
Good instructions are supplied so I will not go into a lot of detail about how to set the system up, but the main points are:
1) Put the pre- written SD card into your Pi
2) Remove the dongle from the keyboard, and insert into a USB port on the Pi, or on a hub if required ( more on this a bit later)
3) Connect the supplied HDMI lead from the Pi t to your TV
4) Connect the Pi to your network via the supplied network cable
5) Connect your Pi power supply
6) Switch on the keyboard
And that is about it.
As soon as the Pi has booted up, you will see the RaspBMC logo. You may need to be patient at this point, as the first thing that RaspBMC will do is try and update itself. As the images for the cards will have probably been written a while ago and have been sitting in a warehouse waiting to ship, this will always certainly happen to you. It is not a long process, but does mean you can't start playing straight away. Make a cup of your favourite warm beverage and by the time you are finished, RaspBMC should be well on it's way to being finished, if not already sitting waiting for you. This is the second install of raspBMC I have done recently and both have gone very smoothly, so if things don't appear to be happening, be patient as things will be happening in the background.
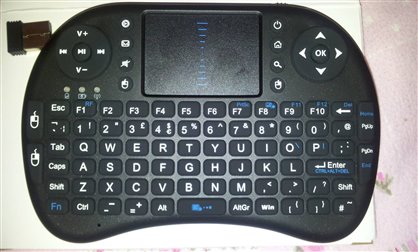
I was extremely pleased to find that the keyboard (pictured left, with the dongle in the top left of the picture) was recognised immediately, with no further configuration required. I have used a couple of these types of keyboards before, and this one is easily up there with the best of them. Being larger than some that are available, although far from bulky, means that it sits a lot more comfortably in the hands. There is a reasonably sensitive touch pad, a directional pad and two separate sets of buttons to mimic mouse buttons. The is also a plethora of other buttons for numerous dedicated functions.
In use, the keyboard was very responsive, both when using the keyboard and also when using the touch pad. I can't speak for battery life at the moment, but the unit is supplied with a USB lead to charge the internal battery.
RaspBMC has been around for a while now and in each iteration has got better and better. It has been built from a solid base, and very much takes care of itself, so is ideal to be included in a kit like this. As mentioned above, as soon as you connect it to a network, it will try and update itself, so you always have the latest, stable version. If you want to go cutting edge and use nightly builds, the enclosed instructions tell you how to do this, although for the average user, I would stay with the default settings.
The instructions in the kit (and indeed the supplied cable) only suggest connecting to a wired network, but this test was actually performed with a wireless dongle. Set up is a little less straightforward, as you first need to go into the RaspBMC settings an input your own SSID and password -you cannot scan for a network as you can say in Raspbian, but once you have done this and saved the configuration, as long as you have a Raspberry Pi friendly usb wi-fi adaptor, you will be away (and find your RaspBMC updating as above). I can understand why Farnell have marketed this as hardwired, as the setup is a lot easier, but for those with a little more experience, wireless is also very much an option.
Once all configured, I used this setup (I was using a 512 Meg Model B Raspberry Pi) to stream videos from the Revision 3 site using the built in add-on. Playback was smooth and looked very good on the 22 inch monitor I was using. There are many, many add-ons for RaspBMC that I could not have the time to go into here. The supplied instructions guide you through installing the BBC i-player add-on and once you have learnt how to do this, adding others is pretty much the same process.You can of course also stream from your own NAS device if you have one or from a local USB hard drive.
In summary, I think this is a well thought out kit, suitable both for the person that just wants a 'plug and play' solution to use their Raspberry Pi as a media box and also for the person that wants to experiment more. This provides all the hardware you need (other than the Pi) to get you started.
Steve
