


This is a post I did almost exactly 1 year ago, I`m bringing it Here to El14 as it`ll have a larger interest base, and will also be importatnt as background info in about a year or so from now, also a good many things have changed and been added to this project that I will also put on here (sometime this week I hope).
I have a Robot project underway currently that I will create a blog for as well, and Z.E.D will be linked to this Robot as a proxy Core.
here`s the old post:
============================================================================================================================================
This is the product of 2 months work, often 12 hours a day!
and although perhaps not immediately apparent, it`s actually a Fully operational computer based on the Z-80 CPU.
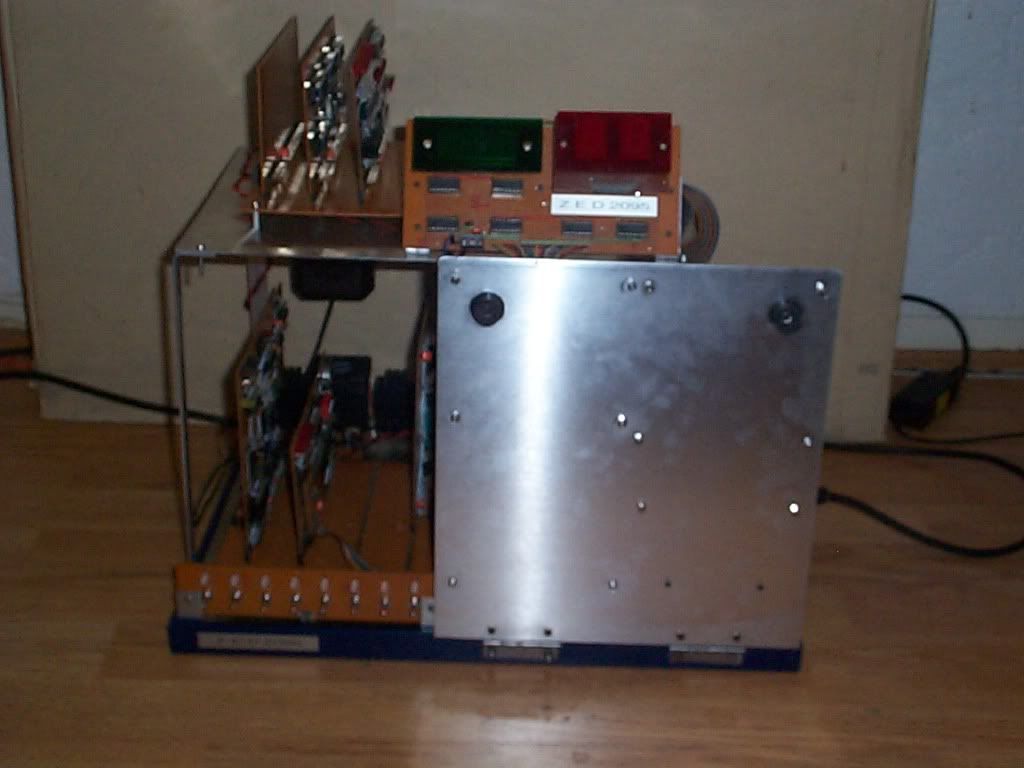
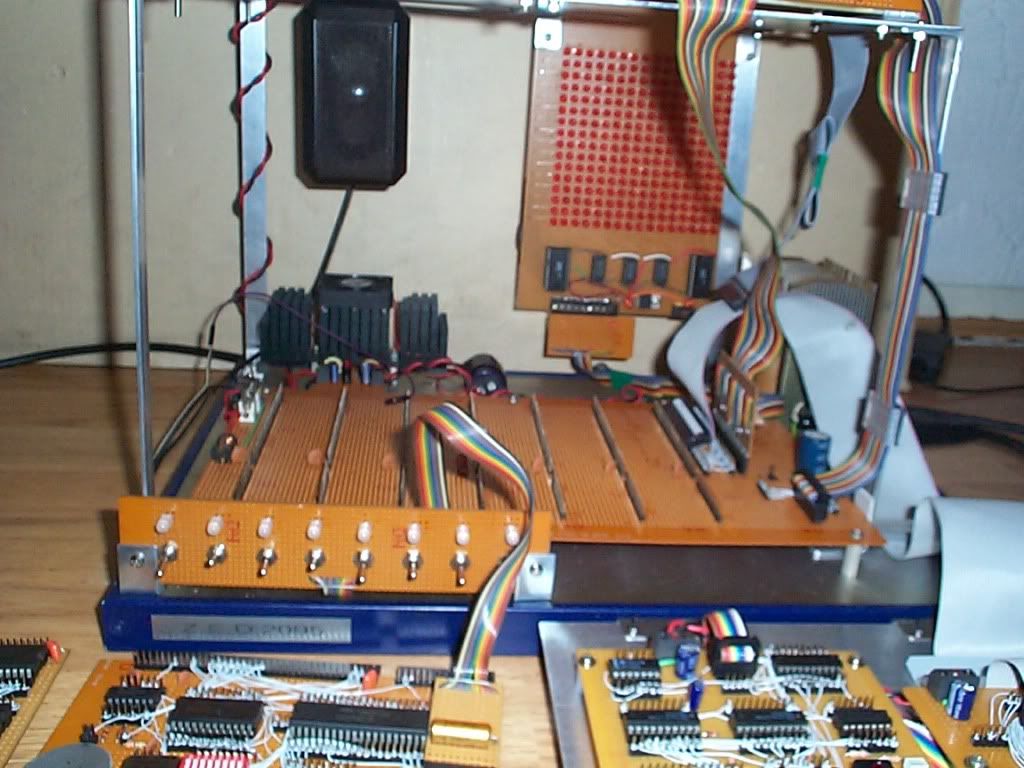
here`s it switched off and "closed":
and now it`s On and "Open" (and really blurry!) 
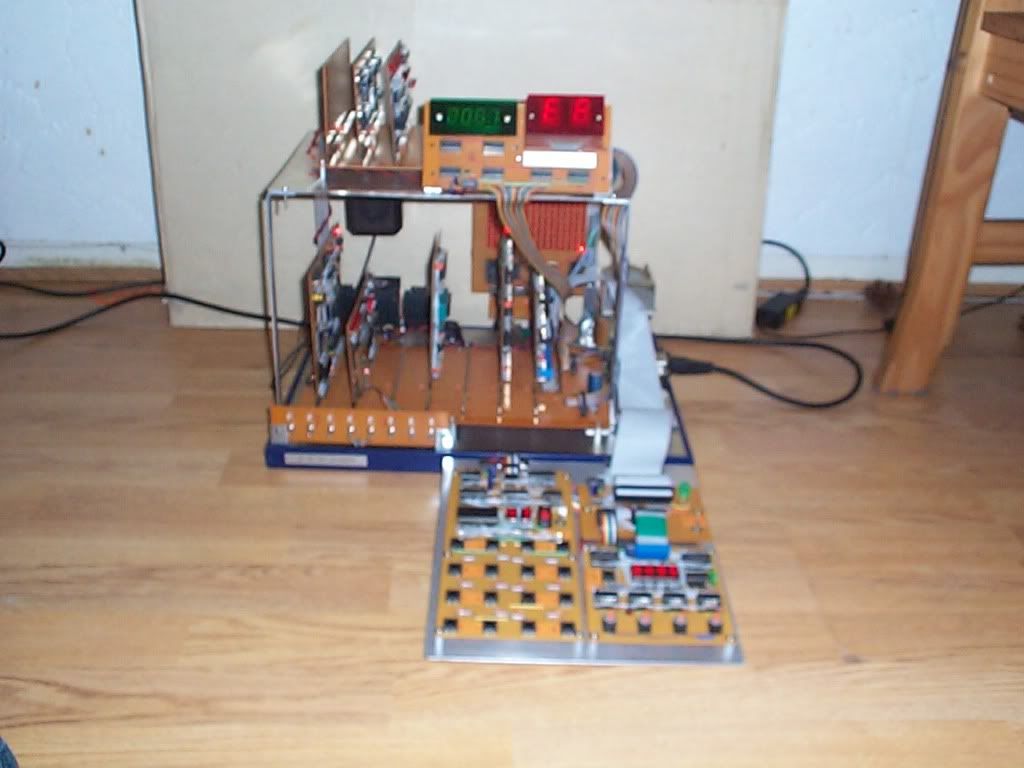
and the difference is basically the Programming keypad folds down, and looks like this close-up:
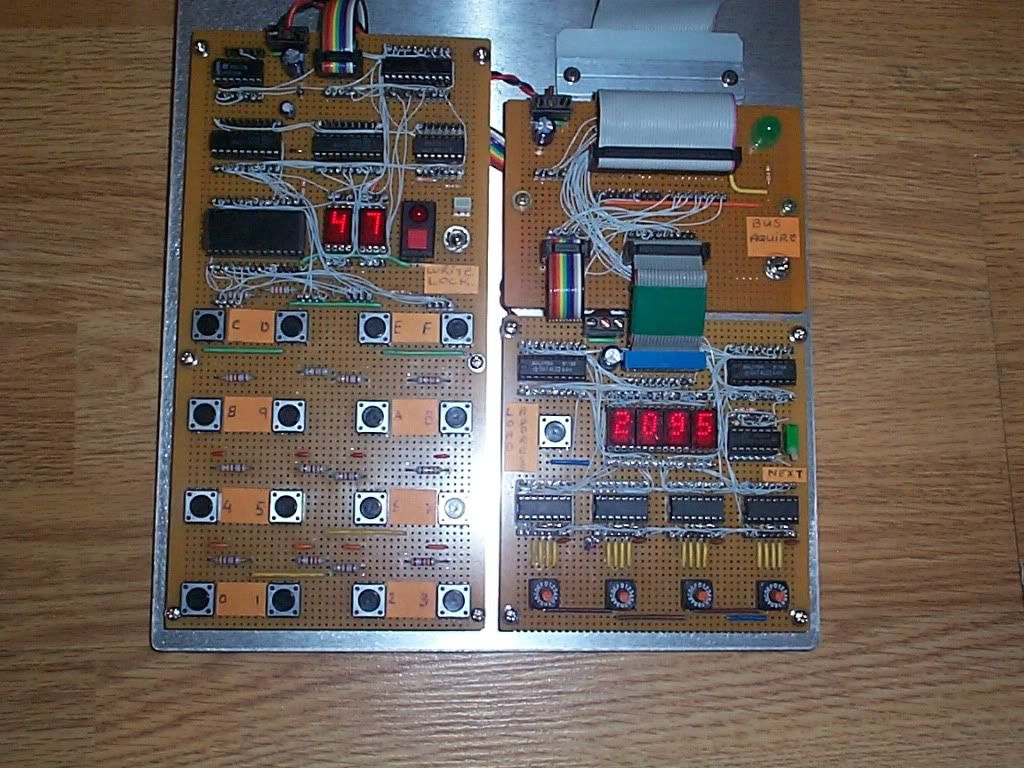
I won`t go to in-depth gory details but this system is designed to have Zero overheads in terms of CPU usage that can otherwise be done in Hardware, so this keyboard will output directly the Address and Data and also display this in Hex with No cpu intervention at all, and works purely on a DMA basis when you hit the Bus Aquire switch and Yes that Is a huge green LED just above it (a project can`t have too many LEDs!).
the Hex keypad basically feeds the Address lines of a 27512 EPROM and outputs the appropriate 4 bit code for the digit pressed, and the Other 4 bits are simply used to toggle a flip-flop that latches this data alternately to make a 1 byte word.
the Address side of the panel is easy, I use 4 rotary hex encoders to Load the start address of where I want to Edit/Program and then click the green switch to advance the now loaded UP-Counters.
asleep yet?...
ok, on with the "show":

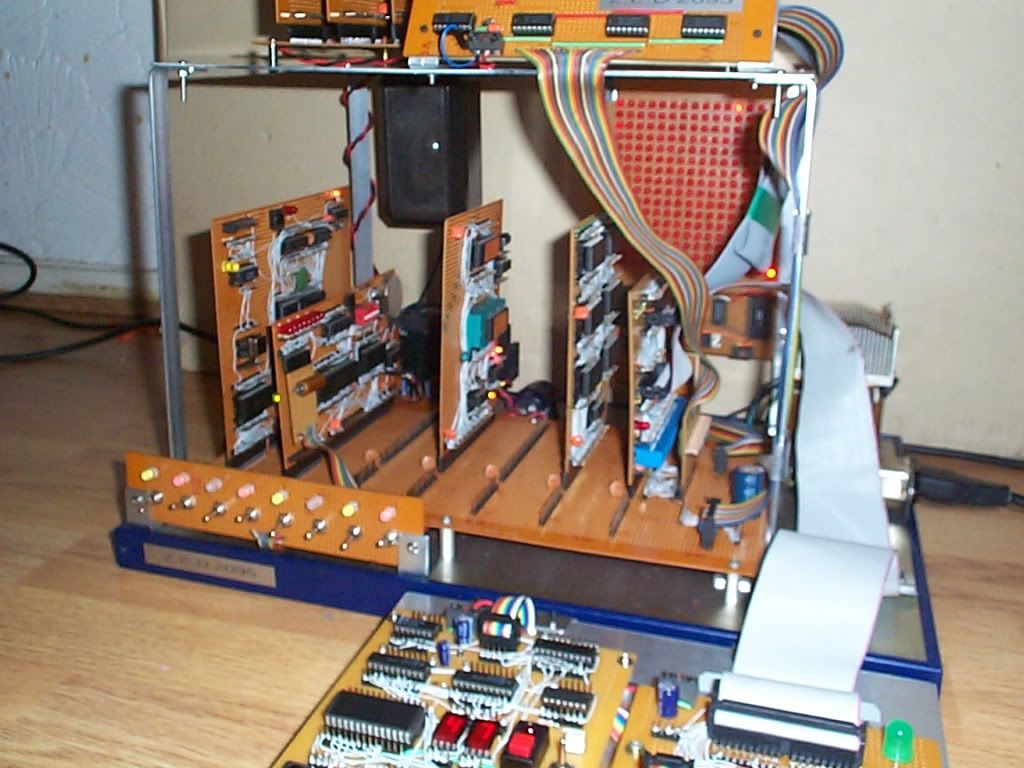
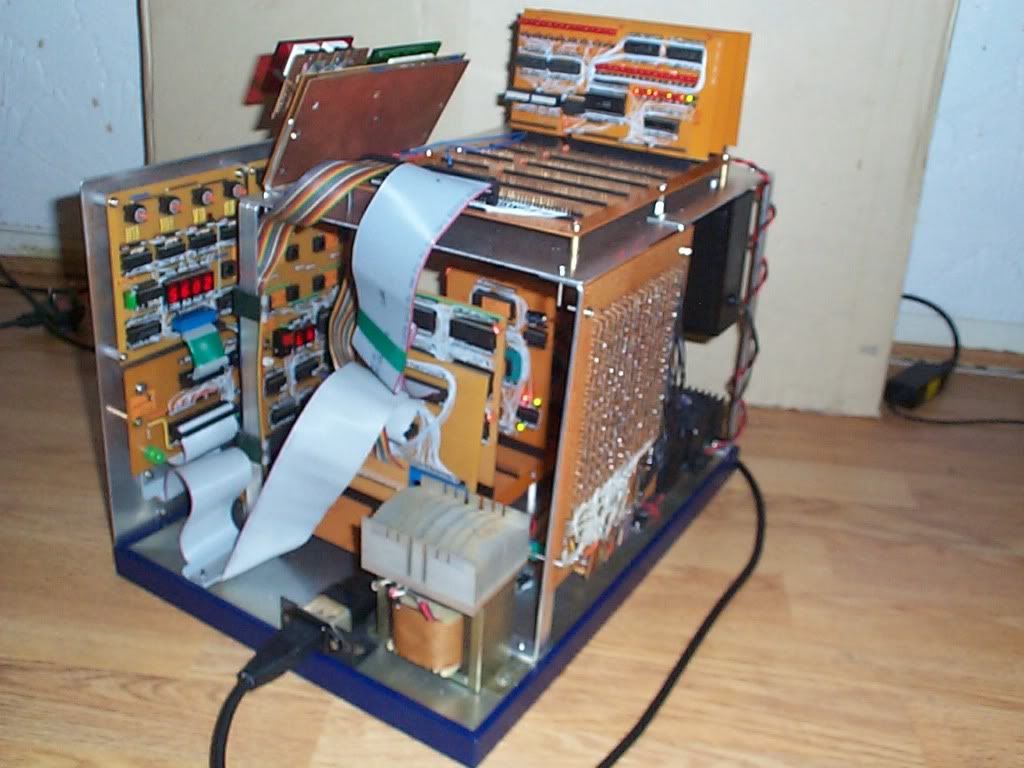
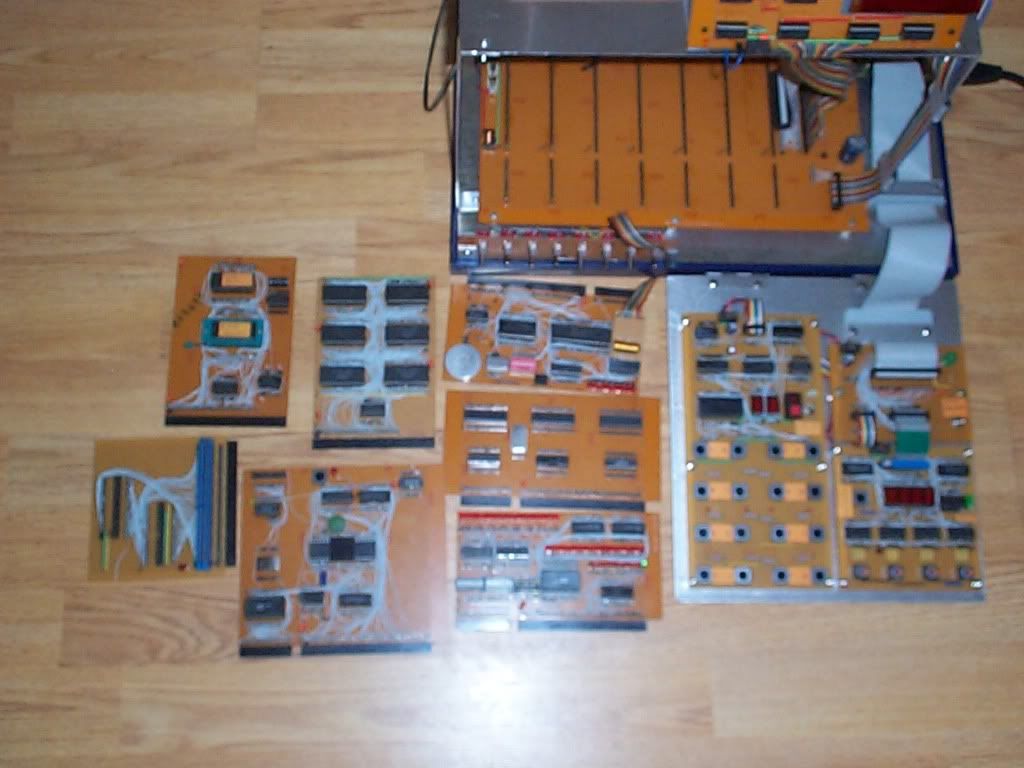
as you can see it`s a Card based system that uses a common bus on 2 tiers (that`s the reason for One of the ribbon cables).
the longer card header has the Power, address, data and control lines, the Shorter one is the decoded I/O lines, giving me 16 groups of 16. this might seem odd as there aren`t 16 card slots, but as you`ll see soon, some of the cards have more than one I/O device on them.
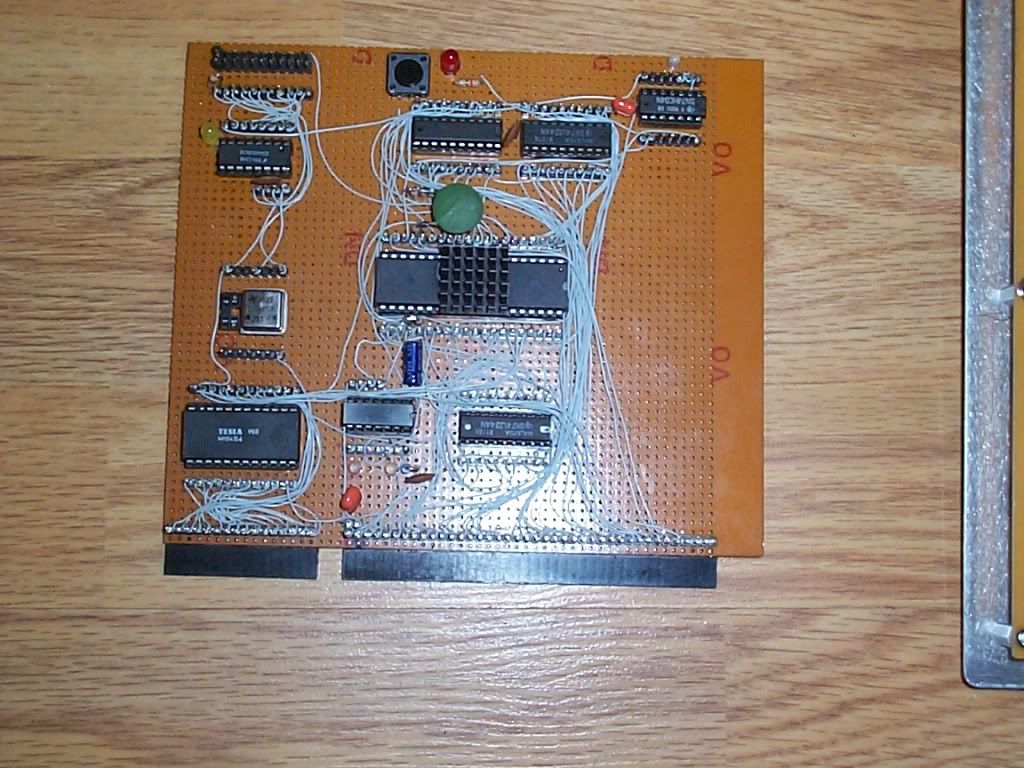
This is the CPU card, quite a mess I know! but it works at 8MHz quite happily, although I only had a 2.048MHz x-tal in there for this picture:
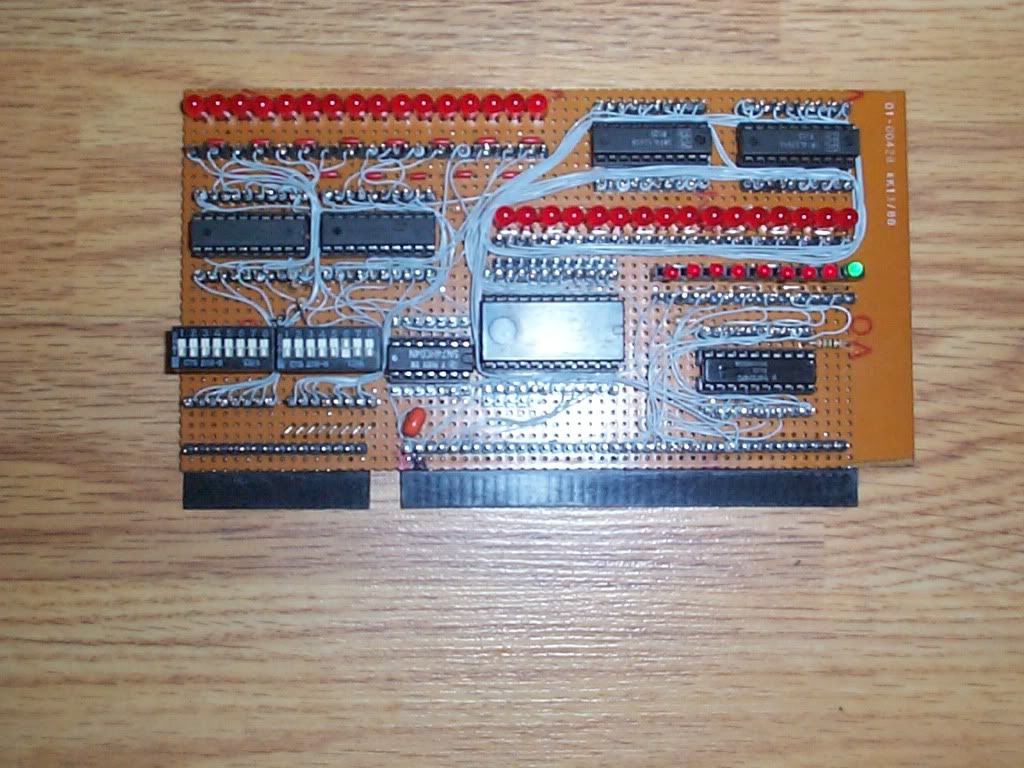
as I eluded to earlier about some cards having more than 1 I/O device on it, This:
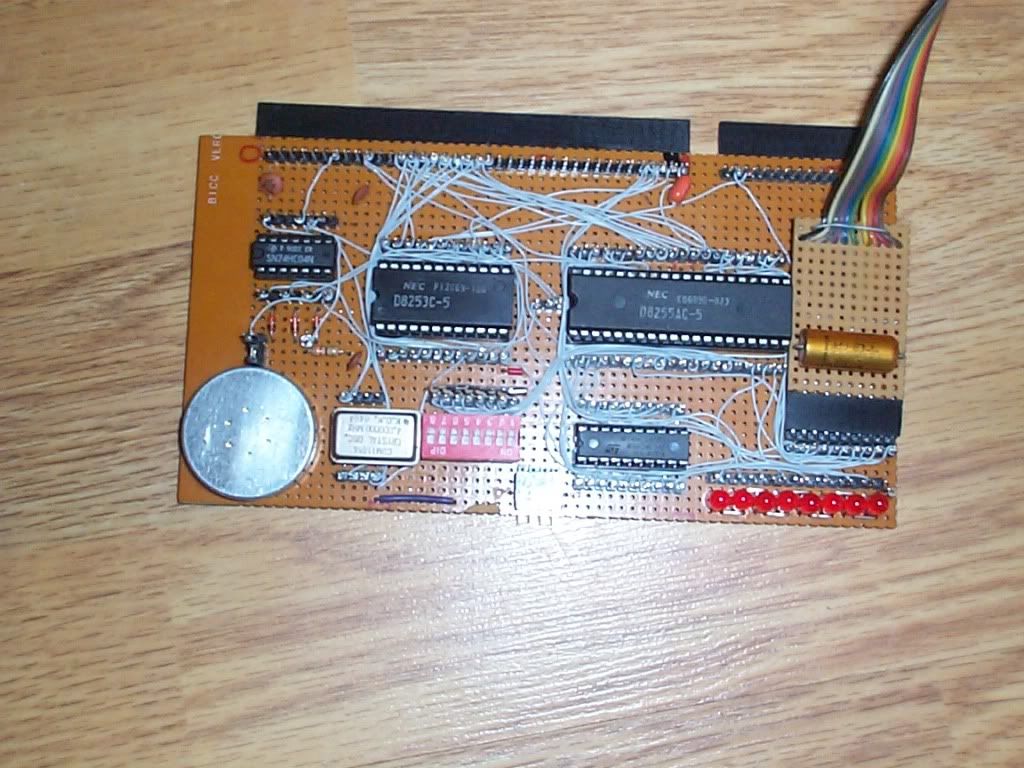
is such a card. Onboard we have an 8255 3x8bit port for general purpose parallel stuff, the pretty ribbon cable goes to the 8x 2 color LEDs and Switch array (nice for testing bits individually), and also a 3 channel counter/timer that I use in square wave mode as a sound card (hence the little speaker thingy).
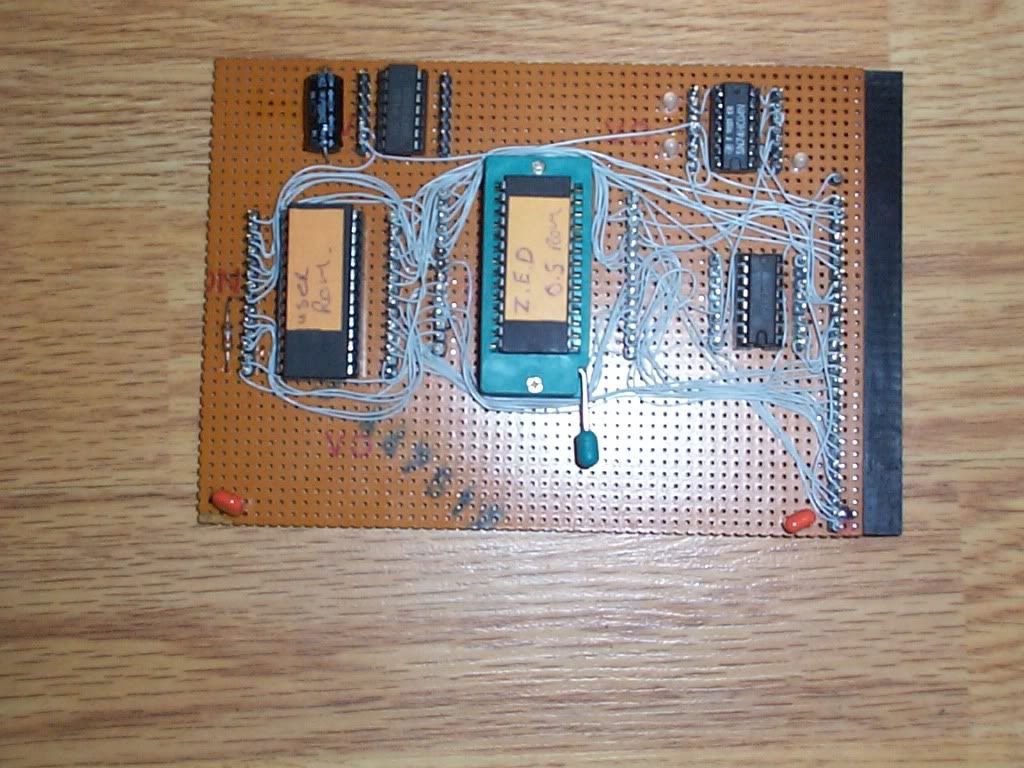
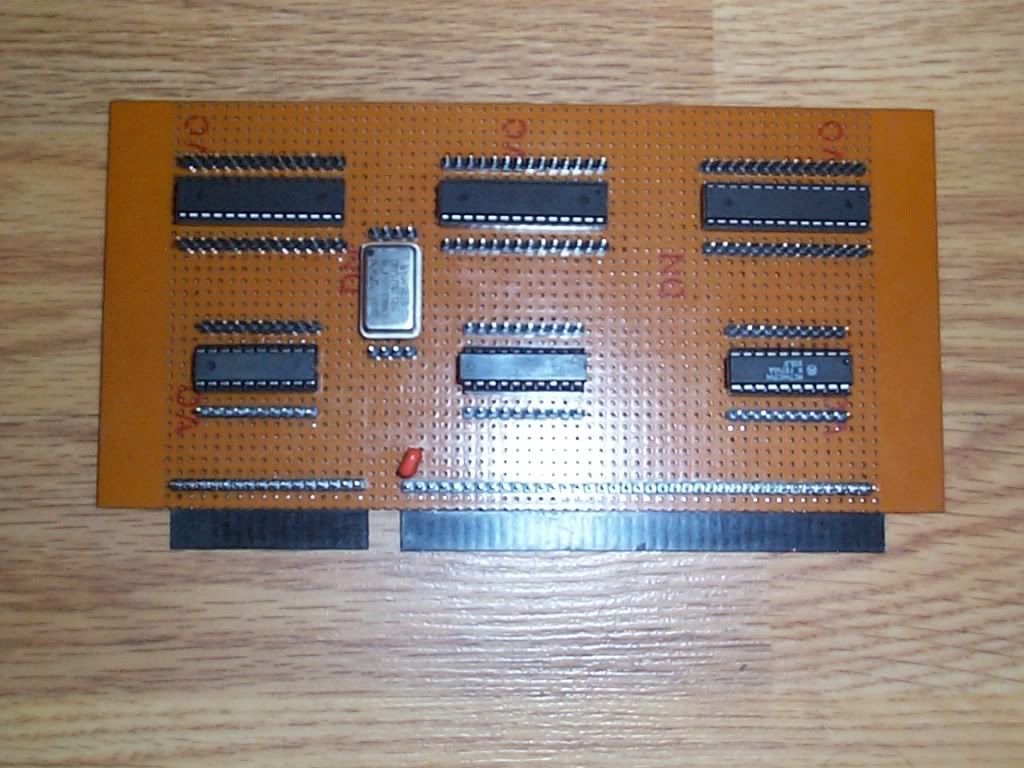
the above is the EEPROM card, one of them contains the Boot/OS rom although it`s Very simple in there at the mo, and doing little other than setting up the IO cards, the stack pointer, interrupts and redirecting the PC (Program Counter) to the Next ROM on that board which is the User area.
the User area is 8k big and starts at 2000H, but the great part about using EEPROM is that I can switch the computer off half way through a prog I`m working on, and it`ll be there next day where I left it, without having to save it to tape etc...
I`ll point out that all this programed in Machine Code directly and by hand.

some of you have already seen this before, it`s the 48k RAM card using a strange Wire-Wrap method I created out of necessity, have you SEEN the price of wire wrap boards and parts lately!??
so a soldering/wire-wrap hybrid that Top wires circuits was born 
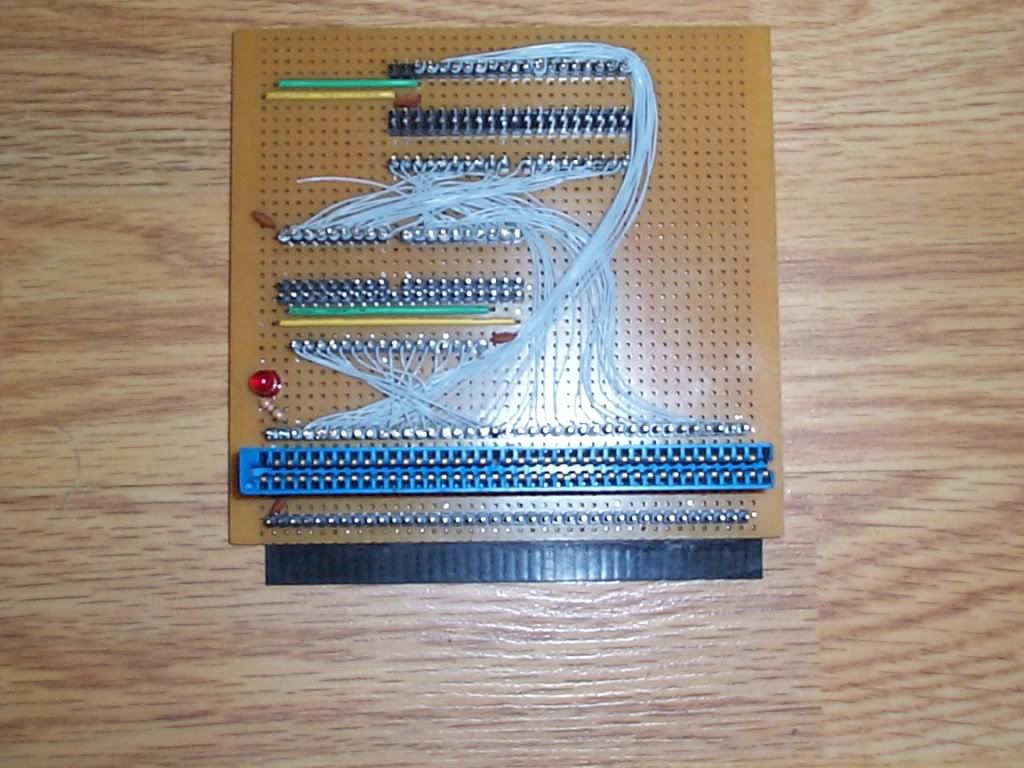
Above is the Ribbon cable interface, simple point-to-point conversion, but Had to incorporate an L.E.D otherwise it just wouldn`t be suitable!
this next card is my favorite of all, it`s my I/O diagnostic card and can be mapped in Anywhere in the Z-80s I/O range and also deliver a decoded strobe that the Address/Data display can use as a Latch to hold information with.
here`s the Address/Data decoder/display mentioned above:
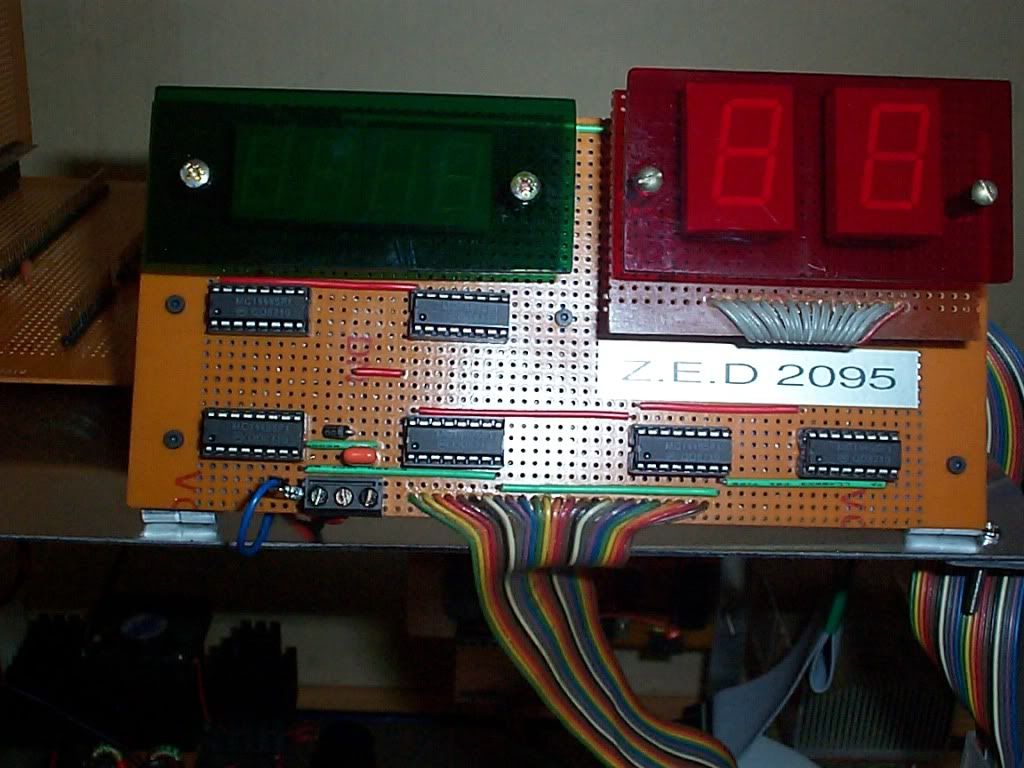
yes I cut my own perspex for it, and no it`s not perfect, but what the hey! the printout looks pretty funky 
this next card isn`t finished yet, it`ll contain 3 micro controllers, all performing tasks that would otherwise have to be done by the CPU (Remember, I wanted Zero overheads).
A quick re-cap of all the cards (so far):
and the now empty Z.E.D skeleton...
incidentally ZED stands for Z Eighty Development, yeah I know, boring eh!
this project is FAR from over! in fact what you`ve seen so far is the bare bones basics of the system, the Real work now that`s it`s fully operational as a stand-alone computer will put the "D" in ZED 
stay tuned...

