


This a continuation of my Mr. Machine saga, following from my last post ( And then there were four. A fourth Mr. Machine has joined the crew. ).
After playing around with the latest Mr. Machine, I decided to jump in and repair the main spring. After trying carefully to extract the main spring, through the center hole, of the spot welded spring enclosure, I quickly decided that this was a non-starter, right after I chipped off a small part of the plastic ring that keeps the spring centered. I then decided to look a little deeper into how the spring failed so that I could develop an orthoscopic-like repair strategy. Here is a series of pictures first comparing the new and old main springs and a closer look at the damage.

From left to right, old Mr. Machine body half and spring housing, new Mr. Machine body half and spring housing.

Closeup of older spring housing.

Closeup of newer spring housing.


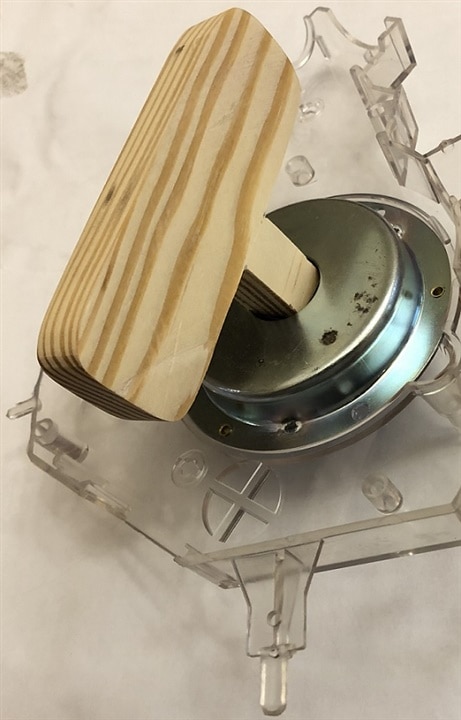
Here is a closeup inspection of the damage. The small tab, created from the cutout and bent into spring housing looks to have been sheared off. Initially while winding the spring, the tab remainder is enough to hold the spring end in place, but as winding continues and the spring winds around the center of the winding mechanism, the spring tension on the tab remainder lessens and the spring slips (unwinding the spring). To better examine the process I needed a way to wind the spring outside the body of Mr. Machine. Here is the tool that I came up with:
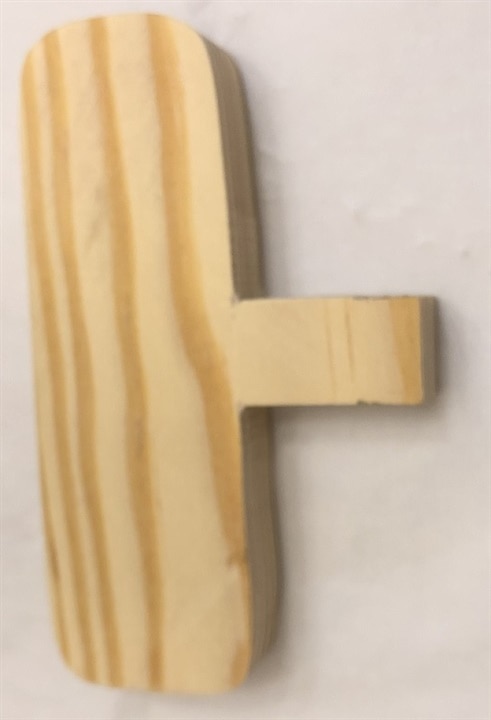
I made this winding key from solid clear pine. I shaved the thickness down for 3/4" to 5/8" on the table saw, matching the dimensions of the plastic hub that fits into the bent square center of the main spring. I then created a roughed out shape of a key with the bandsaw, while narrowing the square protrusion to a matching 5/8". While this did work well, I later reworked the winding key to round out the end of the protrusion so that it would full engage into the spring opening and the plastic center retainer that is a part of the body half. Here is the modified winding key:


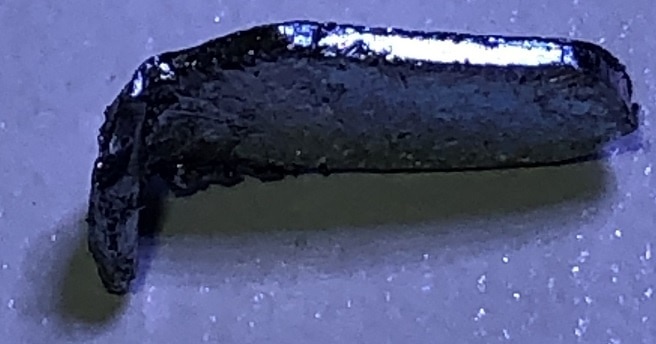
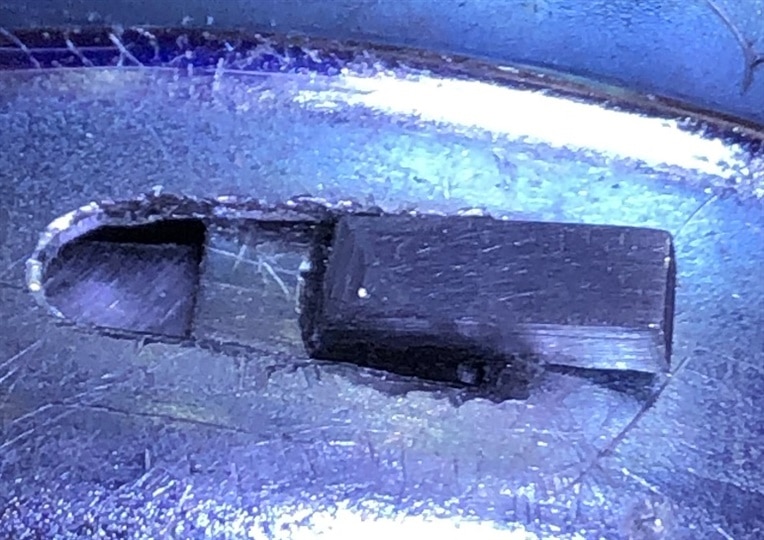
With the modified tool I was ready to examine the spring winding issue and see that as the spring started to pull towards the center, it would slip and re-lock in place under the tab. Now I formulated a plan to design a new spring lock. I created the piece from a scrap of hot rolled steel (angle iron scraps), that could slip into the hole in the spring end and into the hole in the spring housing while sitting on the outside of the spring housing. Here is that part:

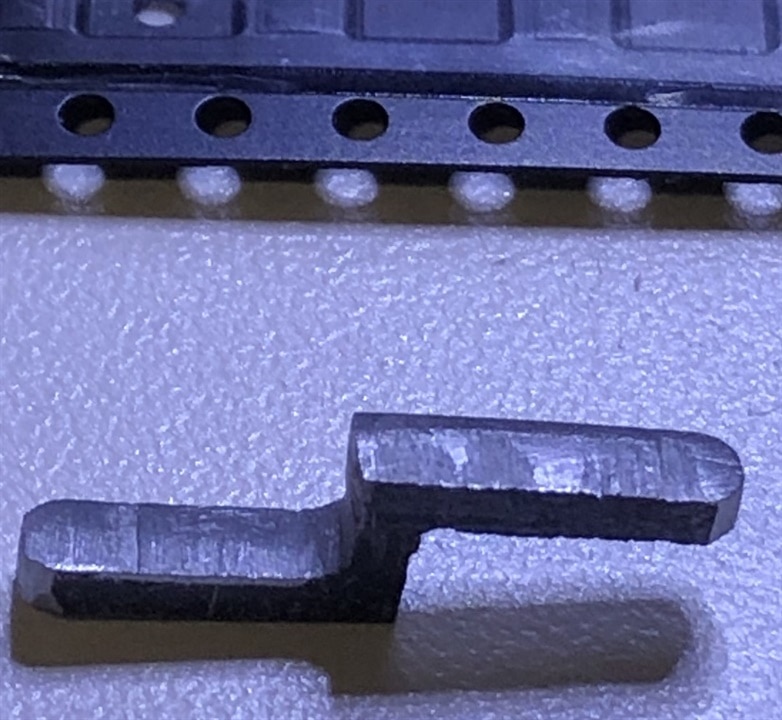
The part is ~ 3/4" long, made form 1/8" thick steel. I cut out the main shape with a hacksaw and then cleaned it up a bit with a file and some sandpaper. Here is some detail about the housing and spring along with an image showing how the part fit into the spring assembly:


This is where it became really interesting. Using my spring winding tool, I began to wind up the spring. I had gone several turns further than I had been able to do in the past. I was ready to dance and sing (sort of like Mr. Machine). I added a couple more turns on the winder when I began to notice the outside tab moving away from the spring housing as the spring tension pulled the spring towards the middle. One more turn of the winder and snap, the spring unwound and I could not find the spring lock anywhere. The spring had returned to it's prior behavior where the former tab could grab the hole at the end of the spring, up to a point. As I would wind the spring a bit, I could hear the clink of metal from inside the spring housing. Oh no, my spring lock was gobbled up into the spring housing.
My mission now was to retrieve the spring lock from within the housing. I decided that a temporary spring lock was required, so I found some heavy gauge, solid wire that I could loop through the hole at the end of the spring, which I tied around a piece of solid brass rod (outside of the housing). With the wire and brass rod hold the spring end in place, I was able to wind up the spring enough to allow the spring lock to move freely and I began to turn shake the spring housing, attempting to get the new spring lock to travel to the tiny opening of the old tab. After a long time, I was able to get the spring lock into position and get one of the ends to barely poke through the opening. I found my tweezers on the bench and attempted to pull out the spring lock. Darn, the tweezers did not get enough material to clamp on to and the spring lock disappeared into the spring housing. I tried and tried again, with no luck. After taking a break in an effort to regain my composure (and to stop swearing), I once again tried to remove the part. Shake, turn, shake, turn and finally I had my break, one of the arms of the spring lock extended completely from the housing. With the tweezers I was able to completely remove the part.
During the removal of the spring lock, I decided that I needed to clean up the broken tab. With a combination of tiny files, extremely tiny drill bits and some cutters, I was able to chip away at the broken tab. I was quite surprised to find that the tab had not broken off, but had actually folded back against the housing. Here are some images of the remains of the tab and an image of the somewhat cleaned out hole:


Now I needed to improve my spring lock design and try once again to achieve full spring winding. My new spring lock needed a way to stabilize itself in the housing opening (not tipping into the spring housing as the spring was wound tighter), so I designed the following part (the cut at the wider end of the part is intended to straddle the thickness of the spring housing):
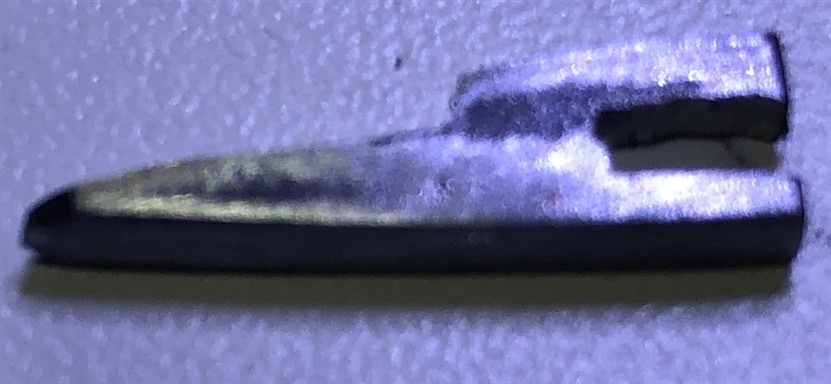

Next I needed to insert the new spring lock into the opening in the spring housing. Here are some pictures of the new spring lock installed:

Again, I tried winding and unwinding the spring a few times prior to reassembling Mr. Machine. This time was able to wind the spring, going well beyond my prior attempts. With this success, I reassembled Mr. Machine and gave it a final test. This time the spring was able to move Mr. Machine fully across the table (and more) on a single winding of the spring. Here is a short video clip of that test (a short video so that Mr. Machine would not run off the edge of the table while I was filming).
From here I am thinking that the next blogs might be devoted to the further restoration of the prior vintage Mr. Machine, where I re-manufacture the missing parts, using the reproduction machine to gather the part dimensions and then 3D printing suitable replacements.
Thanks for reading along. This was a fun and sometime frustrating repair. I hope you enjoyed the story.


